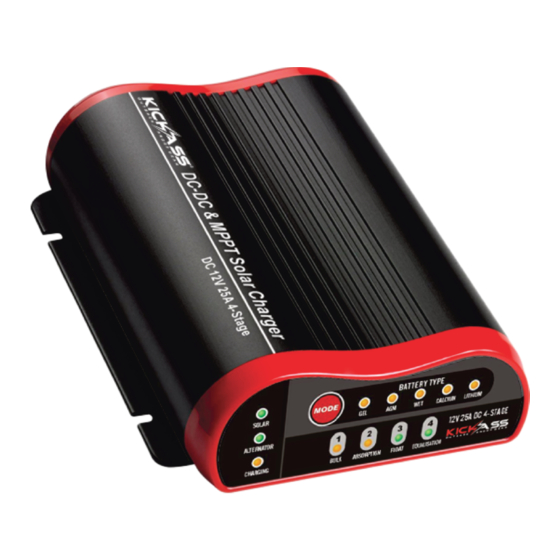
Summary of Contents for KickAss KADCDC25A
- Page 1 ® 25 AMP DC-DC CHARGER WITH MPPT SOLAR CONTROLLER USER MANUAL KADCDC25A | KADCDC25A-AND...
- Page 2 KADCDC25A: For direct wiring. KADCDC25A-AND: With added anderson style plugs for simple plug and play connection. The purpose & features of the KickAss 25 AMP - DC-DC Charger with MPPT Solar Controller: Can charge multiple battery types: Whether your battery is GEL, AGM, WET, CALCIUM or...
- Page 3 The Charger will lower its output current if it senses that the unit will overheat. Temperature compensation: „ The included temperature sensor will measure the battery temperature and adjust current accordingly to prevent overcharging. For more technical details, specifications & videos please visit www.kickass.com.au...
-
Page 4: Specifications
There is a 120 second delay before charger will cut in or cut out. Certifications IP67 IP rating KICKASS constantly improves and innovates its products and we may from time to time discontinue or update product specifications without notice. For the latest product information and specifications, please visit KICKASS.com.au... -
Page 5: Product Overview
PRODUCT OVERVIEW KADCDC25A Output Cable Battery Type LED Alt.in Cable Stage LED Solar in Cable Battery Mode Button Ext. LED Cable Charging LED Ignition Override Cable Alternator LED Ground Cable Solar LED Temperature Sensor Cable Mounting Slots 4.5mm KADCDC25A-AND OUTPUT... -
Page 6: Safety First
MOUNTING It is most important to mount your KickAss Charger as close as possible to your auxiliary battery and be sure to keep your charger away from turbos and exhaust pipes. This will ensure maximum performance out of your charger. -
Page 7: Wiring Size
For more information or assistance, see installation videos at www.kickass.com.au. WIRING INSTALLATION: KADCDC25A 1. Disconnect the negative battery terminal (-) from the starting battery of the vehicle or main battery of the caravan (for trailer installations). 2. Determine the path for the cable to run from the auxiliary battery to the mounted Charger and then to the starting battery. - Page 8 9. Optional installation points, 6, 7 and 8 above will remain the same. FOR SOLAR PANEL ONLY INSTALLATION The KickAss Charger can be used with a solar only input so you can take advantage of the inbuilt MPPT solar regulator. Wiring installation is the same as the above steps, however point 5-6, connection to a start battery and point 8, optional ignition override are not required.
- Page 9 FUSE RED - ALTERNATOR/STARTER BATTERY 8mm 5OAMP GROUND/CHASIS FUSE Recommended products for easy installation (not included): KAFUSE - KickAss 50 Amp Auto Reset Cicuit Breaker KACB50P - KickAss 50 Amp Hi Amp Manual Reset Circuit Breaker 5OAMP GROUND/CHASIS FUSE KAMAXIFHAND - Kickass Inline Maxi Fuse Holder...
- Page 10 KICKASS INLINE MAXIFUSE - KAMAXIFHAND Recommended products for easy installation (not included): KICKASS INLINE KAMAXIFHAND - Kickass Inline Maxi Fuse Holder MAXIFUSE with Anderson Style Plug - KAMAXIFHAND KADBWK8MMPP - KickAss Plug and Play dual battery wiring kit MOUNT DC-DC CHARGER AS CLOSE AS POSSIBLE KA8M5-A2A - KickAss 8B&S 5.5M Anderson Style...
- Page 11 - KAMAXIFHAND Recommended products for easy installation (not included): MOUNT DC-DC CHARGER AS CLOSE AS POSSIBLE KAMAXIFHAND - Kickass Inline Maxi Fuse Holder TO THE AUXILIARY BATTERY with Anderson Style Plug I A R Y A U X I L KA8M5-A2A - KickAss 8B&S 5.5M Anderson Style...
- Page 12 CHOOSING THE BATTERY TYPE The default battery setting is AGM. When the auxiliary battery is connected, press the and hold the mode button for 5 seconds or until the battery light starts flashing then select from either GEL, AGM, WET, CALCIUM or LITHIUM and wait for the battery light to stop flashing your selection will now be saved.
- Page 13 UNDERSTANDING SOLAR, ALTERNATOR & CHARGING LIGHTS Solid on - cut-in voltage reached. (see table below for other indications) SOLAR Solid on - cut-in voltage reached. (see table below for other indications) ALTERNATOR Charging light will flash when unit is charging. CHARGING •...
-
Page 14: Fault Codes
(such as your start battery) to your auxiliary battery and check that the charging LED on the DC- DC charger flashes after minimum cut in voltage is reached and 120 second delay has passed. You can then remove the jumper cables. KickAss constantly updates frequently asked questions, troubleshooting, videos and specifications, please visit:... -
Page 15: Need Help
NEED HELP? KickAss constantly updates frequently asked questions, troubleshooting, videos and specifications, please visit: www.kickass.com.au for the most up to date information. - Page 16 THANK YOU FOR CHOOSING DC-DC CHARGERS For more informa on please visit us at: KICKASS.COM.AU...


Need help?
Do you have a question about the KADCDC25A and is the answer not in the manual?
Questions and answers