Table of Contents
Advertisement
Quick Links
Advertisement
Table of Contents

Related Manuals for Tennant T7AMR


Summary of Contents for Tennant T7AMR
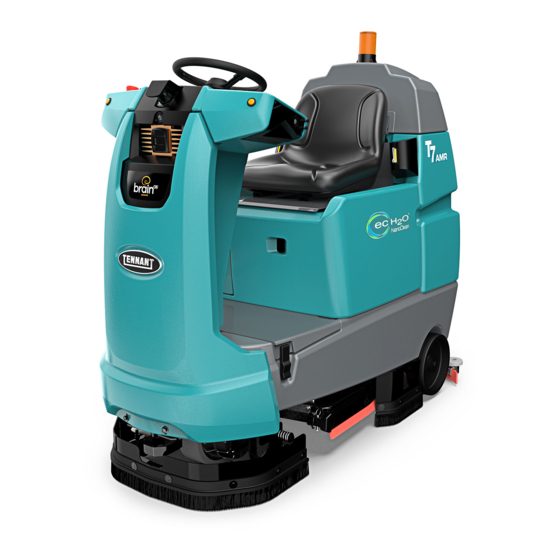
- Page 1 T7AMR (Battery) Rider-Scrubber Operator Manual Hygenic Fully ® Cleanable Tanks TennantTrue ® Parts North America / International 9018134 For the latest Parts Manuals and other Rev. 00 (10-2018) language Operator Manuals, visit: *9018134* www.tennantco.com/manuals...
- Page 2 Installation Date Tennant Company PO Box 1452 Minneapolis, MN 55440 Phone: (800) 553-8033 www.tennantco.com 1−Step. Duramer, and Insta-Fit are US registered and unregistered trademarks of Tennant Company BrainOS is a US registered trademark of Brain Corp. ® Trojan and HydroLINIK are registered trademarks of Trojan Battery Company.
- Page 3 BrainOS, should only be used by trained operators in controlled, restricted environments approved by Brain Corp/Tennant Company. Additional training materials may be provided as to the intended use of the T7AMR Scrubber, and it should only be used in accordance with such training. Use the machine in approved environments in accordance with the Autonomous Navigation Software End User License Agreement (EULA).
-
Page 4: Table Of Contents
Left Perimeter Guard, Right Perimeter Guard, And Front Perimeter Guard ..60 Logging Into BrainOS .......28 Recovery Tank Seal .........61 Positioning The Machine At The Home Location Code......28 Solution Tank Seals ........61 Teaching A New Route Tires ..............61 (BrainOS Software) ......30 T7AMR 9018134 (10-2018) - Page 5 Transporting The Machine .......62 Jacking Up The Machine.......63 Storage Information ........64 Freeze Protection ........64 ec-H2O Models ........64 Specifi cations ............65 General Machine Dimensions/Capabilities ...65 General Machine Performance .....65 Power Type ...........66 Tires ..............66 ec−H2O System ..........66 Machine Dimensions ........67 T7AMR 9018134 (10-2018)
-
Page 6: Important Safety Instructions - Save These Instructions
- In areas with possible falling objects. severe personal injury or death. - With pads or accessories not supplied or approved by Tennant. The use of other pads FOR SAFETY: To identify actions that must be may impair safety. followed for safe operation of equipment. - Page 7 - Do not modify the machine from its original 5. Before leaving or servicing machine: design. - Stop on level surface. - Use Tennant supplied or approved - Turn off machine and remove key. replacement parts. T7AMR 9018134 (10-2018)
- Page 8 380 mm (15 in) or less from the ground. - Do not load/unload on ramp inclines that exceed 15.8% grade. - Turn off machine and remove key. - Use tie-down straps to secure machine. T7AMR 9018134 (10-2018)
- Page 9 Do not use N’utilisez pas de o incendios. flammable matières No utilice materials in inflammables materiales tank. dans le(s) inflamables en réservoir(s). el depósito(s). 25815 Located under the solution fi ll port and next to foot pedals. T7AMR 9018134 (10-2018)
-
Page 10: Operation
H. Recovery tank cover V. Solution tank fi ll cap I. Flashing light W. Rear squeegee J. Operator seat X. Squeegee vacuum hose K. Batteries Y. Steering wheel L. Battery charging connector M. Solution tank front cover T7AMR 9018134 (10-2018) -
Page 11: Controls And Instruments
L. Directional switch C. 1-Step button M. Blue start/pause button D. Horn button N. Signal lights (Rear) E. Brush pressure button F. Brush pressure indicator lights G. Solution fl ow indicator lights H. Solution fl ow button T7AMR 9018134 (10-2018) -
Page 12: Cameras And Sensors
C. Sensors – Front 2D camera D. Sensors – Front 3D camera E. Sensors - Side 2D camera (located on each side of machine) F. Sensors - Side 3D camera (located on each side of machine) G. Sensors - Lower LIDAR T7AMR 9018134 (10-2018) -
Page 13: Machine Setup
DEFLECTION section of this manual. 4. Install the front perimeter guard onto the front of the machine. INSTALLING BRUSHES/PADS To install the brushes or pad, see REPLACING DISK SCRUB BRUSHES OR PAD DRIVER or section of this manual. T7AMR 9018134 (10-2018) -
Page 14: Ec-H2O Water Conditioning Cartridge (Option)
Do not use the same bucket for fi lling and draining the machine. NOTE: For Conventional Scrubbing, only use recommended cleaning detergents. Machine damage due to improper detergent usage will void the manufacturer’s warranty. T7AMR 9018134 (10-2018) -
Page 15: Operation Of Controls
NOTE: ec-H2O Models-During fi rst time use and after replacing the water conditioning cartridge, the ec-H2O system will automatically override the selected solution fl ow rate for up to 75 minutes. T7AMR 9018134 (10-2018) -
Page 16: Setting Brush Pressure
fl ow setting. NOTE: It is recommended that medium or high solution fl ow levels be used for uncoated or unpolished fl oors (more porous). This applies to both conventional and ec-H2O scrubbing modes. T7AMR 9018134 (10-2018) -
Page 17: Emergency Stop Buttons
If ec-H2O system was operated with cleaning begin the robotic route. detergent, drain solution tank, add clear water and operate the ec-H2O system until the indicator light code clears. T7AMR 9018134 (10-2018) -
Page 18: Blue Start/Pause Button
The navigation software will keep track of the current machine location within the route and allows the route to be resumed. Press the blue start/pause button again to resume the robotic route. T7AMR 9018134 (10-2018) -
Page 19: Battery Discharge Bar
It is best to charge the the ROC. If the indicator is gray, the ROC is not batteries only when alerted that the battery needs connected and cannot be paired with a cell phone. charging. See BATTERIES in the MAINTENANCE section. T7AMR 9018134 (10-2018) -
Page 20: How The Machine Works
BRUSH INFORMATION section of this manual ec-H2O system. Conventional cleaning detergents/ or contact a Tennant representative. restorers may cause failure to the ec-H2O solution system. The machine is equipped with BrainOS software that is accessible via the User Interface (UI) touchscreen, also known as the UI touchscreen. -
Page 21: Brush Information
The spring-activated For best results, use the appropriate brush or centering device works with all Tennant pads and pad for the cleaning application. Listed below are allows for fast, easy pad replacement. -
Page 22: Machine Operation
(if equipped). For ec-H2O Scrubbing: Ensure that all conventional cleaning agents are drained and rinsed from the solution tank. For ec-H2O Scrubbing: Ensure that the solution tank is fi lled with clear cool water only. T7AMR 9018134 (10-2018) -
Page 23: While Operating The Machine (Robotic Mode/Manual Mode)
2° C (38° F). FOR SAFETY: When using machine in manual mode, do not scrub on ramp inclines that exceed 7% grade or transport (GVWR) on ramp inclines that exceed 10.5% grade. T7AMR 9018134 (10-2018) -
Page 24: Scrubbing - Manual Mode
WARNING: Flammable materials or reactive metals can cause an explosion 3. Press the 1-Step button. The light in the or fi re. Do not pick up. button is illuminated. All the preset scrubbing functions will turn on. T7AMR 9018134 (10-2018) -
Page 25: Double Scrubbing
The light above the vacuum fan button will turn off, the squeegee will raise and the vacuum fan will stop operating. Then scrub the area. Let the cleaning solution set on the fl oor for 3-5 minutes. T7AMR 9018134 (10-2018) -
Page 26: Water Pickup Mode (No Scrubbing)
The light in the vacuum fan/squeegee button will or fi re. Do not pick up. illuminate, the squeegee will lower and the vacuum fan will start operating. Then pick up the water or non-fl ammable liquid spill. T7AMR 9018134 (10-2018) -
Page 27: Scrubbing - Robotic Mode
If the home location code is moved even slightly, the route may not be performed correctly. • Install home location codes at a height of 40 in. (1000 mm) from the fl oor. 24 in. (610 mm) 40 in. (1000 mm) T7AMR 9018134 (10-2018) -
Page 28: Logging Into Brainos
2. Drive the machine to the desired home location code, positioning the machine so the right-side camera is no less than 24 in. (610 mm) from 3. Upon successful PIN entry, the UI touchscreen the home location code. displays the main menu. T7AMR 9018134 (10-2018) - Page 29 NOTE: A fl ashlight can be used in dark and low light areas to help the machine see and scan the home location code. NOTE: Do not stand in front of the machine right- side camera when it is trying to scan the home location code. T7AMR 9018134 (10-2018)
-
Page 30: Teaching A New Route (Brainos Software)
4. Drive the machine to the desired home location code, positioning the machine so the right-side camera is no less than 24 in (610 mm) from the home location code. See POSITIONING THE MACHINE AT THE HOME LOCATION CODE. T7AMR 9018134 (10-2018) - Page 31 BrainOS navigation software will remember where in the route the cleaning systems were lifted and NOTE: If the 1-Step button is not pressed, the lowered when operating in robotic mode. route will be saved with no cleaning systems engaged. T7AMR 9018134 (10-2018)
- Page 32 UI touchscreen states Drive to scan my home location. NOTE: A new cleaning route cannot be saved until the machine scans the same home location code a second time in the same physical location. T7AMR 9018134 (10-2018)
- Page 33 13. When the route is successfully saved, the UI touchscreen briefl y displays Success! Route saved. and then returns to the main menu. The new cleaning route is saved and is now available to run in robotic mode. T7AMR 9018134 (10-2018)
-
Page 34: Pairing A Phone With The Roc
ROC. displayed, followed by a list of all existing routes for the scanned home location code. 5. Pairing is successful when the cell phone receives a confi rmation text message. T7AMR 9018134 (10-2018) - Page 35 fl ashes and the horn sounds to signal that robotic cleaning is starting. FOR SAFETY: While machine is operating in robotic mode, remove key from ON/OFF key switch to prevent unauthorized use without disrupting robotic route. T7AMR 9018134 (10-2018)
- Page 36 Progress, as well as the machine current DONE to return to the main menu. location on the cleaning route, amount of time spent on the route, and the total amount of time the route should take in robotic mode. T7AMR 9018134 (10-2018)
-
Page 37: Alerts During Robotic Operation
If multiple alerts are triggered, the number of alerts appears on the top left of the UI touchscreen along with a list of alerts that require attention. See ALERT MESSAGES. T7AMR 9018134 (10-2018) -
Page 38: Deleting Routes
BACK to return to (See POSITIONING THE MACHINE AT THE the SETTINGS menu. Touch BACK again to HOME LOCATION CODE). The machine return to the main menu. automatically begins scanning, as displayed on the UI touchscreen. T7AMR 9018134 (10-2018) -
Page 39: Draining And Cleaning The Tanks
fl oor drain or sink. 7. Replace the recovery tank drain hose cap and mount the drain hose back onto the mounting clip after the tank is drained. T7AMR 9018134 (10-2018) - Page 40 Make sure the recovery tank is cover and the tank seal before replacing the empty before tilting. cover. 16. Replace the solution tank drain hose cap and mount the drain hose back onto the mounting clip after the tank is drained. T7AMR 9018134 (10-2018)
-
Page 41: Alert Messages
2. Press the BLUE button in the back to resume. * All scrubbing functions stop, but the machine can still be driven. If necessary, press the 1-Step button for an additional minute of operation to pick up standing water or solution. T7AMR 9018134 (10-2018) - Page 42 UNKNOWN Error(s) of an unknown 1. Turn off and inspect machine. ERROR origin. 2. Reboot and attempt to operate. 3. If issue persists, contact customer service. NOTE: Contact a Tennant Service representative for all other fault codes T7AMR 9018134 (10-2018)
-
Page 43: Machine Troubleshooting
*Verify if cleaning detergent was added to solution tank. If ec-H2O system was operated with cleaning detergent, drain solution tank, add clear water and operate the ec-H2O system until the indicator light code clears. T7AMR 9018134 (10-2018) -
Page 44: Maintenance
MAINTENANCE MAINTENANCE T7AMR 9018134 (10-2018) -
Page 45: Maintenance Chart
(Check every 100 hours after initial 500 hour check) Propelling motor Check motor brushes (Check every 100 hours after initial 500 hour check) Tires Check for damage and wear LUBRICANT/FLUID Distilled water SAE 90 weight gear lubricant T7AMR 9018134 (10-2018) -
Page 46: Batteries
NOTE: Do Not check the electrolyte level if the machine is equipped with a battery watering system. 08247 FOR SAFETY: When servicing machine, keep all metal objects off batteries. Avoid contact with battery acid. T7AMR 9018134 (10-2018) -
Page 47: Charging The Batteries
Refer to the off-board machine. The use of other battery chargers that battery charger owners manual for operating are not supplied and approved by Tennant are instructions. prohibited. Refer to the charger owners manual for additional information. Contact distributor or FOR SAFETY: Do not disconnect the off- Tennant for battery charger recommendations. -
Page 48: Hydrolink Battery Watering System (Trojan Battery Option)
6. After adding water, replace the dust cap on the battery fi ll hose and store the hand pump hose inside the machine’s battery compartment for future use. T7AMR 9018134 (10-2018) -
Page 49: Circuit Breakers And Fuses
500 hours of electrical components they protect. machine operation and then every 100 hours after the initial 500 hours. Circuit Rating Circuit Protected Breaker Instrument panel - power Accessories 20 A AMR system 10 A Brain module T7AMR 9018134 (10-2018) -
Page 50: Cameras And Sensors
Side 2D and 3D cameras are located on each side bottom surfaces are completely clear of all dirt, of the machine. smudges, and/or other debris. Use a fl ash light to inspect these sensor surfaces and ensure they are thoroughly cleaned. T7AMR 9018134 (10-2018) -
Page 51: Scrub Brushes And Pads
1. Stop machine on a level surface. Make sure the scrub head is in the raised position. 2. Turn the machine ON/OFF key switch off. FOR SAFETY: Before leaving or servicing machine, stop on level surface, turn off machine, and remove key. T7AMR 9018134 (10-2018) - Page 52 10. If the scrub brush located on the left side of the 7. Set the yellow spring clip to the open position machine was changed/removed: Close and to make brush installation easier. Press spring resecure the left perimeter guard. clip together and downward to set. T7AMR 9018134 (10-2018)
-
Page 53: Replacing Disk Pads
3. Flip or replace the scrub pad, center the scrub pad on the pad driver. Then reinstall the center disk to secure the pad in place on the pad driver. 4. Reinsert the pad driver into the machine. T7AMR 9018134 (10-2018) -
Page 54: Ec-H2O System
5. Install the new cartridge and reconnect the two hoses. Make sure the hose connectors are fully inserted into new cartridge. 2. Remove the battery compartment shroud from machine to access cartridge. T7AMR 9018134 (10-2018) -
Page 55: Lubrication
STEERING U-JOINT Solution flow button The steering u-joint is located directly below the steering motor. Check for damage or wear and lubricate the steering u-joint after every 200 hours. 7. Reinstall the battery compartment shroud and operator seat. T7AMR 9018134 (10-2018) -
Page 56: Squeegee Blades
Then loosen both rear squeegee assembly mounting knobs. 7. Loosen the two outer knobs on the rear squeegee assembly. Remove the front squeegee blade from the squeegee assembly. 4. Pull the rear squeegee assembly from the machine. T7AMR 9018134 (10-2018) - Page 57 14. Reinstall the squeegee vacuum hose onto the rear squeegee assembly. 11. Reinstall the rear squeegee retaining band onto the squeegee assembly. Be sure each of the fl anges on the retaining band are seated in the cut outs in the rear squeegee assembly. T7AMR 9018134 (10-2018)
-
Page 58: Replacing The Side Squeegee Blades
The squeegee blade end should be further away from the wall when the fl oor curves up into the wall. 2. Open the side squeegee. T7AMR 9018134 (10-2018) -
Page 59: Leveling The Rear Squeegee
6. Readjust the squeegee blade defl ection if necessary. 5. Drive the machine forward again to recheck the squeegee blade defl ection after adjustments are made. 6. Readjust the squeegee blade defl ection if necessary. T7AMR 9018134 (10-2018) -
Page 60: Skirts And Seals
The skirts should clear the fl oor by 0 to 6 mm (0 to 0.25 in) when the scrub brushes are new and the scrub head is down. The bristles should lightly touch the fl oor. Replace damaged and/or worn bristle assemblies. T7AMR 9018134 (10-2018) -
Page 61: Recovery Tank Seal
There are two solution tank seals. Check the seal for damage and wear after every 100 hours of operation. A front seal is located on the bottom of the solution tank cover. A rear seal is located on the bottom of the recovery tank. T7AMR 9018134 (10-2018) -
Page 62: Pushing, Towing, And Transporting The Machine
Immediately after pushing the machine, remove the screw driver from between the brake release lever and the body of the encoder. NEVER operate the machine with the parking brake disabled. FOR SAFETY: Do not operate machine with the brake disabled. T7AMR 9018134 (10-2018) -
Page 63: Jacking Up The Machine
10. Route the rear tie-down straps through the opening at the center part of the rear axle. 11. Stow/secure all parts removed from the machine in a safe place where they will not be lost or damaged. T7AMR 9018134 (10-2018) -
Page 64: Storage Information
FOR SAFETY: When servicing machine, block machine tires before jacking machine up. Use a hoist or jack that will support the weight of the machine. Jack machine up at designated locations only. Block machine up with jack stands. T7AMR 9018134 (10-2018) -
Page 65: Specifi Cations
Maximum rated climb and descent angle with empty tanks (Manual Mode) 15.8% Maximum rated climb and descent angle when scrubbing (Manual Mode) Maximum ambient temperature for machine operation 40° C (104° F) Minimum temperature for operating machine scrubbing functions 2° C (36° F) T7AMR 9018134 (10-2018) -
Page 66: Power Type
80 mm wide x 260 mm OD (3.0 in wide x 10 in OD) ec−H2O SYSTEM Item Measure Solution pump 24 Volt DC, 5A, 5.7 LPM (1.5 GPM) open fl ow, 70 psi bypass setting Solution fl ow rate Low: 0.14 gpm Medium: 0.25 gpm High: 0.35 gpm T7AMR 9018134 (10-2018) -
Page 67: Machine Dimensions
SPECIFICATIONS MACHINE DIMENSIONS 740 mm (29 in) 800 mm 850 mm (31.5 in) (34 in) 1450 mm (57 in) Track Wheel base (at rear wheels) 971 mm 724 mm (31.2 in) (28.5 in) 1645 mm (65 in) T7AMR 9018134 (10-2018)
Need help?
Do you have a question about the T7AMR and is the answer not in the manual?
Questions and answers