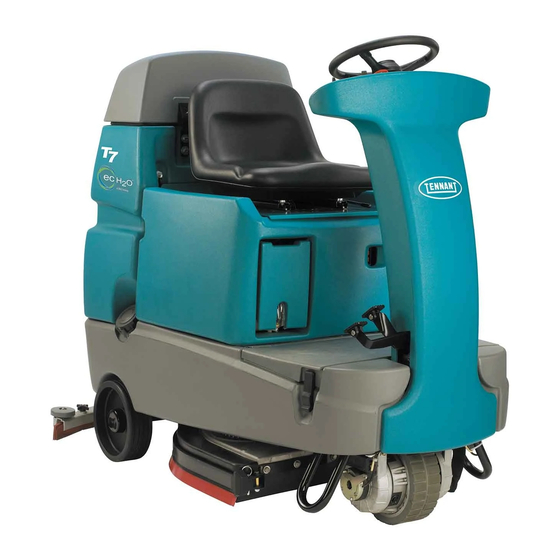
Tennant T7 Installation Instructions
Upgrade kit
Hide thumbs
Also See for T7:
- Service information manual (88 pages) ,
- Operator's manual (54 pages) ,
- Instruction bulletin (11 pages)
Advertisement
Quick Links
KIT NO. 9015933 - Europe
This kit includes the necessary parts to add battery charger communication functionality to machines
equipped with IRIS telemetry technology. See the IMPORTANT INSTALLATION NOTICE before installing kit.
INSTALLATION INSTRUCTIONS:
Installation Time: 2 Hours
Special Tools Required: None
AM II Upgrade Kit Contents
1
2
Ref. Part No.
Description
1
1074466
Harness, Telem
2
1075477
Connector, Harness, Charger, Off- board
3
06923
Screw, Pan, Phl, m3x0.50x25, 4.8
4
579211
Nut, Hex, Lock, m3x0.50, nl,ss
5
1230748
Bracket, Retrofit, AM II Connector [T7]
6
1034731
Screw, Hex, m6x1.00x16, sems,ss
7
1017218
Washer, flat, 0.32B 1.99 .12, ss
8
611005
Switch, interlock
9
1013705
Plate, Thread, Switch, m3 nut
10
06922
Screw, Pan, Phl, m3x0.50x20,4.8
11
130773
Tie, Cable, Nyl, 11.0L, .14W, 3.0 Max. D
12
1230312
Charger, IC- 650, 100- 240V, Off- Board
NOTE: Charger power cord not included, use cord from previous charger.
IMPORTANT INSTALLATION NOTICE:
For IRIS models manufactured after February 2017,
the AM II charger connector harness (Ref. 2) and
charger (Ref. 12) are the only kit parts required for this
upgrade. The new kit AM II charger connector
harness (Ref. 2) easily installs in the same location as
the original red battery connector wire assembly. The
machine's existing telemetry harness is pre-equipped
with an open connector to accept the new charger
connector harness. Carefully follow the kit installation
instructions with this in mind.
When installing the complete IRIS kit with the
addition of the AMII upgrade kit, two telemetry
harnesses (Ref. 1) will be provided. One from each
kit. Only one harness is required for both kits.
PREPARE MACHINE FOR KIT INSTALL:
1. Park machine on level surface, turn off machine,
remove key, and set parking brake if equipped.
2. Disconnect battery cable from machine.
9015968 Rev. 00 (01- 2017)
T7/T7+ IRIS AM II Upgrade Kit
12
11
3
4
7
10
9
8
6
5
Qty.
WARNING: Always disconnect battery cables
from machine before working on electrical
components.
3. Remove seat, battery compartment shroud and
the front two batteries from machine.
1
4. Remove the charger connector interlock switch
1
from machine and discard. Save backing plate for
2
reuse.
2
1
1
1
1
1
2
5
1
5. Remove the existing charger connector wire
assembly from machine and discard.
Tennant Company
Page 1 of 4
Remove
front two
batteries
Discard
Switch
Save
backing
plate
Discard
www.tennantco.com
Advertisement

Summary of Contents for Tennant T7
- Page 1 KIT NO. 9015933 - Europe Page 1 of 4 T7/T7+ IRIS AM II Upgrade Kit This kit includes the necessary parts to add battery charger communication functionality to machines equipped with IRIS telemetry technology. See the IMPORTANT INSTALLATION NOTICE before installing kit.
- Page 2 Nut, Hex, Lock, m3x0.50 (2) Blue to NC terminal as shown 2. Connect the new interlock switch to the retrofit bracket with hardware as shown. Yellow to C terminal as shown Original Plate 9015968 Rev. 00 (01- 2017) Tennant Company www.tennantco.com...
- Page 3 To new AM II charger connector harness Black to Red to Main Negative Contactor (+) Stand-off 9015968 Rev. 00 (01- 2017) Tennant Company www.tennantco.com...
- Page 4 Check wire connections and roller alignment. Repeat step. 4. After testing is confirmed, contact the Tennant 12. Reinstall the batteries, battery compartment technical service department as instructed shroud and seat. Reconnect battery cables.


Need help?
Do you have a question about the T7 and is the answer not in the manual?
Questions and answers