
Related Manuals for Tennant T15


Summary of Contents for Tennant T15
- Page 1 (Electric) Rider Scrubber Operator Manual The Safe Scrubbing Alternative ES Extended Scrub System 331550 North America / International Rev. 03 (02-2009) *331550* www.tennantco.com Home Find... Go To..
- Page 2 ES , Pre--Sweep, FaST--PAK, Smart Release, Touch--N--Go Control Panel, 1--Step, and Lower Total Cost of Ownership are US registered and unregistered trademarks of Tennant Company. Specifications and parts are subject to change without notice. Original Instructions, copyright E 2007, 2008, and 2009 TENNANT, Printed in U.S.A. Home Find... Go To..
-
Page 3: Table Of Contents
....Vacuum Wand ....Replacing Side Squeegee Blades ..T15 331550 (2- -09) Home Find... Go To.. - Page 4 Index ....... . . T15 331550 (2- -09) Home Find... Go To..
-
Page 5: Safety Precautions
This machine is designed solely for scrubbing dirt - - Go slow on inclines and slippery and dust in an indoor environment. Tennant does surfaces. not recommend using this machine in any other - - Use care when backing machine. - Page 6 ON THE UNDERSIDE OF THE TANK COVER AND ON THE LEFT SIDE OF THE OPERATOR COMPARTMENT. FLAMMABLE SPILLS LABEL - - LOCATED ON THE SEAT SUPPORT. FOR SAFETY LABEL - - LOCATED ON THE SEAT SUPPORT. 350656 T15 331550 (3- -08) Home Find... Go To..
-
Page 7: Operation
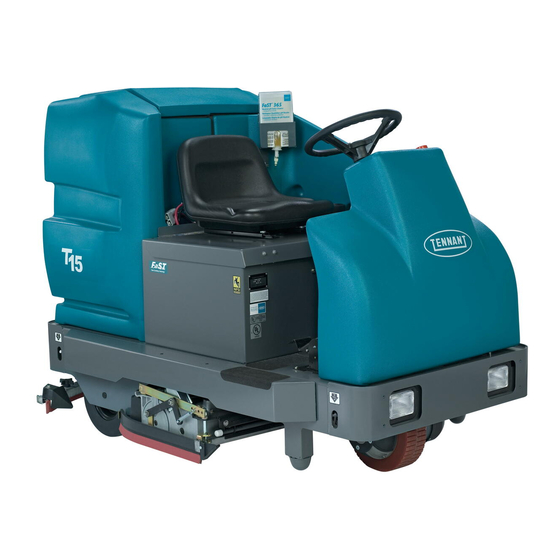
F. Side squeegee G. Scrub head H. Pre- -Sweep assembly (option) Pre- -Sweep side brush (es) (option) J. Batteries K. FaST PAK (option) ec- -H20 System Module (option) L. FaST solution system T15 331550 (2- -09) Home Find... Go To.. -
Page 8: Control Panel Symbols
Recovery tank full Circuit breaker #10 Solution flow Circuit breaker #11 Pre--Sweep (Option) Circuit breaker #12 Dust control (Option) Circuit breaker #13 Circuit breaker #1 Circuit breaker #14 Circuit breaker #2 Circuit breaker #15 T15 331550 (2- -09) Home Find... Go To.. -
Page 9: Controls And Instruments
S. Directional pedal T. Brake pedal U. Circuit breakers V. Horn button W. Dust control switch (option) X. Pre- -Sweep switch (option) Y. Side brush pedals (option) Z. ec- -H20 indicator light (option) T15 331550 (2- -09) Home Find... Go To.. -
Page 10: Operation Of Controls
Neutral position when you take your foot off the directional pedal. When the directional pedal returns to the neutral position, the scrub brushes will stop and after a short delay, the scrub head will raise. T15 331550 (3- -08) Home Find... Go To.. -
Page 11: Brake Pedal
FOR SAFETY: When using machine, go slow on inclines and slippery surfaces. PARKING BRAKE The parking brake on this machine is automatic and will engage approximately one second after the machine stops. T15 331550 (5- -07) Home Find... Go To.. -
Page 12: Key Switch
Off: Press the bottom of the operating lights switch. HOURMETER The hourmeter records the number of hours the machine has been operated. Check the hourmeter regularly; this information is used to determine when to perform routine machine maintenance. T15 331550 (2- -09) Home Find... Go To.. -
Page 13: Operator Seat
(option), the solution flow lever is nonfunctional. The FaST and ec- -H2O system flow rates are pre- -set. The ec- -H2O module has optional flow rate settings. If solution flow adjustments are required, contact an Authorized Service Center. T15 331550 (2- -09) Home Find... Go To.. -
Page 14: Scrubbing Switch
NOTE: The scrub switch also controls the FaST/ec- -H2O system (option) when the FaST/ec- -H2O system is enabled with the FaST/ec- -H2O switch. T15 331550 (2- -09) Home Find... Go To.. -
Page 15: Squeegee Switch
Drain, rinse, and refill the solution tank with clear cool water before operating the FaST system. Conventional cleaning detergents may cause a FaST system failure. T15 331550 (5- -07) Home Find... Go To.. -
Page 16: Ec--H2O Switch (Option)
RECOVERY TANK FULL INDICATOR The recovery tank full indicator light will illuminate when the recovery tank is full. NOTE: When the indicator illuminates, all scrubbing functions will shut off automatically. T15 331550 (2- -09) Home Find... Go To.. -
Page 17: Battery Discharge Indicator
NOTE: The reading on the battery discharge indicator may not be accurate when the machine is first powered on. Operate the machine for a few minutes before reading the charge level of the batteries. T15 331550 (2- -09) Home Find... Go To.. -
Page 18: Pre--Sweep Switch (Option)
Raise brush: Press the top pedal all the way down with the toe of your foot. The side brush will raise to the off position and stop sweeping. Release the pedal and the pedal will lock automatically. T15 331550 (3- -08) Home Find... Go To.. -
Page 19: Circuit Breakers
Not Used motors (option) CB13 25 A Vacuum fan (50 A -- If heavy duty vacuum fan) CB15 CB14 30 A RH Scrub brush motor CB15 30 A LH Scrub brush motor CB13 T15 331550 (2- -09) Home Find... Go To.. -
Page 20: Fuse
Circuit Protected FU-1 80 A Propelling STEERING WHEEL The steering wheel controls the machine’s direction of travel. Left: Turn the steering wheel to the left. Right: Turn the steering wheel to the right. T15 331550 (2- -09) Home Find... Go To.. -
Page 21: Squeegee Wheel Cams
Decrease down pressure: Remove spring from pin and move the pin toward the front of the machine into a new setting. Re--attach spring to pin. NOTE: Adjust the side squeegee down pressure controls equally. T15 331550 (2- -09) Home Find... Go To.. -
Page 22: How The Machine Works
For best results, use the correct brush type for the cleaning application. NOTE: The amount and type of soilage play an important role in determining the type of brushes to use. Contact a Tennant representative for specific recommendations. Pre- sweep- Polypropylene 6-double row Brush -- Recommended for general sweeping applications. -
Page 23: Home Find... Go To
Cleans without scuffing. Cylindrical super abrasive bristle scrub brush -- Nylon fiber impregnated with abrasive grit to remove stains and soilage. Strong action on any surface, performing well on buildup, grease, or tire marks. T15 331550 (10- -08) Home Find... Go To.. -
Page 24: Fast Scrubbing System
FaST system. Conventional cleaning detergents may cause a FaST system failure. NOTE: Storage or transporting machines equipped with FaST in freezing temperatures requires special procedures. Check with a TENNANT representative for advice. T15 331550 (5- -07) Home Find... Go To.. -
Page 25: Ec--H20 System (Option)
-H2O solution system. NOTE: Storage or transporting machines equipped with ec- -H2O in freezing temperatures requires special procedures. Follow the freeze protection procedure located in the STORAGE INFORMATION section. T15 331550 (2- -09) Home Find... Go To.. -
Page 26: Pre-Operation Checklist
- For FaST or ec- -H2O Scrubbing: Confirm the solution tank is filled with clear cool water only. - Check maintenance records to determine maintenance requirements. T15 331550 (2- -09) Home Find... Go To.. -
Page 27: Installing Fast Pak Agent
FaST PAK bag. NOTE: If any dried concentrate is visible on the supply hose connector or the on the FaST PAK connector, soak and clean with warm water. T15 331550 (5- -07) Home Find... Go To.. -
Page 28: Starting The Machine
2. Turn the machine power on. 3. Drive the machine to the area to be cleaned. NOTE: The machine will not travel unless the operator is sitting in the operator’s seat. T15 331550 (5- -07) Home Find... Go To.. -
Page 29: Filling The Tanks
Tennant representative. WARNING: Flammable materials can cause an explosion or fire. Do not use flammable materials in tank(s). FOR SAFETY: When using machine, follow mixing and handling instructions on chemical containers. T15 331550 (5- -07) Home Find... Go To.. -
Page 30: Home Find... Go To
NOTE: When cleaning using the FaST or ec- H2O option, USE CLEAR COOL WATER ONLY. DO NOT add cleaning agents in solution tank. Conventional cleaning agents/restorers may cause failure to the system. 7. Lower the tank cover. T15 331550 (2- -09) Home Find... Go To.. -
Page 31: Scrubbing
1. Start the machine. 2. Drive the machine to the area to be scrubbed. 3. Pre--sweep machines: Press the top of the Pre--sweep switch to lower the Pre--sweep assembly. T15 331550 (5- -07) Home Find... Go To.. -
Page 32: Home Find... Go To
-H2O SCRUBBING: Press the ec- -H2O switch to enable the ec--H20 system. See the ec--H20 SWITCH section of the manual. NOTE: The ec- -H2O system indicator light will not turn on until the machine starts scrubbing. T15 331550 (2- -09) Home Find... Go To.. -
Page 33: Home Find... Go To
H2O SYSTEM INDICATOR LIGHT CONDITION CODE Solid green Normal operation Blinking red Flush ec- -H2O module Solid red Contact Service Center 7. Press the scrubbing switch. T15 331550 (2- -09) Home Find... Go To.. -
Page 34: Home Find... Go To
9. Press the lower side brush pedal to lower the side brush (option). 10. Drive the machine forward and scrub as required. WARNING: Flammable materials or reactive metals can cause an explosion or fire. Do not pickup. T15 331550 (2- -09) Home Find... Go To.. -
Page 35: Double Scrubbing
-set. The ec- -H2O module has optional flow rate settings. If solution flow adjustments are required, contact an Authorized Service Center. FOR SAFETY: When using machine, go slow on inclines and slippery surfaces. T15 331550 (2- -09) Home Find... Go To.. -
Page 36: Stop Scrubbing
2. Pre--sweep machines: Press the bottom of the dust control switch to stop the dust control (option). 3. Pre--sweep machines: Press the bottom of the Pre--sweep switch to stop the Pre--sweep assembly. T15 331550 (5- -07) Home Find... Go To.. -
Page 37: Home Find... Go To
4. Press the top side brush pedal to raise the side brush (option). 5. When the squeegee raises, take your foot off the directional pedal. 6. Press the brake to stop the machine. T15 331550 (5- -07) Home Find... Go To.. -
Page 38: Draining And Cleaning The Tanks
2. Drive the machine next to a floor drain. 3. Turn the machine power off. FOR SAFETY: Before leaving or servicing machine, stop on level surface, turn off machine, and remove key. T15 331550 (5- -07) Home Find... Go To.. -
Page 39: Home Find... Go To
NOTE: DO NOT use steam to clean the tanks. Excessive heat can damage the tanks and components. 6. ES mode (option): After the solution tank has completely drained, reinstall the cap onto the solution tank drain opening. T15 331550 (5- -07) Home Find... Go To.. -
Page 40: Home Find... Go To
WARNING: Flammable materials can cause an explosion or fire. Do not use flammable materials in tank(s). T15 331550 (5- -07) Home Find... Go To.. -
Page 41: Home Find... Go To
NOTE: The scrub head must be lowered approximately 25 mm (1 in) to remove debris trough. NOTE: The debris trough can be removed from the right hand side of the machine only. T15 331550 (5- -07) Home Find... Go To.. -
Page 42: Stop The Machine
SCRUBBING section of the manual. 2. Press the brake to stop the machine. 3. Turn the machine power off. FOR SAFETY: Before leaving or servicing machine, stop on level surface, turn off machine, and remove key. T15 331550 (5- -07) Home Find... Go To.. -
Page 43: Options
4. Press the top side brush pedal all the way down with the toe of your foot to raise the side brush, engage the pedal lock and stop sweeping. T15 331550 (5- -07) Home Find... Go To.. -
Page 44: Pre--Sweep Assembly
3. Press the top of the dust control switch to start the dust control system. NOTE: The dust control system will only operate if the Pre- -Sweep option is on. T15 331550 (5- -07) Home Find... Go To.. -
Page 45: To Empty The Pre--Sweep
2. Press the top of the Pre--Sweep switch to lower the Pre--Sweep assembly. 3. Turn the machine power off. FOR SAFETY: Before leaving or servicing machine, stop on level surface, turn off machine, and remove key. T15 331550 (5- -07) Home Find... Go To.. -
Page 46: Home Find... Go To
5. Pivot the side brush arms out away from the machine. 6. Lift the Pre--Sweep debris hopper and remove it from the Pre--Sweep assembly. 7. Empty the debris hopper. Replace the debris hopper in the Pre--Sweep assembly. T15 331550 (5- -07) Home Find... Go To.. -
Page 47: To Remove The Pre--Sweep Assembly
4. Disconnect the Pre--Sweep harness from the main harness. 5. Open the front access cover and remove the hardware mounting the Pre--Sweep to the machine frame. 6. Move the machine away from the Pre--Sweep assembly. T15 331550 (5- -07) Home Find... Go To.. -
Page 48: To Mount The Pre--Sweep Assembly
4. Set the Pre--Sweep assembly in place with the plate clamps. Shift the assembly right or left so the mounting holes line up in front of the machine. 5. Insert and tighten the mounting hardware. T15 331550 (5- -07) Home Find... Go To.. -
Page 49: Home Find... Go To
7. Turn the machine power on. Check the Pre--Sweep assembly for proper operation. 8. Check the main brush and side brush pattern. Refer to the Pre--Sweep section in the MAINTENANCE section of the manual T15 331550 (5- -07) Home Find... Go To.. -
Page 50: Power Wand
FOR SAFETY: Before leaving or servicing machine, stop on level surface, turn off machine, and remove key. 2. Remove the squeegee suction hose from the top of the squeegee. T15 331550 (5- -07) Home Find... Go To.. -
Page 51: Home Find... Go To
4. Push the power wand solution line into the quick-- connect fitting on the machine. Pull on the hose to make sure it is connected. 5. Turn the machine power on. 6. Press the squeegee switch. T15 331550 (5- -07) Home Find... Go To.. -
Page 52: Home Find... Go To
NOTE: The wheels are properly adjusted when the squeegee blades deflect slightly while the tool is pushed back and forth. 06604 T15 331550 (2- -09) Home Find... Go To.. -
Page 53: Home Find... Go To
12. Turn the machine power off. 13. Disconnect the solution hose from the machine. 14. Disconnect the power wand from the squeegee suction hose. 15. Reconnect the squeegee suction hose to the squeegee. T15 331550 (2- -09) Home Find... Go To.. -
Page 54: Vacuum Wand
FOR SAFETY: Before leaving or servicing machine, stop on level surface, turn off machine, and remove key. 2. Remove the squeegee suction hose from the top of the squeegee. T15 331550 (5- -07) Home Find... Go To.. -
Page 55: Home Find... Go To
3. Put together the wand and the wand hose. 10080 4. Attach the squeegee suction hose to the end of the vacuum hose. 5. Turn the machine power on. 6. Press the squeegee switch. T15 331550 (5- -07) Home Find... Go To.. -
Page 56: Home Find... Go To
OPERATION 7. Vacuum the floor. 8. Turn the machine power off. Disconnect the vacuum hose from the squeegee suction hose. 06599 10. Reconnect the squeegee suction hose to the squeegee. T15 331550 (5- -07) Home Find... Go To.. -
Page 57: Positive Drain Control Valve
4. Lift the tank cover. 5. Slowly open the positive drain control valve to drain and clean the tank. 6. Close the positive drain control valve when through emptying and cleaning the tank. T15 331550 (5- -07) Home Find... Go To.. -
Page 58: Rollout Battery
4. Unplug the machine connector from the batteries. 5. Push the battery cart to the operators side of the machine. Line up the battery cart locks and the slots on the machine. Push the battery cart forward. T15 331550 (5- -07) Home Find... Go To.. - Page 59 Then tighten the jam nuts. Lower battery cart rollers: With a wrench, loosen the jam nut and turn the bolt counter--clockwise. Then tighten the jam nuts. T15 331550 (5- -07) Home Find... Go To..
- Page 60 10. Raise the machine’s battery stop arm all the way to the vertical position. 11. Raise the cart’s battery stop bar by pushing down on the handle. T15 331550 (5- -07) Home Find... Go To..
- Page 61 This will keep the batteries from rolling off the cart when moving. 14. Release the battery cart from the machine by pushing the battery cart locks towards the inside of the battery cart. T15 331550 (5- -07) Home Find... Go To..
- Page 62 16. Pull the battery cart away from the machine. 17. Reverse the previous steps to re--install batteries in the machine. T15 331550 (5- -07) Home Find... Go To..
-
Page 63: Machine Troubleshooting
Uneven brush pressure, level scrub head Broken brush drive belts on cylindrical scrub head, replace belt Check with TENNANT representative for advice Low battery charge Charge batteries until the charger automatically turns off T15 331550 (5- -07) Home Find... Go To.. - Page 64 Defective light or module Contact Service Center ec- -H2O system indicator light does not turn on ec- H2O Model: Clogged module Contact Service Center No water flow Defective solution pump Replace solution pump T15 331550 (2- -09) Home Find... Go To..
-
Page 65: Maintenance
Cylindrical brushes only: Clean debris trough Pre--Sweep brushes Check for damage and wear Pre--Sweep debris hopper Clean FaST PAK supply hose and Clean and connect hose to connector storing plug when not in use T15 331550 (10- -08) Home Find... Go To.. - Page 66 FaST injector filters Replace (S/N 015438-- LUBRICANT/FLUID ..Distilled water . . . Special lubricant, Lubriplate EMB grease (TENNANT part no. 01433--1) ..SAE 90 weight gear lubricant T15 331550 (10- -08) Home Find... Go To..
-
Page 67: Lubrication
STEERING CASTER PIVOT BEARING The steering caster bearing is located on the floorplate. Lubricate with Lubriplate EMB grease (TENNANT part no. 01433--1) every 100 hours. REAR SQUEEGEE CASTERS The rear squeegee casters are located on the back side of the rear squeegee. The rear squeegee casters each have two grease fittings. -
Page 68: Batteries
If needed, add just enough distilled water to cover the plates. Never add acid to the batteries. Do not overfill. Always keep the battery caps on, except when adding water or taking hydrometer readings. T15 331550 (5- -07) Home Find... Go To.. -
Page 69: Charging The Batteries
3. Lift the operator seat to access the batteries. The support arm automatically engages when the seat is lifted all the way up. 4. Check the water level in all battery cells. T15 331550 (5- -07) Home Find... Go To.. - Page 70 5. Unplug the machine connector from the batteries. 6. Plug the charger connector into the battery connector. WARNING: Batteries emit hydrogen gas. Explosion or fire can result. Keep sparks and open flame away. Keep covers open when charging. T15 331550 (5- -07) Home Find... Go To..
- Page 71 7. Plug the battery charger into the wall outlet. NOTE: Refer to the instructions provided by the charger manufacturer for more detailed information. 8. The TENNANT charger will start automatically. When the batteries are fully charged, the TENNANT charger will automatically turn off.
-
Page 72: Self--Diagnostic Test
ES pump turns on and off. D If the machine has FaST, the FaST system turns on and off. D The vacuum fan starts and shuts off. D The brushes turn on and off. T15 331550 (5- -07) Home Find... Go To.. - Page 73 Be sure to record which pressure indicators illuminate when each switch is held down. Contact service personnel with the error code data. 5. Turn off the self--diagnostic test by turning off the machine power. T15 331550 (5- -07) Home Find... Go To..
-
Page 74: Electric Motors
2. Press the bottom of the Pre--Sweep switch to raise the Pre--Sweep assembly and stop sweeping. 3. Turn the machine power off. FOR SAFETY: Before leaving or servicing machine, stop on level surface, turn off machine, and remove key. T15 331550 (5- -07) Home Find... Go To.. - Page 75 6. Slide the new side brush onto the side brush drive shaft. 7. Insert the side brush retaining pin through the side brush hub and shaft. Replace the cotter pin in the end of the retaining pin. T15 331550 (5- -07) Home Find... Go To..
-
Page 76: Pre--Sweep Cylindrical Brush
A polish mark will remain on the floor. 5. Raise the Pre--Sweep assembly and move the machine away from the chalked area. Turn the machine power off. T15 331550 (5- -07) Home Find... Go To.. - Page 77 B. Turn the machine power on and lower the Pre--Sweep assembly. Allow the brush to float in place for 15 to 20 seconds. C. Tighten the two lock nuts on the left hand brush arm. T15 331550 (5- -07) Home Find... Go To..
-
Page 78: Replacing The Pre--Sweep
FOR SAFETY: Before leaving or servicing machine, stop on level surface, turn off machine, and remove key. 4. Loosen and remove the brush idler hex screw from the front of the idler plate. T15 331550 (5- -07) Home Find... Go To.. - Page 79 8. Replace the brush idler plate, and secure with the four brush housing door knobs and hex screw on the front of the idler plate. 9. Check the new brush for proper adjustment. Readjust if necessary. T15 331550 (5- -07) Home Find... Go To..
-
Page 80: Scrub Brushes
FOR SAFETY: Before leaving or servicing machine, stop on level surface, turn off machine, and remove key. 3. Raise the side squeegee and lock in the up position using the side squeegee lock arm. T15 331550 (5- -07) Home Find... Go To.. - Page 81 8. While pressing the brush spring clip together with your thumb and index finger, lift the scrub brush onto the drive plug. 9. Check to make sure the brush is securely mounted on the brush drive hub. T15 331550 (5- -07) Home Find... Go To..
- Page 82 MAINTENANCE 10. Unlock the side squeegee lock plate and the side squeegee will return to the down position. 11. Repeat for the other brush. T15 331550 (5- -07) Home Find... Go To..
-
Page 83: Cylindrical Scrub Brushes
A polish mark will remain on the floor. 5. Raise the scrub head and move the machine away from the chalked area. Turn the machine power off. T15 331550 (5- -07) Home Find... Go To.. - Page 84 B. While holding the flat end of the idler shaft with a wrench, loosen the mounting screw on the outside of the idler door. T15 331550 (5- -07) Home Find... Go To..
- Page 85 Level the scrub head by turning the scrub head links. Both scrub head links should be adjusted equally. Check the brush patterns again and readjust as necessary until both patterns are the same. T15 331550 (5- -07) Home Find... Go To..
-
Page 86: Replacing The Cylindrical Scrub Brushes
Pull the bottom of the door outward, then pull the idler door and idler plug off the brush. 4. Pull the old brush out of the scrub head. T15 331550 (5- -07) Home Find... Go To.. - Page 87 The idler door of that side of the scrub head is stamped with the same letter. Make sure the letter on the door matches the letter on the scrub head when replacing the doors. T15 331550 (5- -07) Home Find... Go To..
-
Page 88: Solution System
The vacuum fan inlet filter is located near the recovery tank. Check the vacuum fan inlet filter daily. Clean inlet filter with a damp cloth or hose when dirty. Allow filter to dry completely before replacing it into machine. T15 331550 (10- -08) Home Find... Go To.. -
Page 89: Solution Tank
FaST PAK holder. Soak the connector in warm water if detergent buildup is visible. When a FaST PAK carton is not installed, store the supply hose connector on the storing plug to prevent the hose from clogging. T15 331550 (10- -08) Home Find... Go To.. -
Page 90: Fast / Solution Filter Screen
(S/N 015438- - The FaST system injector filters are located under the machine. Replace the FaST system injector filters after every 1000 hours of operation. Empty the solution tank before replacing the filters. T15 331550 (10- -08) Home Find... Go To.. -
Page 91: Ec--H2O Module Flush Procedure
Service Center. NOTE: Be sure the cover is installed back onto the ec- -H20 module before operating the machine. Do Not operate the machine without the cover installed on the ec- -H20 module. T15 331550 (2- -09) Home Find... Go To.. -
Page 92: Rear Squeegee Assembly
25 mm (1 in) from the floor. 2. Turn the machine power off. 3. Remove the squeegee suction hose from the squeegee. 4. Remove both squeegee mounting knobs. 5. Pull the squeegee off the machine. T15 331550 (5- -07) Home Find... Go To.. -
Page 93: Replacing The Rear Squeegee Assembly
6. Drive the machine forward with the squeegee down to check the squeegee blade deflection. 7. Readjust the squeegee blade deflection if necessary. T15 331550 (5- -07) Home Find... Go To.. -
Page 94: Adjusting Rear Squeegee Blade Deflection
Turn the squeegee deflection cams counter--clockwise to increase blade deflection. 6. Drive the machine forward again to check the squeegee blade deflection. 7. Readjust the squeegee blade deflection if necessary. T15 331550 (5- -07) Home Find... Go To.. -
Page 95: Adjusting The Squeegee Guide Roller
2. Turn the machine power off. FOR SAFETY: Before leaving or servicing machine, stop on level surface, turn off machine, and remove key. 3. Loosen the two retainer knobs, one at each end of the squeegee. T15 331550 (5- -07) Home Find... Go To.. - Page 96 6. Insert the rotated or new squeegee blade and then insert the retainer band. 7. Tighten the two retainer knobs until the ends of the front and rear squeegee blades touch. Do not over--tighten. T15 331550 (5- -07) Home Find... Go To..
-
Page 97: Replacing Or Rotating The Front Squeegee Blade
10. Install the squeegee assembly on the squeegee pivot. See REPLACING THE SQUEEGEE ASSEMBLY. 11. Adjust the squeegee blade leveling and deflection as stated in LEVELING THE REAR SQUEEGEE and ADJUSTING REAR SQUEEGEE BLADE DEFLECTION. T15 331550 (5- -07) Home Find... Go To.. -
Page 98: Side Squeegee Blades
4. Slide a new squeegee blade into the frame. 5. Replace the retainer bracket, deflector, clevis pin, and cotter pin. 6. Repeat for the side squeegee on the other side of the scrub head. T15 331550 (5- -07) Home Find... Go To.. -
Page 99: Skirts And Seals
PRE- -SWEEP REAR SKIRT (OPTION) The Pre--Sweep rear skirt is located behind the recirculation skirt and main sweeping brush. Check the skirt for damage and wear after every 50 hours of operation. T15 331550 (5- -07) Home Find... Go To.. -
Page 100: Belts And Chains
Proper belt tension is a 2 mm (.08 in) deflection from a force of 0.76 to 0.8 kg (1.7 to 1.8 lb) at the belt midpoint. Check the belt tension and wear every 100 hours of operation. T15 331550 (5- -07) Home Find... Go To.. -
Page 101: Static Drag Strap
70 to 84 Nm (50 to 60 ft. lbs.) after the first 50 hours of operation, and every 1000 hours of operation. The tires are solid rubber. No maintenance is required. T15 331550 (5- -07) Home Find... Go To.. -
Page 102: Pushing, Towing, And Transporting The Machine
FOR SAFETY: Use truck or trailer that will support the weight of the machine. NOTE: Empty the recovery and solution tanks before transporting the machine. T15 331550 (5- -07) Home Find... Go To.. - Page 103 5. Lower the scrub head and block the machine tires. Tie down the machine to the truck or trailer before transporting. The front tie-down locations are the holes in the front side of the machine frame. T15 331550 (5- -07) Home Find... Go To..
-
Page 104: Machine Jacking
FOR SAFETY: When servicing machine, block machine tires before jacking machine up. FOR SAFETY: When servicing machine, jack machine up at designated locations only. Block machine up with jack stands. T15 331550 (2- -09) Home Find... Go To.. -
Page 105: Storage Information
If your machine is equipped with the off--aisle wand option, operate the the off--aisle wand for a few seconds to protect the pump. Continue with the freeze protection procedure if machine is equipped with the ec- -H2O system. T15 331550 (2- -09) Home Find... Go To.. -
Page 106: Ec--H2O Model
When the water turns clear, press the module switch again to stop the flush cycle. Dispose the antifreeze in an environmentally safe way according to local waste disposal regulations. 5. The machine is now ready for scrubbing. T15 331550 (2- -09) Home Find... Go To.. -
Page 107: Specifications
Travel Speed 9.6 Km (6 mph) Maximum rated climb and descent angle for transport 8_@ gross weight Maximum rated climb and descent angle for scrubbing Maximum rated climb and descent angle for trailering T15 331550 (3- -08) Home Find... Go To.. -
Page 108: Power Type
Solution flow rate* -- cylindrical 1.14 LPM (0.30 GPM) (optional) 1.51 LPM (0.40 GPM) (standard) 1.89 LPM (0.50 GPM) (optional) *If the optional solution flow rates are required, contact an Authorized Service Center. T15 331550 (2- -09) Home Find... Go To.. -
Page 109: Machine Dimensions
(80.0 in) 1360 mm (53.5 in) 1092 mm 405 mm (43.0 in) (16.0 in) 810 mm 1830 mm (72.0 in) (32.0 in) 915 mm SIDE VIEW (36.0 in) FRONT VIEW 350790 MACHINE DIMENSIONS T15 331550 (5- -07) Home Find... Go To.. -
Page 110: Index
Controls and instruments, 7 FaST System Air Pump Filter, 88 Cylindrical brushes, Replacing brushes, 84 FaST System Filter Screen, 88 Cylindrical scrub brushes, Checking and adjusting Filling the tanks, 27 brush pattern, 81 T15 331550 (2- -09) Home Find... Go To.. - Page 111 Steering gear chain, 65 Replacing cylindrical brushes, 84 Replacing disk scrub brushes, 78 Replacing or rotating front squeegee blade, 95 Replacing Pre--Sweep cylindrical brushes, 76 Replacing side squeegee blades, 96 Replacing sweep disk brushes, 72 T15 331550 (2- -09) Home Find... Go To..
- Page 112 Cylindrical brushes, 81 Pre--operation checklist, 24 Disk scrub brushes, 78 Pre--Sweep (option), 42 Replacing cylindrical brushes, 84 Dust control switch, 16 Replacing disk scrub brushes, 78 Emptying the debris hopper, 43 Pre--Sweep switch, 16 T15 331550 (2- -09) Home Find... Go To..
- Page 113 Recommended amount, 92 Squeegee leveling knob, 19 Squeegee switch, 13 Squeegee wheel cams, 19 Starting the machine, 26 Steering wheel, 18 Stopping the machine, 40 Storage information, 103 Freeze protection, 103 ec--H20, 104 T15 331550 (2- -09) Home Find... Go To..
- Page 114 INDEX T15 331550 (2- -09) Home Find... Go To..
Need help?
Do you have a question about the T15 and is the answer not in the manual?
Questions and answers