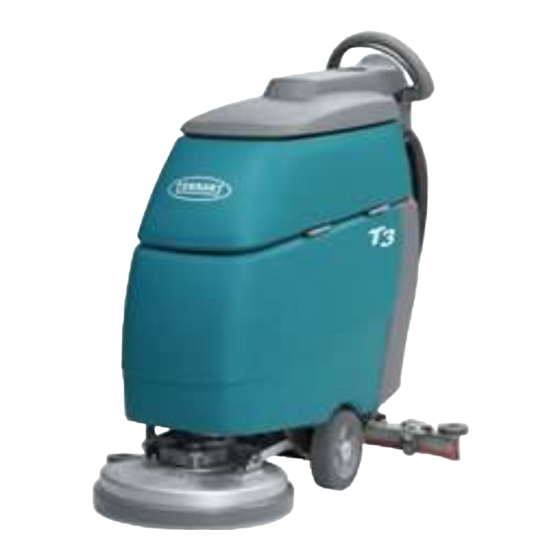
Tennant T3 Operator's Manual
Scrubber dryer
Hide thumbs
Also See for T3:
- Operator and parts manual (124 pages) ,
- Operator's manual (105 pages) ,
- Product manual (12 pages)
Table of Contents

Related Manuals for Tennant T3


Summary of Contents for Tennant T3
- Page 1 TENNANT T3 SCRUBBER DRYER OPERATOR MANUAL Clemas & Co. Unit 5 Ashchurch Business Centre, Alexandra Way, Tewkesbury, Gloucestershire, GL20 8NB. Tel: 01684 850777 Fax: 01684 850707 Email: info@clemas.co.uk Web: www.clemas.co.uk...
-
Page 2: Table Of Contents
......SPECIFICATIONS ......Tennant T3 (10- -05) -
Page 3: Safety Precautions
Battery Cables Before Servicing Machine. replacement parts. All repairs must be performed by a WARNING: Spinning Brush. Keep Hands qualified service person. Away. Turn Off Power Before Working On Machine. Do not modify the machine from its original design. Tennant T3 (08- -04) -
Page 4: Safety Labels
Hazard. Batteries Emit Hydrogen Gas. Keep Sparks And Open Flame Away. Keep Battery Compartment Open When Charging. SPINNING BRUSH LABEL - - Located on scrub head WARNING: Spinning Brush. Keep Hands Away. Turn Off Power Before Working On Machine. Tennant T3 (08- -04) -
Page 5: Machine Components
16. Solution Tank Clean-Out Port CONTROL PANEL SYMBOLS 5% (3°) Maximum Main Power FaST System I/O Switch Machine Climb I/O Key Switch (FaST Model) Solution Flow Brush Motor Slow Speed Control Circuit Breaker Parking Brake Fast Speed Bail Direction Tennant T3 (08- -04) -
Page 6: Machine Installation
1. Park the machine on a level surface, remove the key and set parking brake. 2. Lift the recovery tank to access the battery compartment. Remove the loose battery cable from the compartment (Figure 1). 50 cm Drive Model 43 cm Push Model FIG. 3 Tennant T3 (08- -04) -
Page 7: How The Machine Works
(Figure 7). FIG. 4 FIG. 7 3. Mount the squeegee assembly to the squeegee pivot bracket as shown (Figure 5). Make sure the knobs are completely seated into the slots before securing knobs. Tennant T3 (08- -04) -
Page 8: Installing Fast--Pak
FaST--PAK carton. Do not remove the bag from the carton. Pull the hose connector through the knock--out and remove the orange cap (Figure 10). FIG. 12 FOR SAFETY: When using machine, always follow the handling instructions on chemical container. Tennant T3 (08- -04) -
Page 9: Filling Solution Tank
Machine damage due to improper detergent usage will void the manufacturer’s warranty. WARNING: Fire or Explosion Hazard. Never Use Flammable Liquids. FOR SAFETY: When using machine, follow mixing and handling instructions on chemical containers. FIG. 14 Tennant T3 (08- -04) - Page 10 The FaST system has a set solution flow rate. FIG. 17 FIG. 20 9. To stop scrubbing, release the control handle bail, raise the scrub head and the squeegee. Tennant T3 (08- -04)
-
Page 11: Emergency Stopping (Drive Model)
9. Observe the solution tank level hose for remaining solution. 10 liters will last approximately 10 minutes during conventional scrubbing and 20 minutes during foam scrubbing with the FaST Model. 10. When the solution tank runs dry, empty the recovery tank before refilling. Tennant T3 (10- -05) -
Page 12: Circuit Breaker / Fuses
The hour meter records the number of total hours the brush motor has been powered on. Use the hour meter to determine when to perform recommended maintenance procedures and to record service history (Figure 25). FIG. 27 FIG. 25 Tennant T3 (08- -04) -
Page 13: Draining Solution Tank
WARNING: Fire Or Explosion Hazard. FIG. 30 Batteries Emit Hydrogen Gas. Keep Sparks And Open Flame Away. Keep Battery Compartment Open When Charging. 2. Park the machine on a level surface, turn the key off and set the parking brake. Tennant T3 (08- -04) - Page 14 1 cm from the bottom of the fill--port (B) (Figure 37). Add distilled water if needed. DO NOT OVERFILL. FIG. 34 5. Connect the charger’s AC power supply cord to a properly grounded receptacle (Figure 35). FIG. 37 Tennant T3 (08- -04)
-
Page 15: Machine Maintenance
3. Drain the solution tank and rinse out the inside with water (60°C maximum) as needed (Figure 40) FIG. 43 7. Check the condition of the squeegee blade wiping edge (Figure 44). Rotate blade if worn. (See SQUEEGEE BLADE REPLACEMENT) FIG. 40 Tennant T3 (10- -05) -
Page 16: Monthly Maintenance
Remove any dried concentrate from the hose FIG. 49 connector by soaking it in warm water. 4. Lubricate all pivot points and rollers with silicone spray then coat with a water resistant grease to maintain smooth operation. Tennant T3 (10- -05) -
Page 17: Quarterly Maintenance
(Figure 50). FIG. 52 3. Rotate the rear blade to a new wiping edge and reinstall the band. Make sure the notched edge of the band is facing downward (Figure 53). FIG. 53 FIG. 50 Tennant T3 (10- -05) -
Page 18: Squeegee Blade Adjustment
27° C CHARGE 3. During machine operation, with the casters 1.265 100% CHARGED properly adjusted, the squeegee blades should deflect as shown (Figure 56). 1.223 75% CHARGED 1.185 50% CHARGED 1.148 25% CHARGED 1.110 DISCHARGED Tennant T3 (10- -05) -
Page 19: Brush Motor Belt Replacement (50 Cm Dual Disk Model)
Use a wire brush to clean the battery terminals and cable connectors. FIG. 62 d. After cleaning, apply a coating of clear battery post protectant to the terminals and cable connectors. 5. Check for loose or worn cables. Replace if worn. Tennant T3 (10- -05) -
Page 20: Transporting Machine
For models equipped with the FaST System, 35 mm follow the FaST SYSTEM FREEZE PROTECTION procedure below. FIG. 65 7. After the first 50 hours of use, recheck the belt for proper tension. Tennant T3 (10- -05) -
Page 21: Fast System Freeze Protection
Connect the 15 cm hose (purchased part) to the valve coupling and pour RV anti--freeze into the hose until full (Figure 68). Squeeze the supply hose several times if the anti--freeze does not flow. 15 cm Hose FIG. 68 Tennant T3 (10- -05) -
Page 22: Troubleshooting
Clean solution tank filter or flush out (Conventional Scrubbing) hose solution hose Clogged solution valve Remove valve and clean Solution flow control knob set too low Adjust solution control flow knob Loose screw on control knob Calibrate knob and retighten screw Tennant T3 (10- -05) -
Page 23: Led Fault Codes
Contact Service Center. Four Battery lockout. Recharge batteries immediately. Eight Controller tripped. Contact Service Center. High battery voltage reading Check battery connections. No Bars Sleep mode Turn key to restore. Bars Rippling Throttle engaged. Release activation bail. Tennant T3 (10- -05) -
Page 24: Specifications
OPERATION SPECIFICATIONS MODEL T3 43 cm Single Disk T3 50 cm Dual Disk with Drive LENGTH 1128 mm 1167 mm WIDTH 486 mm 517 mm HEIGHT 1093 mm 1093 mm WEIGHT 100 Kg / 143 Kg with batteries 101 Kg / 144 Kg with batteries... - Page 25 OPERATION MACHINE DIMENSIONS 486mm 517mm * 1093 mm 1128 mm 763 mm 1167 mm * 50 cm Dual Disk Model Tennant T3 (08- -04)
Need help?
Do you have a question about the T3 and is the answer not in the manual?
Questions and answers