Table of Contents
Advertisement
Quick Links
Installation and Operation Manual
Manual Revision C2 — August 2018 — Manual P/N 5900209
Models:
• GP-7
• GP-7LC
• GP-7LCS
Designed and engineered by BendPak Inc. in Southern California, USA. Made in China.
⚠
DANGER
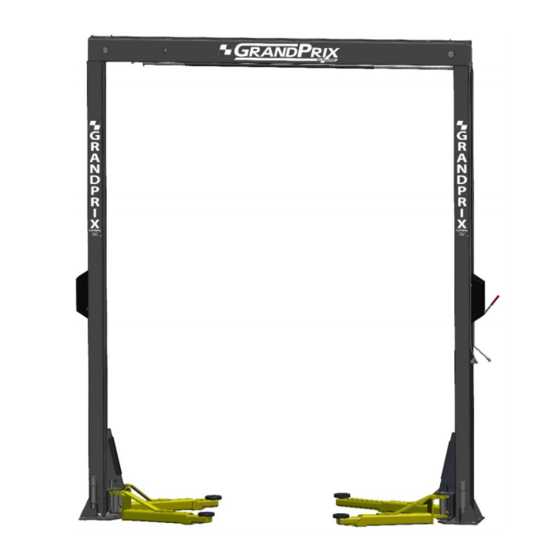
GrandPrix Two-Post Lifts
Read the entire contents of this manual before using this product.
Failure to follow the instructions and safety precautions in this
manual can result in serious injury or death. Make sure all other
operators also read this manual. Keep the manual near the product
for future reference. By proceeding with setup and operation, you
agree that you fully understand the contents of this manual.
1645 Lemonwood Dr.
Santa Paula, CA 93060 USA
Toll Free: (800) 253-2363
Telephone: (805) 933-9970
bendpak.com
Model GP-7 shown.
Advertisement
Table of Contents

Subscribe to Our Youtube Channel
Related Manuals for BendPak GP-7


Summary of Contents for BendPak GP-7
- Page 1 • GP-7LC • GP-7LCS Model GP-7 shown. Designed and engineered by BendPak Inc. in Southern California, USA. Made in China. ⚠ Read the entire contents of this manual before using this product. Failure to follow the instructions and safety precautions in this DANGER manual can result in serious injury or death.
- Page 2 Copyright. Copyright © 2018 by BendPak Inc. All rights reserved. You may make copies of this document if you agree that: you will give full attribution to BendPak Inc., you will not make changes to the content, you do not gain any rights to this content, and you will not use the copies for commercial purposes.
-
Page 3: Table Of Contents
This manual describes the GrandPrix (GP-7 Series) two-post lifts from BendPak: • GP-7. Two-post lift, 7,000 lb. capacity, 78 inch lifting height, requires a 13-foot ceiling. • GP-7LC. Two-post lift, 7,000 lb. capacity, 68 inch lifting height, needs only a 10-foot ceiling. -
Page 4: Shipping Information
Safety Information Please note the following: Use them only for their intended purpose. • GP-7 Series lifts are two-post lifts. If you are parking looking for a lift, visit the Bendpak website. - Page 5 BendPak assumes no liability for damages resulting from: • Use of the equipment for purposes other than those described in this manual. • Modifications to the equipment without prior, written permission from BendPak Inc. • Damage to the equipment from external influences. •...
- Page 6 Do not install the lift on asphalt or any surface other than concrete. Q: Can I install my lift outside? A: No. GP-7 Series lifts are approved for indoor installation and use only. Outdoor installation is prohibited. Q: Which end is the front of the lift? A: To determine the front of your lift, drive a vehicle in straight and stop.
-
Page 7: Specifications
Specifications GrandPrix (GP-7 Series) Two-Post Lifts P/N 5900209 — August 2018 — Rev. C2... - Page 8 GrandPrix (GP-7 Series) Two-Post Lifts P/N 5900209 — August 2018 — Rev. C2...
- Page 9 Top Trough width 119.4" / 3,034 mm Motor 220 VAC, 60 Hz, 1Ph Time to full rise ~45 seconds Maximum operating 2,940 PSI hydraulic pressure Sound 70 dB GrandPrix (GP-7 Series) Two-Post Lifts P/N 5900209 — August 2018 — Rev. C2...
-
Page 10: Components
Lift Arms up once they are on a Safety Lock; even if the lift loses power, the Lift Arms will stay right where they are if they were left on a Safety Lock. Only leave your GP-7 Series lift on the ground or on a Safety Lock. - Page 11 View is from rear of the lift, looking towards the front. Model GP-7 shown. Not all components shown. GrandPrix (GP-7 Series) Two-Post Lifts P/N 5900209 — August 2018 — Rev. C2...
-
Page 12: Installation Checklist
Installation Checklist Following are the steps needed to install a GP-7 Series lift; perform them in this order. ☐ 1. Review the installation safety rules. ☐ 2. Plan for electrical work. ☐ 3. Make sure you have the necessary tools. -
Page 13: Installation
Four-foot level • Open-end wrench set, SAE and metric • Socket and ratchet set, SAE and metric • Hex key wrench set • Crescent and pipe wrenches GrandPrix (GP-7 Series) Two-Post Lifts P/N 5900209 — August 2018 — Rev. C2... - Page 14 Installing your lift on a surface with more than three degrees of slope could lead to injury or even death. Only install GP-7 Series lifts on a level floor (defined as no more than 3/8 of an inch difference over the installation area). If your floor is not level, consider making the floor level or using a different location.
- Page 15 • Anchor torque: 110 – 150 foot pounds ⚠ Use the ALI-certified Anchor Bolts that came with your GP-7 Series lift. If you use WARNING components from a different source, you void your warranty and compromise the safety of everyone who installs or uses the lift.
- Page 16 Chalk Line Guides. The Width Overall value is defined as the distance from the back of one base plate to the back of the other base plate. GrandPrix (GP-7 Series) Two-Post Lifts P/N 5900209 — August 2018 — Rev. C2...
- Page 17 Overall setting for your lift model. 4. When you move the posts into position, put the corners of the base plates into the corners created by the Chalk Line Guides. GrandPrix (GP-7 Series) Two-Post Lifts P/N 5900209 — August 2018 — Rev. C2...
- Page 18 To install the Post Straps: with the welded plate 1. Bolt the Post Strap to the Powerside Post. 2. Bolt the other Post Strap (no welded plate) to the Offside Post. GrandPrix (GP-7 Series) Two-Post Lifts P/N 5900209 — August 2018 — Rev. C2...
- Page 19 Construction, Testing, and Validation” ANSI/ALI ALCTV-2006. ⚠ WARNING Use only the ALI-certified Anchor Bolts that came with your GP-7 Series lift. If you use components from a different source, you void your warranty and compromise the safety of everyone who installs or uses the lift.
- Page 20 ¾ inch diameter Anchor Bolt, for example, use a ¾ inch diameter drill bit. 5. Vacuum each hole clean. BendPak recommends using a vacuum to get the hole very clean. You can also use a wire brush, make sure to thoroughly clean each hole hand pump, or compressed air;...
- Page 21 Anchor Bolts. Wrenching the Nut forces the Wedge up, forcing out the Expansion Sleeve and pressing it tightly against the Concrete. GrandPrix (GP-7 Series) Two-Post Lifts P/N 5900209 — August 2018 — Rev. C2...
- Page 22 ⚠ CAUTION We strongly recommend wearing gloves while handling the Lifting Cables. GP-7 Series lifts use four Lifting Cables: two Long Cables and two Short Cables. The following two different types of ends drawing shows the on these cables. Note that the ends are exaggerated in this drawing to make it easier to see the two types of ends.
- Page 23 The lifting cables move the Lift Heads and Lift Arms up and down. To route the lifting cables: 1. Make sure you have two Long Cables and two Short Cables. All cables have ID tags showing their lengths. GrandPrix (GP-7 Series) Two-Post Lifts P/N 5900209 — August 2018 — Rev. C2...
- Page 24 PSI. If the Cylinder Rod does not move immediately, stop and use a cable puller or other pulling device. Keep hands clear. BendPak recommends installing the two Short Cables (which go on the inner sheaves) first, then proceed to the two longer cables (which go on the outer sheaves). You can do it any way you want, but these instructions go in that order.
- Page 25 Powerside end of the Top Trough. Make sure the all cables sit in the grooves and not on either edge of the sheave assembly. GrandPrix (GP-7 Series) Two-Post Lifts P/N 5900209 — August 2018 — Rev. C2...
- Page 26 2. Route the cable through the small notch in the bottom of the Top Trough, around the Offside above the other components Safety Sheave, across the Top Trough , around the Powerside GrandPrix (GP-7 Series) Two-Post Lifts P/N 5900209 — August 2018 — Rev. C2...
- Page 27 Hydraulic Cylinder. The two Hydraulic Cables are: • Long Hydraulic Cable. Connects to the Hydraulic In port. • Short Hydraulic Cable. Connects to the Hydraulic Return port. GrandPrix (GP-7 Series) Two-Post Lifts P/N 5900209 — August 2018 — Rev. C2...
- Page 28 2. Align the holes on the top of the Powerside Post with the holes on the bottom of the Top Trough, then connect the two using the supplied 10 mm hex bolts, nuts, and the two pipe straps. GrandPrix (GP-7 Series) Two-Post Lifts P/N 5900209 — August 2018 — Rev. C2...
- Page 29 Power Unit, raise it out of the way. ⚠ WARNING BendPak recommends using a lifting device to raise the Lift Head; a forklift, for example. Lift Heads are heavy. If you attempt to raise a Lift Head yourself, you could injure yourself and potentially damage the product.
- Page 30 Dexron III, Dexron VI, Mercon V, Mercon LV, or any synthetic multi-vehicle automatic transmission fluid. Important: Do not connect the Hydraulic Lines to the Power Unit at this time. GrandPrix (GP-7 Series) Two-Post Lifts P/N 5900209 — August 2018 — Rev. C2...
- Page 31 Installing the Safety Assemblies and the Safety Cable Each GP-7 lift has two Safety Assemblies: one on the Powerside Post (above the Power Unit) and the other on the Offside Post. The two Safety Assemblies work together to take the load off the Hydraulic Cylinder and the lifting cables once the lift has reached the desired working height.
- Page 32 Safety Assembly, and then through the right welded plate. 6. Put the second spring on the right end of the safety clevis pin, then install the cotter pin. GrandPrix (GP-7 Series) Two-Post Lifts P/N 5900209 — August 2018 — Rev. C2...
- Page 33 Make sure that one is on each side of the hole in the Welded Pin with Threads. 6. Bring the straight end of the Safety Cable down through the inside of the Powerside Post. GrandPrix (GP-7 Series) Two-Post Lifts P/N 5900209 — August 2018 — Rev. C2...
- Page 34 10. Operate the Safety Lock Release Handle, checking for proper operation of both Safety Assemblies. ⚠ Make sure that both the Powerside and the Offside Safety Assemblies engage DANGER properly before using the lift. GrandPrix (GP-7 Series) Two-Post Lifts P/N 5900209 — August 2018 — Rev. C2...
- Page 35 3. On the Offside, secure the other end of the Trip Stop Tube to the underside of the Top Trough using a 50 mm hex bolt, washer, and nut. inside The bolt must be inserted from the Top Trough. GrandPrix (GP-7 Series) Two-Post Lifts P/N 5900209 — August 2018 — Rev. C2...
- Page 36 GrandPrix (GP-7 Series) Two-Post Lifts P/N 5900209 — August 2018 — Rev. C2...
- Page 37 2. When the two metal Hydraulic Lines are oriented correctly, fix them in place using the Pipe Straps on the side of the Powerside Post. The straps can be rotated to accommodate a better fit. GrandPrix (GP-7 Series) Two-Post Lifts P/N 5900209 — August 2018 — Rev. C2...
- Page 38 6. In the Top Trough, install a straight JIC fitting to the to the end of each Hydraulic Hose, then install Flare Fittings to the end of each Hydraulic Line. 7. Connect the Hydraulic Hoses to the corresponding Hydraulic Lines. GrandPrix (GP-7 Series) Two-Post Lifts P/N 5900209 — August 2018 — Rev. C2...
- Page 39 2. Place one M18 washer and M18 Nyloc nut on the threaded cable end; tighten the nuts until taut, making sure both cables have equal tension. GrandPrix (GP-7 Series) Two-Post Lifts P/N 5900209 — August 2018 — Rev. C2...
- Page 40 Make sure the Safety Lock Release Handle comes through the slot on the front and that the Microswitch Cable comes through the hole on the bottom. 5. Tighten both cover screws. GrandPrix (GP-7 Series) Two-Post Lifts P/N 5900209 — August 2018 — Rev. C2...
- Page 41 Periodic inspection and adjustment is also required. Failure to properly inspect and adjust the arm restraint gears on all four arms can result in damage to the vehicle, injury, or even death. GrandPrix (GP-7 Series) Two-Post Lifts P/N 5900209 — August 2018 — Rev. C2...
- Page 42 6. Tighten the Gear Ring bolts. 7. Adjust the horizontal bolts on each arm so that the head of the bolts presses firmly against the flat face of the Arm Gear Ring. GrandPrix (GP-7 Series) Two-Post Lifts P/N 5900209 — August 2018 — Rev. C2...
- Page 43 Lift arms: When the lift posts are level, make sure the lift arms are level as well. To make sure they are level, raise them to the first locking position and put a level on the pads. GrandPrix (GP-7 Series) Two-Post Lifts P/N 5900209 — August 2018 — Rev. C2...
- Page 44 Never expose the motor to rain or other damp environments; damage to the motor caused by water is not covered by the warranty. GrandPrix (GP-7 Series) Two-Post Lifts P/N 5900209 — August 2018 — Rev. C2...
- Page 45 A quick flip of the switch immediately cuts power to the lift. In the case of the GP-7, the location directly above the Power Unit is being used by the Lowering Handle, so your electrician may want to move the Power Disconnect Switch location up a little.
- Page 46 During the operational test, observe all operating components and check for proper installation and operation. Do not raise any additional vehicles until a thorough operational check has been performed with a typical vehicle. GrandPrix (GP-7 Series) Two-Post Lifts P/N 5900209 — August 2018 — Rev. C2...
-
Page 47: Operation
Make sure the vehicle is not overbalanced on either end. Make sure you know the manufacturer’s recommended lifting points for the vehicle. Never raise just one side, one corner, or one end of a vehicle. GrandPrix (GP-7 Series) Two-Post Lifts P/N 5900209 — August 2018 — Rev. C2... - Page 48 If necessary, use the included adapters. 6. Push in and hold the Up Pushbutton (on the Power Unit near the top). GrandPrix (GP-7 Series) Two-Post Lifts P/N 5900209 — August 2018 — Rev. C2...
- Page 49 5. When the lift is on the ground, release both handles, then move the all four arms to their full drive- thru positions. 6. Drive the vehicle out. GrandPrix (GP-7 Series) Two-Post Lifts P/N 5900209 — August 2018 — Rev. C2...
-
Page 50: Maintenance
⚠ WARNING: Do not operate your lift if you find maintenance issues; instead, remove it from service, then contact your dealer, visit bendpak.com/support, email techsupport@bendpak.com, or call (800) 253-2363. GrandPrix (GP-7 Series) Two-Post Lifts P/N 5900209 — August 2018 — Rev. C2... - Page 51 With an awl, probe between wires and strands and lift any wires that appear loose. Evidence of internal broken wires may require a more extensive rope examination. GrandPrix (GP-7 Series) Two-Post Lifts P/N 5900209 — August 2018 — Rev. C2...
-
Page 52: Troubleshooting
Lift makes odd noises. Lubricate hinge points using white lithium grease. If you continue to have issues with your lift, contact your dealer, BendPak Support at bendpak.com/support, or email techsupport@bendpak.com. GrandPrix (GP-7 Series) Two-Post Lifts P/N 5900209 — August 2018 — Rev. C2... -
Page 53: Wiring Diagram
Wiring Diagram GrandPrix (GP-7 Series) Two-Post Lifts P/N 5900209 — August 2018 — Rev. C2... -
Page 54: Parts Diagrams
Parts Diagrams GrandPrix (GP-7 Series) Two-Post Lifts P/N 5900209 — August 2018 — Rev. C2... - Page 55 GrandPrix (GP-7 Series) Two-Post Lifts P/N 5900209 — August 2018 — Rev. C2...
- Page 56 GrandPrix (GP-7 Series) Two-Post Lifts P/N 5900209 — August 2018 — Rev. C2...
- Page 57 GrandPrix (GP-7 Series) Two-Post Lifts P/N 5900209 — August 2018 — Rev. C2...
- Page 58 GrandPrix (GP-7 Series) Two-Post Lifts P/N 5900209 — August 2018 — Rev. C2...
- Page 59 GrandPrix (GP-7 Series) Two-Post Lifts P/N 5900209 — August 2018 — Rev. C2...
- Page 60 GrandPrix (GP-7 Series) Two-Post Lifts P/N 5900209 — August 2018 — Rev. C2...
- Page 61 GrandPrix (GP-7 Series) Two-Post Lifts P/N 5900209 — August 2018 — Rev. C2...
- Page 62 GrandPrix (GP-7 Series) Two-Post Lifts P/N 5900209 — August 2018 — Rev. C2...
-
Page 63: Labels
Labels GrandPrix (GP-7 Series) Two-Post Lifts P/N 5900209 — August 2018 — Rev. C2... - Page 64 GrandPrix (GP-7 Series) Two-Post Lifts P/N 5900209 — August 2018 — Rev. C2...
- Page 65 GrandPrix (GP-7 Series) Two-Post Lifts P/N 5900209 — August 2018 — Rev. C2...
- Page 66 GrandPrix (GP-7 Series) Two-Post Lifts P/N 5900209 — August 2018 — Rev. C2...
- Page 67 Maintenance Log GrandPrix (GP-7 Series) Two-Post Lifts P/N 5900209 — August 2018 — Rev. C2...
- Page 68 1645 Lemonwood Drive Santa Paula, CA 93060 USA © 2018 BendPak Inc. All rights reserved. bendpak.com...
Need help?
Do you have a question about the GP-7 and is the answer not in the manual?
Questions and answers