Table of Contents
Advertisement
Advertisement
Table of Contents

Related Manuals for 3D Systems Touch


Summary of Contents for 3D Systems Touch
- Page 1 Touch Touch X ™ and ™ Haptic Device User Guide 30-0433 Rev. A...
-
Page 2: Table Of Contents
3.4 Physical Limits of the Device INSTALLING THE 3D SYSTEMS HAPTIC DEVICE 4.1 Overview 4.2 Important Information for Existing Users Upgrading to 3D Systems Touch™ or Touch X™ 4.2.1-Uninstall the Previous Version of the Device Driver 4.3 Connecting the 3D Systems Touch Device 4.4 Installing the Touch Device Drivers... -
Page 3: Introduction
INTRODUCTION Copyright ©2018 3D Systems, Inc. All rights reserved. The content of this manual is furnished for informational use only, is subject to change without notice, and should not be construed as a commitment by 3D Systems, Inc. This document is copyrighted and contains proprietary information that is property of 3D Systems, Inc. -
Page 4: Warranty
User Guide. 3D Systems will promptly repair or replace the Touch or TouchX, if required, to make it free of defects during the warranty period. This warranty excludes repairs required during the warranty period because of abnormal use or conditions (such as riots, floods, misuse, neglect or improper service by anyone except 3D Systems or its authorized service provider). -
Page 5: Getting Started
About This Guide The 3D Systems Touch Device Guide describes the process of installing the required device drivers for your new 3D Systems haptic device and connecting the hardware device to your computer. You will also find information on how to use the device and other information about the device. -
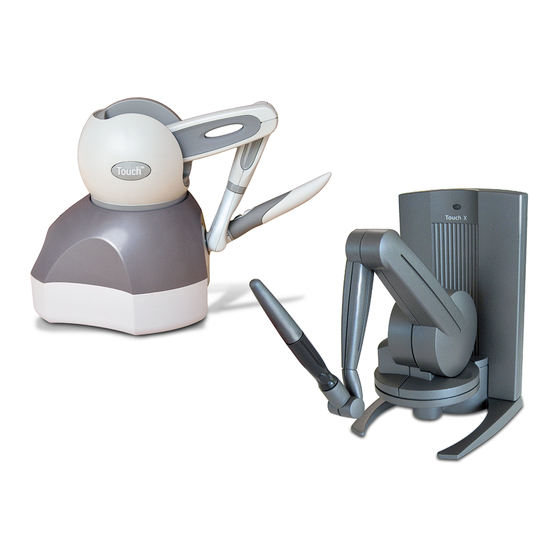
Page 6: The 3D Systems Touch Haptic Device
The haptic device employs high fidelity force feedback that senses motion in 6 degrees of freedom providing the best, most realistic 3D touch sensation for any application. You can feel the point of the stylus in all axes, and track its orientation (pitch, roll and yaw). The haptic device’s portable design, compact footprint, and an USB interface ensures quick installation and ease-of-use. -
Page 7: Using The Haptic Device
3.3.1-Handling the Haptic Device Lifting the device (Touch): To properly lift the device grasp the base of the unit on both sides and lift as shown in the image below. DO NOT lift by grasping the stylus or arm. The stylus is detachable by design. Lifting the unit by the stylus or arm could result in severe damage to the device. - Page 8 Storing the stylus: After the device is calibrated, the stylus may be eft resting on the desk or kept in the inkwell (Touch only). Keep in mind that storing the stylus in the inkwell increases the risk that the device will be knocked over or that the stylus will be damaged.
-
Page 9: 3.3.2-Positioning The 3D Systems Haptic Device
3.3.2-Positioning the 3D Systems Haptic Device The correct placement of the device will vary from one user to another. You may want to experiment to find a placement that feels right for you. • The device should be positioned so that you are comfortable when working with it. - Page 10 Finally, gently twist the stylus back/forth. Gimbal articulation: Micro movements. Showing movement of the haptic device stylus. Touch Touch X You should now have an understanding of the range of motion of the haptic device at each axis point and where its limits are.
-
Page 11: Installing The 3D Systems Haptic Device
Important Information for Existing Users Upgrading to 3D Systems Touch™ or Touch X™ If you are an existing user with a haptic device and want to upgrade, before you run the Touch Setup (on the next page), you must follow these procedures prior to setup. - Page 12 Connect the supplied USB cable to both the device and the host computer. Touch USB Connection Setup TouchX USB Connection Setup Plug the power cord into an available outlet (for 110V the outlet must be rated for at least 2 Amps, for 220V: 1 Amp).
-
Page 13: Installing The Touch Device Drivers
In the Select components to install, be sure the check box, “Desktop Shortcuts” is selected. This will create desktop shortcuts for the Touch Smart Setup Application. If you do not install the Desktop Shortcuts, you will need to go to Start>All Programs>3D Systems>Touch Smart Setup to run the Touch Smart Setup Application. -
Page 14: Run 3D Systems Touch Smart Setup
Select the Sphere Simulation checkbox and perform the steps presented in this section of the Smart Setup. Attempt to touch the sphere with virtual stylus tip. Take note of the feel of the haptic feedback device in this process and verify that the feedback feels correct. -
Page 15: Appendix A: Specifications And Requirements
Pitch, roll, yaw (± 5% linearity potentiometers) Interface USB 2.0 OpenHaptics® SDK compatibility? Device Specifications (Touch X) Force Feedback Workspace ~ 6.4 W x 4.8 H x 4.8 D in > 160 W x 120 H x 120 d mm... - Page 16 USB 2.0 / 3.0 port or USB Hub that supports USB 2.0/ 3.0. (Use only Interface USB A to B cable provided by 3D Systems). OpenHaptics ® SDK Compatibility * Please visit the Support and Resources section of our website for more information: (https:// softwaresupport.3dsystems.com).
-
Page 17: Appendix B: Alternate Configurations
The haptic device may be configured in a dual unit setup. In this scenario, two units are connected upon beginning the Smart Setup application. With two devices connected, select the Touch Smart Setup desktop icon to open the Touch Smart Setup application. When prompted, select both the Right and Left devices from the list. -
Page 18: Appendix C: Optional Setup Steps
NOTE: The following statement is only applicable for LAN devices. In this section you will identify your 3D Systems haptic device and pair it with your host PC. This process only needs to be executed once. There is a safety key exchange during the pairing process. The safety key will be saved to host PC hard drive and the NV-Ram of the 3D Systems Touch after the pairing process is properly done. - Page 19 Click the Next arrow in the bottom right of the dialog or click the Select tab to move on to the next step. The Select tab initializes the 3D Systems Touch device and begins to run to the Servoloop. Click the Next arrow when the six remaining test tabs appear in the dialog to move on to the Calibration stage.
-
Page 20: Appendix D: Troubleshooting
• Verify power supply - Check to make sure the haptic device is plugged in properly. The light should align with a state listed above if properly functioning. • Verify USB port connection - Check that the USB cable plugged into the Touch device. Check that the other end is plugged into the USB port on your computer. - Page 21 X controls force parallel to the table. Y controls force up and down. Z controls force in and out. • Box Test - Provides a box which you can feel with your Touch device. The sides of the box should feel flat and the corners sharp.
-
Page 22: Appendix E: Touch Re-Packaging Instructions
• If necessary, reassemble the box and arrange the foam inserts. Fit the bottom foam insert into the bottom of the box. • Orient the Touch device to fit neatly inside the foam insert. You may need to grasp the Touch device by the upper arm, the piece with the oblong cutout, in order to position it properly. - Page 23 3D Systems, Inc. 333 Three D Systems Circle Rock Hill, SC 29730 www.3dsystems.com Copyright © 3D Systems, Inc. All rights reserved.
Need help?
Do you have a question about the Touch and is the answer not in the manual?
Questions and answers