Husqvarna 520iLX Operator's Manual
Hide thumbs
Also See for 520iLX:
- Operator's manual (208 pages) ,
- Workshop manual (52 pages) ,
- Operator's manual (12 pages)
Table of Contents
Advertisement
Advertisement
Table of Contents

Related Manuals for Husqvarna 520iLX


Summary of Contents for Husqvarna 520iLX
- Page 1 520iLX Operator's manual 2-35...
-
Page 2: Table Of Contents
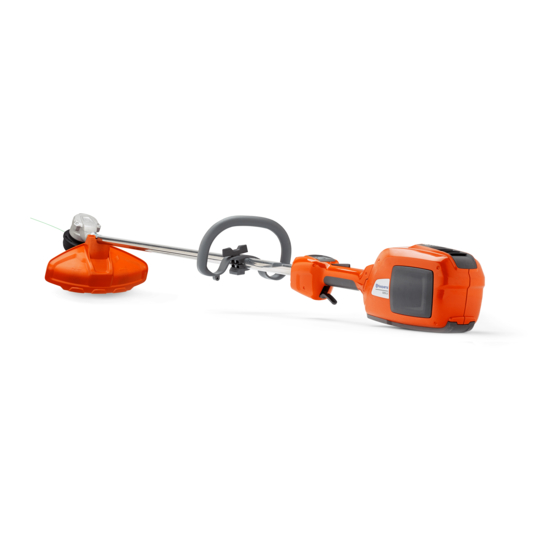
EC Declaration of Conformity........35 Introduction Product description Intended use Husqvarna 520iLX is a battery grass trimmer with an The product is used with a trimmer head to cut grass. electrical motor. Do not use the product for other tasks than grass trimming and grass clearing. - Page 3 7. Power trigger lockout Symbols on the product or its packaging 8. Battery indicate that this product cannot be handled 9. Cord as domestic waste. This product must be deposited at an appropriate recycling facility. 10. Battery charger 11. Operator's manual 12.
- Page 4 Use approved protective gloves. Fail-safe transformer. Use and keep the battery charger indoors Use heavy-duty slip-resistant boots. only. Risk of blade thrust if the cutting equipment touches an object that it does not immediately cut. The product can cut off body parts.
-
Page 5: Safety
Safety IMPORTANT Safety definitions SAFETY Warnings, cautions and notes INSTRUCTIONS are used to point out specially important parts of the manual. WARNING: Read all safety warnings and all instructions. Failure to follow the warnings WARNING: Used if there and instructions may result in electric shock, fire and/or serious injury. - Page 6 that all nuts and screws are General power tool safety warnings tight. WARNING: Read all safety warnings and all instructions. Failure to follow the warnings Check that the trimmer head • and instructions may result in electric shock, fire and/or serious injury. and trimmer guard are not damaged or cracked.
-
Page 7: Personal Safety
children) with reduced etc. that could be thrown out or become wrapped around the cutter or cutter guard. physical, sensory or mental • Check the motor for dirt and cracks. Clean off grass and leaves from the engine using a brush. Gloves capabilities, or lack of should be worn when necessary. -
Page 8: Protective Equipment
Wear personal protective • • Store the equipment in a lockable area so that it is out of reach of children and unauthorized persons. equipment. See instructions • Keep hands and feet away from the cutting area at all times and especially when switching on the under the "Personal motor. - Page 9 under the Maintenance Avoid Unintentional Starting – • heading. Don’t carry appliance with finger on switch. Only use original spare parts. • Store Idle Appliances Indoors • Always ensure that ventilation • – When not in use, appliances openings are kept clear of should be stored indoors debris.
-
Page 10: General Safety Instructions
face. Always exercise care and General safety instructions use your common sense. Avoid WARNING: Read the all situations which you consider warning instructions that to be beyond your capability. If follow before you use the you still feel uncertain about product. -
Page 11: Operation
Children should be • • This product is a dangerous tool if you are not careful or if you use the product incorrectly. This supervised to ensure that product can cause serious injury or death to the operator or others. they do not play with the •... - Page 12 Never use the product if you Ensure that people, animals • • are fatigued, while under the or other things can not affect influence of alcohol or drugs, your control of the product or medication or anything that that they do not come in could affect your vision, contact with the cutting alertness, coordination or...
- Page 13 it and removed the battery. to close to the ground where Do not leave the product stones and other objects can unsupervised when it is be thrown out. switched on. Watch out for thrown objects. • Remove the battery before Always wear approved eye •...
- Page 14 strength, changes in skin Release the power trigger • colour or condition. These after each working operation symptoms usually show in the to save battery power. fingers, hands or wrists. Don’t force the product. It will • Always hold the product with do the job better and with less •...
- Page 15 attachment. However, do not use the product unless • Always hold the product with both hands. Hold the you are able to call for help in the event of an product on the right side of your body. accident. • Do not remove the cut material, or let other persons •...
- Page 16 Use a protective helmet goggles must comply with the • where there is a risk of falling ANSI Z87.1 standard in the objects. USAs or EN 166 in EU countries. Long term exposure to noise • can result in damaged hearing.
-
Page 17: Personal Protective Equipment
Keep first aid equipment • ANSI Z87.1 standard in the USAs or EN 166 in EU countries. close at hand. • Use gloves when necessary, for example when you Personal protective equipment attach, examine or clean the cutting equipment. WARNING: Read the warning instructions that follow before you use the product. - Page 18 correctly. See instructions WARNING: Only use the Product under the heading cutting attachment with overview on page 2 to find the guards we where these parts are located recommend, see on your product. Accessories on page The life span of the product •...
- Page 19 retailer who sells your b) The product is switched off when the LED (B) is out. machine is not a servicing Troubleshooting on page 30 if the warning 2. See dealer, ask him for the indicator (C) is lit or flashes. address of your nearest To do a check of the power trigger lockout service agent.
- Page 20 To start the product on page 4. Start the product, see 3. Make sure that the power trigger and the power 26 . trigger lockout moves freely and that the return springs operate properly. 5. Apply full throttle. 6. Release the power trigger and make sure that the cutting attachment stops and remains still.
- Page 21 2. Do a visual check for damages, for example cracks. • rechargeable as a power supply for the related Husqvarna products only. To prevent injury, do not use the battery as a power supply for 3. Replace the cutting attachment guard if it is other devices.
- Page 22 • Use the BLi battery that is rechargeable as a power Do not use a defective or supply for the related Husqvarna products only. To • prevent injury, do not use the battery as a power damaged battery charger.
- Page 23 that the cable is not caught sure that the cord of the between objects, for example, battery charger is not doors, fences or equivalent. damaged. If extension cables are used, make sure that the Do not use the battery • extension cables are not charger near flammable damaged.
-
Page 24: Maintenance
Special training is necessary • When operating a power tool outdoors, use an • extension cord suitable for outdoor use. Use of a for all servicing and repair cord suitable for outdoor use reduces the risk of electric shock. work, especially for the safety •... - Page 25 SAVE THESE INSTRUCTIONS Assembly Introduction 3. Install the nut, the knob and the screw. Do not tighten too much. This section describes how to assemble and adjust the 4. Adjust the product to an applicable position. product. 5. Tighten the bolt. WARNING: Before you assemble the To assemble the trimmer guard product, read the safety chapter and the...
- Page 26 To connect the battery to the product 2. Decrease the length of the trimmer line by 10-12 cm / 4-4.75 in. WARNING: Only use Husqvarna original 3. Decrease the engine speed to decrease the risk of batteries with the product.
-
Page 27: Trimmer Head
4. Use 80 % throttle when you cut grass near objects. 1. Hold the trimmer head and its cord parallel to the ground and above the ground. 2. Apply full throttle. 3. Move the trimmer head from side to side and sweep the grass. -
Page 28: Maintenance Schedule
To stop the product 3. Push the release buttons on the battery and pull the battery out. 1. Release the power trigger or the power trigger lockout. 2. Push the start/stop button until the green LED is off. Maintenance Introduction The following is a list of the maintenance steps that you Maintenance on page 28 must do on the product. - Page 29 Maintenance Daily Weekly Monthly Do a check of the connections between the battery and the product. Do a check of the connection between the battery and the battery charger. To examine the battery and the 1. Press the snap-in clips on the trimmer head and remove the trimmer head and trimmer line.
-
Page 30: Troubleshooting
Troubleshooting Keypad LED display Possible faults Possible action Green activate LED flashing Low battery voltage. Charge the battery. Red error LED flashing Overload. The cutting attachment is jammed. deacti- vate the product. Remove the battery. Clean the cutting attachment from unwanted mate- rials. -
Page 31: Transportation, Storage And Disposal
Battery charger LED display Possible faults Possible ac- tion Error LED Temperature deviation. Use the battery flashes charger in tem- peratures be- tween 5°C (14°F) and 40°C (104°F). Overvoltage. Make sure that the mains volt- age is the same as the shown voltage value on the rating plate on... -
Page 32: Technical Data
Vibration levels at handles, measured according to ISO 22867, m/s Equipped with trimmer head (original), left/right 1.2/0.7 The Husqvarna Handheld Battery products marked with IPX4 fulfils these requirements on product approval level Noise emissions in the environment measured as sound power (L ) in conformity with EC directive 2000/14/ EC. - Page 33 Vibration levels at handles, measured according to ISO 22867, m/s Equipped with trimmer head (original), left/right 1.2/0.7 The Husqvarna Handheld Battery products marked with IPX4 fulfils these requirements on product approval level Reported data for equivalent sound pressure level for the product has a typical statistical dispersion (standard deviation) of 3 dB (A).
-
Page 34: Accessories
Approved batteries for the product Battery BLi200 Type Lithium-ion Battery capacity, Ah Nominal voltage, V Weight, lb/kg 2.9/1.3 Approved battery chargers Battery charger QC330 Input voltage, V 100-240 Frequency, Hz 50-60 Power, W Accessories Approved accessories Approved accessory Type Cutting attachment guard, art no Trimmer head T25B (Ø... -
Page 35: Ec Declaration Of Conformity
2000/14/EG. The certificate has the number: 01/1610/006. Intertek Semko AB, Box 1103, SE-164 22 Kista, Sweden has issued a voluntary type approval for Husqvarna AB. For information relating to noise emissions, see Technical data on page 32 . Huskvarna, 2018-09-28 Pär Martinsson, Development Manager (Authorized... - Page 39 T25B Li-ion Li-ion 6,0 m 10 cm 4" 3,05 m "Clic" 15 cm 6"...
- Page 40 Original instructions 1140359-26 2018-11-02...
Need help?
Do you have a question about the 520iLX and is the answer not in the manual?
Questions and answers