Table of Contents
Advertisement
Quick Links
Advertisement
Table of Contents

Related Manuals for Husqvarna 520iRX


Summary of Contents for Husqvarna 520iRX
- Page 1 520iRX Operator's manual 2-33...
-
Page 2: Table Of Contents
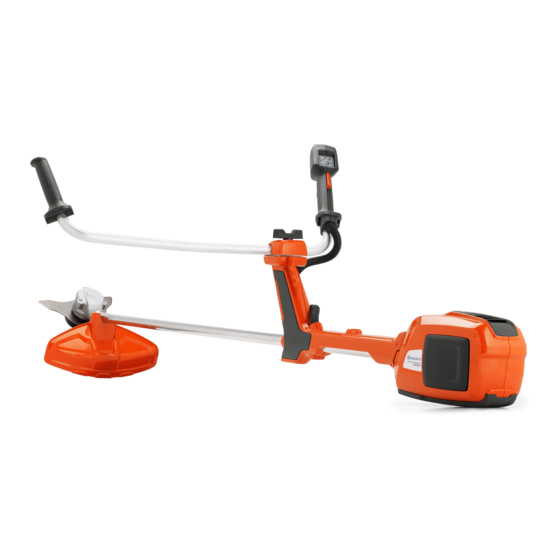
Product description product for other tasks than grass trimming and grass clearing. Use a grass blade or trimmer head to cut Husqvarna 520iRX is a battery grass trimmer with an grass. electrical motor. Note: National or local regulations may regulate the use. - Page 3 3. Shaft Keep a minimum distance of 15 m to 4. Harness quick release persons and animals during operation of the 5. Harness, hip pad product. 6. Handle adjustment 7. Handlebar 8. Power trigger 9. Power trigger lockout Use approved protective gloves. 10.
-
Page 4: Safety
Symbols on the battery and/or on the battery charger Double insulation. Recycle this product at a Product liability recycling station for elec- trical and electronic equip- As referred to in the product liability laws, we are not ment. (Applies to Europe liable for damages that our product causes if: only) •... -
Page 5: Check Before Starting
power tool or battery-operated damaged or cracked. Replace (cordless) power tool. the trimmer head or trimmer guard if the have been Check before starting exposed to impact or are Always remove the battery to cracked. Always use the • prevent the product being recommended guard for the started by accident. - Page 6 power tool. Do not use a times and especially when power tool while you are switching on the motor. tired or under the influence Dress properly. Do not wear • of drugs, alcohol or loose clothing or jewelry. medication. A moment of Keep your hair, clothing inattention while operating and gloves away from...
- Page 7 recommend in the technical Don't force the product. It will • data chapter. do the job better and with less likelihood of injury at the rate Never use a product that has • for which it was designed. been modified in any way from its original specification.
- Page 8 approval from the WARNING: Never allow manufacturer. Only use parts children to use or be in that are approved by the the vicinity of the manufacturer. Injury or death machine. Since the is a possible result of machine is easy to start, incorrect maintenance.
-
Page 9: Assembly
original accessories. Non- WARNING: Never use a authorized modifications cutting attachment and/or accessories can result without an approved in serious personal injury or guard. See the chapter the death of the operator and on Technical data. If an others. incorrect or faulty guard is fitted this can cause Note: National or Local laws serious personal injury. - Page 10 easy to start, children may be objects such as stones, able to start it if they are not broken glass, nails, steel wire, kept under full surveillance. string, etc., that could be This can mean a risk of thrown out or become serious personal injury.
- Page 11 is activated. Keep the product Listen out for warning signals • below waist level. or shouts when you wear hearing protection. Always If anything jams in the cutting • remove your hearing attachment while you operate protection as soon as the the product, stop and product stops.
- Page 12 equipment rotates, as this can the battery from the product result in serious injury. and check that the product is not damaged. Always stop the product, • remove the battery and make Products fitted with grass • sure that the cutting blades can be thrown equipment does not rotate violently to the side when the...
- Page 13 to control the brushcutter can result from a combination safely and this can result in of noise level and long usage. injury to yourself or others. recommends that operators Never use a harness with a use hearing protectors when defective quick release. using products for a longer coherent time of a day.
- Page 14 examine or clean the cutting attachment stops equipment. completely before you work on any part of the cutting attachment. WARNING: Use correct cutting attachment. Only use the cutting Use sturdy non-slip boots. • attachment with the guards we recommend, Accessories on refer to page 32 .
- Page 15 Keep the correct setting follow before you use the on the saw blade. Follow product. the instructions and use In this section the product’s • the recommended setting safety features, its purpose tool. and how checks and maintenance should be carried Wear protective gloves when out to ensure that it operates the cutting attachment is...
- Page 16 ′s safety equipment. If your 1. Make sure that the power trigger is locked when the lock is in its original position. machine fails any of the checks described below you must contact your service agent. When you buy any of our products we guarantee the availability of professional repairs and service.
- Page 17 correctly when you adjust cutting attachment that Product you use, see the product. overview on page 2 . If an WARNING: If the incorrect or faulty cutting product is not safely attachment guard is attached to the harness, attached this can cause you can not control the serious personal injury.
- Page 18 Use the battery in • Husqvarna products only. To temperatures between -10 °C prevent injury, do not use the (14 °F) and 40 °C (114 °F). battery as a power supply for Do not clean the battery or •...
-
Page 19: Maintenance
Do not use a defective or a good airflow, dry and free • damaged battery charger. from dust. Do not lift the battery charger Do not put objects into the • • by the power cord. To cooling slots of the battery disconnect the battery charger. - Page 20 maintenance and servicing of work, especially for the safety a larger extension. devices on the product. If not all checks in this operator's Do not clean the battery or • manual are approved after the battery charger with you have done maintenance, water.
- Page 21 2. Put the loop hanger on the shaft. 2. Attach the blade guard (A) onto the shaft, refer to assemble the trimmer guard on page 21 . 3. Connect the ends of the loop hanger. 4. Install the bolt. 3. Install the drive disc (B) on the output shaft. 5.
- Page 22 therefore always ensure that your hand is shielded by the blade guard when you do this. Note: Make sure that you can not turn the locknut by hand. Replace the nut if the nylon lining does not have a resistance of a minimum of 1.5 Nm. The nut should be replaced after it has been put on approximately 10 times.
- Page 23 • Make sure that there are no cracks on the blade. • Examine the trimmer head and cutting attachment Cracks usually occur when you make too sharp guard for damages or cracks. Replace the trimmer corners at the bottom of the teeth while you sharpen head and cutting attachment guard if they have been the blade.
- Page 24 120 seconds. To connect the battery to the product To start the SavE function The product has a power saving function. The SavE WARNING: Only use Husqvarna original function gives the longest operation time from the batteries with the product. battery.
- Page 25 To trim grass with a trimmer head 1. Push the operation direction button to make the trimmer head turn counterclockwise. The green LED is on when the trimmer head turns counterclockwise. To trim the grass 1. Hold the trimmer head immediately above the ground at an angle.
- Page 26 To cut the grass 3. Use a sideway swing movement from right to left to use the clear stroke and let the left side of the blade 1. Make sure that the trimmer line is parallel to the (between 8 and 12 o'clock) do the cutting. ground when you cut the grass.
- Page 27 3. Turn the handlebar around the shaft. 4. Tighten the knob. Maintenance Introduction The following is a list of the maintenance steps that you Maintenance on page 27 must do on the product. See for more information. WARNING: Read and understand the safety chapter before you do maintenance on the product.
-
Page 28: Battery Charger
To examine the battery and the 2. Pull out the line chute assembly. battery charger 1. Examine the battery for damages, for example cracks. 2. Examine the battery charger for damages, for example cracks. 3. Make sure that the connection cord of the battery charger is not damaged and that there are no cracks in it. -
Page 29: Troubleshooting
Troubleshooting Keypad LED display Possible faults Possible action Green activate LED flashing. Low battery voltage. Charge the battery. Identifying the cutting tool. Release the throttle. Red error LED flashing. The power trigger and the acti- Release the power trigger and the product is vate button are pressed at the active. -
Page 30: Transportation, Storage And Disposal
Battery charger LED display Possible faults Possible ac- tion Error LED Temperature deviation. Use the battery flashes charger in tem- peratures be- tween 5°C (14°F) and 40°C (104°F). Overvoltage. Make sure that the mains volt- age is the same as the shown voltage value on the rating plate on... -
Page 31: Technical Data
1.2/0.7 Equipped with grass blade (original), left/right 2.8/1.6 The Husqvarna Handheld Battery products marked with IPX4 fulfils these requirements on product approval level Noise emissions in the environment measured as sound power (L ) in conformity with EC directive 2000/14/ EC. -
Page 32: Accessories
Approved batteries Only use original BLi batteries for this product. Approved battery chargers Battery charger QC330 QC500 Input voltage, V 100-240 100-240 Frequency, Hz 50-60 50-60 Power, W Accessories Approved accessories Approved accessory Type Cutting attachment Article number guard, No Trimmer head T25B (Ø... -
Page 33: Ec Declaration Of Conformity
2000/14/EG. The certificate has the number: 01/1610/006. Intertek Semko AB, Box 1103, SE-164 22 Kista, Sweden has issued a voluntary type approval for Husqvarna AB. For information relating to noise emissions, refer to Technical data on page 31 . Huskvarna 2018-09-28 Pär Martinsson, Development Manager (Authorized... - Page 35 T25B Li-ion Li-ion 6,0 m 10 cm 4" 3,05 m "Clic" 15 cm 6"...
- Page 36 Original instructions 1140361-26 2018-11-02...
Need help?
Do you have a question about the 520iRX and is the answer not in the manual?
Questions and answers