
Subscribe to Our Youtube Channel
Related Manuals for Xylem OxiTop Control OC 100


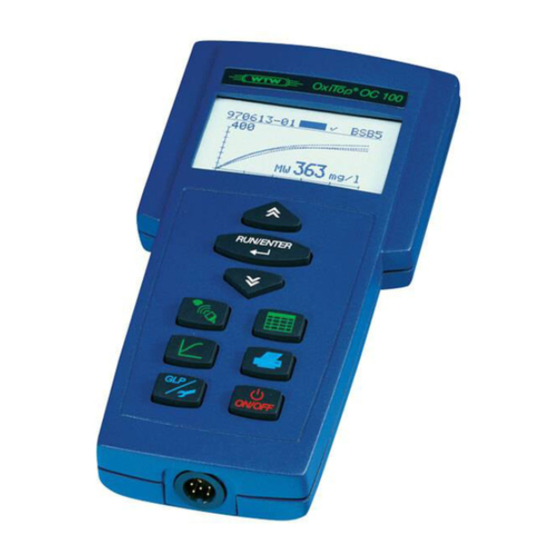
Summary of Contents for Xylem OxiTop Control OC 100
- Page 1 OPERATING MANUAL ba31114e07 08/2014 ® OC 1x0 ® RUN/ENTER ON/OFF ® OxiTop Control OC 100 ® ® OxiTop C or OxiTop BOD/OXYGEN CONSUMPTION: BOD, RESPIRATION, BIOGAS DETERMINATION...
- Page 2 Copyright © 2016 Xylem Analytics Germany GmbH Printed in Germany.
-
Page 3: Table Of Contents
® OxiTop Control OC 100 Contents ® OxiTop Control OC 100 - Contents Overview ......... . 7 ®... - Page 4 ® Contents OxiTop Control OC 100 5.4.4 Calling up data ....... . 29 5.4.5 Calling up data - Stop .
- Page 5 ® OxiTop Control OC 100 Contents 10 What to do if........69 10.1 Display messages .
- Page 6 ® Contents OxiTop Control OC 100 ba31114e07 08/2014...
-
Page 7: Overview
® OxiTop Control OC 100 Overview Overview ® The system Control OxiTop ® The classical application field for the OxiTop measuring heads and controller is the BODx determination (BODx = Biochemical Oxygen Demand for the time x). The evaluation of biological degradability (e.g. test according to OECD 301F) is also part of this field. -
Page 8: Data Management
® Overview OxiTop Control OC 100 The interpretation of the pressure differences in the temporal course depends on the measured material and its preparation and on the sample manipulation (e. g. intermediate aerations) during the measuring period. Data management The measuring head records the measured values and stores the measuring data. -
Page 9: Safety
® OxiTop Control OC 100 Safety Safety Safety information 2.1.1 Safety information in the operating manual This operating manual provides important information on the safe oper- ation of the instrument. Read this operating manual thoroughly and make yourself familiar with the instrument before putting it into opera- tion or working with it. -
Page 10: Unauthorized Use
® Safety OxiTop Control OC 100 use specified above. • The instrument may only be supplied with power by the energy sources mentioned in this operating manual. • The instrument may only be operated under the environmental conditions mentioned in this operating manual. •... -
Page 11: Commissioning
® OxiTop Control OC 100 Commissioning Commissioning Scope of delivery ® Controller OxiTop OC 100 Battery holder with batteries (3 x Mignon, AA, AM3, LR6) Operating manual Additional scope of delivery: depending on set composition Power supply ®... -
Page 12: Energy Saving Feature (Automatic Switch-Off)
® Commissioning OxiTop Control OC 100 3.2.3 Energy saving feature (automatic switch-off) The instrument switches off automatically following the last key actuation after expiry of the specified switch-off interval. To specify the switch-off interval: see section 7.4.8 S , page WITCH OFF INTERVAL Initial commissioning... - Page 13 ® OxiTop Control OC 100 Commissioning 1 Supply batteries in the battery holder (lower case) 2 Data backup battery (upper case) Set the upper case on top of the lower case, turn the controller and tighten the housing screws using the screwdriver. ...
- Page 14 ® Commissioning OxiTop Control OC 100 ba31114e07 08/2014...
-
Page 15: Operation
® OxiTop Control OC 100 Operation Operation General operating principles 4.1.1 Keys - controller RUN/ENTER ON/OFF <On/Off> Switching on/off ON/OFF <PRINT> Printing of measurement data and set- tings via IR interface <RUN/ Confirmation of entries RUN/ENTER ENTER> <><> Select and change settings Function keys: <ORG>... -
Page 16: Socket Field - Controller
® Operation OxiTop Control OC 100 4.1.2 Socket field - controller 1 RS232 interface The RS232 interface is used for communication with the PC. Usage of the RS232 interface is exclusively intended with the WTW software "Achat OC“ (see section 8.1 A , page 62). -
Page 17: Navigation
® OxiTop Control OC 100 Operation Navigation 4.3.1 Operating modes Measurement of single samples for a BOD BOD Routine: (x = 0.5h ... 99d) at 20 °C (preselected) The measuring range and filling volume can be selected out of seven per- manent ranges and the corresponding filling volumes. -
Page 18: Menus, Functions And Dialogs
® Operation OxiTop Control OC 100 4.3.2 Menus, functions and dialogs Example: Pressing the <COMM> button causes the controller to change to the SELECT ACTION menu (communication with the measuring heads). Action: Description of what the Press button. The instrument displays: action caused and possible further request: SELECT ACTION menu... -
Page 19: The Course Of The Measurement
® OxiTop Control OC 100 Operation 4.3.3 The course of the measurement Preparation before Select operating mode starting the mea- Select settings surement Operating mode and settings cannot be changed for a measure- ment once it is started! Start of Measuring End of measurement... - Page 20 ® Operation OxiTop Control OC 100 ba31114e07 08/2014...
-
Page 21: Operating Mode: Bod Standard / Bod Routine
® OxiTop Control OC 100 Operating mode: BOD Standard / BOD Routine Operating mode: BOD Standard / BOD Rou- tine The BOD Standard mode (parallel sample process for up to 12 measuring heads per overall sample) is preset in the delivery condition of the controller. To change to the BOD Routine operating mode (single samples): see section 7.4.1 O , page 43. - Page 22 ® Operating mode: BOD Standard / BOD Routine OxiTop Control OC 100 Confirm the selected measure- RUN/ENTER ment range for the sample. The automatically assigned sample number (YY/MM/DD and sequential number) is given in the header line. Additional information: Type of measurement, run duration, measurement range, final date, ID number.
- Page 23 (2). ® OxiTop Control OC 100 Operating mode: BOD Standard / BOD Routine Start the next measuring head Contact selection: The number of the measuring head is automatically incre- mented. The controller continues to work with the contact selection, i.e. you can now start a sequence of measuring heads (parallel Confirm Stop ...
-
Page 24: Calling Up All Data
® Operating mode: BOD Standard / BOD Routine OxiTop Control OC 100 Calling up all data This function is used to call up the data of all measuring heads, no matter in which operating mode they were started. To call up the data of individual measuring heads: see section 5.4 SAMPLE STATUS TYPE ), page 26. - Page 25 ® OxiTop Control OC 100 Operating mode: BOD Standard / BOD Routine Preselected: - Continue transfer: A new pass is made only for measuring heads that have not yet responded. Return to the entry menu with - Stop For information on searching for missing measuring heads, see section 10 W ..., page...
-
Page 26: Sample Status Type List (Sample Management)
® Operating mode: BOD Standard / BOD Routine OxiTop Control OC 100 SAMPLE STATUS TYPE list (sample management) Entry into the sample management. A list of samples appears in the display (if samples are avail- able): 1 Sample number: Date (JJ/MM/TT) and consecutive number 2 Temporal process of the sample: –... -
Page 27: Showing A Sample
® OxiTop Control OC 100 Operating mode: BOD Standard / BOD Routine Select a sample. According to the sample selected, one of the two following menus appears. Finished sample Current sample The header line contains the following data of the selected sample: ... -
Page 28: Erasing Data Of Finished Samples
® Operating mode: BOD Standard / BOD Routine OxiTop Control OC 100 5.4.2 Erasing data of finished samples This function erases the data of finished samples from the SAMPLE STATUS TYPE list ( sample management) of the controller. You can only erase a sample if it is finished; in non-finished samples, the menu item - Erase sample does not appear. -
Page 29: Showing The Measuring Head List
® OxiTop Control OC 100 Operating mode: BOD Standard / BOD Routine 5.4.3 Showing the measuring head list Select the - list menu item This function is used to allocate individual measuring heads to the rele- vant sample in the SAMPLE STATUS TYPE list (sample management) and to find individual measuring heads. - Page 30 ® Operating mode: BOD Standard / BOD Routine OxiTop Control OC 100 SAMPLE STATUS TYPE list (sample management) Use <><> to select a sam- ple whose run duration is not yet com- pleted (bar not yet full) data after complete mea- surement that have not yet been called up (bar full, no checkmark)
-
Page 31: Calling Up Data - Stop
® OxiTop Control OC 100 Operating mode: BOD Standard / BOD Routine If the measuring heads do not all respond, the following dis- play appears: Renewed start of the data call RUN/ENTER The controller continues to search for missing measuring heads in the scanner mode. - Page 32 ® Operating mode: BOD Standard / BOD Routine OxiTop Control OC 100 After confirmation, the display RUN/ENTER message shown here appears. Three displays are then possible: Case 1 The sample is still running and individual measuring heads of the sample are not attainable. Case 2 The run duration of the sample has ended and the finished, all...
-
Page 33: Evaluation
: ® OxiTop Control OC 100 Operating mode: BOD Standard / BOD Routine - Missing Only appears when the run duration of the sample has expired. Here you can remove the data of a missing or defec- tive measuring head from the SAMPLE STATUS TYPE list (sample management) of the controller. -
Page 34: Sample Statistics (Bod Standard Operating Mode)
® Operating mode: BOD Standard / BOD Routine OxiTop Control OC 100 5.5.1 Sample statistics (BOD Standard operating mode) Starting point: Display of a single curve. Changes to sample statistics. RUN/ENTER The menu selection shown here only appears if the number of measuring heads (n) is at least If n = 1 pressing of <RUN/ ENTER>... -
Page 35: Excluding A Curve (Bod Standard Operating Mode)
® OxiTop Control OC 100 Operating mode: BOD Standard / BOD Routine 5.5.2 Excluding a curve (BOD Standard operating mode) This function is used to temporarily exclude a single curve (e.g. an outlier) from the evaluation and averaging of an overall sample. The curve is only excluded temporarily! The data stock of the SAMPLE STATUS TYPE list (sample management) does not change. -
Page 36: Cursor Interrogation
® Operating mode: BOD Standard / BOD Routine OxiTop Control OC 100 5.5.3 Cursor interrogation Starting point: Display of a single curve with measured value data. Use <><> to select - Cursor RUN/ENTER query (this menu is not dis- played in the BOD Routine oper- ating mode). -
Page 37: Curves Display For Cold Samples
® OxiTop Control OC 100 Operating mode: BOD Standard / BOD Routine 5.5.4 Curves display for cold samples Display of a single curve. Display of all curves. When samples are inserted that are too cold the maximum AutoTemp time is not sufficient for the sample temperature to reach the incubation temperature: Warming the sample can cause excess pressure. - Page 38 ® Operating mode: BOD Standard / BOD Routine OxiTop Control OC 100 A measured value temporarily leaves the mea- suring range. After the exclusion of the defective curve (see section 5.5.2 E XCLUDING (BOD S ), page 35), the controller A CURVE TANDARD OPERATING MODE displays the mean value again.
-
Page 39: Printing
® OxiTop Control OC 100 Printing Printing Switch on the IR printer. Point the controller at the printer: When printing from the SAMPLE STATUS TYPE list (sam- ple management) or from the evaluation: The controller transfers the report data of the selected sam- ple to the IR interface. - Page 40 ® Printing OxiTop Control OC 100 Printing from the evaluation: If the controller is in the display of all curves with cursor display in the display of the single curves with or with- out cursor interrogation the printout is a copy of the display indication. ba31114e07 08/2014...
-
Page 41: Glp/Tools
® OxiTop Control OC 100 GLP/TOOLS GLP/TOOLS GLP/TOOLS main menu GLP/TOOLS menu: Select a menu item with <><>. Confirm with <RUN/ENTER>. The selected menu opens up or the function is carried out. GLP/TOOLS menu: - Show free This function is used to identify free measuring heads. Thus an additional sample labeling is not required. -
Page 42: Show Free Measuring Heads
® GLP/TOOLS OxiTop Control OC 100 Show free measuring heads . This function is used to identify free measuring heads. Free measuring heads can be used to start new samples. GLP/TOOLS menu: Preselected: - Show free Press <RUN/ENTER>. Point the controller at the measuring 40 cm to 1 m heads: All free measuring heads flash... -
Page 43: Settings
® OxiTop Control OC 100 GLP/TOOLS Settings With this function you can undertake or change settings. The table below shows the settings in the delivery state. GLP/TOOLS menu. Select the - Settings menu item with <><> Default setting (bold) Setting and setting range Operating mode BOD Routine... -
Page 44: Operational Life
® GLP/TOOLS OxiTop Control OC 100 Confirm with <RUN/ENTER>. RUN/ENTER Select the required operating mode <><>. Confirm with <RUN/ENTER>. - Back:: Return to the main menu SETTINGS: 7.4.2 Operational life Here you determine the run duration of the measurement. SETTINGS menu: Use <><>... -
Page 45: Date/Time
® OxiTop Control OC 100 GLP/TOOLS 7.4.3 Date/time Here you set the date and time for the controller (important for the assignment of sample numbers). SETTINGS menu: Use <><> to select the - date/time menu item. Use <><> to set each num- RUN/ENTER ber block on a black back- ground. -
Page 46: Glp - Calibration Interval (- Calinterval)
® GLP/TOOLS OxiTop Control OC 100 Switching the GLP func- tion on or off SETTINGS menu: Use <><> to select the - GLP menu item. GLP menu: RUN/ENTER Preselected: - GLP Confirm with <RUN/ENTER>. Use <><> to select either GLP On or Off. Confirm with <RUN/ENTER>. -
Page 47: Data Storage
® OxiTop Control OC 100 GLP/TOOLS 7.4.6 Data storage Here, you can set whether the controller should automatically erase the oldest finished samples if the memory is full to create space for new measurement data (setting auto). With the manual setting, the message "Memory lack! Erase finished sample/s! is displayed if the memory is full (see section 10 W HAT TO DO ..., page 69). - Page 48 ® GLP/TOOLS OxiTop Control OC 100 , is smaller than 1% of the selected measurement range final Incubator value. Measuring time Recommended sample temper- of the measure- ature at the start of the mea- ment surement 1 day -0.5K ... T Incubator Incubator 2 days...
-
Page 49: Switch-Off Interval
® OxiTop Control OC 100 GLP/TOOLS BOD measuring Duration of the adapta- Duration of the test phase time tion phase 0.5 to 23 hours Since the measurement times are very short, the sys- tem always suppresses the AutoTemp phase here even if the AutoTemp function is switched on in the set- tings. -
Page 50: Language
® GLP/TOOLS OxiTop Control OC 100 Preset: RUN/ENTER - Interval: 5 minutes To change it: Confirm with <RUN/ENTER>. Set the required number of min- utes with <><>. Confirm with <RUN/ENTER>. - Back (to the SETTINGS menu) 7.4.9 Language ® Select the language here in which the displays of the OxiTop control- ler appear. -
Page 51: Check
® OxiTop Control OC 100 GLP/TOOLS Check Main menu GLP/TOOLS. Use <><> to select the - Check menu item. - Show 7.5.1 Showing the measuring heads CHECK menu: RUN/ENTER Preselected: SHOW menu: - Show free - Free or - All ... - Page 52 ® GLP/TOOLS OxiTop Control OC 100 RUN/ENTER The measuring head flashes. A display appears on the con- troller giving the following infor- mation: Series number of the measur- ing head, Battery status (OK/LOBAT/EMPTY!!), the next calibration date (only in operating modeBOD Standard) ...
-
Page 53: Controller Information
® OxiTop Control OC 100 GLP/TOOLS 7.5.3 Controller information CHECK menu. Use <><> to select the - Controller Info menu item. The display shows the following RUN/ENTER information: Number of measuring heads for which there is still memory capacity ... - Page 54 ® GLP/TOOLS OxiTop Control OC 100 The instrument automatically RUN/ENTER allocates the sample number (in the header line). The filling volume (164 ml) and the type together with the run time of 5 days are preset. For information on the further handling of the sample up to the “finished”...
-
Page 55: Pneumatic Test
® OxiTop Control OC 100 GLP/TOOLS - Set Cal date This menu item only appears if the controller is in the BOD Standard operating mode, GLP is switched on and the test is finished. - Stop: Return to the curve display. The Cal test is considered as not performed. -
Page 56: Maintenance
® GLP/TOOLS OxiTop Control OC 100 Pneumatic test menu item. The user interface of the controller guides you through the test: CHECK menu. Use <><> to select the - Set the plunger of the syringe on RUN/ENTER ® the OxiTop PT test resource to 5 scale parts. -
Page 57: Erasing Finished Samples
® OxiTop Control OC 100 GLP/TOOLS 7.6.1 Erasing finished samples Here you can erase the data of finished samples that are already eval- uated or no longer required in order to free memory in the controller. MAINTENANCE menu: RUN/ENTER - Erase sample preselected ERASE FINISHED SAMP. - Page 58 ® GLP/TOOLS OxiTop Control OC 100 If no finished samples are available in the memory, the follow- ing display appears: ba31114e07 08/2014...
-
Page 59: Reset/Release
® OxiTop Control OC 100 GLP/TOOLS After carrying out the - Reset/release function the data of the 7.6.2 Reset/release This function can be used to release measuring heads again that were unintentionally started. measuring head are erased! Reset/release menu item. MAINTENANCE menu: Use <><>... -
Page 60: Reading Out Data
® GLP/TOOLS OxiTop Control OC 100 7.6.3 Reading out data In case you lost your controller or your controller is defective, the "Restore data" function facilitates to restore the data of running measurements using a new or other controller. This means the data are not lost! To perform this function the memory of the controller must be abso- lutely empty! The data of each single measuring head are restored... - Page 61 ® OxiTop Control OC 100 GLP/TOOLS The controller returns to the RESTORE DATA menu. Perform this procedure for every measuring head with a mea- surement running, without leav- ing the RESTORE DATA function. If the data of a measuring head were already restored the following is dis- played for approx.
-
Page 62: Transmitting Data
® Transmitting data OxiTop Control OC 100 Transmitting data The RS232 interface is used to transmit data to a PC (see section 4.1.2 , page 16). OCKET FIELD CONTROLLER For details, see operating manual of the Achat OC software. Achat OC software With the Achat OC software, you can ... -
Page 63: Maintenance, Cleaning, Disposal
® OxiTop Control OC 100 Maintenance, cleaning, disposal Maintenance, cleaning, disposal Maintenance 9.1.1 General maintenance activities The only maintenance activity required is replacing the batteries. 9.1.2 Replacing the supply batteries (controller) ® Switch off the controller OxiTop -OC 100. ... - Page 64 ® Maintenance, cleaning, disposal OxiTop Control OC 100 Remove the supply battery holder from the fixing in the lower case and turn it around. Remove the empty supply batteries. Insert the new supply batteries - 3 pieces, alkaline (alkali manga- nese), Size: Mignon, AA, AM3, LR6).
-
Page 65: Replacing The Data Backup Battery (Controller)
® OxiTop Control OC 100 Maintenance, cleaning, disposal 9.1.3 Replacing the data backup battery (controller) Evaluate and back up all the measurement data. Options available: – print out the results (see section 6 P , page 39) RINTING – save the data in the PC using the software “Achat OC“, see sec- tion 8.1 A , page 62 CHAT... - Page 66 ® Maintenance, cleaning, disposal OxiTop Control OC 100 Remove the empty data backup battery. Insert the new data backup battery (1 piece, lithium battery, ® CR2430, e.g. WTW type Batt/ OxiTop NOTE Ensure that they are inserted in the correct position! The positive pole must point upwards.
-
Page 67: Changing The Supply Battery (Measuring Head)
® OxiTop Control OC 100 Maintenance, cleaning, disposal 9.1.4 Changing the supply battery (measuring head) Change the battery after the measurement has been terminated. Press in the snap-action holder and open the upper case. Remove the batteries. ... -
Page 68: Cleaning
® Maintenance, cleaning, disposal OxiTop Control OC 100 Cleaning 9.2.1 Cleaning of the sample bottles See application reports. 9.2.2 Cleaning of the controller and measuring heads Occasionally wipe the outside of the measuring instrument with a damp, lint-free cloth. NOTEThe housing is made of synthetic material (ABS). Thus, avoid contact with acetone or similar detergents that contain solvents. -
Page 69: What To Do If
® OxiTop Control OC 100 What to do if... What to do if... already used! 10.1 Display messages - Stop start or Display message Cause Remedy Select a new and free measuring The selected measuring head has already been started for a measure- head or ment and can only be used for a new... - Page 70 No active ! ® What to do if... OxiTop Control OC 100 Display message Cause Remedy No measurement has been Modification of the distances or started. angle The measuring heads are placed Search at other storage locations at another location (e.g.
- Page 71 ® OxiTop Control OC 100 What to do if... Display message Cause Remedy Transfer the unfinished samples of Memory lack! The instrument works with the set- No ready samples ting, Erase memory auto (automati- the sample management to “fin- autom.
- Page 72 ® What to do if... OxiTop Control OC 100 Display message Cause Remedy The selected measurement range Select the correct measurement undef. has been exceeded. range (see application reports on (Display in the curve pre- the CD-ROM, Principles of measur- ...
- Page 73 0 of 19 ® OxiTop Control OC 100 What to do if... Display message Cause Remedy No measuring head was found by Modification of the distances or called up the controller. angle The measuring heads are placed ...
-
Page 74: Display Messages On The Charging Status Of The Batteries
® What to do if... OxiTop Control OC 100 10.2 Display messages on the charging status of the bat- teries 10.2.1 Batteries in the controller Display message Notes/ explanation The warning appears for approx. 3 seconds. The instrument then continues to run normally. The instrument can still be safely operated within the specifications. -
Page 75: General Information
® OxiTop Control OC 100 What to do if... 10.3 General information Cause Remedy The BOD Routine operating mode Switch on the BOD Standard oper- No or missing sample entries in the sample is switched on. Samples were ating mode management started in the other operating... - Page 76 ® What to do if... OxiTop Control OC 100 Cause Remedy Prepare the relation separate curve – number of measuring head; see sec- Which measuring head belongs to which mea- tion 5.5 E , page 33. VALUATION surement curve? ...
- Page 77 ® OxiTop Control OC 100 What to do if... Cause Remedy Perform the command: - All . See GLP/TOOLS - Check - Show . Check of the controller Controller information See section 7.5.3 C , page 53 ONTROLLER INFORMATION All single information on the state of the controller is listed.
- Page 78 ® What to do if... OxiTop Control OC 100 Cause Remedy The printer is not switched on Switch on the printer The IR printer does not react The printer has no optical contact Establish optical contact with the controller: ...
-
Page 79: Technical Data
® OxiTop Control OC 100 Technical data Technical data ® 11.1 Controller OxiTop OC 100 Measuring ranges 0 ... 40 / 80 / 200 / 400 / 800 / 2000 / 4000 mg/l BOD Run durations and data Measuring time of the measure- records ment Datasets... -
Page 80: Measuring Head Oxitop
® Technical data OxiTop Control OC 100 ® ® 11.2 Measuring head OxiTop -C or OxiTop -C/B Measuring principle Piezoresistive pressure sensor Operation pressure 500 ... 1350 hPa (mbar). range Maximum allowed pres- 2000 hPa (mbar) sure Accuracy ± 1% of the measured value ± 1 hPa Resolution 1 hPa Display... - Page 81 ® OxiTop Control OC 100 Safety ......9 Scope of delivery ....11 Application reports .
- Page 82 ® OxiTop Control OC 100 ba31114d07 08/2014...
- Page 84 For more information on how Xylem can help you, go to xyleminc.com. ® Service address: Xylem Analytics Germany Sales GmbH &...
Need help?
Do you have a question about the OxiTop Control OC 100 and is the answer not in the manual?
Questions and answers
Hello, How can I measure the anaerobic degradation processes (e.g. biogas determination) with the measuring head OxiTop®-C and OxiTop® Control OC 100)? Thank you for your time and consideration. Best regards
Anaerobic degradation processes can be measured using the OxiTop®-C measuring heads and the OxiTop® Control OC 100 controller by monitoring the pressure changes in a sealed sample vessel. The OxiTop®-C uses a piezoresistive pressure sensor to detect gas production, such as biogas, which occurs during anaerobic degradation. The controller collects and manages this data, allowing evaluation of biological degradability under anaerobic conditions.
This answer is automatically generated