
Related Manuals for Merrychef eikon e1s


Summary of Contents for Merrychef eikon e1s
- Page 1 User Manual APAC – GBR Section 2: Operations and Installation Guide Part number: 32Z3959s2 Read instructions before use...
-
Page 2: Table Of Contents
User Manual Section 2: Operations and Installation Guide Table of Contents Document information ............................... 4 Version control ..................................4 Document purpose ................................4 Related documents ................................4 How to use this guide ................................. 4 Symbols and their meanings ............................4 Introduction to e1s .............................. - Page 3 User Manual Section 2: Operations and Installation Guide Viewing and editing cooking profiles ..........................22 Moving a cooking profile in a group of cooking profiles ....................22 Moving a cooking profile in a list ............................ 23 Adding a new cooking profile group..........................23 Adding a cooking profile to a group of cooking profiles ....................
-
Page 4: Document Information
Document purpose The purpose of this guide is to give a brief introduction to the Merrychef eikon e1s oven. It is intended to get you started as well as to provide instructions on how to operate the system on a regular basis. -
Page 5: 2A. Introduction To E1S
User Manual Section 2: Operations and Installation Guide 2A. Introduction to e1s The Merrychef eikon e1s microwave combination oven offers you the flexibility of combination cooking with additional control over fan speed and microwave power. Combination cooking enables high quality results to be achieved in a fraction of the time taken by conventional cooking, particularly when baking, browning, roasting and grilling dishes. -
Page 6: Appliance Parts And Their Functions
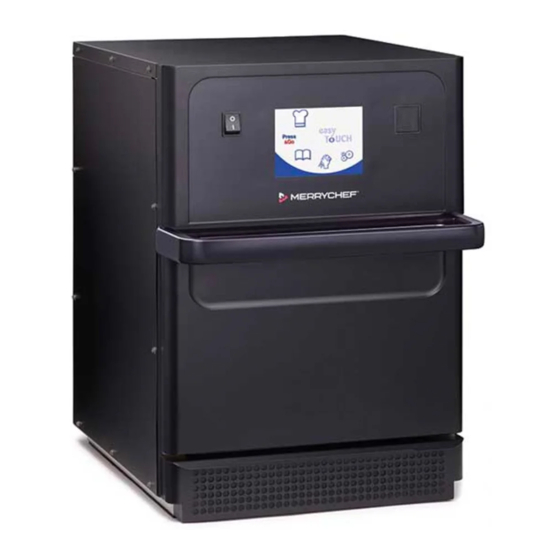
User Manual Section 2: Operations and Installation Guide Appliance parts and their functions Figure 2.3: Appliance parts and their functions ON/OFF appliance switch – Used to turn the microwave combination oven on and off. Turning this switch off does not isolate the appliance from the electricity supply. -
Page 7: Equipment And Accessories Supplied
It is removable for cleaning. and should be kept clean and free of obstruction. There are a number of other optional Merrychef accessories that customers can purchase to use with the microwave combination oven. Contact Merrychef suppliers for more information. -
Page 8: 2B. Installing The Appliance
User Manual Section 2: Operations and Installation Guide 2B. Installing the appliance Users must read Section 1: Safety Guide before installing or using the microwave oven. Unpacking Cut the box banding straps and Remove the customer Remove the packaging to remove the lid. -
Page 9: Installation Location Requirements
User Manual Section 2: Operations and Installation Guide Installation location requirements Minimum space required Figure 2.4 shows the space required to install the appliance. It also shows the minimum horizontal distances from adjacent walls and surfaces. The safety clearance on the top must also always be complied with. -
Page 10: Electrical Installation Requirements
User Manual Section 2: Operations and Installation Guide Electrical installation requirements Safety rules Observe the following rules to prevent hazards caused by faulty electrical connections: Only electricians qualified under the terms of EN 50110-1 and from an authorised service company are •... - Page 11 User Manual Section 2: Operations and Installation Guide Properties of the residual-current device The residual-current device (RCD) must have the following properties: Filter for filtering out RF currents. • ‘Time delayed’ trip characteristic for RCD devices with trip threshold >30mA: prevents RCD being tripped by •...
-
Page 12: 2C. Getting Started
User Manual Section 2: Operations and Installation Guide 2C. Getting started Before turning on the oven, users must read the Section 1G: Hazards and safety precautions when preparing appliance for use in the Safety Guide. Fitting the air filter The air filter is fitted in position below the cavity door. -
Page 13: Settings On First Usage
User Manual Section 2: Operations and Installation Guide Settings on first usage The system is preconfigured with all the required settings to start cooking immediately following installation. However, you may want to configure the following before using the oven. -
Page 14: Selecting Suitable Utensils
User Manual Section 2: Operations and Installation Guide Selecting suitable utensils You may want to ensure you have suitable utensils before using the oven. Only use utensils that are suitable for use in microwave combination ovens. Check the manufacturer’s instructions and temperature rating to determine the suitability of individual containers or utensils. -
Page 15: Understanding The Main Menu And Keyboard
User Manual Section 2: Operations and Installation Guide Understanding the main menu and keyboard The easyTouch ® screen display, layout and icons shown herein are for guidance purposes only and are not intended to be an exact representation of those supplied with the appliance. -
Page 16: 2D. Cooking Procedures
User Manual Section 2: Operations and Installation Guide 2D. Cooking procedures How to cook On a preheated oven, select a Open the appliance door and Close the appliance door again. cooking profile from the place the prepared food on the... -
Page 17: Using A Cooking Profile - Quick Serve Mode
User Manual Section 2: Operations and Installation Guide Using a cooking profile – quick serve mode Select the ‘cookbook’ symbol from the main menu screen and then select the All Menus option. Use the scroll up/down arrows to find the cooking profile. -
Page 18: Using A Cooking Profile - Full Serve Mode
User Manual Section 2: Operations and Installation Guide Using a cooking profile – full serve mode Select the ‘cookbook’ symbol from the main menu screen and then select a group of cooking profiles, for example ‘ITALIAN SUBS’, to display the individual cooking profiles. -
Page 19: Choosing Cooking Profiles For Press&Go Menu
User Manual Section 2: Operations and Installation Guide Choosing cooking profiles for Press&Go menu Select ‘Press&Go’ from the main menu screen, and then select the ‘edit cookbook’ symbol. Two lists are displayed. The list on the left shows the cooking profiles that are part of the •... -
Page 20: Changing The Cavity Temperature
User Manual Section 2: Operations and Installation Guide Changing the cavity temperature You may need to change the cavity temperature depending on the food you are cooking. If the cavity temperature is set to a value unsuitable for a cooking profile, it will need to be changed before that cooking profile can be used. -
Page 21: Cooking Profiles
User Manual Section 2: Operations and Installation Guide Cooking profiles Creating a cooking profile 1. Enter development mode 3. Set the cooking time 5. Set the fan speed Select the ‘chef’s hat’ symbol from Select the ‘clock’ symbol and enter Select the ‘fan’... -
Page 22: Viewing And Editing Cooking Profiles
User Manual Section 2: Operations and Installation Guide Viewing and editing cooking profiles Select the ‘cookbook’ symbol Select the ‘All menus’ symbol Select the ‘edit cookbook’ from the main menu screen. from the cookbook screen. symbol. Use the up/down scroll arrows to Select the ‘view/edit cooking... -
Page 23: Moving A Cooking Profile In A List
User Manual Section 2: Operations and Installation Guide Moving a cooking profile in a list Select the ‘cookbook’ symbol from the main menu Use the big scroll arrows to locate cooking profile screen and then select the ‘edit cookbook’ symbol groups and then use the small arrows in the centre in the cookbook screen. -
Page 24: Adding A Cooking Profile To A Group Of Cooking Profiles
User Manual Section 2: Operations and Installation Guide Adding a cooking profile to a group of cooking profiles Select ‘cookbook’ from the main Select the cooking profile group Select the ‘edit cookbook’ symbol menu screen. you want to add to. -
Page 25: Editing A Selected Cooking Profile Group Name
User Manual Section 2: Operations and Installation Guide Editing a selected cooking profile group name Select ‘cookbook’ from the main Select the ‘edit cookbook’ symbol Select the cooking profile menu screen. from the cookbook screen. group that you want to edit. -
Page 26: Changing Settings
User Manual Section 2: Operations and Installation Guide Changing settings Changing settings process Select the ‘settings’ symbol from the main menu screen. Note: The main menu is displayed after the oven is pre-heated. If you want to change settings without pre-heating the oven, for example change... -
Page 27: Operating Mode / Navigation Settings
User Manual Section 2: Operations and Installation Guide Operating mode / navigation settings Select the ‘operating mode/navigation’ symbol from the settings menu. Select ‘QUICK SERVE MODE’ for cooking only. Select ‘FULL SERVE MODE’ for creating cooking profiles. Select ‘MANUAL MODE’ to manually cook only via the ‘chef’s hat’... -
Page 28: Cavity Temperature Settings And Labels
User Manual Section 2: Operations and Installation Guide Cavity temperature settings and labels Select the ‘temperature’ symbol from the settings menu. The temperature screen is displayed if two or more cavity temperatures are set above the minimum. You can now:... -
Page 29: Service Information And Error Logs
User Manual Section 2: Operations and Installation Guide Service information and error logs The service information and error log function is required for servicing and repairing the system and therefore covered in Section 3: Service and Repair Guide. -
Page 30: Setting The Date And Time
User Manual Section 2: Operations and Installation Guide Setting the date and time Select the ‘clock/date’ symbol from the settings menu to display the setting options. Change the date: Select ‘MONTH’, enter the correct month on the keypad and select OK. -
Page 31: Sound Settings
User Manual Section 2: Operations and Installation Guide Sound settings Select the ‘speaker’ symbol to access the volume, tone and further sound settings. Make changes as required: Select the ‘speaker’ symbol to adjust the volume level suitable for the environment from none (OFF) to the loudest (100%). -
Page 32: Temperature Timer Setting
User Manual Section 2: Operations and Installation Guide Temperature timer setting Select the ‘thermometer / timer’ symbol from the settings menu. Select the ‘timer enabled’ checkbox (green tick). Select a weekday using the up/down arrows at the bottom of the screen. -
Page 33: Usb Programme Downloads
User Manual Section 2: Operations and Installation Guide USB programme downloads Switch the appliance OFF and open the cover to the USB port on the control panel at the. Plug in the USB memory stick and switch on the oven. -
Page 34: Temperature Band Setting
User Manual Section 2: Operations and Installation Guide Temperature band setting Select the ‘temperature band’ symbol. Select the required temperature band checkbox, shown by a green tick. Note: Generally, the lowest practical ‘Temp Band’ should be chosen. If the... -
Page 35: Set Screen Saver
User Manual Section 2: Operations and Installation Guide Set screen saver Select the ‘ENABLED’ checkbox to switch the screen saver ON or OFF and select the ‘time’ box below it. Enter a time delay on the keypad from 1 to 60 minutes before the screen saver starts. -
Page 36: 2G. Cool-Down Procedures
User Manual Section 2: Operations and Installation Guide 2G. Cool-down procedures The microwave combination oven must be cooled down properly before cleaning, servicing or repairing. Users must read the Safety Guide - Section 1J: Hazards and safety precautions during servicing and repair and Section 1K: Hazards and safety precautions when taking the appliance out of service. -
Page 37: 2H. Cleaning Procedures
User Manual Section 2: Operations and Installation Guide 2H. Cleaning procedures Daily cleaning tasks What must be cleaned? Procedure Cleaning chemicals Cavity Clean by hand with a soft cloth or Cleaning and protective chemicals paper towel approved by the manufacturer... -
Page 38: Cleaning Instructions
User Manual Section 2: Operations and Installation Guide Cleaning instructions Ensure the oven has been cooled down as per the instructions in Section 2G: Cool-down procedures. • Users must read Section 1I: Hazards and safety precautions during cleaning in the Safety Guide. - Page 39 Spray Merrychef approved cleaner For difficult areas, leave to Wash off all surfaces using a wet onto a sponge and clean all internal soak for 10 minutes with the clean cloth.
- Page 40 User Manual Section 2: Operations and Installation Guide Stage 2: Apply oven protector (optional) Spray Merrychef protector or a Spread the protective chemical Replace the cleaned and dried Merrychef approved protector lightly onto all internal surfaces, cook plate.
- Page 41 User Manual Section 2: Operations and Installation Guide Stage 4: Cure protective chemical (if oven protector applied) Switch ON the appliance using Preheat the cavity. Once The protective chemical turns the on/off button. reaching the preset operating light brown when cured and the temperature it will take about oven is ready to be used again.
-
Page 42: End Of Day Operations
User Manual Section 2: Operations and Installation Guide End of day operations Turning the oven off Switch off the microwave combination oven using the on/off switch at the front of the appliance. Leave the appliance door ajar to let moisture escape. -
Page 43: Servicing Information
User Manual Section 2: Operations and Installation Guide Servicing information Warranty information and contacting customer services In order to be able to claim under the warranty for the microwave combination oven, the appliance must be installed in accordance with the instructions in the Operations and Installation Guide by a qualified service engineer from an authorised service company. -
Page 44: Fault Finding
User Manual Section 2: Operations and Installation Guide Fault finding Although every effort is made to ensure your oven will continue to perform to a high standard, please check Table 2.7 to see if the problem can be easily resolved before contacting your service agent. - Page 45 Microwave Combination Oven Welbilt is one of the world’s largest manufacturers and suppliers of professional gastronomic appliances. We supply our customers with energy-saving, reliable and market-leading technologies from a single source. If you want to find out more about Welbilt and its company brands, please visit us at www.welbilt.com Welbilt UK Limited, Ashbourne House, The Guildway, Old Portsmouth Rd, Guildford GU3 1LR, United Kingdom +44 1483 464 900;...
Need help?
Do you have a question about the eikon e1s and is the answer not in the manual?
Questions and answers