
Related Manuals for Merrychef conneX 12e


Summary of Contents for Merrychef conneX 12e
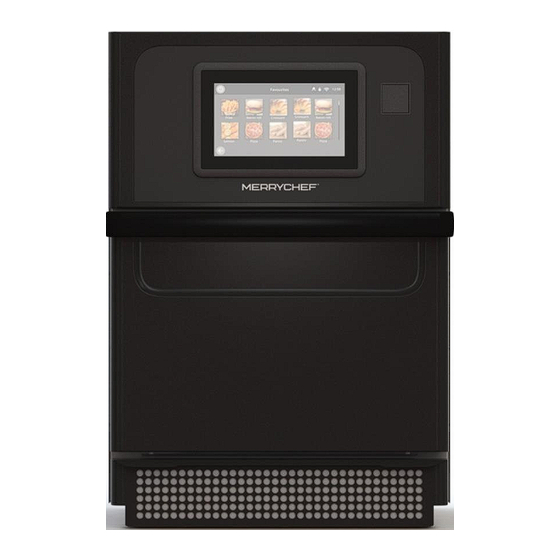
- Page 1 Service & repair manual Microwave combination oven Read instructions before use. Part number: 32Z9262 Models: 50Hz & 60Hz Language: ENGLISH...
-
Page 2: Table Of Contents
Safe working when testing components. Requirements. Testing selected components (casing mounted). Recommissioning test. High voltage components (casing removed). Mains voltage components (casing removed) . KitchenConnect ® components. Replacing components. Safe working when replacing appliance parts. Overview. Merrychef conneX service and repair manual ®... - Page 3 Removing the convection fan motor speed controller. 6.16 Replacing the heating element. 6.17 Overview – further components. 6.18 Technical data summary sheet. Circuit boards and diagrams. IO circuit board. Circuit diagrams. Annual PM check procedure for conneX ® Merrychef conneX service and repair manual ®...
-
Page 4: Declaration Of Conformity
® authorised service agent using genuine Merrychef replacement parts. Merrychef will have no obligation with respect to any product that has been improperly installed, adjusted, operated or not maintained in accordance with national and local codes or installation instructions provided with the product, or any product that has its serial number defaced, obliterated or removed, or which has been modified or repaired using unauthorised parts or by unauthorised service agents. -
Page 5: Identifying Your Microwave Combination Oven
Meaning Year of manufacture 2021 22, ... 2022, ... Month of manufacture January 02, ... February, ... Place of manufacture 2130 Sheffield (UK) 0757 Foshan (China) Production number 12345 Technical data Manufacturer addresses Merrychef conneX service and repair manual ®... -
Page 6: About This Service And Repair Manual
About this service and repair manual. Purpose. This service and repair manual is intended for all trained Merrychef service technicians who work with the microwave combination oven and provides them with the necessary information for carrying out servicing and repair work properly and safely. -
Page 7: For Your Safety
This manual provides technical guidance for technicians who have successfully undertaken a recognized product familiarization and training course run by Merrychef to carry out service/repair tasks to the appliance/s shown on the front cover of this manual which must not be used for any other make or model of appliance. -
Page 8: Requirements To Be Met By Personnel And Working Positions
Operational training for the end user to include how the oven functions and Heat protective gloves (compliant with how to clean the equipment correctly. EN 407 in European Union). Safety boots. Merrychef conneX ® service and repair manual... - Page 9 Repairs. Activity Personal protective equipment (PPE) All repairs. Work wear and approved PPE depending on the job that is required as specified in national regulations (country specific). Merrychef conneX ® service and repair manual...
-
Page 10: Intended Use Of The Microwave Combination Oven
Use only cleaning chemicals that have been approved by the manufacturer. ▪ High-pressure cleaners or water jets must not be used for cleaning. ▪ The appliance must not be treated with alkali or acid solutions6 or exposed to acid fumes. ▪ Merrychef conneX ® service and repair manual... -
Page 11: Warning Signs On The Microwave Combination Oven
Risk of electronic component damage. Safety symbols. Mandatory warning signs. The safety symbols be attached to the microwave The warning signs must be attached to the microwave combination oven. combination oven and optional accessories. Merrychef conneX ® service and repair manual... -
Page 12: Safety Devices
8 (no Internal high Prevent faulty components from Ensure correct operation. picture) temperature generating too much heat and causing thermostats potential fire hazard. Merrychef conneX ® service and repair manual... -
Page 13: Summary Of Hazards
You must ensure, however, that these safety devices are in place and in working order. The nature of these residual risks and what effect they have are described below. Hazard points. The following illustration shows a Merrychef conneX microwave combination oven: ®... -
Page 14: Safe Working When Working On The Appliance
Before starting work, familiarize yourself with the hazards described in section 3 ‘For your safety’ in the conneX Installation and User manual. Eligibility of personnel for working on the appliance. Only qualified Merrychef trained personnel from a factory authorized service company (FAS) are permitted to set up and work on the appliance. Regulations for working on the appliance. - Page 15 Risk of body parts When the appliance is being moved e.g., to gain better Always observe the requirements for being crushed if access to the connections. the supporting surface. the appliance tips over or falls. Merrychef conneX ® service and repair manual...
- Page 16 UI associated wiring, anti-static damage. & IO boards. precautions must be taken, such as wearing an ESD wrist strap. IMPORTANT - oven power supply and all capacitors must be proved dead first. Merrychef conneX ® service and repair manual...
-
Page 17: Hazards And Safety Precautions When Taking The Appliance Out Of Service
Risk of slipping. Ensure that the floor around the In front of the appliance. appliance is always dry. Merrychef conneX ® service and repair manual... -
Page 18: Safe Working During Electrical Installation
Note. Residual Current Devices (RCDs) are also known by other terms, such as Earth Leakage Circuit Breakers (ELCBs), Safety Switches, Ground Fault Interrupters (GFIs) and Ground Fault Circuit Interrupters (GFCIs). These should not be confused with over current protection. Merrychef conneX ® service and repair manual... -
Page 19: Electrical Installation Requirements
Alternative Recommended (Per phase) Circuit Breaker (per phase) conneX 12e standard power Residual Current Device (RCD) The installation regulations require protection by a Residual Current Device (Ground Fault Circuit Interrupter). Suitable residual current devices, with a high immunity to nuisance tripping, meeting the relevant national regulations must be used. As long cable runs can be a factor in nuisance tripping, they should be avoided. - Page 20 Make sure that the electrical connections are intact, secure and all equipment panels are re-fitted before you ▪ reconnect the appliance to the power supply. Before putting the appliance back into operation, make sure that the appliance, including all metallic accessories, is ▪ connected to an equipotential bonding system. Merrychef conneX ® service and repair manual...
-
Page 21: Process For Discharging The Capacitors
2.14 Process for discharging the capacitors. Tools required. (LOTO) – lock off kit. An approved capacitor discharge tool like the Merrychef recommended tool P/N 30Z5027 Approved electrical class 1 insulted gloves rated to a minimum of 5000 Volts. Approved voltage tester and voltage proving device. -
Page 22: Safe Working When Replacing Appliance Parts
Before starting servicing and repair work, wait until the cooking chamber has cooled to below 50°C / 122°F or use the ▪ ‘Cool-down' function to cool the cooking chamber. Wear personal protective equipment. ▪ Merrychef conneX ® service and repair manual... - Page 23 Never operate an appliance that has failed the "Microwave leakage test", Merrychef require working as close to zero ▪ emissions as possible. NOTE – the conneX 12e Model is only available with a single magnetron low power specification, the magnetron is ▪ centrally located at the top of the oven under the top panel.
-
Page 24: Technical Data
Degree of protection IPX3 – Protected from water sprays of up to a ° angle Noise emission max. 65 [dBA] Approval marks Tested safety UKCA, CE, CB (IEC), UL Hygiene UL-EPH (NSF/ANSI 4) Merrychef conneX ® service and repair manual... - Page 25 Low voltage supply to adjustment. controller operation. connections. / 8.5A @ 50 the main PCB, (IO LED self-test indicator. Check IO Board Board). connections X100, X101 and X500. Check input voltage. Check output voltage. Merrychef conneX ® service and repair manual...
- Page 26 Check Live supply potential on VFD Check for consistent output voltage between each phase between Blue (U), Red (V) & Yellow (W) (Digital multi-meter should be set to VAC to conduct this check). Merrychef conneX ® service and repair manual...
- Page 27 The oven oven for proper shuts down and operation displays E104. Check IO X512 Check IO LEDs LD14 to LD18. Merrychef conneX ® service and repair manual...
- Page 28 Check Error Log for E102 & E116 events. One Magnetron fitted Provides microwave Follow all test Magnetron(s). conneX 12e - 800W per as standard. energy, 0 to 100%, magnetron, procedures in Section through the 5.8. 7-8A at 230VAC.
- Page 29 *Note 2: 208/240 HV Transformers used in most 60Hz applications Always review country specific service parts lists for required replacements. Never use non-approved alternatives. See section 6.18 for the Technical Data Summary Sheet Merrychef conneX ® service and repair manual...
-
Page 30: Dimensional Drawings
Front view (door closed) Cavity dimensions (door closed) [12.24] 311mm 21.38] 543.0 mm [24.1] 612mm Front view (door closed) Cavity dimensions (door open) [31.9] [16.02] 810mm 407.0 [21.38] 543.0 mm View from the top (door closed) Merrychef conneX ® service and repair manual... -
Page 31: Accessing The Universal Controller (Ui)
The Universal Controller (U/I) display, layout and icons shown herein are for guidance purposes only and are not intended to be an exact representation of those supplied with the appliance. Full operational details can be found in the Installation and User Manual. Merrychef conneX ® service and repair manual... -
Page 32: The Keyboard Screen
For names of cooking profiles, names of cooking profile groups and passwords use 1-20 characters in 2 lines max. For stage instructions of individual cooking profiles use 1-52 characters in 5 lines max. Full operational details can be found in the Installation and User Manual. Merrychef conneX ® service and repair manual... -
Page 33: Cleaning Procedures
Merrychef ® approved eye protection ▪ cleaning chemicals) Merrychef oven protector ▪ Cool down the oven. 1. Press the clean icon from 2. Place a pan of ice into the 3. Wait for temperature to 4. Once the cooling process is... -
Page 34: Using A Usb Stick
During cooking and cleaning, there must not be a USB stick inserted and the USB port must be closed. USB menu downloads & instructions go to Merrychef - Merrychef conneX®12 Uploading a new recipe file from a USB will overwrite all the existing programs in the memory. -
Page 35: Firmware Updates
Firmware updates. Important note: Procedures for accessing the latest firmware and loading instructions can be found by going to the below website. The menu upload guide can be found under the guides tab. https://www.merrycheftechnical.com Merrychef conneX ® service and repair manual... - Page 36 NOTE – See the website for the latest firmware instructions by following the link - See section 6.11 for replacing components. SD card location on the UI screen. PM module location on the IO board. Merrychef conneX ® service and repair manual...
- Page 37 Once the oven is switched back on select the power symbol and then select the information ‘i’ button. Review the data displayed. Select the back arrow to return to the previous screen, the information can also be selected from the main screen/ settings. Merrychef conneX ® service and repair manual...
-
Page 38: Service Information
If a firmware update is required refer to page 35. Enter service mode. 1. Switch on the oven and wait until the Merrychef screen is displayed then select the settings icon. 2. Enter the user password "MANAGER" on the keypad or the full serial number if the password is not recognised. -
Page 39: Errors And Diagnostics
The displayed QR code can be scanned with a smart phone to access the Merrychef technical support website. ‘Restart’ button can be selected to ‘reboot’ the appliance. If the fault remains, the appliance will display the error again and prevent operation of the oven. - Page 40 4. A pop up screen confirms completion of the download. Select the grey tick and remove the USB from the appliance. 5. Return to the main menu using the back key on the bottom left-hand corner of the screen. Merrychef conneX ® service and repair manual...
- Page 41 Magnetron(s) current draw. ▪ The diagnostics view screen can be accessed by selecting the button in the bottom right of the screen. 4. Selecting ‘Diagnose’ provides a QR code to access further assistance online. Merrychef conneX ® service and repair manual...
- Page 42 Display colour codes. Grey = Normal operation / standby Green = On / OK Blue = Off / OK / Selected Yellow = Warning, out of normal range Red = Warning, switched off Merrychef conneX ® service and repair manual...
- Page 43 Ambient temperature around the control circuitry. ▪ Number of individual recipe cook cycles. ▪ Percentage of ambient, chilled & frozen food products cooked. ▪ Time breakdown of oven operation by day, week or month. ▪ Merrychef conneX ® service and repair manual...
- Page 44 (off / 33%, 50%, 85% / 100% / off). 6. Select the convection fan and check if it is operating correctly. When increasing the fan power gradually, in 10% increments, to 100% the fan noise should become louder. Merrychef conneX ® service and repair manual...
- Page 45 Information at the top of the screen indicates: Demo mode (if selected) ▪ Mode of operation ▪ Cooking programs (changes) locked or ▪ unlocked. Wi-Fi connectivity (displayed when ▪ unable to connect) Current time ▪ Merrychef conneX ® service and repair manual...
-
Page 46: Fault Finding
When the oven switch is switched ON, by tapping the centre of the screen, the display scrolls through the Welbilt brands before settling on the Merrychef Screen. The safety relays energise and then the auxiliary components start running –... - Page 47 Please adhere to all best safety practices by Merrychef and ensure the High Voltage circuitry has been successfully discharged before attempting any works on or around the Merrychef unit while the panels are off. Further information can be found at: https://www.merrycheftechnical.com/...
- Page 48 Message 3 • if Ambient >70°C >2Mins, air filter removed and replaced. "E103 ambient overheat. Please contact your Merrychef service partner to resolve". Restart button displayed. E104: cavity The safety Manually reset the cavity overheat thermostat at the rear of the oven.
- Page 49 UI displays: E106 or above 300 cavity overheat during a cook detected. Please cycle. contact your Merrychef service partner to resolve. E107: Comm E107 observed Ensure cable connections are secure, especially the X523 connected cable between Error. in the event log the IO and the UI boards.
- Page 50 Check the error log. If the cavity temp reads 328 C the sensor was open circuit or contact your not connected. A closed circuit will register the IO board temperature and will not Merrychef service generate the E111 error. partner to resolve.
- Page 51 Message 3 • if Mag stat >125°C, open circuit, >2minutes, post air filter removal "E117 Magnetron overheat " recovery unsuccessful, please contact your Merrychef service partner to resolve." Restart button displayed E-1 Unknown Internal error.
- Page 52 No user action registered within 10 seconds. Door switch circuit remained. open circuit, check door switches & connections E97: Recommission Door Open Failed No user action registered within 10 seconds. Door switch circuit remained. closed circuit, check door switches & connections Merrychef conneX ® service and repair manual...
-
Page 53: Safe Working When Testing Components
If the customer requires PAT testing of the Merrychef equipment, we suggest this is limited to a) earth continuity and b) insulation resistance (measured at ~ 500 V DC). All Merrychef commercial combination microwave ovens are classified as CLASS 1 for the purpose of testing. - Page 54 WARNING Never touch the component under test while tests are being carried through. Call a trained authorized Merrychef service agent if the oven under test still fails in order to check all earth connections ▪ and disconnect the radio interference filters before repeating the test if required.
- Page 55 Replace the faulty HV component if required (see High voltage components in section 5.8). ▪ Note: Opening the door during the test will stop the test. Reselect the test to run again. On completion of the test, specify the result by selecting ‘Pass’ or ‘Fail’. Merrychef conneX ® service and repair manual...
- Page 56 10. On completion of the test, specify the result by selecting ‘Pass’ or ‘Fail’. Note: Opening the door during the test will stop the test. Reselect the test to run again. Merrychef conneX ® service and repair manual...
- Page 57 On completion of the test, specify the result by selecting ‘Pass’ or ‘Fail’. Note: Opening the door during the test will stop the test. Reselect the test to run again. This test only generally recommended for workshop activities. Merrychef conneX ® service and repair manual...
-
Page 58: Recommissioning Test
If the ‘recommission test’ tab is greyed out, the oven is above 100°C and will not allow to the test to commence until the oven is cooled down. Merrychef conneX ® service and repair manual... - Page 59 When all the tests have been successfully performed the display shows the recommission test has passed. Select the lower green check mark to confirm. In the event of a recommission test failure, the detail will be recorded in the Error Log. Rectify any error and repeat the recommission test. Merrychef conneX ® service and repair manual...
- Page 60 Model Preheat Display Thermometer Action 251°C or higher Recalibrate conneX ® 250°C *255°C 244°C or lower Recalibrate 245°C to 250°C No action required Merrychef conneX ® service and repair manual...
- Page 61 10. If the temperature is still unstable repeat steps to make safe and replace the IO board (see Section 6.10 Replacing the IO board). 11. Refit the panels of the casing. 12. Switch ON the appliance and repeat the test procedure as described above. Merrychef conneX ® service and repair manual...
-
Page 62: High Voltage Components (Casing Removed)
Primary winding and chassis. Pass if reading is over 10 MΩ Filament winding and chassis. Pass if reading is over 10 MΩ NOTE: One end of the high voltage (secondary) winding is connected to the chassis, so this is not tested. Merrychef conneX ® service and repair manual... - Page 63 5. Using a megger/insulation tester, test the insulation resistance between both terminals and the metal outer case of the high voltage capacitor. The test is passed if the megger/insulation tester display reads over 100 MΩ. Merrychef conneX ® service and repair manual...
-
Page 64: Mains Voltage Components (Casing Removed)
Door closed (cooking), speed as specified by program or setting up to a maximum of 5200 rpm (100% @ 10V). ▪ Convection fan: motor speed controller LED status display. The VFD contains a diagnostic indicator (Red LED) to display the drives operational status. Merrychef conneX ® service and repair manual... - Page 65 Onboard Fuse Blown 2 then 3 Fan motor off (switched off after 55ms) Convection fan: motor speed controller control voltages & link positions. Oven conneX 12e Variant Input % Volts Link positions are factory pre-set based on the model of convection fan used in the conneX ovens. The link positions must not be altered without express instruction from Merrychef.
-
Page 66: Kitchenconnect ® Components
M7 hex socket wrench / nut runner M7 hex open / ring spanner M8 hex socket wrench / nut runner M10 hex socket wrench / nut runner M14 hex socket wrench / spanner Merrychef conneX ® service and repair manual... -
Page 67: Overview
6 Replacing components Back to contents > Overview. View: left hand side – conneX ® 12e. View: right hand side – conneX 12e. ® Merrychef conneX ® service and repair manual... - Page 68 USB socket for uploading and downloading firmware & files VFD supply fuse 3A fuse VFD supply protection from excessive current draw Ethernet port Ethernet port for network connection VFD safety relay Convection fan motor IP switched relay supplying VFD power Merrychef conneX ® service and repair manual...
-
Page 69: Removing / Fitting The Casing
Move the back panel up to remove remove them. Important: If the optional ethernet cable is fitted, disconnect before removing the back panel. 4. Ensure the high voltage capacitors are discharged before commencing any work. Merrychef conneX ® service and repair manual... -
Page 70: Removing / Fitting The Door Assembly And Hinges
The appliance is cool. ▪ Additional PPE, Mask & Gloves for handling insulation material. ▪ Remove the top and side panels. ▪ Ensure the high voltage capacitors are discharged before commencing any work. ▪ Merrychef conneX ® service and repair manual... - Page 71 Check that the door seal firmly meets the cavity frame all the way around once closed. A poor sealing door can ▪ cause issues with the oven’s operation. Check the door switches are correctly adjusted and operating freely. ▪ Merrychef conneX ® service and repair manual...
-
Page 72: Adjusting The Door Microswitches/Interlocks
Adjust the microswitches after refitting the door or replacement of the door seal. ▪ Adjust the microswitches after refitting or replacing old with new door switches. ▪ Adjust the microswitches after determining incorrect operation during route service and maintenance. ▪ Merrychef conneX ® service and repair manual... - Page 73 The switch bracket can now be rotated around the top screw. Move the microswitch bracket until it just operates the switch. As soon as the primary door switch (SW3) closes, nip up the two flange head nuts to 2.1Nm. Merrychef conneX ® service and repair manual...
- Page 74 SW3 closes third. ▪ Oven door closed. Opening the door: SW3 opens first. ▪ SW2 opens second. ▪ SW1 closes third. ▪ Right-Hand Side Left-Hand side Outer Switch Inner Switch (closest to cooling fan) Merrychef conneX ® service and repair manual...
-
Page 75: Replacing The Door Gasket
4. Apply a continuous thin bead 5. Place the new door seal over the door seal onto the door. Ensure it is level of Merrychef approved high door in the same place as the old and square. Wipe off any excess sealant... -
Page 76: Replacing A Magnetron
The magnetron is located on top of the cavity and is fixed to the waveguide, which in turn are fixed to the top of the cavity. The conneX 12e comprise of a single magnetron & waveguide located on the top centre of the cavity. - Page 77 Ensure nothing has become trapped under the magnetron mounting points (e. g. insulation material) while fitting the magnetron. This can lead to microwave leakage. NOTICE: If the electric connections have not been restored properly this may lead to malfunction/damage of the oven. Merrychef conneX ® service and repair manual...
-
Page 78: Replacing The Cooling Fan
Follow the steps in the reverse order to fit the cooling fan, torquing the cooling fan bracket nuts to 2.1Nm. Check to The door interlock switch operation as detailed in section 6.5. NOTICE: If the electrical connections have not been restored properly this may lead to malfunction/damage of the oven. Merrychef conneX ® service and repair manual... - Page 79 Looking from the front, top right above the IO Board and bottom left. Lift the front panel upwards and out to detach from the cavity frame. Disconnect the electrical connections; X523 on the IO board, the USB, ethernet and speaker loom connectors. Merrychef conneX ® service and repair manual...
- Page 80 Refit all oven panels, plug in the oven, and switch on. NOTE- If the oven is to be connected to an external WIFI box then switch 4 should be switched over to the on position. Merrychef conneX ® service and repair manual...
- Page 81 Check the IO and UI versions are the latest release. If not, execute a firmware update using the latest versions. See section 4.5 for details. Run a recommission test in the Service Settings. Merrychef conneX ® service and repair manual...
-
Page 82: Replacing The Io Board (Input Output Board)
Remove the PM (Personality Module) from the IO Board and place safety aside to refit to the replacement IO. Jumper Positions NOTICE: Do not use tools to remove or refit the Personality Module. Merrychef conneX® service and repair manual... -
Page 83: Pm (Personality Module) Replacement
Follow the screen prompts to update the IO firmware if requested. Check the IO and UI versions are the latest release. If not, execute a firmware update using the latest versions. See section 4.5 for details. Recommission the oven in service settings. Merrychef conneX ® service and repair manual... -
Page 84: Replacing The Stirrer Motor And Stirrer Assembly
Unfasten the two M7 Hex screws at the front of the jet/impinger plate. Drop down the jet/impinger plate slightly at the front and slide forward to release to two rear tabs. The plate will then drop down and forward to remove. Merrychef conneX ® service and repair manual... - Page 85 Tighten the partition plate screws to 2.1 Nm of torque. Tighten the jet/impinger plate screws to NO more than 1.8 Nm of torque. Tighten the stirrer motor pozidrive screws to 1Nm torque. Merrychef conneX ® service and repair manual...
-
Page 86: Replacing The Convection Fan Motor
Removing the convection fan motor assembly will also give access to the upper & lower catalytic converters and the heating element. CAUTION: Wear personal protective equipment to protect your fingers when using the knife. Merrychef conneX ® service and repair manual... -
Page 87: Replacing A Transformer (High Voltage)
Ensure the flange nuts holding the convection motor in place have been torqued to 2.1Nm and are torqued diagonally. 6.14 Replacing a transformer (high voltage). Component The conneX 12e has one HV transformer, at the rear of the oven, under the cavity. Tools required. - Page 88 It is imperative that the electrical connections are replaced correctly. If the electric connections have not been restored properly this may lead to malfunction/damage to the oven. HV Transformer Wire Number 50Hz 60Hz ➔ 200V 208V ➔ 230V 240V ➔ Merrychef conneX ® service and repair manual...
-
Page 89: Removing The Convection Fan Motor Speed Controller
Ensure the wiring of the speed controller is in accordance with the diagram shown. From Convection Motor Link From IO Board Note: Ensure the replacement board does not have a jumper (link) fitted to the J5 position. Merrychef conneX ® service and repair manual... -
Page 90: Replacing The Heating Element
Use a 7mm spanner to hold the terminal on the element and loosen the M7 hex nut fixing the wiring connection. Follow the same procedure re-connecting the wiring and tighten to 2 Nm. Merrychef conneX service and repair manual ®... -
Page 91: Overview - Further Components
There are two, metal bars in the cavity to support the cook plate. Protective earth – connections to casing. M8 nut Equipotential bonding connection. M8 nut (not fitted to some country specific versions) Merrychef conneX ® service and repair manual... - Page 92 Steam Vent (Exhaust pipe). The straight steam vent runs from the rear of the cavity directly out of the rear of the oven, secured by a single M4 flange nut and gasket torqued to 2.1Nm. Merrychef conneX ® service and repair manual...
- Page 93 The cavity overheat thermostat switch is located at the rear of the oven, mounted on the left-hand side of the magnetron air flow ductwork, fitted by two M3 x 4 CSK Philips SS Screws and flat washers torqued to 1Nm. The manual reset button is now directly accessible from the rear of the oven. Merrychef conneX ® service and repair manual...
- Page 94 The green LED is illuminated to show correct functionality. Capacitor (high voltage). The high voltage capacitor is located on top of the cavity and is fixed by a sheet metal bracket and a pozidriv (PZ2) screw. 43 to Diode Merrychef conneX ® service and repair manual...
- Page 95 2.1 Nm. Air Filter Microswitch. The air filter microswitch is located on the bottom front left-hand side of the cavity frame by a M5.5 hex nut and wired directly to the IO Board (X511). Merrychef conneX ® service and repair manual...
- Page 96 UI, by two M7 hex nuts and connected directly to the UI loom. Air Filter Securing Magnet. The air filter is secured in position by two magnets on the cavity assembly. Merrychef conneX ® service and repair manual...
- Page 97 F3 F4 F5 F7 Is located next to the SMPS on the magnetron duct. Convection Fan Safety Relay. The convection fan safety relay is located next to the DF on the cavity base. Merrychef conneX ® service and repair manual...
- Page 98 6 Replacing components Back to contents > Rear Panel Fixings. Ethernet Port. Merrychef conneX ® service and repair manual...
-
Page 99: Technical Data Summary Sheet
Convection Fan Motor Assembly E105 Supply frequency out of range by 2Hz 19 Door Switch Bracket E106 Cavity 75 C above setpoint or 300 conneX 12e Heater Element UI to panel E107 Communication fault between UI & IO Magnetron <1 IO Bracket... -
Page 100: Circuit Boards And Diagrams
LD3 – RH Magnetron, yellow = on LD5 - MW voltage selection LD28 – Cooling Fan, on / pulsing relay, yellow = 200/208 VAC HV yellow (varying with wattage) transformer tapping LD4 – LH magnetron, yellow = on Merrychef conneX service and repair manual ®... - Page 101 X500 X515 X402 X516 X532 X530 X413 X531 X534 X403 X535 X533 X517 X600 X540 X403 X541 X412 X518 X401 X200 X210 X101 X100 X410 X113 X112 X110 X411 X560 X519 X520 X521 Merrychef conneX ® service and repair manual...
- Page 102 Wire 18 + Wire 19 - X510 Not used – Linked out (jumper) X511 Air Filter micro switch X512 Cavity overheat thermostat. Wires 70 & 69 X513 Magnetron overheat thermostat. Wires 72 & 71 Merrychef conneX ® service and repair manual...
- Page 103 Not used X534 Not used X535 Not used X540 Not used X541 Not used X560 Not used X600 Chassis ground Note: IO Board test points (TP1 to TP58) are for factory build procedures only. Merrychef conneX service and repair manual ®...
- Page 104 L / L1 Microwave, Heater & Control E / GND Circuit Filter N / L2 N / L2* N/L2 Door switches – LV safety interlock circuit Overheat thermostats – ELV safety circuit. 800W Ovens Merrychef conneX service and repair manual ®...
- Page 105 IO BOARD Not Used Stirrer Motor HV Transformer Not Used Notes: Standard power versions IO Board LV Connections. X514. Link fitted. X112. Pins 1 & 2 not used X411. Not used Jumper (Link) Merrychef conneX service and repair manual ®...
- Page 106 7 Circuit boards and diagrams Back to contents > 7 CIRCUIT B OARD S A ND DIAGRA MS Magnetron Over-Heat Stirrer Motor Stat (NC Microwave Circuit Wiring Magnetron Merrychef conneX ® service and repair manual...
- Page 107 ® Model: Merrychef conneX Service procedures. All tests to be carried out by a trained Merrychef technician. • Ensure all documented safety procedures are followed for each individual task. • Refer to the relevant section within this manual for task details.
- Page 108 Follow the onscreen instructions and record result. 18. Come out of the service and setting modes. Pre-heat the oven and cook one item of food from the operators’ menu. Merrychef conneX™ service and repair manual...
- Page 109 . . . Item Description Commissioning Operator Go to the Merrychef technical website for part numbers..Check installation and surroundings as per installation instructions..Check cook baskets for damage and For operator to check.
- Page 110 WELBILT UK LT D., A SHBOURNE HOUSE, T HE GUILDWAY, OLD POR TSMOU T H ROA D, GUILDF ORD, GU 3 1LR , UK . | +1 4 4 (0 ) 14 83 4 6 49 0 0 | W W W.MERRYCHEF.COM...
Need help?
Do you have a question about the conneX 12e and is the answer not in the manual?
Questions and answers