
Subscribe to Our Youtube Channel
Related Manuals for PEUGEOT XS1P52QMI-4


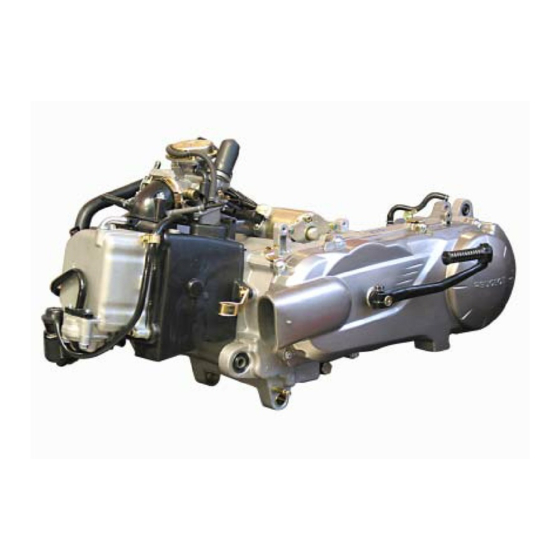
Summary of Contents for PEUGEOT XS1P52QMI-4
- Page 1 Sales division Technical network leadership WORKSHOP MANUAL 125/151 CC 4-STROKE ENGINE 2 VALVES...
-
Page 3: Table Of Contents
Removal of the throttle valve........................20 Removal of the float, needle valve and jets....................20 Removal of the mixture screw ........................22 Removal of the deceleration enrichment device ..................22 Reproduction or translation, even partial, is forbidden without the written consent of Peugeot Motocycles... - Page 4 Checking the valve clearance ........................41 CRANKCASE ..............................42 Removal of the crankshaft ........................42 Checking the crankshaft and conrod assembly ..................43 Replacing the lip seal..........................43 Fitting the conrod and crankshaft assembly.....................44 Reproduction or translation, even partial, is forbidden without the written consent of Peugeot Motocycles...
-
Page 5: Products Danger Symbols Used
Used batteries. collection point. People's safety can be seriously affected if Compulsory Operation that can be the recommendations are not fully gloves dangerous for people. respected. Reproduction or translation, even partial, is forbidden without the written consent of Peugeot Motocycles... - Page 6 Indicate the specific procedures that shall New part Use a new part. be followed in order not to damage the vehicle. Reproduction or translation, even partial, is forbidden without the written consent of Peugeot Motocycles...
-
Page 7: Characteristics
0.95 l (0.7 I at oil change) Crankcase SAE 5W40 Synthetic Minimum grade: API SJ 0.18 l (0.17 I at oil change) Relay box SAE 80W90 Minimum grade: API GL4 Reproduction or translation, even partial, is forbidden without the written consent of Peugeot Motocycles... -
Page 8: Special Important Points
The clips are specific, they must always be changed each time they are removed and replaced with new genuine parts clips. Petrol is highly inflammable, do not smoke in the working area and avoid proximity to flames or sparks. Reproduction or translation, even partial, is forbidden without the written consent of Peugeot Motocycles... -
Page 9: Tightening Torques
45 Nm Turbine 10 Nm Stator 10 Nm Engine speed sensor 6 Nm Drive pulley 55 Nm Driven pulley 45 Nm Clutch plate and shoes 55 Nm Reproduction or translation, even partial, is forbidden without the written consent of Peugeot Motocycles... -
Page 10: Special Tools
759788 tool Bearing Spacer 755585 801682 758008 extractor tool adaptor Engine Piston loc- 756575 802349 mount adap- 64765 king fork ter* (*) New or modified tool Reproduction or translation, even partial, is forbidden without the written consent of Peugeot Motocycles... -
Page 11: Standard Tools
18 mm 10 to 50 Nm Type : Facom U.49PJ3 Type : Facom J.208A50 Automatic resetting type torque wrench 40 à 200 Nm Type : Facom S.208A200 Reproduction or translation, even partial, is forbidden without the written consent of Peugeot Motocycles... -
Page 12: Operation
- Remove the strainer cap (1) and clean the strainer (2). Tightening torque: 15 Nm. Every time oil is changed, the filter (2) must be cleaned and the O-ring changed (3). Reproduction or translation, even partial, is forbidden without the written consent of Peugeot Motocycles... -
Page 13: Primary Transmission
- Remove the fixed flange. 752237 Tightening torque: 55 Nm. - Pull the belt aside (3). - Remove the drive pulley (4) with the guide hub (5). Reproduction or translation, even partial, is forbidden without the written consent of Peugeot Motocycles... -
Page 14: Removal Of The Driven Pulley
Checking the drive belt - Measure the width of the belt (A). Minimum width: 17.5 mm. - Make sure the belt is not cracked. Reproduction or translation, even partial, is forbidden without the written consent of Peugeot Motocycles... -
Page 15: Removal Of The Clutch Lining Assembly
752361 assembly using tool 758008 equipped with the protection spacer P/N 801682. - Remove the nut using spanner P/N 752361. - Slacken tool P/N 758008. 801682 Reproduction or translation, even partial, is forbidden without the written consent of Peugeot Motocycles... -
Page 16: Refitting The Clutch Lining Assembly
- Fit the drive pulley with its guide hub onto the connecting rod. - Fit and tighten the nut. Tightening torque: 55 Nm. - Install the transmission cover (8 screws). Tightening torque: 10 Nm. Reproduction or translation, even partial, is forbidden without the written consent of Peugeot Motocycles... -
Page 17: Removal Of The Starter System
- Remove the lock ring (3), using circlip pliers. - Remove the washer. - Remove the elastic washer. - Remove the starter gear sector (1) and the washer (4) from the drive train cover. Reproduction or translation, even partial, is forbidden without the written consent of Peugeot Motocycles... -
Page 18: Fitting The Starter System
(2). - Position the pin (6) on the kick starter drive piece in the cover housing (D). Reproduction or translation, even partial, is forbidden without the written consent of Peugeot Motocycles... -
Page 19: Secondary Transmission
Make a note of the way the secondary shaft pinion is installed. - The primary shaft can be drifted out of the casing using a mallet (5). Reproduction or translation, even partial, is forbidden without the written consent of Peugeot Motocycles... -
Page 20: Replacing The Bearings Of The Relay Box
- While the casing is expanded fit the new bearing fully home in its housing. - Using fitting tool P/N 759788, fit a new lightly greased gasket (2). Reproduction or translation, even partial, is forbidden without the written consent of Peugeot Motocycles... -
Page 21: Carburettor
- Locate the position of the choke (1) and then remove it (2 screws). - Remove the choke holder (2) (2 screws). - Remove the O-ring (3). Reproduction or translation, even partial, is forbidden without the written consent of Peugeot Motocycles... -
Page 22: Removal Of The Throttle Valve
Check that the membrane is in good condition. Removal of the float, needle valve and jets - Remove the float chamber and its O-ring (4 screws). Reproduction or translation, even partial, is forbidden without the written consent of Peugeot Motocycles... - Page 23 - Remove the needle well (9). Check the condition of the needle valve and the needle valve seat (A). Check the condition of the float chamber O-ring. Reproduction or translation, even partial, is forbidden without the written consent of Peugeot Motocycles...
-
Page 24: Removal Of The Mixture Screw
- Remove the mixture screw and its spring. - Remove the washer and the O-ring (2). Removal of the deceleration enrichment device - Remove the cover (2 screws). Reproduction or translation, even partial, is forbidden without the written consent of Peugeot Motocycles... - Page 25 - Re-install all the other components and, if necessary, when starting the engine, readjust according to the values indicated on the technical data card. Reproduction or translation, even partial, is forbidden without the written consent of Peugeot Motocycles...
-
Page 26: Magneto Flywheel/Freewheel
- Remove the volute (2) (6 screws). - Remove the cylinder cover. Right-hand side (3) (4 screws). - Remove the turbine (4 screws). Tightening torque: 10 Nm. Reproduction or translation, even partial, is forbidden without the written consent of Peugeot Motocycles... - Page 27 - Remove the sheath holder (4). - Remove the stator and sensor assembly (3) (2 screws each). • Stator: Tightening torque: 10 Nm. • Sensor: Tightening torque: 6 Nm. Reproduction or translation, even partial, is forbidden without the written consent of Peugeot Motocycles...
-
Page 28: Removal Of The Overrunning Clutch
- Using tool P/N 800673, remove the notched 800673 nut and the washer of the overruning clutch. Tightening torque: 90 Nm. - Remove the overrunning clutch. Reproduction or translation, even partial, is forbidden without the written consent of Peugeot Motocycles... -
Page 29: Checking The Overrunning Clutch
- Remove the lip seal. - Using fitting tool P/N 756668, fit a new lightly greased gasket (1). 756668 Oil pump - Remove the plate (2 screws). Reproduction or translation, even partial, is forbidden without the written consent of Peugeot Motocycles... - Page 30 MAGNETO FLYWHEEL/FREEWHEEL - Remove the circlip (1). - Remove the oil pump gear (2). - Remove the pin. - Remove the oil pump (2 screws). Reproduction or translation, even partial, is forbidden without the written consent of Peugeot Motocycles...
-
Page 31: Cylinder Head/Cylinder/Piston
- Using a wrench, turn the crankshaft in the direction of operation to as to line up the marks on the camshaft gear (A) with the cylinder head gasket face. Reproduction or translation, even partial, is forbidden without the written consent of Peugeot Motocycles... - Page 32 - Remove the camshaft gear (6) (2 screws). - Tie a wire to the timing chain in order to prevent it from falling into the crankcase. Reproduction or translation, even partial, is forbidden without the written consent of Peugeot Motocycles...
- Page 33 - Remove the 4 nuts. - Remove the plate (9). - Remove the cylinder head. - Removal of the metal gasket (10) and the 2 centring pillars (11). Reproduction or translation, even partial, is forbidden without the written consent of Peugeot Motocycles...
-
Page 34: Removal Of The Camshaft And/Or Rockers
- Remove the pins from the rockers using a 5 mm screw (2). - Remove the inlet (3) and exhaust (4) rockers. - Remove the springs (5). - Remove the camshaft (6). Reproduction or translation, even partial, is forbidden without the written consent of Peugeot Motocycles... -
Page 35: Removal Of The Valves Or Valve Stem Seals
- Remove the 2nd valve in the same way. When removing a valve, always change 758596 the valve stem seal. - Using tool P/N 758596, fit a new valve stem seal. Reproduction or translation, even partial, is forbidden without the written consent of Peugeot Motocycles... - Page 36 (Use lithium soap grease). Seals and valve stems must be lubricated. Reproduction or translation, even partial, is forbidden without the written consent of Peugeot Motocycles...
-
Page 37: Removal Of The Cylinder / Piston
- Remove the base gasket (2) and the 2 centring pillars (3). - Remove one of the circlips (4) with pliers. - Remove the gudgeon pin. - Remove the piston. Reproduction or translation, even partial, is forbidden without the written consent of Peugeot Motocycles... -
Page 38: Checking The Cylinder
• Top compression ring gap: 0.2 to 0.4 mm. • Compression ring gap: 0.25 to 0.4 mm. • Oil control ring gap: 0.2 to 0.7 mm. Reproduction or translation, even partial, is forbidden without the written consent of Peugeot Motocycles... -
Page 39: Installing The Piston Rings On The Piston
- Fit the gudgeon pin and circlips. - The circlip gaps (1) must face upwards or downwards, but under no circumstances to the side. Use new rings. Reproduction or translation, even partial, is forbidden without the written consent of Peugeot Motocycles... -
Page 40: Fitting The Cylinder
- Fit the chain pad (1). - Fit the 2 guiding pillars (2) and the metal gasket on the cylinder (3). Reproduction or translation, even partial, is forbidden without the written consent of Peugeot Motocycles... -
Page 41: Setting The Timing
- If necessary, dislodge the gear from the camshaft without removing it and move the chain around the gear on the required side. - Fit the 2 screws. Tightening torque: 12 Nm. Reproduction or translation, even partial, is forbidden without the written consent of Peugeot Motocycles... -
Page 42: Checking The Timing
- Using a wrench, turn the crankshaft in the direction of operation to as to line up the marks on the camshaft gear (B) with the cylinder head gasket face. Reproduction or translation, even partial, is forbidden without the written consent of Peugeot Motocycles... -
Page 43: Checking The Valve Clearance
• At the intake a 0.15 mm feeler gauge shouldn't go. • At the exhaust a 0.15 mm feeler gauge shouldn't go. - On the contrary, if the fealer gauge goes, reset the clearances. Reproduction or translation, even partial, is forbidden without the written consent of Peugeot Motocycles... -
Page 44: Crankcase
- Disengage the timing chain from the crankshaft gear. - Removing the the cranshaft and conrod assembly. - Remove the timing chain and notice its direction of rotation. Reproduction or translation, even partial, is forbidden without the written consent of Peugeot Motocycles... -
Page 45: Checking The Crankshaft And Conrod Assembly
80 mm 40 mm Replacing the lip seal - Remove the lip seal. - Using fitting tool P/N 757990, fit a new lightly greased gasket (1). 757990 Reproduction or translation, even partial, is forbidden without the written consent of Peugeot Motocycles... -
Page 46: Fitting The Conrod And Crankshaft Assembly
- Fit the 2 guiding bushes (3) to the LH casing and a new paper gasket (4), do not use oil or grease. - Place the RH casing over the LH casing assembly. Reproduction or translation, even partial, is forbidden without the written consent of Peugeot Motocycles... - Page 47 CRANKCASE - Fit and tighten the 2 clamping bolts. Tightening torque: 12 Nm. - Trim the casing gasket in (A). Reproduction or translation, even partial, is forbidden without the written consent of Peugeot Motocycles...
- Page 48 P/N MA0020GB In our permanent concern to make improvements PEUGEOT MOTOCYCLES reserves the right to suppress, modify, or add any reference mentioned. DC/APV 06/2010 (non contractual pictures)
Need help?
Do you have a question about the XS1P52QMI-4 and is the answer not in the manual?
Questions and answers