
Related Manuals for Honeywell BW Solo


Summary of Contents for Honeywell BW Solo
- Page 1 Honeywell BW Solo User Manual Honeywell Solo User Manual Rev. A October 2018 P/N: G05-4001-000...
- Page 2 • Calibration intervals and bump test procedures may vary due to national legislation. • Honeywell recommends using calibration gas cylinders containing the gas that is appropriate to the sensor you are using, and in the correct concentration.
-
Page 3: Table Of Contents
5. Battery ..............................17 5.1. Battery Status ..........................17 5.2. Battery Replacement ........................17 6. Turning The Honeywell BW Solo On & Off ..................19 6.1. Turning The Honeywell BW Solo On ..................19 6.2. Turning The Honeywell BW Solo Off ..................19 6.3. - Page 4 14.3. Replacing/Servicing Other Parts ....................43 15. Firmware Update ..........................43 16. Year Of Manufacture ........................... 43 17. Sensors & Settings ..........................44 18. Troubleshooting ........................... 46 19. Honeywell BW Solo Specifications ...................... 47 20. Limited Warranty and Limitation of Liability ..................49...
- Page 5 Honeywell BW Solo User Manual WARNINGS This Manual must be carefully read by all individuals who have or will have the responsibility of using, maintaining, or servicing this product. The product will perform as designed only if it is used, maintained, and serviced in accordance with the manufacturer’s instructions.
- Page 6 Honeywell Analytics recommends performing a calibration at least once every 180 days (6 months). • Any rapid up-scaling reading followed by a declining or erratic reading may indicate a gas concentration beyond the upper scale limit, which can be hazardous.
- Page 7 Honeywell BW Solo User Manual Caution This device complies with Part 15 of the FCC Rules / Industry Canada license-exempt RSS standard(s). Operation is subject to the following two conditions: (1) this device may not cause harmful interference, and (2) this device must accept any interference received, including interference that may cause undesired operation.
- Page 8 Honeywell BW Solo User’s Guide Operation Area and Conditions Safety Certifications Class I, Division 1, Groups A,B,C,D T4; Class I, Zone 0, AEx/Ex ia IIC T4 Ga -40°C≤ Tamb ≤ 60°C ATEX: Sira 18ATEX2243, 2460 II 1G I M1 / Ex ia IIC T4 Ga / Ex ia I Ma Tamb -40°C to 60°C...
-
Page 9: Standard Contents
• 2. General Information Honeywell BW Solo is easy to operate — even if you’re wearing gloves. Using this button or the Honeywell SafetySuite Device Configurator software, you can easily configure set points, latching alarms, and other parameters. You can also access measurements for short-term exposure limit... -
Page 10: User Interface & Display Overview
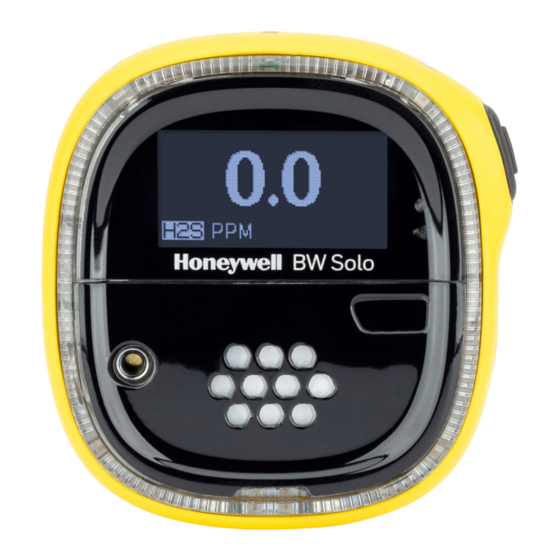
Honeywell BW Solo User Manual 3. User Interface & Display Overview The BW Solo has a single button for on/off, parameter viewing, and programming functions. The display is backlit when you press the button. Front Readings Display LED Visible Alarm Band... -
Page 11: Out-Of-Box Experience (First Time Use Only)
Press and hold the button for 3 seconds. When you power the unit on, it counts down, 3-2-1. LEDs flash, the vibration alarm shakes, and the audible alarm sounds, and the Honeywell logo then appears on the screen. After startup, the “Set language” screen is shown. -
Page 12: Status Indicator Icons
Honeywell BW Solo User Manual 3.2. Status Indicator Icons On-screen icons are used to indicate battery, bump, calibration and sensor status, as well as peak reading. The table below details how and when each icon is displayed. The triangular red LED located to the right of the screen illuminates to accompany these (it is active when the non- compliance feature is on). -
Page 13: Ble (Bluetooth Low Energy) Operation
However, you need a Honeywell real-time monitoring software license to transmit monitor alarm information from Honeywell Real-Time Monitoring software. 4.1. BLE Icons An icon is shown on the Honeywell BW Solo’s screen to show the status of BLE (Bluetooth Low Energy), including connectivity. Icon Explanation BLE connected. -
Page 14: Pairing With Smartphones
Open the Safety Communicator program. The app opens and begins scanning for nearby Bluetooth instruments. As instruments are found, they show up in the list. If the Honeywell BW Solo does not show up, click “Scan” so that it searches for the instrument. - Page 15 Honeywell BW Solo User Manual When the Honeywell BW Solo is found, it shows up in the list, represented by its image and serial number: Click on the Honeywell BW Solo device that displays the serial number of the unit you are trying to connect.
- Page 16 Honeywell BW Solo User Manual If it pairs successfully, a confirmation message is shown: If you want to pair another instrument, click “Pair another.” Otherwise, click “Done.” The Honeywell BW Solo is now sending data to Safety Communicator.
-
Page 17: Battery
Honeywell BW Solo User Manual For further instructions, consult the Safety Communicator app. If you plan to use Honeywell real- time monitoring software, consult the relevant User Manual. 5. Battery Always make sure the battery has enough power before using it. Only use this battery: 2/3AA 3.6V 1.65Ah Lithium battery (P/N: BWS-BAT01). - Page 18 Honeywell BW Solo User Manual Turn over the battery door, remove the old battery, and then press the new battery into place. Note the polarity (+/- orientation). Turn over the battery door and align the battery over its compartment. Then press it into the instrument.
-
Page 19: Turning The Honeywell Bw Solo On & Off
A Honeywell logo appears first, followed by a progress bar, and then the main reading display. Note: The instrument checks for a critical low battery and will shut down if it is too low. It also checks for forced bump or forced calibration if the function is enabled and if bump or calibration is due. -
Page 20: Bump Status
Honeywell BW Solo User Manual 6.4. Bump Status Note: When forced bump and calibration are enabled, the instrument will power down if it is not bump tested or calibrated. This icon is shown when less than 12 hours remains before a bump test should be performed. -
Page 21: Navigation
Honeywell BW Solo User Manual 7. Navigation All navigation is done by pressing the single button on the Honeywell BW Solo. Here are the basic “rules” of navigation on the instrument: Power On 3-second hold Power Off 5-second hold from the main screen... -
Page 22: Main Navigation
Honeywell BW Solo User Manual 7.2. Main Navigation Start at the main screen and click the button twice in rapid succession (similar to a double mouse-click) to start. The first option you see is “>Information”. Step through the other top-level options one click at a time. -
Page 23: Navigation: Information Menu
Honeywell BW Solo User Manual 8. Navigation: Information Menu Basic navigation of the Honeywell BW Solo Information menu allows you to step through screens to see settings and status. All are read-only information on a single screen, except for Event Log, which has its own navigation to show one or more events. -
Page 24: Event Log Navigation
Honeywell BW Solo User Manual 8.1. Event Log Navigation Note: The Event Log is not present in the Information navigation for BW Solo monitors sold in North America. The Event Log consists of a listing of events that have been captured. -
Page 25: Navigation: Settings
Passcode Exit • * Not included on the BW Solo Lite version. Also, the Mute function under Latching is not included on the BW Solo Lite. 9.1. Enter Settings Mode Note: A passcode can be required to access the settings menu. Setting an access restriction can be done using the Passcode submenu or by using an IntelliDoX with SafetySuite software. -
Page 26: Menus & Submenus In Settings Mode
Honeywell BW Solo User Manual 9.2. Menus & Submenus In Settings Mode Each Settings menu has a submenu of editable settings. All are accessed, changed, and saved in the same way: Press the button once to step from one setting to the next. -
Page 27: Language
Honeywell BW Solo User Manual 9.3. Language English is the default language, but other languages can also be selected for the instrument. You can select any of the languages for viewing onscreen information. Navigate to a language and press the button for 1 second to select it. -
Page 28: Setpoints
Honeywell BW Solo User Manual 9.8. Setpoints In Setpoints, you can assign setpoints for low alarm, high alarm, TWA, and STEL. • Range entry is assigned four digits and two decimal places. • Range entry is limited between 0000.01 and 9999.99 (determined by gas type). -
Page 29: Force Bump
Honeywell BW Solo User Manual For Manual Calibration: At the “Cal Now” screen, press and hold the button to begin the process. Follow the calibration instructions. Once the Calibration has passed, the user may proceed to the idle screen. If calibration fails, then the instrument will revert to the “Cal Now” screen. -
Page 30: Intelliflash
Honeywell BW Solo User Manual • Digits 0 to 9 • Upper-case characters A to Z • A space 9.15. IntelliFlash IntelliFlash verifies operation and compliance by flashing the green LED on the top of the instrument at intervals you select. This indicator notifies you that the monitor has no fault conditions and that all required maintenance, such as bump test and calibration, has been performed. -
Page 31: Non-Compliance Indicator Leds
By default, no passcode is required for access to the instrument’s settings. However, a 4-digit passcode can be set, which will prevent access to all settings. This can be set here or through Honeywell SafetySuite software. If a passcode is ever lost and the instrument cannot be accessed, contact Technical Support. - Page 32 Honeywell BW Solo User Manual Exit to the main menu...
-
Page 33: Zeroing
• Calibration intervals and bump test procedures may vary due to national legislation. • Honeywell recommends using calibration gas cylinders containing the gas that is appropriate to the sensor you are using, and in the correct concentration. - Page 34 Honeywell BW Solo User Manual Place the calibration cap over the Honeywell BW Solo, and hook the cap’s left clip to the corresponding groove of the detector and press down on the tab to snap the right clip into place.
-
Page 35: Calibrating
Click the button until you see Calibrate. Place the calibration cap over the Honeywell BW Solo, and hook the cap’s left clip to the corresponding groove of the detector and press down on the tab to snap the right clip into place. -
Page 36: Replacing The Filter & Sensor
Honeywell BW Solo User Manual IMPORTANT! If the sensor does not pass a full calibration, the sensor may need replacement. Do not use the instrument until it passes a full calibration. 13. Replacing The Filter & Sensor The sensor needs to be replaced when it is unable to be calibrated or behaves erratically. Also, the filter should be inspected periodically, and it should be replaced if it shows signs of accumulated dust, dirt, or debris. -
Page 37: Replacing The Filter
Use only the sensor specifically designed for the Honeywell BW Solo. Otherwise, the detector will not monitor the target gas. Ensure that the sensor cover is properly aligned to ensure a proper environmental seal. -
Page 38: 4-Series Sensor Replacement
Honeywell BW Solo User Manual Lift off the sensor frame and (if present) the rubber spacer. Pull the sensor straight out. Note the three sockets on the pcb for the sensor’s electrodes for the 4-Series sensor type and the three contact points for the 1-Series sensor type. - Page 39 Honeywell BW Solo User Manual...
-
Page 40: 1-Series Sensor Replacement
Honeywell BW Solo User Manual If not already done, place the metal insert inside the sealing ring, and then place that combination over the sensor, followed by the sensor frame over the spacer. Align the frame so that it fits properly around the audible alarm port. Tighten the screws to hold the frame in place. - Page 41 Honeywell BW Solo User Manual Invert the sensor so the three contacts are showing. Press the round part of the sensor into the sensor frame, aligning its notch with the matching part of the sensor frame’s back. Invert the sensor and stretch the O-ring around the perimeter of the sensor.
-
Page 42: Reinstalling The Cover
Honeywell BW Solo User Manual 13.5. Reinstalling The Cover To reinstall the cover, align it over the compartment, press upper part into place first, and then press the lower part until it clicks. IMPORTANT! Always calibrate the instrument after you replace the sensor. Failure to calibrate the instrument... -
Page 43: Maintenance
Note: If the Honeywell BW Solo is to be used with an IntelliDox, make sure the infrared (IR) sensor on the rear of the instrument is clean to ensure best communication quality. -
Page 44: Sensors & Settings
Honeywell BW Solo User Manual For example.: “9256 BWS 0A 18 30 00001” indicates that the instrument was manufactured in the 30th week of the year 2018. 17. Sensors & Settings The available sensors and their range, resolution, temperature range, and low and high setpoints... - Page 45 Honeywell BW Solo User Manual The following are available sensors for the Solo Lite (not available in North America): Range Resolution Temperature High Type Setpoint Setpoint 0-100 ppm -20 to +50° C/-4 to 122°F 10 ppm 15 ppm 0-1000 ppm 1 ppm -20 to +50°...
-
Page 46: Troubleshooting
Honeywell BW Solo User Manual 18. Troubleshooting If a problem occurs, refer to the solutions provided here. If the problem persists, contact Technical Support. Problem Possible Cause Solution The detector does not No battery. Install a battery. activate. Depleted battery. -
Page 47: Honeywell Bw Solo Specifications
Honeywell BW Solo User Manual 19. Honeywell BW Solo Specifications Size 2.74" H x 2.63" W x 1.42" D (69.7 x 66.7 x 36.1 mm) 1-Series sensor models 2.74" H x 2.63" W x 1.61" D (69.7 x 66.7 x 41 mm) 4-Series Series sensor models Weight 3.56 oz. - Page 48 Honeywell BW Solo User Manual Specifications continued Humidity 5% to 95% relative humidity (non-condensing) Refer to specific measurement operating range of different sensors Dust and Water IP66; IP68 1.2 meters for 45 minutes Resistance Certifications & Class I, Division 1, Groups A,B,C,D T4;...
-
Page 49: Limited Warranty And Limitation Of Liability
Honeywell Analytics’ warranty obligation is limited, at Honeywell Analytics’ option, to refund of the purchase price, repair or replacement of a defective product that is returned to a Honeywell Analytics authorized service center within the warranty period.
Need help?
Do you have a question about the BW Solo and is the answer not in the manual?
Questions and answers