Table of Contents
Advertisement
Quick Links
Advertisement
Table of Contents

Subscribe to Our Youtube Channel
Related Manuals for Chauvet DJ Festoon


Summary of Contents for Chauvet DJ Festoon
- Page 1 Festoon Festoon VW User Manual...
-
Page 2: Table Of Contents
AC Power ......................... Fuse Replacement ......................Power Linking......................... Mounting ........................Controller........................Mounting ........................Festoon/Festoon VW String / Extension String / Additional Festoon Strings....4. Operation....................... Control Panel Operation................... Menu Map ........................ Configuration (DMX) ....................DMX Personality and Starting Address................12 Set # of Festoon/Festoon VW Strings................ -
Page 3: Before You Begin
© Copyright 2019 Chauvet & Sons, LLC. All rights reserved. Electronically published by Chauvet in the United States of America. CHAUVET, the Chauvet logo, and Festoon/Festoon VW are registered trademarks or trademarks of Chauvet & Sons LLC. (d/b/a Chauvet and Chauvet Lighting) in the United States and other countries. -
Page 4: Safety Notes
ALWAYS terminate the open end of your string when being used outdoors or near moisture. • The Festoon/Festoon VW Strings may be exposed to rain and moisture, as long as the bulbs hang at a 90° angle to the ground. The Festoon/Festoon VW controller is not intended for outdoor use. -
Page 5: Introduction
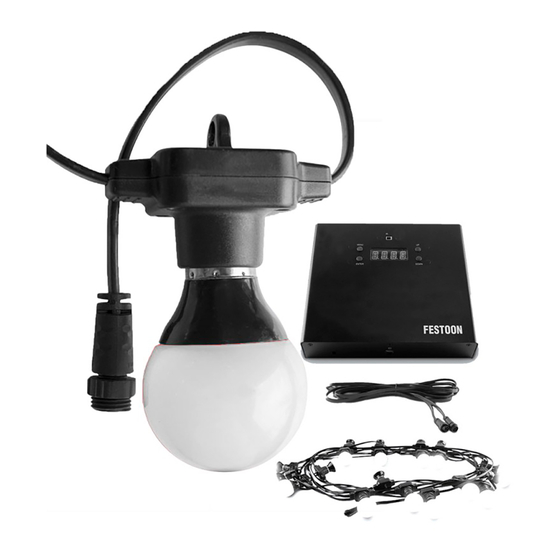
Display and Menu Buttons D-Fi USB Port Festoon String Port Power In/Out DMX Out DMX In Extension String Festoon/Festoon VW String Festoon/FestoonVW Bulb (in detail) Mounting Eyelet IP43 Rated Socket, Cabling and Plug Festoon/Festoon VW User Manual Rev. 2 Page 3 of 23... -
Page 6: Product Dimensions: String And Bulb
NTRODUCTION Product Dimensions: String and Bulb 29.5 in 749 mm 5 in 127 mm 590.5 in 15000 mm 561 in 14249 mm Page 4 of 23 Festoon/Festoon VW User Manual Rev. 2... -
Page 7: Product Dimensions: Controller
NTRODUCTION Product Dimensions: Controller 2 in 51 mm 7.5 in 191 mm 8.4 in 213 mm 6.7 in 17 cm Festoon/Festoon VW User Manual Rev. 2 Page 5 of 23... -
Page 8: Setup
ETUP AC Power The Festoon/Festoon VW controller has an auto-ranging power supply and it can work with an input voltage range of 100 to 240 VAC, 50/60 Hz. To determine the product’s power requirements (circuit breaker, power outlet, and wiring), use the current value listed on the label affixed to the product’s back panel, or refer to the product’s specifications chart. -
Page 9: Power Linking
Product Product Additional Products Depending upon how many Festoon/Festoon VW Strings you have connected, you can power link products. Use the chart below to configure your setup. 1 String - 13 products @ 120 V 24 products @ 230 V... -
Page 10: Mounting
Take care to site it away from potential water hazards, for example, avoid installing it where excessive humidity, water splatter or condensation may occur. Orientation The Festoon/Festoon VW controller may be mounted in any position; however, make sure adequate ventilation is provided around the product. Rigging •... -
Page 11: Mounting
Orientation The Festoon/Festoon VW String may be installed using various ways to achieve stunning looks, but the bulbs MUST hang at a 90° perpendicular angle to the ground. This will prevent rain or moisture from collecting in the lamp holders. - Page 12 IP rated cap. Festoon/Festoon VW Bulbs MUST hang at a 90 degree perpendicular angle to maintain an IP43 rating. Page 10 of 23 Festoon/Festoon VW User Manual Rev. 2...
-
Page 13: Operation
3 Festoon/Festoon VW Strings (180CH DMX Led3 personality) Each Festoon/Festoon VW controller can control up to 3 Festoon/Festoon VW strings. Additional controllers will need to be purchased for larger displays. Festoon/Festoon VW User Manual Rev. 2 Page 11 of 23... -
Page 14: Configuration (Dmx)
PERATION Configuration (DMX) The Festoon/Festoon VW works with a DMX controller. If you are not familiar with the DMX protocol, information about DMX is in the CHAUVET DMX Primer. Download the DMX Primer from www.chauvetdj.com. DMX Personality and Starting Address When selecting a starting DMX address, always consider the number of DMX channels the selected DMX mode uses. - Page 15 Dimmer Speed set by Display Menu Dimmer Speed Mode OFF Dimmer Speed Mode Dimmer Speed Mode 1 (fast) Dimmer Speed Mode 2 (medium) Dimmer Speed Mode 3 (slow) Festoon/Festoon VW User Manual Rev. 2 Page 13 of 23...
- Page 16 DMX pixel mapping personalities assign individual DMX control to each bulb in the Festoon/Festoon VW string/s. The pixel mapping personality to use depends on the number of Festoon/Festoon VW strings you have connected. To put the Festoon/Festoon VW into a pixel mapping personality simply select one of the following DMX personalities.
- Page 17 PERATION Example Layout: 120CH Mode - 2 String String 2 Ends at 120 String 2 starts at 61 Festoon/Festoon VW User Manual Rev. 2 Page 15 of 23...
-
Page 18: Configuration (Standalone)
DMX signals from the controller. Set # of Festoon/Festoon VW Strings The Festoon/Festoon VW controller can control up to 3 Festoon/Festoon VW Strings. Follow the directions below to setup your Festoon/Festoon VW: Press <MENU> repeatedly until Led shows on the display. -
Page 19: Manual Color Mixing
Use <UP> or <DOWN> to select either OFF, dIM1, dIM2 or dIM3. Press <ENTER> to confirm. Your Festoon/Festoon VW string comes with an IP rated cap meant to terminate the end of the festoon/Festoon VW string. Retain this cap, and ALWAYS terminate the open end of your string when being used outdoors or near moisture. -
Page 20: Irc-6 Infrared Remote Control
PERATION IRC-6 Infrared Remote Control The Festoon/Festoon VW is compatible with the IRC-6 infrared remote control from Chauvet DJ. To activate IR mode, follow the instructions below: Press <MENU> repeatedly until SEr shows on the display. Press <ENTER>. Press <UP> or <DOWN> to select On or OFF. -
Page 21: Master/Slave Mode
USB from Chauvet DJ. Simply set the product's DMX Personality and DMX Address, set the DIP switch D- Fi receiving/transmitting channel, then plug it into the D-Fi USB port. You will need two (2) D-Fi USB in order to use the Festoon/Festoon VW wirelessly with another Festoon/ Festoon VW, one to transmit and one to receive. -
Page 22: Maintenance
Softly drag any dirt or grime to the outside of the transparent surface. Gently polish the transparent surfaces until they are free of haze and lint. Always dry the transparent surfaces carefully after cleaning them. Page 20 of 16 Festoon/Festoon VW User Manual Rev. 2... -
Page 23: Technical Specifications
ATING 104 °F (40 °C) Convection IP43 I/O C ONNECTOR HANNEL ANGE 3-pin XLR 3, 9, or 60/120/180 Ordering UPC N RODUCT UMBER Festoon 03091197 781462215453 Festoon VW 03091376 781462217242 Festoon/Festoon VW User Manual Rev. 2 Page 21 of 16... -
Page 24: Returns
Be sure to pack the product properly. Any shipping damage resulting from inadequate packaging will be your responsibility. FedEx packing or double-boxing are recommended. Chauvet reserves the right to use its own discretion to repair or replace returned product(s). Page 22 of 23 Festoon/Festoon VW User Manual Rev. 2... -
Page 25: Contact Us
Outside the U.S., U.K., Ireland, Benelux, France, Germany, or Mexico, contact the dealer of record. Follow the instructions to request support or to return a product. Visit our website for contact details. Festoon/Festoon VW User Manual Rev. 2 Page 23 of 23...
Need help?
Do you have a question about the Festoon and is the answer not in the manual?
Questions and answers