Table of Contents
Advertisement
HD 450/HD 450 Injection
User Manual
Cleaning and Disinfection Unit
HD 450/HD 450 Injection
Dear User
We thank you for the trust you have placed in us in choosing to purchase this
cleaning and disinfection unit.
Like our other products, this cleaning and disinfection unit was manufactured
and certified according to the strictest quality standards. However, please read
this user manual thoroughly before operating this unit.
Careful handling and care of the cleaning and disinfection unit helps increase
its useful lifespan as well as preserve its value.
IC Medical GmbH
Advertisement
Table of Contents

Related Manuals for IC Medical HD 450


Summary of Contents for IC Medical HD 450
- Page 1 HD 450/HD 450 Injection User Manual Cleaning and Disinfection Unit HD 450/HD 450 Injection Dear User We thank you for the trust you have placed in us in choosing to purchase this cleaning and disinfection unit. Like our other products, this cleaning and disinfection unit was manufactured and certified according to the strictest quality standards.
- Page 2 To all doctors, doctor's assistants and service personnel Please read this user manual thoroughly before operating the HD 450/HD 450 Injection. Important: Follow all safety instructions in this user manual. Store this user manual safely in a location near the cleaning and disinfection unit.
- Page 3 450/HD 450 Injection. User manual The user manual contains important safety regulations and information that you will require to operate the HD 450/HD 450 Injection. Read the manual completely and thoroughly in the order presented. Avoid danger Read all safety regulations carefully before using the HD 450/HD 450 Injection.
- Page 4 Do not modify or intentionally damage the power cord or the power plug. ■ Do not operate the 450/HD 450 Injection when the power cord and/or the power plug are damaged. ■ Do not pull on the power cord to unplug the power plug from the power socket.
- Page 5 Should you have any questions concerning the compatibility of the process media with the instruments, please contact their manufacturer(s). IC Medical provides instructions on the use of processing media in the HD 450/HD 450 Injection, but assumes no responsibility for the effect they may have on the ■ instruments.
-
Page 6: Table Of Contents
Manual function test………………………………………...53 Processing media……………………………………...19 Tests in daily use…………………………………………..53 Filling rinsing agent…………………………………….20 Chapter 10 – Malfunctions……………………………….54 Dosage…………………………………………………..21 Turning the HD 450/HD 450 Injection on/off………...21 Warnings……………………………………………………..54 Requirements for initial operation……………………..21 Malfunction messages………………………………………54 Before calling us……………………………………………..55 Chapter 4 – Cleaning and disinfecting……………22 Malfunction messages………………………………………57... -
Page 7: Chapter 1 - Specifications
Cleaning and disinfection According to DIN EN ISO 15883-1 and -2, the HD 450/HD 450 Injection is regarded as a cleaning and disinfection unit. With this unit, thermoresistant medical instruments (instruments that are heat-resistant up to a temperature of 95 °C) can be maintained automatically, provided... - Page 8 Built-in water softening The HD 450/HD 450 Injection has a built-in water softening s y s t e m . The water hardness of the local drinking water supply can be entered into the HD 450/HD 450 Injection, allowing for the optimal operation of the water softening system.
-
Page 9: Chapter 2 - Description Of Unit
Information contained in this chapter: Standard components included as part of the package Symbols on the display screen The components of the HD 450/HD 450 Injection Security features of the HD 450/HD 450 Injection Package contents ... -
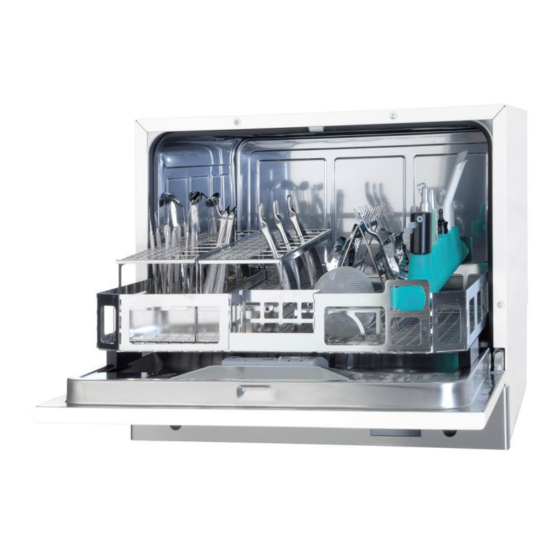
Page 10: Views Of Unit
External control panel (optional) Ethernet network connection (RJ45) Cold water connector (CW) Waste water connector Inside view Connecting port for injector ail (HD 450 Injection) Water supply port (CW) + FD water Receptacle for salt Washing arm Wide-mesh and fine-mesh screen... -
Page 11: Accessories For Loading The Unit
Chapter 2 – Description of unit Accessories for loading the unit The HD 450/HD 450 Injection must be equipped with a base rack for operation. Users may select between a base rack without an injector rail and a base rack with an injector rail for loading instruments with hollow cavities. - Page 12 Chapter 2 – Description of unit Components Part number Components External operation panel - HD 450/HD 450 Injection 105 005 Injection filter (content: 15 pieces) 105 006 Flexio-basic basket 1 105 035 Flexio-basic basket 2 105 008 Flexio-Injection bar 8 adaptor...
-
Page 13: Acoustic Signals
Chapter 2 – Description of unit 3-level acoustic signals The HD 450/HD 450 Injection gives acoustic signals. These are meant to attract your attention and serve to provide you with information. In the administrator menu, you will be able to configure these signals to suit your needs. -
Page 14: Automatic Door Locking Mechanism
This means that the HD 450/HD 450 Injection m u s t b e connected to the power grid and turned on at the power switch in order to open and close the door. -
Page 15: Water Softening System
Chapter 2 – Description of unit Water softening system For the error-free operation of the unit, the HD 450/HD 450 Injection requires softened water. Tap water that exceeds a certain hardness level (21°dH) must be softened in order that no deposits gather on the instruments and the inside of the cleaning unit. -
Page 16: Chapter 3 - Initial Operation
HD 450/HD 450 Injection and/or injury may result. Requirements for the location of the unit Location The HD 450/HD 450 Injection is to be set up in a dry and dust-free location. The humidity at the unit's location is to be 30 - 60 % and the ambient temperature 15 - 35°C. -
Page 17: Different Ways Of Setting Up
Different ways of setting up You may choose to set up the HD 450/HD 450 Injection in the following ways: As a built-in unit in a recess intended for this purpose and an already existing continuous work surface ... -
Page 18: Topping Up Regenerative Salt
Chapter 3 – Initial operation Fill with regenerative salt – if necessary! ■ For a water hardness level of more than 21° dH, use only special IRA salt (Art.No.: 103 006). ■ Never fill cleaner or other types of processing media into the salt receptacle! This may cause the water softening system to malfunction. -
Page 19: Processing Media
Chapter 3 – Initial operation Processing media ■ Protect your eyes, hands, clothing and metal surfaces from coming into contact with the processing media. They contain components that are irritants or even corrosive agents. ■ Any type of liquid remaining in the unit in case of a malfunction may also contain processing media. - Page 20 Chapter 3 – Initial operation Fill with rinsing agent – if necessary! ■ Check the suitability of instruments for use with rinsing agents. WARNING! If you notice visible streaks on the instruments, the cause could be an overdose of cleaning agent. If cleaning agent is missing or insufficient, the corresponding information will be displayed, and you will be prompted to add cleaning agent.
-
Page 21: Dosage
Serious injury may result. Turn on the HD 450/HD 450 Injection by pressing the power switch momentarily. Turn off the HD 450/HD 450 Injection by pressing on the power switch for 3 seconds. -
Page 22: Chapter 4 - Cleaning And Disinfecting
What to take note of when removing washware Types of loads You may clean and disinfect the following types of washware in the HD 450/HD 450 Injection: Solid instruments up to a max. of 6 kg Glassware, e.g. beakers, test tubes etc. -
Page 23: Loading Washware
Chapter 4 – Cleaning and disinfecting Cleaning The adapters for handpieces and elbow attachments should be checked the adapter for transfer regularly for any signs of dirt or stains. Silicone inserts can be rubbed instruments clean with a moist, lint-free cloth. Changing the filter of the HD The white injection filter (Art. -
Page 24: Before The Start Of Each Program, Take Note Of The Following
Chapter 5 – Cleaning and disinfecting ■ Take note Empty all containers of any remaining liquid before placing them into the cleaning unit. Rinse away any hazardous liquids remaining in them, such as disinfectant. ■ Individual instruments should be placed in baskets or trays —never directly into the base rack. -
Page 25: Starting A Program
■ Use the power switch to turn the unit on. ■ The display comes on. Wait until the HD450 HD 450 Injection is ready. Starting a program ■ Never leave the unit unattended when it is running. The unattended operation of electrical devices, including that of the HD 450/HD 450 Injection, is at your own risk. -
Page 26: Start Time Preselection
Chapter 5 – Cleaning and disinfecting Start time preselection The thermal disinfector HD450 and HD450 Injection has a freely programmable time delay. To optimize your processing time, you can select the free start time between 1 and 99 hours in the hour rhythm. The thermodesinfector then starts automatically at the desired time. -
Page 27: When The Program Is Running
Chapter 4 – Cleaning and disinfecting When the program is running After the start of the program, you can monitor its progress in the display. When the program is running, the different steps are shown on the display. Sump rinse Any remaining water is first rinsed out before a new cleaning cycle begins. -
Page 28: End Of Program
Chapter 5 – Cleaning and disinfecting WARNING! Narrow-necked hollow instruments are to be dried manually by passing clean and oil-free air through them! ■ Hollow instruments have not shifted and/or are still fixed in place Otherwise, they need to be processed again. ■... -
Page 29: Manual Program Cancellation
Chapter 4 – Cleaning and disinfecting Manual program cancellation ■ All running programs can be canceled at any step; however, if the program is canceled during the drying phase, the washware is not to be considered cleaned or disinfected. Where required, the program must then be run again. -
Page 30: Removing Washware
Please note the following during a program run and when removing washware at the end of a program: ■ Never use force when opening the door. The HD 450/HD 450 Injection may be damaged in the process and/or hot steam may be emitted from the unit. -
Page 31: User Menu
Chapter 6 – Logs Chapter 5 – MENU / SETTINGS The HD450 / HD450 Injection offers 2 menu levels. User menu: This is where users can set their personal preferences. Administrator menu: This is where all the basic settings for the unit are set. Accessing the menu Start screen: press MENU Enter user code... - Page 32 Chapter 6 – Logs Setting time and date Using the arrows, set the current time and date. Press OK to confirm. Setting language Now the user can set his or her own language. Confirmation message in the selected Press OK to confirm. language Note that the language for each user can be set separately!
- Page 33 Chapter 6 – Logs Administrator menu Administrator menu Add user Enter name and press OK to confirm Enter 3-digit code and confirm with OK entries are to be exported.
- Page 34 Chapter 6 – Logs User added successfully Please note that each user has to have his or her own code. Up to 32 users may be added. Deleting a user Select desired user and select Confirm delete OK to confirm. Confirmation message Edit administrator Enter desired name.
- Page 35 Chapter 6 – Logs Export memory Select whether all or only new Confirmation of export entries are to be exported. Formatting memory IMPORTANT!!! Before the memory is erased, all records must be exported. If this is not done, it is possible that records are lost. Safety warning before format.
- Page 36 Chapter 6 – Logs Setting time and date Using the arrows, set the current time and date. Press OK to confirm. Sounds & keypresses Select the desired options for your environment. Manual filter change Enter user code Confirmation message Records will be kept in memory of who changed the injection filter. Removing lime deposits Depending on the hardness of the water, you may turn on/off the water softening system here.
- Page 37 Chapter 6 – Logs Setting language This is where the local language of the unit Confirmation message in the selected can be selected. language. This setting applies for the entire unit and all users. Exporting transfer data Backup unit settings Confirmation screen No records are backed up with the transfer data.
- Page 38 Chapter 6 – Logs Update firmware Confirm with YES You will then be guided through the menu.
-
Page 39: Chapter 6 - Logs
Data such as program type, batch and process parameters of logged cleaning and disinfection cycles are stored in the internal log memory of the HD 450/HD 450 Injection. For batch documentation, the internal log memory can be exported and transferred to a variety of output media. This can take place immediately after each completed cleaning and disinfection process or at a later date, e.g. -
Page 40: Using A Usb Stick As Output Medium
■ Never pull the USB stick out of the port when read/write operations are in progress. If these instructions are not followed, data loss, damage to the USB stick and/or the HD 450/HD 450 Injection and/or its software may result. -
Page 41: Computers As Output Media
USB stick. Computers as output media You can access the HD 450/HD 450 Injection directly from the network of your practice. For this, the HD 450/HD 450 Injection has to be connected via the network connection (RJ45). -
Page 42: Hd450-Printer
Network: If the HD 450/ HD 450 Injection is integrated into the network of your practice, it is possible to access the logs through the network. For this, you will need to select your unit in the network via the options. - Page 43 Chapter 6 – Logs Log specimen...
-
Page 44: Chapter 7 - Maintenance
Chapter 7 – Maintenance Chapter 7 – Maintenance Information contained in this chapter: How to clean the HD 450/HD 450 Injection Changing the injection filter (HD 450 Injection) Which cleaning agents are suitable How to avoid spots and stains... - Page 45 If the water flows out easily through the nozzles, they are unobstructed. Front exterior of unit if The control unit and the plastic exterior of the HD 450/HD 450 Injection required is to be cleaned only with a moist cloth or a suitable cleaner for plastics.
- Page 46 WARNING! The injection filter needs to be changed every 20 cycles. This change will be indicated on the display. ■ Use only injection filters from IC Medical. Art.-No. 105 006 ■ If the injection pump malfunctions, change the injection filter and reset the counter.
-
Page 47: Cleaning The Injection Filter
Chapter 7 – Maintenance Cleaning the injection filter (only for the HD 450 Injection) Remove the injection rail from the basic basket. Remove the silicone coupling (back to the rail). Remove the silicone stopper (front on the rail). Overview of the required components: silicone plugs, injection rail, filter, silicone... - Page 48 Chapter 7 – Maintenance Clean the injection filter under running water. For coarse dirt injection filter can be cleaned during a treatment cycle in a thermal. To do this, the injection filters in the basic basket and start a cleaning cycle. Please note that in this case no handpieces can be prepared! Replace the silicone plug back on the rail.
- Page 49 Chapter 7 – Maintenance Test the position. Replace the silicone coupling again. guide the silicone coupling must be positioned on the frame of the filter.
- Page 50 Chapter 7 – Maintenance visual inspection whether the filter is correctly positioned. Assembly injection tube in the base rack.
-
Page 51: Avoiding Stains
Chapter 7 – Maintenance Avoiding stains Stains on instruments or in the HD 450/HD 450 Injection may be due to Stains due to low water low water quality. quality To prevent stains on the instruments or in the washing chamber, we recommend that the entire rinsing be done with fully demineralized water (FD water). -
Page 52: Chapter 8 - Operational Breaks
45 °C. Taking the unit out of operation If you would like to take the HD 450/HD 450 Injection out of operation for a longer period of time, e.g. -
Page 53: Transportation
The HD 450/HD 450 Injection should be operated, stored and transported in a frost-free environment. However, if there is any remaining fluid in the HD 450/HD 450 Injection that has frozen, allow the unit to stand at room temperature for 2 hours for it to thaw. -
Page 54: Chapter 9 - Function Test
When the parameters exceed fixed threshold values, the HD 450/HD 450 Injection will display warning messages or fault indicators. If necessary, it will cancel the program with the corresponding message. -
Page 55: Chapter 10 - Malfunctions
These may appear on the display shortly after turning on the HD 450/HD 450 Injection or when a program is running. If a malfunction occurs while a program is running, he program will be canceled; this will be indicated by an audible sound. - Page 56 Before contacting us Follow the steps as indicated for dealing with a warning or a malfunction message appearing on the display of the HD 450/HD 450 Injection. In addition, you will find the most important occurrences in the following table. These situations are listed next to possible causes and the corresponding courses of action.
- Page 57 Chapter 10 – Malfunctions General situation Possible causes Recommended course of action Remaining moisture on Base rack and/or basket inserts Arrange washware properly and do instruments or racks not loaded properly or too not overload full Dry instruments manually Open the door immediately after program ends. Door was closed for a long time after program ended (see logs) Remaining moisture in...
-
Page 58: Malfunction Messages
Chapter 10 – Malfunctions Malfunction messages Code Malfunction/warning Possible causes Recommended course of action Program must be restarted Power failure A running program was interrupted by Disinfection cannot be confirmed a power failure Check the circuit breakers Do not turn off the unit at the power switch when a program is running. - Page 59 Chapter 10 – Malfunctions Process was canceled Cleaning and disinfection process was Cleaning and disinfection process manually stopped by user was not completed! Program must be restarted Overflow switch active Unit is leaking (e.g. water, wash, Turn off water supply! processing media) Be sure to inform specialist supplier/customer service!
-
Page 60: Technical Data
Technical data Technical data Type designation HD450 HD450 Injection Measurements of unit (HxBxD) 450 x 555 x500 cm 450 x 555 x 580 cm Washing chamber (HxBxD) H= max. load height 33,5 x 49.5 x 45 cm 33,5 x 49.5 x 45 cm D= max. -
Page 61: Operational Data
Operational data Operational data Partial Program Sump rinse Partial cycle Partial cycle Partial cycle Partial cycle Partial cycle cycle Universal Intermediate Pre-wash 1 Pre-wash 2 Cleaning Disinfection Drying program rinse Amount of water Maintenance time [min.] Temperature [°C] <90... -
Page 62: Appendix A - Symbols On The Unit
Appendix A – Symbols on the unit Appendix A – Icons upon the unit The icon „crossed out rubbish bin“ marks a unit that ist not allowed to be disposed via household garbage. It has to be disposed appropriate and professional by the producer / distributor.
Need help?
Do you have a question about the HD 450 and is the answer not in the manual?
Questions and answers