Table of Contents
Advertisement
Quick Links
All Restoration Hardware bunk bed are designed to meet the highest safety
standards and comply with all U.S. and Canadian bunk bed and cradles regulations.
Made in Vietnam
Distributed in the U.S.A by:
Restoration Hardware Baby & Child
11640 Harrel St. Suite B
Mira Loma, CA 91752
www.rhbabyandchild.com
Distributed in Canada by:
Restoration Hardware Canada, Inc.
1500-1055 West Georgia Street
Vancouver, British Columbia V6E4N7
W A R N IN G : Rea d a ll
I nstr u ct i ons b efo r e a s s e mb lin g
thi s pr od uct .
KEEP I N ST R UC TI O NS FO R
FUTURE US E .
CUSTOMER SERVICE
If you are missing parts or have any questions about this product, contact us first. You can also order parts by writing to
the address above. Include the product model number, color, and a brief description of the part. Call 1-800-762-1751.
CARE AND CLEANING
DO NOT scratch or chip the finish. DO NOT use abrasive chemicals for cleaning. If the crib is to be stored, store in a cool
dry place and carefully package all original hardware to protect from loss.
TOOLS AND INSTALLATION
Tools Necessary: Key Wrench (included).
NOTE : It may be easier to assemble product with two people.
NOTE: When inserting bolts, turn clockwise until tight. Then loosen 1/2-3/4 of a turn. After crib is completely assembled,
return to each bolt and tighten.
M o d e l N o : 3 5 5 - 1 3
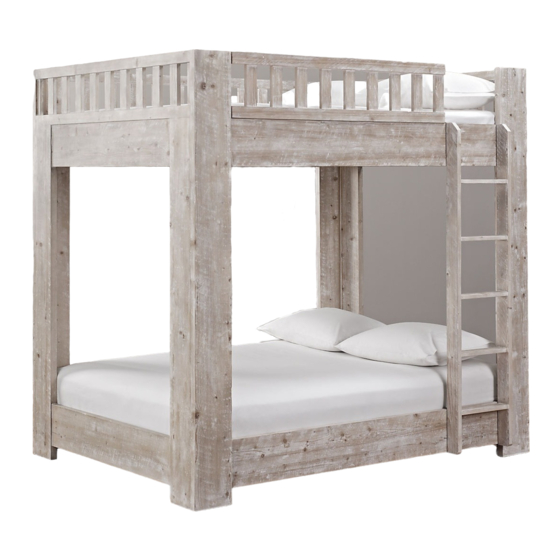
CA LLUM F U LL- OV E R- FUL L B UN K BED
Page 1 of 10
Advertisement
Table of Contents

Related Manuals for Restoration Hardware Callum Full-Over-Full Bunk Bed


Summary of Contents for Restoration Hardware Callum Full-Over-Full Bunk Bed
- Page 1 M o d e l N o : 3 5 5 - 1 3 CA LLUM F U LL- OV E R- FUL L B UN K BED All Restoration Hardware bunk bed are designed to meet the highest safety standards and comply with all U.S. and Canadian bunk bed and cradles regulations.
- Page 2 8. Always use the ladder for entering and leaving the upper bunk. 9. Do not use substitute parts. Contact Restoration Hardware for replacement parts 10. Use of a night light may provide added safety precaution for a child using the upper bunk.
- Page 3 M od e l N o: 35 5 - 13 CAL LU M F ULL- OVE R- FU LL BU N K BED P A R T S I D E N T I F I C A T I O N (B) Ladder (x1 piece) (A) Bunk Bed End (x2 pieces) (D) Front Guard Rail (x1 piece)
- Page 4 M od e l N o : 3 5 5 - 1 3 CA L LUM F U LL-OV E R- FUL L BUN K BED H A R D W A R E I N C L U D E D ITEM DESCRIPTION QTY.
- Page 5 M od e l N o: 35 5 - 1 3 CA L LU M FULL- OVE R- FU LL BU N K BED BUNK BED END ASSEMBLY INSTRUCTIONS STEP 1: NOTE: Each side rail needs 2 people to assembly, put the bunk bed end panel on a straight line, insert the side rail on end panel at the same time and set up hardware to assembly but not fully tighten, set up another side rail &...
- Page 6 M o d el N o : 3 5 5 - 1 3 CAL LUM FU LL- OVE R - FU LL BU N K BED FONT GUARD RAIL ASSEMBLY INSTRUCTIONS STEP 2: Determine which side you wish to position the ladder. Guard Rail (D) can be attached at either side, depending on where you would like the Ladder (B) to be positioned.
- Page 7 M od e l N o: 35 5 - 1 3 CA LLUM F ULL- OV E R- FUL L BUN K BED SLAT ROLL ATTACHMENT INSTRUCTIONS NOTE: If you need to move the unit, do not drag it. 2 or more people are needed to safely move the unit. STEP 3: Lay the Stretcher Bars (H) in between the Top Side Rails (F), then tighten using Long Screws (4) and...
- Page 8 M od e l N o: 35 5 - 1 3 CA L LU M FULL- OVE R- FUL L BU N K B ED LADDER ATTACHMENT INSTRUCTIONS STEP 4: Position the Ladder (B) in the opening between the Front Guard Rail (D) and the post of the Bunk Bed End (A).
- Page 9 M o d el N o: 3 5 5 - 1 3 CAL LU M FU LL- OVE R -F U LL BU N K BED TOP PLATFORM PANEL ATTACHMENT INSTRUCTIONS STEP 5: Lay the Top Platform Panels (I) on top of the Stretcher Bars (H) and attach using Qty.40 Long Screws (4) with Philips head screwdriver Long Screws (40 pcs.)
- Page 10 M od e l N o : 3 5 5 - 1 3 CA LLUM F U LL-OV E R- FUL L BUN K BED INSTALL BEDDING STEP 6: BEDDING SPECIFICATIONS FOR TOP BUNK: The following size mattress and Foundation are specified for use with this Bunk bed: MATTRESS DIMENSION SPECIFICATIONS FOR TOP BUNK Twin - over - twin Bunk: (74"...
Need help?
Do you have a question about the Callum Full-Over-Full Bunk Bed and is the answer not in the manual?
Questions and answers