
Related Manuals for MRC MIA-LA


Summary of Contents for MRC MIA-LA
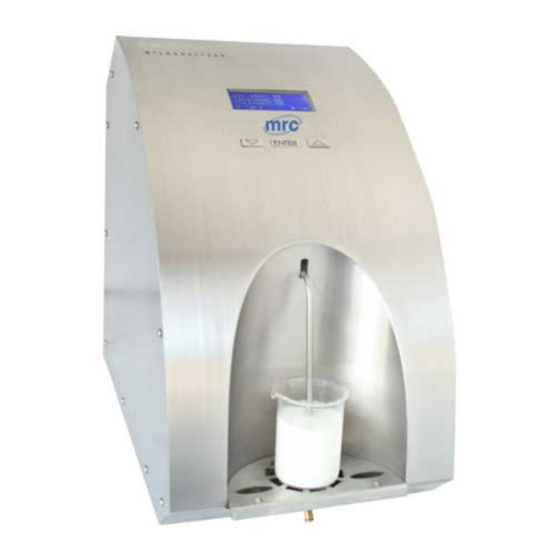
- Page 1 MIA-LA MILK ANALYZER LCD display – 4 lines x 16 characters Operation manual Operation manual 1/92...
- Page 2 Due to continuous improvement in milk analyser, information contained in this manual is subject to change without notice. Contact producer for revisions and corrections 3, Hagavish st. Israel 58817 Tel: 972 3 5595252, Fax: 972 3 5594529 mrc@mrclab.com MRC.1.18 Operation manual 2/92...
- Page 3 Ultrasonic milkanalyser SAFETY INSTRUCTIONS 1. Read this manual carefully and make sure that you understand all the instructions. 2. For safety purposes the device is equipped with grounded power cable. If there is no grounded electrical outlet where the device will be used, please, install such before using the device.
- Page 4 Ultrasonic milkanalyser PARTS AND ACCESSORIES In the table below the standard delivery configuration of the milk analyser is listed: № Item № Description Ultrasonic portable milk analyzer LSLA001 50 sec 1 sample measurement time 30 sec Operation manual Plastic sample holder LSLA003 Spare Pipes LSLA004...
- Page 5 Ultrasonic milkanalyser ECS POS Serial Printer LSLA017 12 V Serial Printer Power Supply Cable LSLA018 RS232 Interface Cable - Milk Analyser – LSLA019 Serial Printer 21. Power supply from embedded accumulator LSLA021 with charger Plug type Spare O-ring for the pH probe USB flash drive option Operation manual 5/92...
-
Page 6: Function
Ultrasonic milkanalyser FUNCTION The function of the milk analyser is to make quick analysis of milk on fat (FAT), non-fat solids (SNF), proteins, lactose and water content С), pH, freezing point, salts, total solids, percentages, temperature ( conductivity as well as density of one and the same sample directly after milking, at collecting and during processing. -
Page 7: Technical Parameters
Ultrasonic milkanalyser 2. TECHNICAL PARAMETERS 2.1. Working modes characteristics: The program of the milk analyser has four working modes. 2.1.1. Measurement mode milk / dairy product – first type 2.1.2. Measurement mode milk / dairy product – second type 2.1.3. Measurement mode milk / dairy product – third type These modes have been calibrated on customers’... -
Page 8: Measuring Range
Ultrasonic milkanalyser 2.2. Measuring range: Fat ………………..... …………..from 0.01% to 25% (45%*) SNF ……………………………… ...…………………..from 3% to 40% Density ** ………………………. ……...…….from 1000 to 1160 kg/m3 Protein …………………………. ……………………..from 2% to 15% Lactose ………………………... …………………from 0.01 % to 20 % Water content …………………... -
Page 9: Accuracy
Ultrasonic milkanalyser 2.3. Accuracy: Fat …..……………………………….. …...………………….…... 0.06% SNF ………………………………….. …………...………….…... 0.15% Density ……………………………… ……………………….. 0.3 kg/m Proteins ……………………………... ……...……………….…... 0.15% Lactose ……………………………… .…………………………... 0.20% Water content ………………………. .……………………………. 3.0% Temperature of milk ……………….. .……………………………… 1 Freezing point………………………..……...………………… 0.005 Salts ………………………………... - Page 10 Ultrasonic milkanalyser Fig.1 Front panel 1. pH probe & holder (option) 10. sample holder 2. Printer 11. ss grid 3. Display 12.waste liquid pipe 4-8 Buttons 13. USB flash-drive slot 9. input pipe Operation manual 10/92...
- Page 11 Ultrasonic milkanalyser Fig.2 Back panel 1. pH probe (option) connectors cleaning solution/waste liquid 2. weight scales input (option) 8.DC Power Supply output 3. pH probe input (option) 9. Switching adapter 4. USB/RS232 (option) 10. Power switch 5. RS232/printer 11. DC Power Supply input Operation manual 11/92...
- Page 12 Ultrasonic milkanalyser Fig 3 Principle working scheme Operation manual 12/92...
- Page 13 Ultrasonic milkanalyser Fig. 4 Connecting peripheral devices Operation manual 13/92...
- Page 14 Ultrasonic milkanalyser Fig. 5 Cable Description 90-1801-0008 RS232 Interface Cable - Milk Analyser – Serial Printer/ IBM PC 90-1801-0009 DC 12V Power Supply Milk Analyzer Cable 1. GND 2. No connection 3. No connection 4. 12V DC There’s an option in the analyser – embedded USB interface (USB to RS232 Serial Converter) for connection with computer type IBM PC.
- Page 15 Ultrasonic milkanalyser USB interface is based on the element MCP2200 of the company Microchip Technology Inc. – site: http://www.microchip.com. For establishing a connection through this interface a driver has to be installed for MCP2200 in the correspondent computer, which will be connected with the analyzer. Please, follow the procedure, from the Internet site of the producer: http://www.microchip.com/wwwproducts/devices.aspx?ddocname=en546923, by choosing the suitable for your operation system driver.
-
Page 16: Qualification Of Raw Milk, Thermally Treated Milk, Other Dairy Products And Derivatives
Ultrasonic milkanalyser 3. QUALIFICATION OF RAW MILK, THERMALLY TREATED MILK, OTHER DAIRY PRODUCTS AND DERIVATIVES 3.1. Taking samples and preparation for analysis In order to receive reliable results in qualification of milk, dairy products and derivatives are needed: precise samples taking; correct samples storing (in need to be preserved);... -
Page 17: Making Analysis
Ultrasonic milkanalyser If in the process of exploitation there is a need to ask a question the company-producer, you have to send the data, written on the display during the above described initialization procedure. 3.2.1.4.Till the analyser is prepared for work (at about 5 minutes) the following message is written on the display: “Getting ready”. -
Page 18: Displaying The Results
Ultrasonic milkanalyser Make sure the analyser is still during measurement. Vibrations may lead to inaccurate results. To start measurement: - pour the preliminary prepared sample in the sample holder (now you may use holders with different size - plastic and glass 100 ml); Fig.6 Input pipe The input pipe of the analyser is knee-joint (mobile). - Page 19 Ultrasonic milkanalyser F= ff.ff - measured FAT in percentage; S= ss.ss - measured SNF in percentage; D= dd.dd - measured density in percentage; P= pp.pp - measured protein in percentage; L= ll.ll - measured lactose in percentage; - measured sample’s added water in percentage; W= ww.ww By pressing the button”...
- Page 20 Ultrasonic milkanalyser xx.xx is the measured milk sample’s conductivity in [mS/cm]. If the results are outside the limits for this type of sample (see table from the Appendix Conductivity measurement), the cursor flashes after the letter С, reminding that the sample is not correct. On the printout it is printed as !!!. If the conductivity value is outside measuring range (2-14 mS/cm), the following message appears on the display: C=OutRg (Out of Range), and on the printout there isn’t any line with...
-
Page 21: Cleaning The Analyser
Ultrasonic milkanalyser 4. CLEANING THE ANALYSER Fig. 7 Connecting the container with detergent 1. Connector for the cleaning solution 4. Vessel for waste solution 2. Connector for the waste liquids 5. Vessel for the cleaning agent 3. metal pipe Operation manual 21/92... -
Page 22: Automatic Cleaning The Analyser
Ultrasonic milkanalyser This procedure prevents gathering milk fat residues and milk stone on the sensor. The milk stone consists of milk solids, calcium, iron, sulphates, magnesium, etc. All these substances form layer on the pipe and sensor’s walls, which leads to deviations in the measurement results and blocking up the piping. -
Page 23: Current Cleaning
Ultrasonic milkanalyser 4.1.1. Current cleaning. 4.1.1.1. Automatic start The current cleaning is made with alkaline solution (for working solution preparation see 4.2.1.), with which the reservoir for the cleaning solution is filled in. It is automatically started, without operator's interference after the set time intervals elapse 55 min. - Page 24 Ultrasonic milkanalyser Cleaning Please wait If there is a glass with sample it is completely emptied and then the analyser automatically fulfills procedure for sucking the cleaning solution and c rinsing the analyser's inner system. In order the input metal pipe to be cleaned out for a short time a cleaning solution is pumped out for a short time in the already empty glass or in case there is no empty glass there –...
-
Page 25: End Final Cleaning
Ultrasonic milkanalyser Sheep Cleaning Final Clean By choosing Cleaning the current cleaning is started. The display shows the following: Auto clean started! Put empty glass In this way the current cleaning is started. The procedure and operator’s actions are described above. Do not switch off the device at the end of the working day before the automatic cleaning procedure is completed. - Page 26 Ultrasonic milkanalyser Always before the final acidic cleaning rinse the device with alkaline cleaning solution by manual starting if it was not already automatically cleaned. It is necessary to be done in order to remove the milk residues which could react with the acidic cleaning solution.
- Page 27 Ultrasonic milkanalyser Fig 8. Rinsing with water Press the button Enter in order to continue the procedure. Then the following message appears on the display: Cleaning Please wait Do not miss to clean with water because the residues from the alkaline cleaning solution could react with the acidic solution, which will lead to gas and sediment formation.
- Page 28 Ultrasonic milkanalyser Glass Alcal Deterg Waste pipe Glass press Enter 5. Place glass filled with alkaline cleaning solution. 6.The pipe, coming from the orifice with inscription Waste Pipe has to be placed in the glass. Fig 9. Cleaning 7. Pressing button Enter starts the procedure for cleaning with alkaline solution.
- Page 29 Ultrasonic milkanalyser 8. After the cleaning procedure is finished, the following message appears, reminding the the analyzer needs rinsing. 9. Rinsing procedure is executed, described in p. 2. After it is finished, the display shows: Glass Acid Detrg Waste pipe Glass press Enter 10.
-
Page 30: Preparation Of Cleaning Solution
Ultrasonic milkanalyser 4.2. Preparation of cleaning solution 4.2.1. Preparation of alkaline cleaning solution Preparation of 3 % alkaline solution of Lactodaily for circulation cleaning in the milk analyser: 1. Take the package concentrated chemical Lactodaily 2. Carefully open, paying attention not to spill it. 3. -
Page 31: Working With The Peristaltic Pumps
Ultrasonic milkanalyser 4.3. Working with the peristaltic pumps There are two peristaltic pumps in the analyser – 1 for the sample and 1 for the cleaning. Fig. 11 Peristaltic pump SL 16 Operation manual 31/92... -
Page 32: Possible Malfunctions And Error Messages, Troubleshooting
Ultrasonic milkanalyser POSSIBLE MALFUNCTIONS AND ERROR MESSAGES, TROUBLESHOOTING In the table below are described the possible malfunctions during the milk analyser’s exploitation and ways for their repair/remedy. If the problem persists after all recommended measures are taken, please, connect the nearest service center. -
Page 33: Making Corrections And Recallibration Of The Device
Ultrasonic milkanalyser 6. MAKING CORRECTIONS AND RECALLIBRATION OF THE DEVICE In the process of work with the analyser there is a possibility the results to start differing between the data for some of the measuring parameters when measured with the milk analyzer and the corresponding reference method of analysis (Gerber for fat, Kjeldhal for proteins etc). -
Page 34: Making Corrections
Ultrasonic milkanalyser For example М% of the reference samples: 2,20 3,00 3,80 4,60 5,20 М%average when measuring with the analyser: 2,38 3,17 4,01 4,79 5,42 Difference: 0,18 0,17 0,21 0,19 0,22 Conclusion: the difference is relatively constant value and correction is possible to be done with –... -
Page 35: Preparing The Analyzer For Mode Corrections
Ultrasonic milkanalyser 6.3.2. Preparing the analyzer for mode Corrections 6.3.2.1. Press the button Enter and without releasing it switch on the power supply of the device, wait for the starting identification messages and release the button after the following message appears on the display: Release button to start setup After releasing the button on the display is shown:... - Page 36 Ultrasonic milkanalyser Position on Measurement and press Enter. By using buttons “up”▲ and ”down”▼position on the corresponding calibration (for example Correction 1 – cow) and press Enter. 6.3.3.2. Choosing correction parameter After choosing calibration mode the display shows the following: Cal1 Cow Param:Fat Correct=00.00...
- Page 37 Ultrasonic milkanalyser type IBM PC and the company's calibration program or autonomous - by recalibration. When making corrections or calibrations be 100% sure in the accuracy of the reference methods result. 6.4. Recalibrating the milk analyser 6.4.1. Running the analyser in mode Recalibrate 6.4.1.1.
- Page 38 Ultrasonic milkanalyser 6.4.1.3. In the newly opened menu, position on Recalibrate and press the button Enter. 6.4.2. Making recalibration 6.4.2.1. Choosing the calibration mode After starting Recalibrate, the display shows the following: Cal: 1 Cow Prev Next You can choose the type of milk to be calibrated. By pressing ▼ (Next ) you can switch between Cal: 1, Cal: 2 or Cal: 3.
- Page 39 Ultrasonic milkanalyser Cal1 Cow High FAT=05.29 Edit Next With the button ▲(Next), choose SNF and in the same as above described procedure, enter the value for SNF. After it is finished, press “Enter” (OK) and you are going back to the previous menu. With button ▲...
- Page 40 Ultrasonic milkanalyser You must enter values for all the measured milk parameters!!! In other case the calibration will not be correct. 6.4.2.3. Making recalibration with the available samples After entering the values for the separate parameters of the sample, pressing Enter (OK) will display the following menu: Cal: Cow Put sample High...
- Page 41 Ultrasonic milkanalyser which reminds us to make the next measurement. Before each measurement the milk is stirred by pouring it 2-3 times from vessel to vessel. Continue the procedure till the 5th measurement. Cal 1 Samp Low Fat = f.ff SNF=y.yy Den=d.dd -------------------------...
-
Page 42: Checking The Calibration
Ultrasonic milkanalyser This means that the calibration was completed successfully and the analyzer is recalibrated for cow milk, marked as “Cal: Cow”. Switch off the power supply of the device and switch it on again. The device is ready to work with the new calibration. Next time when the analyser is switched on, it will be ready for work with those milk types it was just calibrated with. -
Page 43: Starting The Device In A Service Test/Setup Operational Mode. Menus Designation
Ultrasonic milkanalyser 7. STARTING THE DEVICE IN A SERVICE TEST/SETUP OPERATIONAL MODE. MENUS DESIGNATION 7.1. Starting the device in a service Test/Setup operational mode. In order to start the Setup of the device the operator has to press the button Enter and without releasing it to switch on the power supply of the device, to wait for the starting identification messages and to release the button after the following message appears on the display:... -
Page 44: Menus Function
Ultrasonic milkanalyser Due to continuous device improvement or due to the type of ordered type device it is possible some of the functions of the analyser to be not active (options not included). In this case, when trying to enter such function will display the following message: Not available option 7.2. - Page 45 Ultrasonic milkanalyser Serve for assigning different working parameters (modes). 7.2.3.1. Net number. Serves for assigning the device network number when connecting it in the production network. The possible numbers are from 0 to 15 including. After starting this function the display shows the following: Net number By using the button “up”▲...
- Page 46 Ultrasonic milkanalyser Current working Internal storing Save calibration (1, 2 or 3) buffer Current calibration content is not changed, the analyser continues using it, but there is a reserve copy in an internal buffer. Current working Internal storing Restore calibration (1, 2 or 3) buffer...
- Page 47 Ultrasonic milkanalyser If the option Large Disable, is chosen, then only the main results are send to the computer – Fat, SNF, Density, Lac, Proteins, Added Water, sample temperature, device serial number and calibration number. If the option Enable, is chosen, except the above mentioned parameters also data for Salts, Freezing Point, pH, Conductivity will be send to the computer.
- Page 48 Ultrasonic milkanalyser Example: When it is suitable to us this possibility of the analyser? For example if you have a device factory calibrated for Cow milk, Sheep Milk and UHT milk, but yоu need oftenly to measure camel milk. Using the methods, explained in details in Appendix Methods you may make a new calibration without need to send the analyser back to the producer for calibration.
- Page 49 Ultrasonic milkanalyser There are the following possibilities: With button Exit – to leave the menu. With button Yes – to confirm the chosen from the list calibration name.Now the program returns to the beginning of the menu for setting calibration names. With button Next –...
-
Page 50: Tests
Ultrasonic milkanalyser Edit FrPoints FrPoint Calibr1 FrPoint Calibr2 FrPoint Calibr3 ----------------------------- Exit After choosing freezing point for the calibration, the following is displayed: FrPoint Calibrx -0.fff Where: Calibrx - basic freezing point to be edited for chosen calibration; -0.fff - basic freezing point current value; By pressing the buttons: “up”▲... -
Page 51: Ph Meter & Co Meter
Ultrasonic milkanalyser 7.2.4.5. Keypad 7.2.4.6. USB Flash Please, use this menu only after reading the above pointed document SetCell.pdf 7.2.5. pH meter & Co meter Ph and conductivity measuring are additional possibilities for the analyser and are optional. Their usage is described in Appendices PH Measurement and Conductivity Measurement. -
Page 52: Summary Of Milk Analyser Setup Functions
Ultrasonic milkanalyser 7.2.7. Summary of milk analyser setup functions Analyzer Setup Special modes Calibration Cycle Reports Shut Down Corrections Calibration 1 Density Lactose Salts Proteins Water Calibration 2 Density Lactose Salts Proteins Water Calibration 3 Density Lactose Salts Proteins Water Temperature Cond measure... - Page 53 Ultrasonic milkanalyser Edit samp's 3 Edit FrPoints FrPoint Calibr1 FrPoint Calibr2 FrPoint Calibr3 Save/Rest Save Calibr 1 Save Calibr 2 Save Calibr 3 Rest Calibr 1 Rest Calibr 2 Rest Calibr 3 Fan Temp Offs Settings Page2 Final clean cnt Auto Print Res Larg Res En/Dis Set Calibr Name...
- Page 54 Ultrasonic milkanalyser Calibration Measuring En/Disable pH U Display pH Test U[V] Co Meter Calibr Co Meter Test Co Meter En/Dis Accessories Weight scale Raw Test Calibration Measure On Line En/Dis Battery Measure Bat U Ctrl Enabl/Dis RT Clock Display Time Adjust Time Adjust Date Operation manual...
-
Page 55: Additional Possibilities Of The Analyser
Ultrasonic milkanalyser 8. ADDITIONAL POSSIBILITIES OF THE ANALYSER 8.1. Connecting to 12 V DC power supply. If there is a need the analyser to work on place without electrical supply available, then it could be powered by car battery or other 12 V DC external power supply. - Page 56 Ultrasonic milkanalyser o Release the button Enter. o Using the buttons Up/Down choose menu Settings and press Enter. o Using the buttons Up/Down choose menu COM1 Mode and press Enter. o With the right button (Up) choose COM1 Mode – Prn, press Enter and leave the menu.
-
Page 57: Measuring High Fat Samples (Option)
Ultrasonic milkanalyser 1. To cancel the entered data by pressing the button 0 on the external keypad and to start entering them again. 2. Confirm the entered data by pressing the button Enter on the external keypad. The display shows currently chosen calibration. The device is ready to start measurement. -
Page 58: Working With Embedded Accumulator (Option)
Ultrasonic milkanalyser By which the device passes in a mode of measuring high fat samples. This calibration mode is active till the power supply of the device is switched off i.e. it has to be always set if the device will be calibrated for high fat measurement. -
Page 59: Embedded Real Time Clock (Option)
Ultrasonic milkanalyser 2. The analyser is in mode Sleep – do not accept any commands, expects change in the power (supply from switching adapter for starting the battery), display shows the following Low Battery 3. The battery power is under the allowed minimum, milk analyser is automatically switched off. -
Page 60: Usb Flash-Drive (Pen Drive) (Option)
Ultrasonic milkanalyser Display Time Adjust Time Adjust Date Exit Using these menus, the operator has the possibility to show on the display the current time and date, and if necessary – to adjust them. The time is shown in the format: hh:mm:ss dd:mm:yy Exit... - Page 61 Ultrasonic milkanalyser December, day13. Tabs with results are in accordance with software resLS, i.e. the file, created on the flash drive is with the same structure and may be processed with the same, already existent client software, used for collecting data with PC (see the manual of the software resLS.exe).
-
Page 62: Appendices
Ultrasonic milkanalyser APPENDICES APPENDIX PREPARATION SAMPLES MILKANALYSERS’ CALIBRATION For calibration are needed samples of cow milk with the following parameters: Low Fat High Fat Middle 1 Cow 2,2% 5,2% 3,6% For the calibration are needed: 1. Distilled water 2. Min. 3 milk samples with known values for fat, SNF, protein, density, lactose, salts. - Page 63 Ultrasonic milkanalyser 2-2,3% FAT; 8.7-9% SNF; 3,3-3,5 % Protein; 4,8-4,9% Lactose; 0,75 Salts; 1030-1033 kg/m3 Density. The second cow milk sample with high fat content to be with the following parameters: 5-5,3% FAT; 8.4-8,79% SNF; 3,1-3,2% Protein; 4,6-4,7% Lactose; 0,7 Salts; 1028-1029 kg/m3 Density.
-
Page 64: Determination Some Of The Parameters By Formulas
Ultrasonic milkanalyser 1. Determination some of the parameters by formulas There is dependence between the different parameters in milk and its density, which may be expressed with mathematical equation. On this base different formula, tested and confirmed by the classical laboratory methods for analysis, are developed. -
Page 65: Determination Of Salts Content
Ultrasonic milkanalyser Where –solids-non-fat content in percentages (%), – constant coefficient. 0,45 This is an actual coefficient for sheep breeds on the territory of the Balkan Peninsula. 4. Determination of salts content We recommend using the following formulas: А/ for cow milk Salts = SNF* 0,083 (% ) Where –... - Page 66 Ultrasonic milkanalyser Where – solids-non-fat content in percentages (%), 0,475 - constant coefficient. This is an actual coefficient for sheep breeds on the territory of the Balkan Peninsula. Operation manual 66/92...
-
Page 67: Appendix 2 Freezing Point Determination
Ultrasonic milkanalyser APPENDIX 2 FREEZING POINT DETERMINATION 1. Methods for determination. The milk analyser determines the freezing point of each sample and the quantity of added water. The milk analyser does not measure the freezing point, but calculates it from the components it depends on. The basic components in the milk are water, solids, lactose, FAT, proteins, minerals (salts) and acids. - Page 68 Ultrasonic milkanalyser confidence that will show 99% of all freezing point determinations on milk without added water: “if the freezing point is –0,525C or below, milk may be presumed to be free of water or may be confirmed as water free by tests, specified below. If the freezing point is above –0,525C, milk will be designated as “presumptive added water”...
- Page 69 Ultrasonic milkanalyser If you’ve entered for the device basic freezing point –0.540C, measured freezing point –0.540C, the milk analyser will indicate 0%. When you add 3,8% water, the device will indicate 3,8%-added water. From the above mentioned follows that it is very important to enter correct basic freezing point in the device.
-
Page 70: Appendix 3 Ph Measuring (Only For Devices With Embedded Function)
Ultrasonic milkanalyser APPENDIX 3 PH MEASURING (ONLY FOR DEVICES WITH EMBEDDED FUNCTION) 1. General information PH probe is a unit, measuring the solution acidity or alkalinity degree. It is measured on scale of 0 to 14. The term pH is derived from "p", the mathematical symbol for the negative logarithm, and "H", the chemical symbol of Hydrogen. -
Page 71: Electrolyte Replacement (For Refillable Electrode Only)
Ultrasonic milkanalyser - Store the electrode as mentioned above (see section Storage). 2.5. Electrolyte Replacement (for refillable electrode only). The reference electrolyte needs to be refilled when the electrode has been used for a long period, or when the internal electrolyte has dried up. To accomplish this, follow the procedure described below. -
Page 72: Electrode Activation
Ultrasonic milkanalyser pH electrodes have junction, which allows the internal fill solution of the measuring electrode to leak out into the solution being measured. The junction can become clogged by contamination in the solution. If a clogged junction is suspected it is best to clear the junction. Heat up the diluted KCl solution to 60-80°C. -
Page 73: Buffer Solutions
Ultrasonic milkanalyser How long an electrode will last is determined by how well is maintained and the pH application. The harsher the system, the shorter the lifespan. For this reason it is always a good idea to have a back-up electrode on hand to avoid any system down time. -
Page 74: Ph Helpful Hints
Ultrasonic milkanalyser For pH electrodes, originally supplied with milk analyser read the following information: Temperature compensations The output of pH electrodes varies with temperature in manner, predicted by theory. When needed, Sensorex can supply electrode holders with build-in automatic temperature compensators. The need of automatic compensation depends on the temperature variation, the pH value being measured. - Page 75 Ultrasonic milkanalyser - Use fresh buffers for calibrations. Avoid contamination of the stock buffer solution and do not use it beyond the expiry date. - Keep all connections dry. - Immerse the electrode far enough into the solution to insure the reference junction is below the surface.
-
Page 76: Preparation For P Hmeasurement
Ultrasonic milkanalyser 1. Preparation for pH measurement When the analyzer is with pH measuring option, it is received from the customer with pH probe packed separately and there’s a stopper on its place. If you need to measure pH follow the procedure below: 1. - Page 77 Ultrasonic milkanalyser It is very important to close the nut tightly, paying attention not to allow air to enter the system. Fig. 12 Placing the probe Operation manual 77/92...
-
Page 78: Ph Measuring
Ultrasonic milkanalyser If you are working with the analyser regularly (each day) do not remove the probe after work.. If you ‘ll not use the analyser more than 2 days, you must take out the probe and to place the stopper back. The pH probe must be stored separately as per the instructions of point 2.3 Appendix 3. - Page 79 Ultrasonic milkanalyser Off line by starting the menu pH & Co Meter | Measuring, when the analyser works only as a pH meter. On line automatic pH measuring, when measuring the rest of the sample’s parameters. When starting work with рН meter first connect the probe/sensor, and then the power supply of the device.
-
Page 80: Ph Calibration
Ultrasonic milkanalyser 8. pH Calibration. Fig. 13 Calibration buffers Take out the sensor. You may not place the nut, because the analyzer do not sucks during calibration. Serves for calibrating the pH meter. For that purpose use 2 standard buffers, shown on the display as Low buffer (for example 5.00 pH) and High buffer (for example 7.00 pH). -
Page 81: Ph Measuring
Ultrasonic milkanalyser 4. Input the buffer value when the probe is in its isopotential point and with which our probes are accompanied with. Then the display shows: pH Calibr Put Izopot buff Buf=xx.xxx V=x.xxxV Set Where x.xxx is measured by the probe voltage. 5. -
Page 82: Ph En/Disable
Ultrasonic milkanalyser By pressing the button Exit, the operator may exit the program and to pass towards another menu. 10. pH En/Disable Serves for enabling/disabling the pH measuring during normal work of the analyser - On line. After starting it the display shows: pH Measuring Where XXX is the current situation of the working mode. -
Page 83: Appendix 4 Conductivity Measuring (Only For Devices With Embedded Function)
Ultrasonic milkanalyser APPENDIX 4 CONDUCTIVITY MEASURING (ONLY FOR DEVICES WITH EMBEDDED FUNCTION) 1. Method of determination. Conductivity (or Electrolytic Conductivity) is defined as the ability of a substance to conduct electrical current. It is the reciprocal of the resistance. In a healthy animal*, the mean value of electric conductivity is: Milk type Conductivity values Cow milk... -
Page 84: Conductivity Measurement
Ultrasonic milkanalyser be released into the milk. The concentration of ions in the milk is thereby raised, and it can more easily conduct electrical current conductivity of the milk increases. Milk conductivity can be used as tests for degree of water evaporation in condense milk production. -
Page 85: Co Meter Test
Ultrasonic milkanalyser Co meter Calibr Put new sample And press Enter ADC=xxxxx/1 Where xxxx is the result from the first calibration measurement. The operator have to put a new buffer, N.B. do not use one and the same buffer more than once! Then start the next measurement. -
Page 86: Co Meter En/Dis
Ultrasonic milkanalyser 5. Co Meter En/Dis. Enables or disables the conductivity measurement system. The following message appears on the display: Cond Measuring 6.Corrections in conductivity measurement It is done by starting the menu Corrections -> Cond measure. You have the possibility to increase/decrease the measured conductivity value from –... - Page 87 Ultrasonic milkanalyser 4. Empty its content in a measuring mug with 1 l volume, paying attention all its content to be emptied. – 3,056 г For standard buffer: 5,02 ms 5. Add 600-700 ml distilled water, which was preliminarily deaerated in vacuum dryer or boiled and then cooled down to 20 ˚С.
-
Page 88: Table Of Contents
Ultrasonic milkanalyser Contents: 1. FUNCTION ................................... 6 2. TECHNICAL PARAMETERS ........................... 7 2.1. WORKING MODES CHARACTERISTICS: ......................7 – 2.1.1. M ................7 EASUREMENT MODE MILK DAIRY PRODUCT FIRST TYPE – 2.1.2. M ................7 EASUREMENT MODE MILK DAIRY PRODUCT SECOND TYPE –... - Page 89 Ultrasonic milkanalyser 6.3.2. P ..................35 REPARING THE ANALYZER FOR MODE ORRECTIONS 6.3.3. M ............................35 AKING CORRECTION ............................42 HECKING THE CALIBRATION 7. STARTING THE DEVICE IN A SERVICE TEST/SETUP OPERATIONAL MODE. MENUS DESIGNATION ................................43 7.1. STARTING THE DEVICE IN A SERVICE TEST/SETUP OPERATIONAL MODE........43 7.2.
- Page 90 Ultrasonic milkanalyser 2.5. ELECTROLYTE REPLACEMENT (FOR REFILLABLE ELECTRODE ONLY)........71 2.6. NEW ELECTROLYTE PREPARATION: ......................71 2.7. RE-USE THE ELECTRODE..........................71 2.8. ELECTRODE CLEANING ............................ 71 2.9. ELECTRODE ACTIVATION ..........................72 2.10. REJUVENATION PROCEDURE ........................72 2.11. ELECTRODE LIFESPAN ........................... 72 3.
- Page 91 Ultrasonic milkanalyser GUARANTEE CARD MIA-LA Guarantee period is 1 (one) year after purchasing date. Improper handling, transport and storage will invalidate the guarantee. Guarantee is void if warranty labels are removed. Serial № Date of purchase: Password: Distributor: Signature: Stamp:...
- Page 92 Ultrasonic milkanalyser GUARANTEE CARD Purchaser: Service report: Service Delivery Damage Signature entry date date 3, Hagavish st. Israel 58817 Tel: 972 3 5595252, Fax: 972 3 5594529 mrc@mrclab.com MRC.1.18 Operation manual 92/92...
Need help?
Do you have a question about the MIA-LA and is the answer not in the manual?
Questions and answers