Table of Contents
Advertisement
Quick Links
Advertisement
Table of Contents

Related Manuals for AND SJ-3000WP/-BT


Summary of Contents for AND SJ-3000WP/-BT
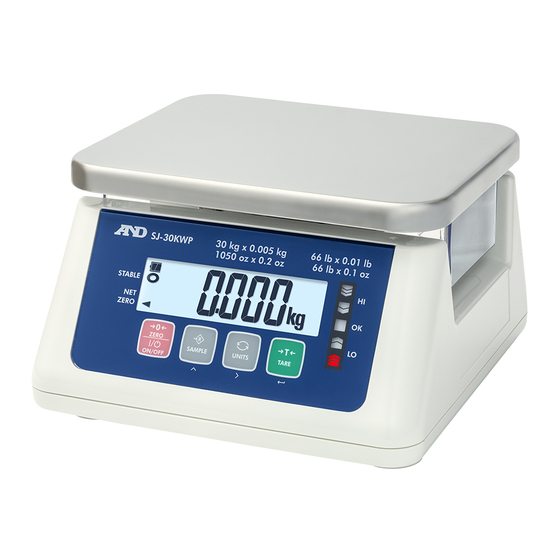
- Page 1 SJ-3000WP/-BT SJ-6000WP/-BT SJ-15KWP/-BT SJ-30KWP/-BT 1WM PD4003567A...
- Page 2 No part of this publication may be reproduced, transmitted, transcribed, or translated into any language in any form by any means without the written permission of A&D Company, Limited. The contents of this manual and the specifications of the instrument covered by this manual are subject to change for improvement without notice.
-
Page 3: Table Of Contents
3.2. Setting Up The Scale ....................4 4. DISPLAY AND SYMBOLS ....................5 4.1. Display ........................5 4.2. Symbols ........................5 4.3. Operations And Functions Of Switches ..............6 5. OPERATION ........................7 5.1. Basic Weighing Operation ..................7 5.2. Notes About Operations ..................... 7 5.3. -
Page 4: Safety Precautions
Avoid installing the scale in direct sunlight, which may cause discoloration or malfunctions. Do not mix battery types, or new and old batteries. Replace with all new batteries at the same time. If the scale is not to be used for a long period of time, remove all batteries from the battery compartment to avoid leakage. -
Page 5: Parts Description
Keep the cover closed to maintain waterproof performance. Battery cover To maintain waterproof performance, close completely this cover and secure by screws. Leveling foot Display and switch Screwdriver Use this screwdriver to open or close the battery cover. -
Page 6: Preparation
CAUTION Do not mix used and new batteries. Do not mix the different types of batteries. That may cause damage to the batteries or the scale. Take care of the polarity of batteries. The polarity marks are shown in the battery compartment. -
Page 7: Display And Symbols
Turns on when the comparator results are displayed. Comparator LEDs "Ib", "oz", "ozt" , "Ib-oz" , "tI-s" , "tI-h" , "tI-t" , "t" , "pcs" , "N" , "g" and "kg" are Weighing units available. A selected unit is displayed. -
Page 8: Operations And Functions Of Switches
In the function setting mode to set the parameters: Press the switch to select the function item. During measurement: Press the switch to tare the scale and display zero (net weight display). In the function setting mode to set the parameters: Other than at the item "unit":... -
Page 9: Operation
TARE Place the object to be weighed on the weighing pan or in the container, and wait for the STABLE indicator to turn on and read the value. Press & hold Remove the object from the weighing pan. -
Page 10: Weight Display Resolution
The LCD backlight is controlled by the functions If no switch is prssed and the weight display continues to be stable for a certain period of time, the LCD backlight will automatically turn off. The elapsed time to turn off is set by the function setting . -
Page 11: Selecting A Weighing Unit
6. SELECTING A WEIGHING UNIT 6.1. Storing The Weighing Unit Press the switch while pressing and holding the switch in order to TARE display in the function setting mode. p-*** Press twice the switch to display MODE Unit Press the switch to display a unit. -
Page 12: Counting Mode
7. COUNTING MODE Determines a unit weight (the weight of one piece) from a known sample quantity, and calculates how many pieces are on the weighing pan using the unit weight. The unit weight is maintained even if the power is turned OFF. -
Page 13: Comparator
1 (LOLO), level 2 (LO), Level 3 (OK), level 4 (HI), level 5 (HIHI) and outside the highest limit. To use the comparator modes, the function settings must be ... -
Page 14: The Formula To Compare
8.1. The Formula To Compare Comparison is performed using the formula listed below and the results are output. Five-level comparator mode Results Comparison formula LED display LOLO Displayed value < LOLO limit, ( Red LED on) LOLO limit ≤ Displayed value < LO limit ( Yellow LED on) LO limit ≤... - Page 15 ( No LEDs on) upper limit < Displayed value, or The comparator values are common to the weighing and counting mode. Ignore the decimal point when setting the comparator values. Example for SJ-6000WP/-BT when the setting value is "001000":...
-
Page 16: Entering The Comparator Values
4. Press the switch to display the memory number to be confirmed. SAMPLE 5. By pressing the switch, LO is lit and the lower limit value of the memory number MODE selected is displayed. 6. By pressing the switch, HI is lit and the upper limit value of the memory number SAMPLE selected is displayed. - Page 17 MODE 6. Press the key at the lower limit value display to make LO and a digit of the value TARE blink. 7. Set the lower limit value by using the following keys.
- Page 18 Lower limit Upper limit...
-
Page 19: Auto-Tare
The SJ-WP/-BT series has an auto-tare function to be used with the comparator mode enabled. If the weight values are in the OK range of comparator limits and stable for a preset period of time, the scale will automatic 1 ally tare the weight and show zero. -
Page 20: Wireless Communication Function (Sj-Wp-Bt Model Only)
LED lights in orange. (About 3 to 4 seconds) Turn on the power and wait for a while. If there are multiple scales or balances, turn off the power of those other than the one to be connected. When pairing is successful, the "Wireless communication mark"... -
Page 21: Data Output Mode (Prt)
Auto print + data output (prt-3) When the value is stabilized (stability mark is lit) and its value is + 5d (d=scale) or greater, data will be output. The next output will be after the weghing value returns to +4d or less. -
Page 22: Command Mode
Data is output when the weighing value is stabilized (stability mark is lit) and its value is +5d or greater, or -5d or smaller. The next output will be after the weighing value has returned to the range of -4d to +4d. - Page 23 Command List Remarks Command Description Requests data be output immediately. Same as the ZERO Zeros the scale when the weighing value is stable. key. Same as the TARE Tares the scale when the weighing value is stable. key. Same as the MODE Switches the weighing unit.
- Page 24 In seven-level comparator mode : The lower threshold value excluding the value of rank 3 is stored. polarity and decimal In five-level comparator mode : LOLO limit value is stored. point. In three-level comparator mode : LO limit value is stored.
- Page 25 Command Examples (“_” stands for "space"(20H)) To request weighing data Command Q C Reply S T , + 0 0 1 2 . 3 4 5 _ k g C Stable positive data U S , + 0 0 0 7 .
- Page 26 In 5-level comparator mode…Outputs the HI threshold value (upper limit value) in use In 3-level comparator mode…Not use In 7-level comparator mode…Outputs upper threshold value of rank 3 in Command ? H 1 C , + 0 0 0 0 3 0 0 0 _ k g C Reply ...
- Page 27 Command H 3 , + 0 0 0 0 5 0 0 0 _ k g C , + 0 0 0 0 5 0 0 0 _ k g C Reply In 5-level comparator mode…Sets the HIHI threshold value (upper limit value) in use In 3-level comparator mode…Sets the HI threshold value (upper limit value) in use...
- Page 28 In 5-level comparator mode…Not use In 3-level comparator mode…Not use In 7-level comparator mode…Sets lower threshold value of rank 1 in , + 0 0 0 0 0 0 0 0 _ k g C Command , + 0 0 0 0 0 0 0 0 _ k g C Reply...
- Page 29 Note: This equipment has been tested and found to comply with the limits for a Class A digital device, pursuant to part 15 of the FCC Rules. These limits are designed to provide reasonable protection against harmful interference when the equipment is operated in a commercial environment.
-
Page 30: Calibration
Method 2 : Make sure that the scale is in the weighing mode. S witch co ve r Loosen the two screws on the switch cover and open the switch cover. The calibration (CAL) CA L swit ch switch is located inside. - Page 31 Gravity acceleration correction Restoring the factory Press the switch TARE set values to execute it. Power OFF To exit from the calibration mode, press and hold the switch or press the switch. The scale turns the power OFF.
-
Page 32: Gravity Acceleration Correction
When calibration using a calibration weight is to be performed, go to step 3 of "11.3.Calibration Using A Weight". To finish the setting procedure, press and hold the switch or the CAL switch. The scale returns to the weighing mode. -
Page 33: Calibration Using A Weight
Prepare a weight, preferably a weight with the same value as the weighing capacity of the scale to be calibrated. Note that the calibration weight value can be changed. Turn the power ON and warm up the scale for at least half an hour. ... -
Page 34: Restoring The Calibration Data To The Factory Set Values
TARE The factory set values are restored and Press displayed. Then, the display returns to To finish the setting procedure, press and hold the switch or press the switch. The scale turns the power OFF. -
Page 35: Function Settings
The parameters set in the function settings are maintained even if the power is turned OFF. Parameter While pressing Item Press & holding 12.1.Setting The Parameters Turn the power OFF. Press and hold the switch and press the TARE switch to turn the power ON. The software version is displayed. Press "... -
Page 36: Restoring The Function Settings To The Factory Set Values
12.2.Restoring The Function Settings To The Factory Set Values Turn the power OFF. Press and hold the switch and press the TARE switch to turn the power ON and to display the software version. Release the switch but Press continue to press the... -
Page 37: Function List
12.3.Function List Item Parameter Description All function is enable. Key lock Enable function: ON/OFF key, zero key, Tare key Auto power-off function disabled Turns off after 5 minutes Auto power-off Turns off after 10 minutes Turns the power OFF function automatically. - Page 38 Auto-tare function disabled Auto-tare function Auto-tare function enabled Immediately after OK and stable 0.5 second after OK and stable 1.0 second after OK and stable 1.5 seconds after OK and stable Timing to tare automatically 2.0 seconds after OK and stable...
- Page 39 Description Item Parameter Stream mode / command mode Command mode only Output by print key / Command mode Auto print +/- data output / Command mode Output mode Auto print + data output SJ-WP-BT model only / Command mode Auto comparator +/- data output on comparator OK / Command mode...
-
Page 40: Maintenance
Calibrate the scale periodically to maintain the weighing accuracy. 13.2. Pick cleaning When unable to weigh properly due to dust between the load cell and overload stopper, insert a cleaning pick to remove the dust from the load cell. The space between the load cell... -
Page 41: Error Codes
CAL error Indicates that the calibration procedure is canceled because the calibration weight is too light. Check that the weighing pan is installed properly and the mass of the calibration weight is correct. Low battery Indicates that the batteries have run out. -
Page 42: Specifications
14. SPECIFICATIONS Specifications Model SJ-3000WP/-BT SJ-6000WP/-BT SJ-15KWP/-BT SJ-30KWP/-BT Capacity 3 kg 6 kg 15 kg 30 kg 0.001 kg 0.002 kg 0.005 kg 0.01 kg 0.0005 kg 0.001 kg 0.002 kg 0.005 kg Minimum display "d" 0.0002 kg 0.0005 kg 0.001 kg... - Page 43 Other weighing units Model SJ-3000WP SJ-6000WP SJ-15KWP SJ-30KWP Capacity 3000 g 6000 g 15000 g 30000 g 10 g 0.5 g * 1 g * Minimum display 0.2 g 0.5 g 0.1 g 0.2 g 0.5 g Capacity 6.6 lb 13 lb 33 lb 66 lb...
-
Page 44: Gravity Acceleration
15. GRAVITY ACCELERATION Values of gravity at various locations Amsterdam 9.813 m/s Manila 9.784 m/s Athens 9.807 m/s Melbourne 9.800 m/s Auckland NZ 9.799 m/s Mexico City 9.779 m/s Bangkok 9.783 m/s Milan 9.806 m/s Birmingham 9.813 m/s New York 9.802 m/s Brussels 9.811 m/s... - Page 45 World map...
- Page 46 MEMO...
- Page 48 3-23-14 Higashi-Ikebukuro, Toshima-ku, Tokyo 170-0013, JAPAN Telephone: [81] (3) 5391-6132 Fax: [81] (3) 5391-6148 A&D ENGINEERING, INC. 1756 Automation Parkway, San Jose, California 95131, U.S.A. Telephone: [1] (408) 263-5333 Fax: [1] (408)263-0119 A&D INSTRUMENTS LIMITED Unit 24/26 Blacklands Way, Abingdon Business Park, Abingdon, Oxfordshire OX14 1DY United Kingdom Telephone: [44] (1235) 550420 Fax: [44] (1235) 550485 A&D AUSTRALASIA PTY LTD...
Need help?
Do you have a question about the SJ-3000WP/-BT and is the answer not in the manual?
Questions and answers
How to enter in service mode
To enter the service (function setting) mode on the AND SJ-3000WP/-BT scale, press and hold the ON/OFF switch while also pressing and holding the TARE switch when the scale is turned off.
This answer is automatically generated
SJ-WP -BT series Service manual
The service manual for the AND SJ-3000WP/-BT series includes the following sections:
1. Safety Precautions
2. Parts Description
3. Preparation
3.1. Installing/Exchanging Batteries
3.2. Setting Up the Scale
4. Display and Symbols
4.1. Display
4.2. Symbols
4.3. Operations and Functions of Switches
5. Operation
5.1. Basic Weighing Operation
5.2. Notes About Operations
5.3. Weight Display
10.2. SJ-WP-BT Wireless Communication Specification
It also contains model specifications, dimensions, accessories, and wireless communication settings.
This answer is automatically generated