Advertisement
Colorado MCR / TCR
Instructions for Operating and Installation
(Read these instructions carefully and retain for future reference)
A qualified electrician must carry out the electrical installation of this radiator. The electrical
installation must comply with current UK regulations. Any claim on the warranty could be invalid
Electric Towel Radiator
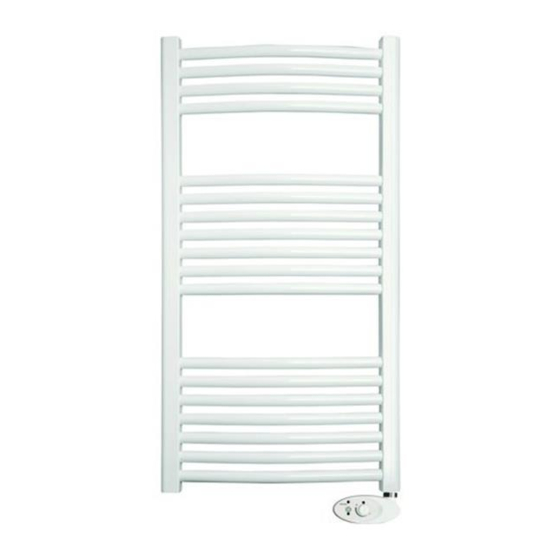
Models
MCR 40/120
MCR 40/140
TCR 140 Chrome
NOTE
if these requirements have not been met.
1
White
White
Advertisement

Related Manuals for Ducasa Colorado TCR 140


Summary of Contents for Ducasa Colorado TCR 140
- Page 1 Colorado MCR / TCR Electric Towel Radiator Instructions for Operating and Installation (Read these instructions carefully and retain for future reference) Models MCR 40/120 White MCR 40/140 White TCR 140 Chrome NOTE A qualified electrician must carry out the electrical installation of this radiator. The electrical installation must comply with current UK regulations.
-
Page 2: Table Of Contents
CONTENTS General Information page 3 Installation Instructions page 5 Electrical Power Supply Location Of Towel Radiator Mounting The Towel Radiator Operating Instructions page 7 Controls Mode Indicator Table Function Modes Maintenance And Guarantee page 16... -
Page 3: General Information
• Comfort, Economy, Program, 2-Hour Boost, Open Window Detection and Frost Protec- tion settings • Overheat protection with safety cut-out • Large backlit display. • Programmable by infrared remote control (Ducasa Remote) – optional • Fitted with connecting power cable 1200mm long (without a plug) - Page 4 MODEL MCR 40/120 MCR 40/140 TCR 140 Wattage (W) Power 230V/1/50Hz. 230V/1/50Hz. 230V/1/50Hz. Weight (Kg.) Dimensions (mm) 500 x 940 x 70 500 x 1400 x 70 500 x 1400 x 70 Class IP Rating Cable (mm) 1200 1200 1200 IMPORTANT INFORMATION See Section “Installation Instructions –...
-
Page 5: Installation Instructions
INSTALLATION INSTRUCTIONS ELECTRICAL POWER SUPPLY A qualified electrician must carry out the electrical installation of this radiator. The electrical installation must comply with current UK regulations. Any claim on the warranty could be invalid if these requirements have not been met. The radiator requires a 230V 50Hz power supply. - Page 6 STEP 1 First position the four support assemblies on the towel rail. Locate component (B) in a support position between the tubes from the back of the towel radiator and hold it in position by attaching the retaining component (D) from the front using screw (C). Repeat this in all four support positions. STEP 2 Now lift the towel radiator onto the wall in the desired location and press against the wall, check that it is level and then mark the position of the four supports.
-
Page 7: Operating Instructions
OPERATING INSTRUCTIONS The room temperature is controlled by the electronic thermostat in the control end on the right side of the appliance. The thermostat is precise to ±0.3ºC. Plastic cover: IR receiver: The part connecting Allows full remote control to the heating element of the device through the is kept hidden by this dedicated remote control. -
Page 8: Function Modes
Setting the Clock 1. In the Stand-by mode press and hold the - button for more than 3 seconds to enter the “Set” menu. 2. Press the + button until “tEd” is shown and then press the Mode button. 3. Use the +/- buttons to select the day of the week (1 = Monday) and confirm by pressing the Mode button. - Page 9 Keypad Lock To lock the buttons (Except the On/Standby button) press the Mode button for 3 seconds. A key symbol will appear on the screen to signify it being locked. To unlock, press the Mode button for 3 seconds again – the key symbol will disappear. OpenWindow Detection When the Open Window Detection function is enabled, the device is able to sense an open window by registering a sudden decrease of the temperature in the room.
- Page 10 The Remote Control (Optional) General Description The remote control communicates with the radiator using infra-red signal from a maximum distance of 10m from the appliance and requires 2x AAA batteries. ECO Button Temperature IR transmision (not compatible with Colorado Towel Rail) ‘+’...
- Page 11 OPEN WINDOW DETECTION FUNCTION To enable the “open window detection” function, press both the ECO and - buttons together for 3 seconds. To disable the function, repeat the same procedure. 2-Hour Boost This mode will force continued heating for 2 hours independent of room temperature, after this time the Colorado the radiator will return to the previously operated mode.
- Page 12 Ducasa Single Zone Remote Programming Quick View Instructions Make sure remote shows a symbol in between the 2 lines, above the clock. If not press First set the date and time by pressing Use +/- to select the day (1=Monday, 7=Sunday)
- Page 13 LoT 20 Table Models MCR 40/120 MCR 40/140 TCR 140 Heat output Nominal heat output (P 0.45kW 0.75kW 0.45kW Maximum continuous heat output 0.45kW 0.75kW 0.45kW max,c Auxiliary electricity consumption At nominal heat output (el 0.00044 kW 0.00044 kW 0.00044 kW At minimum heat output (el In standby mode (el 0.00037 kW...
- Page 14 Installation Notes:...
- Page 15 Installation Notes:...
- Page 16 MAINTENANCE AND CARE Ducasa radiators require very little maintenance. The surfaces of the radiator must not be cleaned with an abrasive product or those containing granular substances. We recommend regular cleaning with PH neutral products. In order to clean the radiator, it is recommended that the electric power is switched off.
Need help?
Do you have a question about the Colorado TCR 140 and is the answer not in the manual?
Questions and answers