Table of Contents
Advertisement
Quick Links
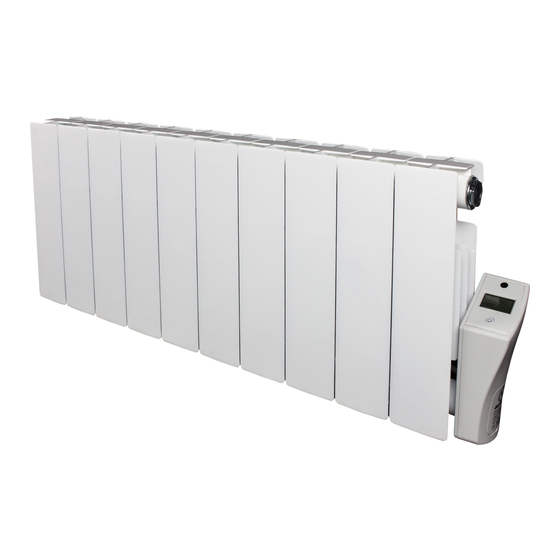
Low Level & Full Height Thermal Electric Radiator
Installation and Operation Guide
Type
Wattage
DPL 10
DPL 15
DP 450
DP 600
DP 900
DP 1200
DP 1500
DP 1800
ADVANCED ELECTRIC HEATING
Richmond DPL & DP
Models
No. of Fins
950
10
1425
15
450
600
900
1200
1500
10
1800
12
Size (WxHxD) (mm)
865
340
1265 340
3
310
575
4
390
575
6
550
575
8
710
575
870
575
1030 575
1
Net Weight (kg)
96
12.8
96
19.2
96
6.1
96
8.1
96
11.8
96
15.7
96
19.3
96
25.7
Advertisement
Table of Contents

Subscribe to Our Youtube Channel
Related Manuals for Ducasa Richmond DPL 10


Summary of Contents for Ducasa Richmond DPL 10
- Page 1 ADVANCED ELECTRIC HEATING Richmond DPL & DP Low Level & Full Height Thermal Electric Radiator Installation and Operation Guide Models Type Wattage No. of Fins Size (WxHxD) (mm) Net Weight (kg) DPL 10 12.8 DPL 15 1425 1265 340 19.2 DP 450 DP 600 DP 900...
-
Page 2: Installation
Installation Main Principles This appliance must be connected to a 230V 50Hz power supply. This appliance must be connected to a switched fused spur or a plug. Main installation must be provided by an omni- polar device where the distance between contacts must be a minimum of 3mm. Power Cord Wires = Neutral (Grey or Blue) Live (Brown) - Page 3 The standard rules about recycling and removal of synthetic heating fluid should be followed once the appliance is no longer in use. Children of less than 3 years should be kept away unless continuously supervised. Children aged from 3 years and less than 8 years shall only switch on/off the appliance provided that it has been placed or installed in its intended normal operating position and they have been given supervision or instruction concerning use of the applince in a safe way and understand the hazards involved.
-
Page 4: Electric Power
Directions for the Installer Installation should only be completed by a qualified professional. Electric Power The electrical circuits within your house should be of the correct type and size for the appliance wattage. We recommend that the fused spur outlet is placed 10cm to the right of the appliance and 15cm from the floor. - Page 5 Mark the appropriate location and fix the brackets in place with the supplied plugs and screws, ensuring the brackets are installed in the correct position (figure 2). Figure 2 Once the brackets have been installed the radiator can be hung from the supports (figure 3). To lock the radiators in place press on the ratchet and turn until a click is heard (figure 4).
-
Page 6: Operation
Operation The room temperature is controlled by the electronic thermostat in the control end located on the side of the appliance. The thermostat has a precision of ±0.3ºC. Main modes: Time ‘button’ standby time Frost protection ECO ‘button’ Comfort Pilot wire Heating indicator ON / stand by ‘button’... - Page 7 Mode Change Press the Mode button to change between the mode screens shown below: Pilot wire Comfort Economy Frost Protection Programme 2hr Boost ECO mode Pilot Wire When in the pilot wire mode and if connected to a separate central pilot wire controller the appliance can receive four type of control signal: 1.
-
Page 8: Programme Mode
Programme Mode The programme mode has three programs which can be amended by the user (P1, P2, P3). To select a programme, press the mode until the Programme mode is selected. Then press the time button to select either P1, P2 or P3. To edit a programme: 1. -
Page 9: Setting Time
Programming – Quick Guide Setting Time Chose Time using -/+ Day starts blinking. in Stand by mode , press buttons and select with and hold Time button Mode button. Chose week day (1-7) -/+ Select Hour -/+ Select Minutes -/+ , confirm pressing Mode cofirm pressing Mode cofirm pressing Mode... -
Page 10: Functions Menu
Functions Menu Once power has been supplied to the radiator it will initially be in the standby mode. stand by Function Setting Functions 1. In the Stand-by mode press and hold the time button for more than 3 seconds. 2. Press the + or - button to select Time or Function, press mode to chose Function. -
Page 12: The Remote Control (Optional)
The Remote Control (Optional) General Description The remote control communicates with the radiator using infra-red signal from a maximum distance of 10m from the appliance and requires 2x AAA batteries. Temperature transmision Time Button Mode Button Operating Mode ‘-’ Button ‘+’... -
Page 13: Low Battery Warning
IR Transmission Any alterations made using the remote control will be sent to the radiator via an IR signal after 1 symbol flashing in the top right hand second of inactivity. This can be seen by the IR transmission corner. Keypad lock This function allows the user to lock the keypad on the remote to avoid inadvertent changes. - Page 14 Ducasa Single Zone Remote Programming Quick View Instructions Make sure remote shows a symbol in between the 2 lines, above the clock. If not press First set the date and time by pressing Use +/- to select the day (1=Monday, 7=Sunday)
- Page 15 LoT 20 Table Models 1200 1500 1800 Heat output Nominal heat output (P 0.95kW 1.42kW 0.45kW 0.6kW 0.9kW 1.2kW 1.5kW 1.8kW Maximum continuous heat output 0.95kW 1.42kW 0.45kW 0.6kW 0.9kW 1.2kW 1.5kW 1.8kW max,c Auxiliary electricity consumption 0.00076 0.00076 0.00076 0.00076 0.00076 0.00076...
- Page 16 MAINTENANCE AND CARE Ducasa radiators require very little maintenance. The surfaces of the radiator must not be cleaned with an abrasive product or those containing granular substances. We recommend regular cleaning with PH neutral products. In order to clean the radiator, it is recommended that the electric power is switched off.
Need help?
Do you have a question about the Richmond DPL 10 and is the answer not in the manual?
Questions and answers