
Related Manuals for Hytorc jGun DIGITAL


Summary of Contents for Hytorc jGun DIGITAL
- Page 1 DIGITAL Pneumatic Torque Tool Operations Manual 333 Route 17 N. 800-FOR-HYTORC hytorc.com Mahwah, NJ 07430 (800-367-4986) 201-512-9500...
- Page 3 Warranty. The jGun® Pneumatic Torque Tools (SINGLE SPEED and DUAL SPEED Models) have a one-year limited warranty. Every tool is tested before leaving the factory and is warranted to be free from defects in workmanship and materials. HYTORC will repair or replace, without charge, any tool which, upon examination, proves to be defective in workmanship or materials for one (1) year after the date of purchase.
- Page 4 HYTORC • All warranty repairs are free of all charges including return-freight. HELP If you require any further assistance, please call your local HYTORC Representative or 1-800-FOR-HYTORC (1-800-367-4986). Please visit us at HYTORC.com. FOLLOW US ONLINE...
-
Page 5: Table Of Contents
HYTORC Reaction Washer Overview Safety Personal Protective Equipment HYTORC Washer Requirements HYTORC Washer Assembly, Use and Service (SETUP) Important Preparation Steps for the HYTORC Washer Important Installation Steps for the HYTORC Washer Installing HYTORC Washer Driver Tightening with HYTORC Washer jGun DIGITAL Maintenance and Troubleshooting Tips jGUN®... -
Page 6: Warranty
Warranty The jGun DIGITAL has a one year limited warranty. Every HYTORC tool is tested before leaving the factory and is warranted to be free from defects in workmanship and materials. HYTORC will repair or replace, without charge, any tool which upon examination proves to be defective in workmanship or materials for one (1) year after the date of purchase. -
Page 7: Jgun Digital Overview
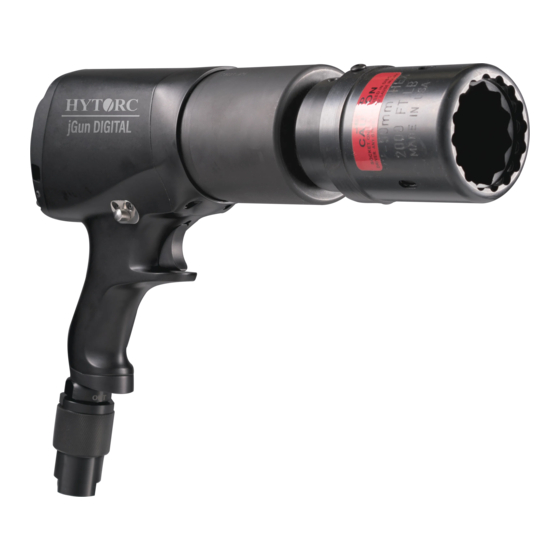
DIGITAL Overview The jGun DIGITAL Pneumatic Torque Tool is designed to safely and accurately deliver up to 8,000 ft-lbs of torque onto a fastener. This is accomplished using a patented planetary gearbox torque multiplier system and an appropriate reaction arm or HYTORC Reaction Washer™ and HYTORC Nut™. The torque multiplier produces torque ratios of up to 4180:1 while the Reaction Arm or Washer is used to absorb the high counter rotational force produced as the final torque value is reached. -
Page 8: Jgun Digital Safety
Inspect the tool before each use. Replace any obviously worn or damaged parts. • When not in use, store the jGun DIGITAL and jGun DIGITAL accessories in the plastic storage case supplied with the tool. Do not expose the gun to high humidity or large temperature varia- tions. -
Page 9: Air Supply Requirements
Ensure that air line fittings are tight and leak free. Do not over tighten air line fittings. • Open the air supply connected to the jGun DIGITAL unit and run the jGun DIGITAL while setting the torque on the display. -
Page 10: The Rbrc Seal
United States to facilitate the collection of spent lithium ion batteries. Help protect our environment and conserve natural resources by returning the spent lithium ion battery to an authorized HYTORC service center for recycling. You may also contact your local recycling center for information on where to drop off the spent battery. - Page 11 CAUTION: Under certain conditions, with the charger plugged into the power source, the charger can be shorted by foreign material. Foreign materials of a conductive nature such as, but not limited to, steel wool, aluminium foil, or any buildup of metallic particles should be kept away from charger USB connectors.
-
Page 12: Reaction Arm Or Washer
Reaction Arm or HYTORC Washer Choose the correct reaction arm for the job. The jGun DIGITAL is shipped with a standard length reaction arm, but your gun may have been ordered with a custom reaction arm for a specific purpose. -
Page 13: Reaction Arm And Socket Installation
Reaction Arm and Socket Installation • Choose the correct reaction arm for the job. The jGun DIGITAL is shipped with a standard length reaction arm, but your gun may have been ordered with custom-length reaction arm for a specific purpose. - Page 14 Reaction Arm Installed • Lock the reaction arm to the jGun DIGITAL by aligning the set-screw with the hole in the splined section and then tightening the set screw firmly. Tightening Reaction Arm Set Screw • Place the appropriately sized socket onto the jGun DIGITAL barrel.
- Page 15 Installing Digital jGun DIGITAL Socket • Install the socket locking pin and retaining ring. Installing Socket Locking Pin and Retaining Ring jGUN® Pneumatic Torque Tools (Single Speed and Dual Speed Models) Operations Manual...
-
Page 16: Key Operating Safety Points
IS LOCATED BETWEEN THE REACTION ARM AND THE IMMOVABLE OBJECT WHEN THE FASTENER IS BEING TORQUED. • Ensure the jGun DIGITAL barrel is in a straight line with relation to the stud and that the socket is fully engaged onto the fastener. •... -
Page 17: Jgun Digital Setup And Use
DIGITAL SETUP AND USE Proper setup and use of the jGun DIGITAL before and during installation ensures accurate results and safe operation. Setting a Torque Value jGun DIGITAL Display 1. Connect an adequate air supply to the input of the tool's regulator. -
Page 18: Charging The Jgun Digital
2. A charger with USB cable is provided in the case with the tool. 3. Connect the charger to the USB connector on the right side of the display housing on the rear of the gun. jGun DIGITAL Battery Indicator and USB Connector... -
Page 19: Operating The Jgun Digital
7. Ensure that the reaction arm is placed firmly against a stationary surface such as an adjacent nut, a flange, or equipment housing. (If using the HYTORC™ Reaction Washer in place of a standard reaction arm ensure that it is setup according to the steps in the HYTORC Reaction Washer Overview section). -
Page 20: Loosening A Fastener
8. Ensure that the reaction arm is placed firmly against a stationary surface such as an adjacent nut, a flange, or equipment housing. (If using the HYTORC™ Reaction Washer in place of a standard reaction arm ensure that it is setup according to the steps in the HYTORC Reaction Washer Overview section). - Page 21 Lubricating the Air Motor To lubricate the air motor: 1. Turn the jGun DIGITAL upside down and disconnect the air hose at the regulator coupling connection. 2. Pour approximately one ounce (29.6 ml) of air tool oil, or spray a lubricant, into the hose coupling on the gun.
-
Page 22: Hytorc Reaction Washer Overview
HYTORC Washer and Socket HYTORC Washer Socket Mounted on the jGun DIGITAL In addition to the added safety of having no external moving parts, the HYTORC Washer system provides a universal reaction point for all applications, eliminating the need for custom-designed reaction arms. -
Page 23: Safety
HYTORC Washer Assembly, Use and Service (SETUP) • Correct preparation and use of HYTORC Washers are a prerequisite for good rundown and for safe handling Important Preparation Steps for the HYTORC Washer • Before using the HYTORC Washer the connection elements must be carefully checked and cleaned •... -
Page 24: Important Installation Steps For The Hytorc Washer
• Install the clean, dry nut on the opposite side from which you want to tighten. • Now install the lubricated nut (on the same side as the HYTORC Washer) by turning it clockwise until it is hand tightened against the HYTORC Washer. -
Page 25: Installing Hytorc Washer Driver
Aligning HYTORC Washer™ Socket Set Screw with Machined Recess in jGun DIGITAL Splines Installing HYTORC Washer Driver • The set screw for fastening the HYTORC Washer Driver is aligned with the milled recess in the ring gear of the tool. -
Page 26: Tightening With Hytorc Washer
• Put the tool in HYTORC Washer mode. • Place the HYTORC Washer Driver on the jGun DIGITAL and tighten the set screw. • Engage the HYTORC Washer Driver and tool with the nut by placing it over the top of the bolt to be tightened. - Page 30 H Y TO R C WO R LD HE A D QUA R T E R S 333 Route 17 North, Mahwah, NJ 07430 • +201-512-9500 • 800-FOR-HYTORC WO R LDW ID E H Y TO R C LO CAT I O N S...
Need help?
Do you have a question about the jGun DIGITAL and is the answer not in the manual?
Questions and answers