Table of Contents
Advertisement
Quick Links
Advertisement
Table of Contents
Troubleshooting

Related Manuals for Mercury T6200 TowSport


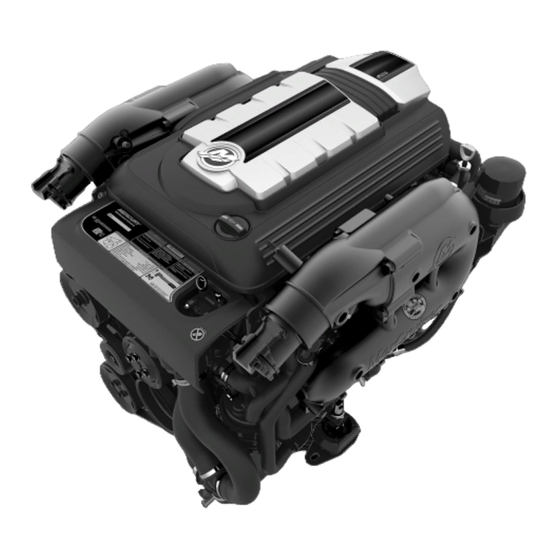
Summary of Contents for Mercury T6200 TowSport
- Page 1 T6200 / T6200 H.O. TowSport OP ERA TIO N AN D M A INTENAN C E M A N U AL...
- Page 3 The engine exhaust from this product contains chemicals known to the state of California to cause cancer, birth defects or other reproductive harm. The serial numbers are the manufacturer’s keys to numerous engineering details that apply to your Mercury Marine power package. When contacting Mercury Marine about service, always specify model and serial numbers.
- Page 4 At Mercury Marine every engine is operated and tested before it is boxed for shipment to make sure that the product is ready for use. In addition, certain Mercury Marine products are tested in a controlled and monitored environment, for up to 10 hours of engine run time, in order to verify and make a record of compliance with applicable standards and regulations.
-
Page 5: Table Of Contents
TABLE OF CONTENTS Section 1 - Getting to Know Your Power Package Adaptive Speed Control (ASC)..........2 Remote Controls (DTS Models)..........7 Identification................2 Remote Controls..............7 Engine Serial Number ............2 Panel Mount Features............7 Transmissions..............3 TowSports Panel Mount Features........8 ZF Marine Transmissions.......... - Page 6 Poor Performance............65 Steering Wheel Jerks or Is Difficult to Turn..... 66 Section 7 - Customer Assistance Information Owner Service Assistance............68 Contact Information for Mercury Marine Customer Service Local Repair Service............68 ..................69 Service Away From Home..........68 Customer Service Literature...........
- Page 7 Section 8 - Checklists Predelivery Inspection (PDI)............ 72 Customer Delivery Inspection (CDI)........73 Section 9 - Maintenance Log Scheduled Maintenance Log........... 76 Vessel Maintenance Notes............77 90-8M0128975 JUNE 2017 Page iii...
- Page 8 Page iv 90-8M0128975 JUNE 2017...
- Page 9 Section 1 - Getting to Know Your Power Package Section 1 - Getting to Know Your Power Package Table of Contents Adaptive Speed Control (ASC)..........2 Remote Controls (DTS Models)..........7 Identification................2 Remote Controls.............. 7 Engine Serial Number ............. 2 Panel Mount Features.............
-
Page 10: Adaptive Speed Control (Asc)
Section 1 - Getting to Know Your Power Package Adaptive Speed Control (ASC) This power package utilizes Adaptive Speed Control (ASC) to maintain the engine RPM that is demanded at the remote control, regardless of the load change. As an example of how ASC functions, when the operator steers the boat into a hard turn or is navigating at a slow on‑plane speed in following seas when boat control is needed without a lot of speed, the propulsion control module will automatically adjust the engine to maintain the RPM without the operator changing the position of the remote control throttle handle. -
Page 11: Transmissions
Section 1 - Getting to Know Your Power Package Transmissions ZF Marine Transmissions The ZF Marine transmission identification plates have the gear ratio, serial number, and model number listed. NOTE: A digital and mechanical version of each type of transmission is available. ZF 45IV V-drive (digital), 46IV V-drive similar Transmission identification plate 58436... -
Page 12: Keep The Lanyard Stop Switch And Lanyard Cord In Good Operating Condition
Section 1 - Getting to Know Your Power Package • Poor operating practices • Sitting on the seat or gunwale at planing speeds • Standing at planing speeds • Operating at planing speeds in shallow or obstacle‑infested waters • Releasing your grip on the steering wheel •... -
Page 13: Smartcraft Digital Instruments
Section 1 - Getting to Know Your Power Package Refer to the VesselView operator's manual for more information. 61325 VesselView SmartCraft Digital Instruments The SmartCraft instrument package augments the VesselView display. The instrument package may include: • Tachometer • Speedometer •... -
Page 14: Remote Controls (Non-Dts Models)
Remote Controls (Non‑DTS Models) Remote Control Features—Non‑DTS Your boat may be equipped with one of the Mercury Precision or Quicksilver remote controls shown. If not, consult your dealer for a description of the functions and operations of the remote control. -
Page 15: Remote Controls (Dts Models)
Remote Controls IMPORTANT: Your boat must be equipped with a Mercury Marine electronic remote control. Start in gear protection is provided by this control system and prevents the engine from starting when the control is actuated in forward or reverse. Refer to the Mercury Precision Parts/Quicksilver Accessories Guide. -
Page 16: Towsports Panel Mount Features
Section 1 - Getting to Know Your Power Package TowSports Panel Mount Features Lanyard stop switch Control handle and shift lock Detent tension adjustment screw Control handle tension adjustment screw Throttle only button (on helm‑mounted CAN pad) 33173 Lanyard stop switch—The lanyard turns the ignition off whenever the operator moves far enough away from the operator's position to activate the switch, assuming the operator is attached. - Page 17 Section 1 - Getting to Know Your Power Package To access the circuit breaker and fuses, remove the outside engine cover. Pull the outside engine cover up to remove it from the four rubber mount grommets. 63785 The circuit breaker provides protection for the engine wiring harness and the instrumentation power lead. 63787 All of the engine protection fuses are located at the front of the engine.
- Page 18 Section 1 - Getting to Know Your Power Package DTS engine, freshwater cooled shown, others similar Oxygen sensor fuses (4) Spare fuses Engine and trim relay fuse DTS helm power fuse Fuel injector fuse Alternator and fuel pump relay fuse Ignition coil fuse Malfunction indicator lamp (MIL) fuse...
-
Page 19: Visual And Audio Warning Systems
Section 1 - Getting to Know Your Power Package This power package uses a clean power harness that is connected to the engine starting battery. This clean power harness minimizes an excessive voltage drop to the engine and drive digital control electrical system. This harness is protected by a 5‑amp fuse and is located near the engine starting battery. -
Page 20: Caution
Section 1 - Getting to Know Your Power Package Caution If a caution state is detected, the audio warning system will sound for six one‑second intervals. Horn (on or off) Time (in seconds) 33402 Critical If a critical state is detected, the audio warning system sounds for six seconds and then turns off. Horn (on or off) Time (in seconds) 53403... - Page 21 Section 2 - On the Water Section 2 - On the Water Table of Contents Safe Boating Recommendations.......... 14 High‑Speed and High‑Performance Operation..... 18 Carbon Monoxide Exposure..........15 Passenger Safety in Pontoon Boats and Deck Boats..18 Be Alert To Carbon Monoxide Poisoning ..... 15 Boats Having an Open Front Deck .......
-
Page 22: Safe Boating Recommendations
Most boats are rated and certified for maximum load (weight) capacities (refer to your boat's capacity plate). Know your boat's operating and loading limitations. Know if your boat will float if it is full of water. When in doubt, contact your authorized Mercury Marine dealer or the boat manufacturer. Ensure that everyone in the boat is properly seated. -
Page 23: Carbon Monoxide Exposure
Section 2 - On the Water Be alert. • The operator of the boat is responsible by law to maintain a proper lookout by sight and hearing. The operator must have an unobstructed view particularly to the front. No passengers, load, or fishing seats should block the operator's view when the boat is above idle or planing transition speed. -
Page 24: Poor Ventilation
Section 2 - On the Water Poor Ventilation Under certain running or wind conditions, permanently enclosed or canvas enclosed cabins or cockpits with insufficient ventilation may draw in carbon monoxide. Install one or more carbon monoxide detectors in your boat. Although the occurrence is rare, on a very calm day, swimmers and passengers in an open area of a stationary boat that contains or is near a running engine may be exposed to a hazardous level of carbon monoxide. -
Page 25: Stopping The Engine
Section 2 - On the Water Place the remote control handle in neutral. NOTICE Without sufficient cooling water, the engine, the water pump, and other components will overheat and suffer damage. Provide a sufficient supply of water to the water inlets during operation. WARNING Explosive fumes contained in the engine compartment can cause serious injury or death from fire or explosion. -
Page 26: Freezing Temperature Operation
IMPORTANT: If the boat is operated during periods of freezing temperature, precautions must be taken to prevent freeze damage to the power package. Damage caused by freezing is not covered by Mercury MerCruiser Limited Warranty. Drain Plug and Bilge Pump The engine compartment in your boat is a natural place for water to collect. -
Page 27: Boats Having An Open Front Deck
Section 2 - On the Water Boats Having an Open Front Deck No one should ever be on the deck in front of the fence while the boat is in motion. Keep all passengers behind the front fence or enclosure. Persons on the front deck could easily be thrown overboard or persons dangling their feet over the front edge could get their legs caught by a wave and pulled into the water. -
Page 28: Impact With Underwater Hazards
After striking a submerged object, stop the engine as soon as possible and inspect the drive system for any broken or loose parts. If damage is present or suspected, the power package should be taken to an authorized Mercury MerCruiser dealer for a thorough inspection and necessary repair. -
Page 29: Cavitation
Frequently check engine oil level. Add oil as needed. It is normal for oil consumption to be high during the break‑in period. After the Break‑In Period To help extend the life of your Mercury MerCruiser power package, follow these recommendations: •... -
Page 30: End Of First Season Checkup
End of First Season Checkup At the end of the first season of operation, contact an authorized Mercury MerCruiser dealer to discuss and/or perform scheduled maintenance items. If you are in an area where the product is operated continuously, year‑round, you should contact your dealer at the end of the first 100 hours of operation or once yearly, whichever occurs first. -
Page 31: Section 3 - Specifications
Section 3 - Specifications Section 3 - Specifications Table of Contents Fuel Requirements............... 24 Methanol and Ethanol Fuel Blends ....... 24 Fuel Ratings ..............24 Engine Oil................24 Using Reformulated (Oxygenated) Gasoline (USA Only) 6.2 MPI TowSport Engine Specifications......25 .................. -
Page 32: Fuel Requirements
Using Reformulated (Oxygenated) Gasoline (USA Only) Reformulated gasoline is required in certain areas of the USA and is acceptable for use in your Mercury Marine engine. The only oxygenate currently in use in the USA is alcohol (ethanol, methanol, or butanol). -
Page 33: Mpi Towsport Engine Specifications
Section 3 - Specifications If Mercury/Quicksilver 25W‑40 Synthetic Blend Engine Oil is unavailable, use the following lubricants, listed in order of recommendation. 1. Mercury/Quicksilver 25W‑40 Mineral NMMA FC‑W Catalyst Compatible. IMPORTANT: If you are servicing a catalyst engine, use the following oils for short periods of time only. -
Page 34: Fluid Specifications
*Battery manufacturers may rate and test their batteries to different standards. MCA, CCA, Ah, and reserve capacity (RC) are the ratings recognized by Mercury Marine. Manufacturers that use standards different than these, such as equivalent MCA, do not meet Mercury Marine battery requirements. -
Page 35: Section 4 - Maintenance
Section 4 - Maintenance Section 4 - Maintenance Table of Contents Owner/Operator Responsibilities.......... 28 Checking the Fluid Level When Hot ......36 Dealer Responsibilities............28 Changing ..............36 Cleaning Care Recommendation......... 28 Transmission Anodes—45IV and 46IV......... 36 Cleaning Gauges............28 Transmission Remote Control Cable Adjustment .... -
Page 36: Owner/Operator Responsibilities
It is the operator's responsibility to perform all safety checks, to ensure that all lubrication and maintenance instructions are complied with for safe operation and to return the unit to an authorized Mercury MerCruiser dealer for a periodic checkup. Normal maintenance service and replacement parts are the responsibility of the owner/operator and as such, are not considered defects in workmanship or material within the terms of the warranty. -
Page 37: Do-It-Yourself Maintenance Suggestions
Raw Water Flush Do‑It‑Yourself Maintenance Suggestions Present day marine equipment, such as your Mercury MerCruiser power package, are highly technical pieces of machinery. Electronic ignition and special fuel delivery systems provide greater fuel economies, but also are more complex for the untrained mechanic. -
Page 38: 20 Hour Break In
Section 4 - Maintenance 20 Hour Break In • Change the transmission fluid and filter—ZF requirement to maintain warranty—dealer item Annually or 100 Hours • Check the battery condition and connections—dealer item • Lubricate the propeller shaft splines • Check the torque of the propeller nut •... -
Page 39: Oil Level-Overfilled
Section 4 - Maintenance Remove the dipstick, wipe it clean, and install it fully into the dipstick tube. Wait 60 seconds to allow trapped air to vent. Remove the dipstick. 58400 V-drive model shown 58402 In-line drive model shown Inspect the dipstick for the oil level reading. The oil should be between the ADD mark and the FULL or OK range mark on the dipstick. -
Page 40: Engine Oil Drain Pump
Capacity Fluid Type Engine oil (with filter) 4.7 L (5 US qt) Mercury/Quicksilver 25W‑40 Synthetic Blend Engine Oil, NMMA FC‑W Engine Oil Drain Pump Loosen the oil filter to vent the system. Remove the dipstick. Install the oil pump onto the dipstick tube. -
Page 41: Changing The Oil Filter
Engine oil (with filter) 4.7 L (5 US qt) Mercury/Quicksilver 25W‑40 Synthetic Blend Engine Oil, NMMA FC‑W Start the engine and operate for three minutes while checking for leaks. Stop the engine and allow the oil to drain into the oil pan for approximately five minutes with the boat at rest in the water. -
Page 42: Filling
The coolant level in the heat exchanger should be at the bottom of the filler neck. If the coolant level is low, verify that there is fluid in the coolant recovery bottle. If the recovery bottle is empty, contact your authorized Mercury MerCruiser dealer. -
Page 43: Changing
Check the antifreeze concentration for adequate freeze protection and correct if necessary. Refer to the Specifications section. Install the fill cap to the coolant recovery bottle. Changing Contact your authorized Mercury MerCruiser dealer. Transmission Fluid Checking the Fluid Level Before Operation IMPORTANT: Always check the fluid level before starting and operating. -
Page 44: Checking The Fluid Level When Hot
The process for checking the fluid level when hot is the same as checking the fluid level before operation. Changing Contact your authorized Mercury MerCruiser dealer. Transmission Anodes—45IV and 46IV The transmission anodes are incorporated onto the transmission housing to retard the effects of corrosion. The anodes should be inspected every year, more often when operating in brackish or saltwater. -
Page 45: Transmission Remote Control Cable Adjustment
Section 4 - Maintenance NOTE: Removing the anode will allow the water in the transmission to drain into the boat. 58498 45IV shown, 46IV similar Measure the anode. If the anode is 50% eroded, replacement is required. 58499 New anode shown Install the anode and tighten to the specified torque. -
Page 46: Flame Arrestor
Section 4 - Maintenance EFI electronic control module (ECM): The ECM requires a stable voltage source. During multiple engine operation, an onboard electrical device may cause a sudden drain of voltage at the engine's battery. The voltage may go below the ECMs minimum required voltage. - Page 47 Section 4 - Maintenance Lift up on the front of the second cover to disengage the cover from the front grommets. Pull the cover towards the front of the motor to remove it from the two rear grommets. Front grommets Rear grommets 63786 Loosen the clamp securing the flame arrestor and remove the flame arrestor.
-
Page 48: Fuel System Maintenance
Section 4 - Maintenance Fuel System Maintenance Fuel System WARNING Fuel is flammable and explosive. Ensure that the key switch is off and the lanyard is positioned so that the engine cannot start. Do not smoke or allow sources of spark or open flame in the area while servicing. Keep the work area well ventilated and avoid prolonged exposure to vapors. -
Page 49: Draining The Filter Housing
Section 4 - Maintenance Slide the filter housing up to release it from the bracket. The fuel hoses have enough slack to remove the filter housing from the bracket. Bracket retainers Filter cover Red service cap 63676 Draining the Filter Housing WARNING Fuel is flammable and explosive. -
Page 50: Lubrication
45IV transmission shown, others similar Shift cable pivot points Shift cable guide 58835 Tube Ref No. Description Where Used Part No. Mercury 25W-40 Synthetic Blend Shift cable pivot points 92-8M0078629 4-Stroke Engine Oil 2-4-C with PTFE Shift cable guide 92-802859A 1 Serpentine Drive Belt... -
Page 51: Serpentine Belt Failure Identification
Section 4 - Maintenance Serpentine Belt Failure Identification Appearance Description Cause Solution Replace the belt and Abrasion Belt is in contact with an object. Each side of the belt appears inspect for contact with an Can be caused by improper belt shiny or glazed. -
Page 52: Checking
Section 4 - Maintenance Appearance Description Cause Solution Uneven rib wear Belt shows damage to the side A foreign object in the pulley can Replace the belt and with the possibility of breaks in cause uneven wear and cut into the inspect all pulleys for the tensile cord or jagged edged belt. -
Page 53: Flushing The Power Package-Models Without A Flushing Attachment
Section 4 - Maintenance CAUTION Rapid release of the belt tensioner, or allowing the tensioner to snap back quickly, could cause injury or product damage. Relieve the spring tension slowly. Use a breaker bar and appropriate socket to relieve the tensioner. Rotate the tensioner counterclockwise away from the belt until it stops. - Page 54 Section 4 - Maintenance If not equipped with a seacock, disconnect the seawater inlet hose from the transmission seawater inlet fitting and plug the seawater inlet hose. 58419 45IV shown, 46IV similar Install an appropriate connector attached to the fresh water supply hose and install the connector onto the transmission seawater inlet fitting.
-
Page 55: The Boat In The Water
Section 4 - Maintenance Operate the engine in neutral for at least 10 minutes. Slowly return the throttle to the idle speed position. 10. Stop the engine. 11. Immediately shut off the supply water and remove the flushing attachment. 12. Install the water inlet hose to the seawater inlet of the seawater pump or 45IV transmission water inlet. 13. -
Page 56: Flushing The Power Package-Models With A Flushing Attachment
Section 4 - Maintenance If not equipped with a seacock, disconnect the seawater inlet hose from the seawater pump inlet fitting and immediately plug the seawater inlet hose to prevent water from siphoning into the engine or boat. 55049 Seawater inlet hose connection Install an appropriate connector onto the flushing water supply hose and install onto the water inlet of the seawater pump. - Page 57 Section 4 - Maintenance Close the seacock, if equipped. For visual clarity, the seacock shown is not installed Hose fitting to engine Seacock Handle (closed position) To water source pickup attachment 18510 If the boat is not equipped with a seacock, disconnect the water hose from the water pickup and plug both ends to prevent water from entering the boat.
- Page 58 IMPORTANT: Do not store the quick‑connect fitting in the flush socket on the engine. Doing so would allow the seawater pump to suck air during engine operation causing an overheating problem. Damages due to engine overheating are not covered by Mercury MerCruiser Warranty. 63788 Quick-connect fitting: store on the boat, NOT the engine 16.
- Page 59 Section 4 - Maintenance 17. Remove the plugs from the water hose and connect to the fittings. Tighten the hose clamps securely. 18. Open the seacock, if equipped. IMPORTANT: If the unit is to be stored in the water, the seacock should remain closed until time of usage. If the unit is to be stored out of the water, open the seacock.
- Page 60 Section 4 - Maintenance Notes: Page 52 90-8M0128975 JUNE 2017...
-
Page 61: Section 5 - Storage
Section 5 - Storage Section 5 - Storage Table of Contents Cold Weather or Extended Storage........54 Draining the Seawater System..........56 Reformulated (Oxygenated) Gasolines (U.S.A. Only)... 54 Draining the Raw Water..........56 Fuel Containing Alcohol..........54 Air Actuated Single‑Point Drain System (Standard Preparing Power Package for Storage—MPI Models.. -
Page 62: Cold Weather Or Extended Storage
(phase) of the water/alcohol from the gasoline in the fuel tank. The fuel system components on your Mercury Marine engine will withstand up to 10% alcohol content in the gasoline. We do not know what percentage your boat's fuel system will withstand. Contact your boat manufacturer for specific recommendations on the boat's fuel system components (fuel tanks, fuel lines, and fittings). -
Page 63: Special Fuel Mix
Running out of fuel can damage catalyst components. Do not allow the fuel tanks to become empty during operation. Check the antifreeze concentration where applicable. Refer to the Specifications section. Before adding Mercury Quickstor Fuel Stabilizer to the fuel in the tank, determine the type of fuel that is in the fuel tanks and proceed with the following: Vessels using fuel without alcohol—fill the vessel fuel tanks with fresh gasoline that does not contain alcohol and add... -
Page 64: Towsport And Inboard Transmissions Extended Storage
IMPORTANT: The engine must not be operating at any point during the draining procedure. IMPORTANT: Mercury MerCruiser requires that propylene glycol antifreeze, mixed to the manufacturer's instructions, be used in the raw water section of the cooling system during freezing temperatures or for extended storage. Ensure that the propylene glycol antifreeze contains a rust inhibitor and is recommended for use in marine engines. - Page 65 Section 5 - Storage NOTE: On some V‑Drive models the air actuated valve is at the rear of the engine. Blue plug 55106 Ensure that the lever on top of the air pump is flush with the handle (horizontal). Install the air pump on the actuator fitting. Pull the lever on the air pump (vertical) to lock the pump onto the fitting.
- Page 66 Section 5 - Storage IMPORTANT: If water does not drain from the seawater pump housing when both green indicators are extended, remove the blue drain plugs on the seawater pump housing. Seawater pump housing water drain Blue drain plugs 56033 11.
-
Page 67: Air Actuated Single-Point Drain System (Closed Cooling)
Section 5 - Storage 18. The drain system should remain open while transporting the boat or while performing other maintenance. This helps ensure that all water is drained. 19. Before launching the boat, pull up on the manual release valve. Verify that the green indicators are no longer extended. Green indicators 6135 20. - Page 68 Section 5 - Storage Pull the lever on the air pump (vertical) to lock the pump onto the fitting. Actuator fitting Green indicators Manual release valve Air pump Lever (locking) 8293 Pump air into the system until both green indicators extend out of the actuator assembly. Check to ensure water drains out of the distribution housing.
- Page 69 Section 5 - Storage 10. There are power packages that require specific drain plugs removed because the engine angle is greater than the air actuated drain system allows for proper draining of the system. Remove the blue plugs shown in the following illustrations. 58423 TowSport closed cooling in-line transmission port side view 58765...
-
Page 70: Battery Storage
Section 5 - Storage 17. Before launching the boat, pull up on the manual release valve. Verify that the green indicators are no longer extended. Green indicators 6135 18. Open the seacock, if equipped, or unplug and connect the water inlet hose prior to operating the engine. Battery Storage Whenever the battery will be stored for an extended period of time, be sure the cells are full of water and the battery is fully charged and in good operating condition. -
Page 71: Section 6 - Troubleshooting
Section 6 - Troubleshooting Section 6 - Troubleshooting Table of Contents Diagnosing EFI Problems............. 64 Excessive Engine Temperature........65 Engine Guardian System............64 Insufficient Engine Temperature........65 Troubleshooting Charts............64 Low Engine Oil Pressure..........65 Starter Motor Will Not Crank Engine, or Cranks Slowly Battery Will Not Recharge.......... -
Page 72: Diagnosing Efi Problems
Diagnosing EFI Problems Your authorized Mercury MerCruiser dealer has the proper service tools for diagnosing problems on electronic fuel injection (EFI) systems. The engine control module (ECM) on these engines has the ability to detect some problems with the system when they occur, and store a Trouble Code in the ECMs memory. -
Page 73: Poor Performance
Ignition problem. See Engine Runs Rough, Misses, or Backfires. Engine overheating. See Excessive Engine Temperature. EFI system fault. Have EFI system checked by an authorized Mercury MerCruiser dealer. Excessive Engine Temperature Possible Cause Remedy Water inlet or seacock closed. Open. -
Page 74: Remote Control Is Difficult To Move Or Makes Unusual Sounds
Steering Wheel Jerks or Is Difficult to Turn Possible Cause Remedy Insufficient lubrication on steering components. Lubricate. Check all parts and fasteners if any are loose or missing, see authorized Loose or missing steering fasteners or parts. Mercury MerCruiser dealer immediately. Page 66 90-8M0128975 JUNE 2017... -
Page 75: Section 7 - Customer Assistance Information
Section 7 - Customer Assistance Information Section 7 - Customer Assistance Information Table of Contents Owner Service Assistance............ 68 Contact Information for Mercury Marine Customer Local Repair Service ............ 68 Service ................. 69 Service Away From Home ..........68 Customer Service Literature..........69 Stolen Power Package .......... -
Page 76: Owner Service Assistance
If your power package is stolen, immediately inform the local authorities and Mercury Marine of the model and serial numbers and to whom the recovery is to be reported. This information is maintained in a database at Mercury Marine to aid authorities and dealers in recovery of stolen power packages. -
Page 77: Contact Information For Mercury Marine Customer Service
Attn: Publications Department W6250 Pioneer Road P.O. Box 1939 Fond du Lac, WI 54936-1939 Outside the United States and Canada, contact the nearest Mercury Marine or Marine Power International Service Center for further information. When ordering be sure to: •... -
Page 78: Other Languages
Section 7 - Customer Assistance Information Other Languages To obtain an Operation, Maintenance and Warranty Manual in another language, contact the nearest Mercury Marine or Marine Power International Service Center for information. A list of part numbers for other languages is provided with your power package. - Page 79 Section 8 - Checklists Section 8 - Checklists Table of Contents Predelivery Inspection (PDI)..........72 Customer Delivery Inspection (CDI)........73 90-8M0128975 JUNE 2017 Page 71...
-
Page 80: Predelivery Inspection (Pdi)
Section 8 - Checklists Predelivery Inspection (PDI) IMPORTANT: This checklist is for packages that are not equipped with Joystick Piloting for Sterndrive (JPS). For engine packages equipped with JPS, use the JPS‑specific checklist, which appears in the JPS Operation Manual. Perform these tasks before the Customer Delivery Inspection (CDI). -
Page 81: Customer Delivery Inspection (Cdi)
Approve the external appearance of the product (paint, cowl, decals, etc.) ⃞ Warranty—provide and explain the limited warranty to the customer. Explain dealer services. ⃞ ⃞ Explain the optional Mercury Product Protection Plan (North America only) Operation of equipment—explain and demonstrate: ⃞ E‑stop switch/lanyard stop switch operation (all helms) ⃞... - Page 82 Section 8 - Checklists N/A Completed Item ⃞ Boat (lights, battery switch location, fuses/breakers) ⃞ ⃞ Trailer (if applicable) Registration: ⃞ Complete and submit warranty registration—provide the customer with a copy Page 74 90-8M0128975 JUNE 2017...
- Page 83 Section 9 - Maintenance Log Section 9 - Maintenance Log Table of Contents Scheduled Maintenance Log..........76 Vessel Maintenance Notes........... 77 90-8M0128975 JUNE 2017 Page 75...
-
Page 84: Scheduled Maintenance Log
Section 9 - Maintenance Log Scheduled Maintenance Log 100 Hours Actual Hours Service Notes Dealer Name Signature Date 200 Hours Actual Hours Service Notes Dealer Name Signature Date 300 Hours Actual Hours Service Notes Dealer Name Signature Date 400 Hours Actual Hours Service Notes Dealer Name... -
Page 85: Vessel Maintenance Notes
Section 9 - Maintenance Log Vessel Maintenance Notes Record all general maintenance performed on your power package here. Save all work orders and receipts. Engine Date Maintenance Completed Servicing Dealer Hours 90-8M0128975 JUNE 2017 Page 77... - Page 87 Parc Industriel de Petit-Rechain 41-71 Bessemer Drive P.O. Box 1939 B-4800 Verviers, Belgium Dandenong South, Victoria 3175 Australia Fond du Lac, WI 54936-1939 USA © Mercury Marine. All rights reserved. 90-8M0128975 JUNE 2017 Printed in U.S.A.
Need help?
Do you have a question about the T6200 TowSport and is the answer not in the manual?
Questions and answers