
Related Manuals for Bondtech BMG

Summary of Contents for Bondtech BMG
- Page 1 BMG for Creality CR-10 Assembly and installation manual This work is licensed under a Creative Commons Attribution 4.0 International License.
-
Page 2: Table Of Contents
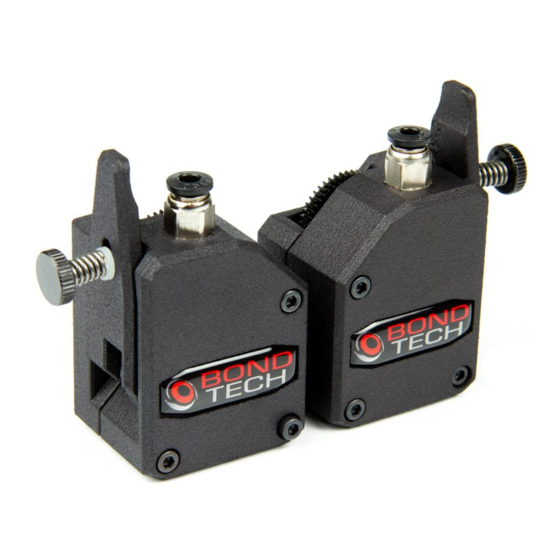
Introduction The Bondtech BMG 1.75 mm extruder is the simplest way to increase the performance and reliability of your Creality CR-10 printer in a matter of minutes. This new revolution in design utilizes the proven Bondtech Dual Drive Technology with precision CNC-manufactured parts. -
Page 3: Compatibility
The upgrade is compatible with the following machines: Creality CR-10 Creality CR-10S What’s in the box? 1x Bondtech BMG Righthand extruder with a filament guide. 1x Motor gear 4x M3 Nuts (installed into bracket if purchased) 4x M3x8 bolts 1x Mounting bracket As we share the files of the mount you can also buy the kit without the mount and print the part yourself. - Page 4 ● Loosen and remove the M3 screws that holds the extruder and motor attached to the bracket. Also disconnect the stepper motor cable. ● Extruder and motor removed. Installation manual BMG for Creality CR-10 V1.0...
- Page 5 Important! Please use the orientation shown in the photo! ● Leave about 1-1.5 mm clearance between the gear and the motor. Tighten the setscrew. Installation manual BMG for Creality CR-10 V1.0...
- Page 6 ● Microswitch correctly positioned into the mount. ● Use the two screws you removed earlier from the original unit and screw them into the housing to secure the cover and the microswitch. Installation manual BMG for Creality CR-10 V1.0...
- Page 7 Tighten the screws to hold it together. • Place the extruder with the bracket and use the included M3x8 bolts to secure it to the bracket on the printer. ● Tighten all 4 screws. Installation manual BMG for Creality CR-10 V1.0...
- Page 8 1 to position 4 and the cable that was in position 4 to position 1. ● This is how the cables is connected once they are moved, compare to the photo in the top. Installation manual BMG for Creality CR-10 V1.0...
- Page 9 You successfully upgraded your feeder! Now you just need to configure the software of your 3d printer to start printing again. Installation manual BMG for Creality CR-10 V1.0...
-
Page 10: Software Configuration
We add the following line. G28 ; home all axes M92 E415 ; set new E-step value for Bondtech BMG Extruder G1 Z5 F3000 ; lift G1 X5 Y10 F1500 ; move to prime G1 Z0.2 F3000 ; get ready to prime G92 E0 ;... -
Page 11: Using Custom Firmware
As a general setting for the Thumbscrew adjuster we recommend using the following. Hard filaments like PLA, ABS, PETG Tighten the thumbscrew fully and then back it off 1.5 turns. Soft filaments: Tighten the thumbscrew fully and then back it off 3-4 turns. Installation manual BMG for Creality CR-10 V1.0... - Page 12 Good luck with your Bondtech feeder! If you have any questions please first read the FAQ (http://www.bondtech.se/en/faq/). If the question still hasn’t been answered feel free to contact us by email or our online chat. Repslagarvägen 3 J 33153 Värnamo...
Need help?
Do you have a question about the BMG and is the answer not in the manual?
Questions and answers