Table of Contents
Advertisement
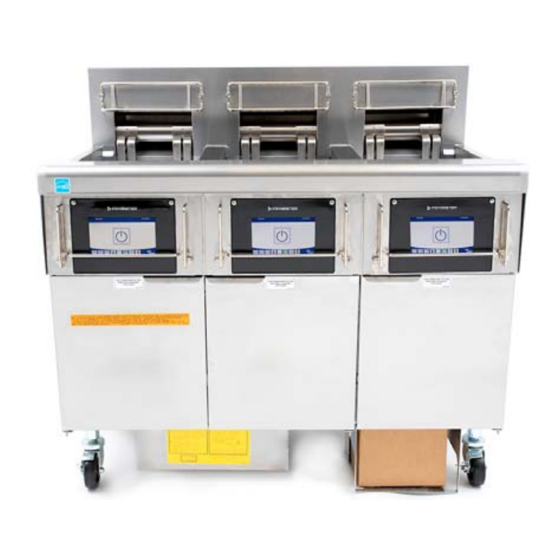
BIELA14-T Series
Gen III LOV
Installation, Operation and Maintenance Manual
This manual is updated as new information and models are released. Visit our website for the latest manual.
This equipment chapter is to be installed in the Fryer Section of the Equipment Manual.
WARNINGS AND NOTICES ............................................................................................................... Page ii
WARRANTY STATEMENT .................................................................................................................. Page v
INTRODUCTION ................................................................................................................................ Page 1-1
INSTALLATION INSTRUCTIONS ...................................................................................................... Page 2-1
OPERATING INSTRUCTIONS ............................................................................................................ Page 3-1
M4000 COMPUTER INSTRUCTIONS ............................................................................................... Page 4-1
OPERATING THE BUILT-IN FILTRATION SYSTEM .......................................................................... Page 5-1
PREVENTIVE MAINTENANCE ........................................................................................................... Page 6-1
OPERATOR TROUBLESHOOTING ................................................................................................... Page 7-1
RTI (BULK OIL) INSTRUCTIONS ....................................................................................................... Page A-1
JIB PREPARATION WITH SOLID SHORTENING OPTION ............................................................... Page B-1
SOLID SHORTENING MELTING UNIT USE ...................................................................................... Page C-1
FOR YOUR SAFETY
Do Not Store or use gasoline or other
flammable vapors and liquids in the vicinity
of this or any other appliance.
*8197340*
Part Number: FRY_IOM_8197340 10/2018
Original Instructions
™
Electric Fryer
TABLE OF CONTENTS
READ THE INSTRUCTIONS CAREFULLY BEFORE USING
CAUTION
Advertisement
Chapters
Table of Contents

Related Manuals for Frymaster Gen III LOV


Summary of Contents for Frymaster Gen III LOV
-
Page 1: Table Of Contents
BIELA14-T Series Gen III LOV ™ Electric Fryer Installation, Operation and Maintenance Manual This manual is updated as new information and models are released. Visit our website for the latest manual. This equipment chapter is to be installed in the Fryer Section of the Equipment Manual. - Page 2 NOTICE IF, DURING THE WARRANTY PERIOD, THE CUSTOMER USES A PART FOR THIS FRYMASTER FOOD SERVICE EQUIPMENT OTHER THAN AN UNMODIFIED NEW OR RECYCLED PART PURCHASED DIRECTLY FROM FRYMASTER, OR ANY OF ITS FACTORY AUTHORIZED SERVICERS, AND/OR THE PART BEING USED IS MODIFIED FROM ITS ORIGINAL CONFIGURATION, THIS WARRANTY WILL BE VOID.
- Page 3 This fryer has a power cord (three-phase) for each frypot and may have a single five-wire cord for the entire system. Prior to movement, testing, maintenance and any repair on your Frymaster fryer; disconnect ALL electrical power cords from the electrical power supply.
- Page 4 DANGER No structural material on the fryer should be altered or removed to accommodate placement of the fryer under a hood. Questions? Call the Frymaster Dean Service Hotline at 1-800-551-8633. WARNING Do not block the area around the base or under the fryers.
- Page 5 LOV-T™ ELECTRIC WARRANTY STATEMENT Frymaster, L.L.C. makes the following limited warranties to the original purchaser only for this equipment and replacement parts: A. WARRANTY PROVISIONS - FRYERS 1. Frymaster L.L.C. warrants all components against defects in material and workmanship for a period of two years.
- Page 6 damage in shipment; abnormal use; removal, alteration, or obliteration of either the rating plate or the date code on the heating elements; operating the frypot without shortening or other liquid in the frypot; no fryer will be warranted for which a proper start-up form has not been received. ...
-
Page 7: Introduction
BIELA14-T SERIES GEN III LOV™ ELECTRIC FRYER CHAPTER 1: INTRODUCTION NOTE: The Frymaster BIELA14-T fryer requires a start-up, demonstration and training before normal restaurant operations can begin. General Read the instructions in this manual thoroughly before attempting to operate this equipment. This manual covers all configurations of McDonald’s BIELA14-T LOV™... - Page 8 Example of box used to distinguish CE and Non-CE specific information. Installation, Operating, and Service Personnel Operating information for Frymaster equipment has been prepared for use by qualified and/or authorized personnel only, as defined in Section 1.6. All installation and service on Frymaster equipment must be performed by qualified, certified, licensed, and/or authorized installation or service personnel, as defined in Section 1.6.
- Page 9 Frymaster, L.L.C. to perform service on the equipment. All authorized service personnel are required to be equipped with a complete set of service and parts manuals, and to stock a minimum amount of parts for Frymaster equipment. A list of Frymaster Factory Authorized Servicers (FAS’s) is located on the Frymaster website at www.frymaster.com.
-
Page 10: Installation Instructions
167°F (75°C). NOTICE If the electrical power supply cord is damaged, it must be replaced by a Frymaster Authorized Servicer or a similarly qualified person in order to avoid a hazard. DANGER This appliance must be connected to a power supply having the same voltage and phase as specified on the rating plate located on the inside of the appliance door. - Page 11 Do not block the area around the base or under the fryers. DANGER No structural material on the fryer should be altered or removed to accommodate placement of the fryer under a hood. Questions? Call the Frymaster Dean Service Hotline at 1-800-551-8633. 2.1.2 Electrical Grounding Requirements All electrically operated appliances must be grounded in accordance with all applicable national and local codes, and, where applicable, CE codes.
- Page 12 No structural material on the fryer should be altered or removed to accommodate placement of the fryer under a hood. Questions? Call the Frymaster Service Hotline at 1-800-551-8633. Once the fryer has been positioned at the frying station, use a carpenter’s level placed across the top of the frypot to verify that the unit is level, both side-to-side and front-to-back.
-
Page 13: Figure
DANGER Hot oil can cause severe burns. Avoid contact. Under all circumstances, oil must be removed from the fryer before attempting to move it to avoid spills, falls, and severe burns. Fryers may tip and cause personal injury if not secured in a stationary position. Clean and fill frypot(s) to the bottom oil level line with cooking oil. -
Page 14: Operating Instructions
BIELA14-T SERIES GEN III LOV™ ELECTRIC FRYER CHAPTER 3: OPERATING INSTRUCTIONS FINDING YOUR WAY AROUND THE BIELA14-T SERIES LOV™ ELECTRIC FRYER Elements Tilt Housing Basket Holder Top Cap Control Panel (M4000 Bezel Controller Shown) Reset Switch Power Switch Dispose Handle... - Page 15 3.1 Equipment Setup and Shutdown Procedures WARNING The on-site supervisor is responsible for ensuring that operators are made aware of the inherent hazards of operating a hot oil filtering system, particularly the aspects of oil filtration, draining and cleaning procedures. CAUTION Before turning on the fryer, ensure the frypot drain valves are closed.
-
Page 16: See Figure
Shutdown Place the controller ON/OFF switch in the OFF position to turn the fryer off. Filter the oil and clean the fryers (See Chapters 5 and 6). Clean the filter pan and replace the filter paper or pad. Do not leave solid shortening in the filter pan over night. -
Page 17: Figure
3.3.3 Routine Oil Changes When the oil reservoir level is low, a yellow indicator is activated (see Figure 3) and displays TOP OFF OIL EMPTY. Press the check button to clear the screen. Once the reservoir is refilled and/or replaced, press and hold the orange reset button next to the oil reservoir until the yellow indicator is no longer illuminated. -
Page 18: Figure
BIELA14-T SERIES GEN III LOV™ ELECTRIC FRYER CHAPTER 4: M4000 CONTROLLER INSTRUCTIONS M4000 General Information Welcome to the M4000, an easy to use touch screen controller with the utility of 40-product menu capability. One button push starts a cook cycle for a selected product. Just choose a menu item on a product button and press the START button under the display showing the desired item. - Page 19 4.2.1.3 Crew Mode Button The crew mode button switches from the home screen to the cooking mode (see Figure 3). 4.2.1.4 Menus Button Figure 3 The menus button is used to set up multiple menus with specific products such as breakfast, lunch and changeover menus (See Figure 4.2.1.5 Recipes Button The recipes button allows editing or adding of products (see Figure 5).
- Page 20 4.2.1.10 Filter Menu Button Pressing the filter menu button provides access to the functions associated with filtering, disposing, draining, filling as well as deep cleaning the vats (see Figure 10). If an auto filter is skipped the button turns yellow until the filtration is completed. Figure 10 4.2.1.11 Temperature Button Pressing the temperature button displays the actual vat temperature and the setpoint temperature...
- Page 21 4.3 M4000 Menu Summary Tree Reflected below are the major programming sections in the M4000 and the order in which submenu headings will be found under the sections in the Installation and Operation Manual. Filtration Menu Auto Filtration Maintenance Filter Dispose Oil Drain Oil Fill Vat from Drain Pan...
- Page 22 4.4 M4000 Information Summary Tree Reflected below are the information statistics in the M4000 and the order in which submenu headings will be found in the controller.
- Page 23 Basic Operation...
- Page 24 Cooking...
-
Page 25: Figure
Fryer (Service) Setup Programming It is necessary upon initial power up or when changing out a controller to configure the parameters for the fryer. The setup includes locale, energy type, vat type, fresh oil type, waste oil type and auto top off settings. These settings should ONLY be changed by a technician DISPLAY ACTION... - Page 26 DISPLAY ACTION □ WASTE OIL Press the Waste Oil button. Select NONE, BULK or FRONT DISPOSE. NOTE: Select NONE if disposing oil into an MSDU or other METAL NONE BULK FRONT DISPOSE container. Select BULK if disposing oil into a bulk oil system, which has large storage oil tanks that are connected to the fryer.
- Page 27 DISPLAY ACTION 47. Press the √ (check) button inside the SETUP COMPLETE box. SETUP COMPLETE □ OIL TYPE Press the Oil Type button. OC01v01, OC02v02, etc. Select the correct oil type curve. Press the down arrow button to scroll to additional oil type curves. OC01vO1=F212, OC02v02=MCSOL, OC12v02=F600 Ensure the oil type matches what the store is using.
- Page 28 DISPLAY ACTION 64. Press the √ (check) button once the value is entered. Press the √ (check) button to save the value. 66. Press the √ (check) button inside the SETUP COMPLETE box. SETUP COMPLETE 67. Press the Dispose Delay Timer button. This is the amount of time once the DISCARD NOW prompt is displayed and bypassed before □...
-
Page 29: Figure
Fryer (Manager) Settings Programming It is necessary upon initial power up or when changing out a controller to configure these local manager settings for the fryer. The setup includes language, date and time, temperature scale, sound settings, filter settings, energy savings, lane assignments and screen brightness. - Page 30 DISPLAY ACTION SETUP COMPLETE 20. No action. 21. Press the smaller √ (check) button inside the SETUP COMPLETE box. 22. Press the Set Date button 23. Press the Date Format box to toggle between MM-DD-YY or DD-MM-YY. 24. At the top of the screen, the year is shown. Press the left or right arrow to select the year.
- Page 31 DISPLAY ACTION □ SOUND 43. Press the Sound button. 44. Use the up down arrows to change the volume level and tone. Volume has nine levels with 1 being the softest and 9 the loudest. Tone has three frequencies from 1-3. Use different frequencies to distinguish protein or French fry stations.
- Page 32 DISPLAY ACTION 62. Press the Filter Lockout Time button. The Filtration Lockout Time option is used to set the times in which the □ FILTRATION LOCKOUT TIME filter prompt is disabled (ex. noon rush). NOTE: If FILTER LOCKOUT is disabled (OFF), this option is grayed out and not available.
- Page 33 DISPLAY ACTION 81. Press the smaller √ (check) button inside the SETUP COMPLETE RESET THE SYSTEM box. 82. Press the Brightness button. □ BRIGHTNESS This is used to set the brightness of the screen. Use the up down arrows to adjust. (Default is 100.) 83.
- Page 34 Adding or Editing Existing Products This function is used to add additional products or edit existing products. DISPLAY ACTION Press the Home button. Press the Recipes button. 1 2 3 4 Enter 1234 Press the √ (check) button. Choose the product icon to edit or press the + to add a new product.
- Page 35 DISPLAY ACTION 14. Use the keypad to enter or edit the cook time in minutes and seconds. 15. Press the √ (check) button. 16. Press the load compensation or sensitivity button. 17. Use the up and down arrows to change the load compensation or sensitivity setting recommended for this product.
- Page 36 DISPLAY ACTION 27. Enter the time in minutes and seconds for the seconds shake to be performed. 28. Press the √ (check) button. 29. Press the Filter button. 30. Ensure that the filter button is ON to enable auto filtration for this product.
- Page 37 4.10 Adding or Editing Menus This function is used to add or edit menus. Menus allow the operator to group certain products together. For example, setting up a breakfast menu allows grouping of breakfast only products. This is helpful when switching products by narrowing the number of products to choose from.
- Page 38 4.11 Changing from Breakfast Menu to Changeover or Lunch Menu If separate menus are created for Breakfast, Changeover and Lunch, pressing the MENU button from the main screen shall display menu change options. Pressing the desired menu shall switch the menus. DISPLAY ACTION Press the Menu button.
- Page 39 DISPLAY ACTION Press the ON/OFF button under Breakfast or Changeover to switch menus. NOTE: Only one menu can be selected at a time. Once the desired menu is selected, “ON” is highlighted under the menu. Press the back button to return to the main screen. Press the product icon to switch products.
- Page 40 DISPLAY ACTION Select LEFT VAT or RIGHT VAT for split vats. PRESS AND HOLD Press and hold the Press and Hold button to begin high limit test. While pressing and holding the button the vat begins to heat. The controller displays the actual vat temperature during the test.
- Page 41 DISPLAY ACTION Press the Crew Mode button. CREW MODE 4.13.2.2 Passcode Setup The password mode allows a restaurant manager to change passwords for various modes. DISPLAY ACTION Press the Home button. Press the Service button. Press the Manager button. 4 3 2 1 Enter 4321 Press the √...
- Page 42 4.13.2.3 USB – Menu Operation This option allows the ability to upload menus to the controller. This allows products to be created in MenuSync to be saved to a USB drive and uploaded to the fryer. DISPLAY ACTION Press the Home button. Press the Service button.
- Page 43 DISPLAY ACTION DAY AND DATE (Day and date of filter statistics displayed) COOKS REMAINING UNTIL NEXT FILTER (Number of times cooks that remain until the next filter prompt.) DAILY NUMBER OF COOKS (Number of cooks that day) Press the down arrow to scroll to more DAILY NUMBER OF FILTERS (Number of times vat filtered for a statistics.
- Page 44 4.14.3 Life Statistics The life statistics function is used to view the commission date of the fryer which is automatically set once the fryer has completed 25 cooks, the serial number of the controller, the total time the fryer has operated in hours and the total heat cycle count of the fryer (the amount of times the controller has turned the heat on/off).
- Page 45 4.14.6 Last Load Statistics The last load statistics provides data for the last cook cycle. DISPLAY ACTION 1. Press the Information button. 2. Press the Last Load button. LAST COOKED PRODUCT LAST LOAD START TIME LAST LOAD COOK TIME 3. Press the down arrow to scroll to more statistics.
- Page 46 DISPLAY ACTION 10. GATEWAY SOFTWARE VERSION 11. GATEWAY IP ADDRESS 6. Press the up arrow to scroll 12. GATEWAY LINK QUALITY up; the back button to return 13. GATEWAY SIGNAL STRENGTH AND NOISE to menu or the home button to exit. 4.14.8 Reset Usage Statistics The reset function resets all usage data in the usage statistics.
- Page 47 4.14.10 Fresh Oil Reset Usage Statistics The reset function resets all fresh oil data in the fresh oil statistics. DISPLAY ACTION Press the Information button. 2. Press the down arrow button. 3. Press Fresh Oil Reset button. 4 3 2 1 Enter 4321.
- Page 48 4.14.12 TPM (Total Polar Material) Statistics The TPM statistics provides data from the OQS (Oil Quality Sensor). The same data can be accessed by pressing the TPM button on the front of the controller when the TPM button is solid. DISPLAY ACTION Press the Information button.
-
Page 49: Figure
BIELA14-T SERIES GEN III LOV™ ELECTRIC FRYER CHAPTER 5: FILTRATION MENU INSTRUCTIONS Introduction The FootPrint Pro filtration system allows the oil in one frypot to be safely and efficiently filtered while the other frypots in a battery remain in operation. - Page 50 Reinstall the crumb tray at the front of the pan. (See Figure 1) DO NOT USE FILTER POWDER WITH THE PAD! Push the filter pan back into the fryer, positioning it under the fryer. Ensure “P” is not displayed in the top right corner of any controller.
- Page 51 DISPLAY ACTION Push the filter pan fully into place. Displayed if the filter pan is INSERT PAN not fully engaged. DRAINING IN PROGRESS No action required. WASHING IN PROGRESS No action required. FILLING IN PROGRESS No action required. PREHEAT No action required. Displayed until the fryer reaches setpoint. START Fryer is ready for use.
- Page 52 Displayed if the oil level is too low. Press the √ (check) button to acknowledge issue and return to idle cook mode. Check to see OIL LEVEL TOO LOW if the JIB is low on oil. If JIB is not low and this continues to occur, contact your FAS.
- Page 53 5.3.3 Maintenance or End of Day Filter NOTICE Ensure that the filter pad or paper is replaced daily to keep the The filter pad or paper must be replaced system operating correctly. For proper operation in high volume daily. or 24-hour stores, the filter pad or paper must be changed twice a day.
- Page 54 When cooking oil is exhausted, dispose the oil into an appropriate container for transport to the waste oil container. Frymaster recommends a McDonald’s Shortening Disposal Unit (PMSDU). Refer to the documentation furnished with your disposal unit for specific operating instructions. NOTE: If using an MSDU built before January 2004 the unit will not fit under the drain.
- Page 55 DISPLAY ACTION Select DISPOSE OIL. Press the √ (check) button to continue. If the X button is selected, the user returns to the filtration menu. DISPOSE OIL? DANGER Allow oil to cool to 100°F (38°C) before draining into an appropriate METAL container for disposal. Remove the filter pan and insert the disposal unit.
- Page 56 DISPLAY ACTION Select LEFT VAT or RIGHT VAT for split vats. Select DISPOSE OIL. Press the √ (check) button to continue. If the X button is selected, the DISPOSE OIL? user returns to the filtration menu. This message is only displayed if the bull tank is full. Press the √ BULK TANK FULL? (check) button to acknowledge and call the bulk oil waste provider.
- Page 57 DISPLAY ACTION 19. Press the √ (check) button to return to step 17 and continue filling. CONTINUE FILLING? Otherwise press the X button once the vat is full to exit and return to OFF. 20. The controller switches off. 5.3.6 Drain Oil to Pan The drain to pan function drains the oil from the vat to the filter pan.
- Page 58 5.3.7 Fill Vat from Drain (Filter) Pan The drain to pan function drains the oil from the vat to the filter pan. DISPLAY ACTION The fryer MUST be OFF. Press the filtration menu button Select LEFT VAT or RIGHT VAT for split vats. Press the down arrow.
- Page 59 DISPLAY ACTION Select LEFT VAT or RIGHT VAT for split vats. Press the down arrow. Select FILL VAT FROM BULK. Press the √ (check) button to continue. If the X button is selected, the FILL VAT FROM BULK? controller goes to OFF. START FILLING? Press and hold the button to fill the vat.
- Page 60 DISPLAY ACTION Select OIL PAN TO WASTE. Press the √ (check) button to continue. If the X button is selected, the OIL PAN TO WASTE? user returns to the filtration menu. If no pan is detected, the controller displays INSERT PAN until the pan is detected. Press the √...
- Page 61 DISPLAY ACTION Press the filtration menu button Select LEFT VAT or RIGHT VAT for split vats. Press the down arrow. Select DEEP CLEAN. Press the √ (check) button to continue. If the X button is selected, the DEEP CLEAN? user returns to the filtration menu. If no pan is detected, the controller displays INSERT PAN until the pan is detected.
- Page 62 DISPLAY ACTION 10. No action is required while the vat drains the oil into the disposal DRAINING IN PROGRESS container. IS VAT EMPTY? 11. Once the vat is empty, press the √ (check) button to continue. 12. Fill the vat to be cleaned with water and cleaning solution mix. Press the √...
- Page 63 5.3.11 Deep Clean (Boil-Out) for Bulk Oil Systems WARNING Ensure a filter pad is in place prior to draining The deep clean mode is used to remove carbonized oil from or disposing of oil. Failure to insert a filter pad the frypot.
- Page 64 DISPLAY ACTION OPEN DISPOSE VALVE 11. Open the left cabinet door and unlock the valve if necessary. Pull the dispose valve completely forward to start disposal. 12. No action is required while the pump transfers the waste oil from the DISPOSING pan to the bulk oil waste tanks for four (4) minutes.
- Page 65 DISPLAY ACTION 25. Ensure the vat and filter pan are completely dry. DANGER Ensure that the frypot and filter pan are completely dry and VAT AND PAN DRY? free of water before filling with oil. Failure to do so will cause splattering of hot liquid when the oil is heated to cooking temperature.
-
Page 66: Preventive Maintenance
BIELA14-T SERIES GEN III LOV™ ELECTRIC FRYER CHAPTER 6: PREVENTATIVE MAINTENANCE Fryer Preventive Maintenance Checks and Service DANGER The crumb tray in fryers equipped with a filter system must be emptied into a fireproof container at the end of frying operations each day. Some food particles can spontaneously combust if left soaking in certain shortening material. - Page 67 6.2.4 Clean around AIF and ATO sensors Clean the sediment from around the AIF and ATO sensors during maintenance filtration when the oil is drained from the frypot. Use a screwdriver or other similar object which allows access around the probe (see photo right).
- Page 68 Annual/Periodic System Inspection This appliance should be inspected and adjusted periodically by qualified service personnel as part of a regular kitchen maintenance program. Frymaster recommends that a Factory Authorized Servicer inspect this appliance at least annually as follows: 6.6.1 Fryer Inspect the cabinet inside and out, front and rear for excess oil.
- Page 69 Verify that the temperature and high-limit probes are properly connected, tightened and functioning properly, ● and that mounting hardware and probe guards are present and properly installed. Verify that component box and contactor box components (i.e. computer/controller, relays, interface boards, ●...
-
Page 70: Operator Troubleshooting
Although the chapter covers the most common problems reported, you may encounter problems that are not covered. In such instances, the Frymaster Technical Services staff will make every effort to help you identify and resolve the problem. - Page 71 Troubleshooting 7.2.1 Controller and Heating Problems Probable Causes Corrective Action Problem Verify that the fryer is plugged in and No Display on No power to fryer. that the circuit breaker is not tripped. Controller. Failed controller or another component Call your FAS for assistance. A filter error has occurred due to dirty or Follow instructions on the screen to clear clogged filter pad or paper, clogged pre-...
- Page 72 Probable Causes Corrective Action Problem M4000 displays HELP HI- Shut the fryer down immediately and call 2 or HIGH LIMIT your FAS for assistance. Failed high limit FAILURE DISCONNECT POWER. M4000 displays Problem with the temperature measuring Shut the fryer down and call your FAS for TEMPERATURE PROBE circuitry including the probe or damaged assistance.
- Page 73 Probable Causes Corrective Action Problem Pull filter pan out and fully reinsert into fryer. Ensure controller does not display P. A. Filter pan is not fully set into fryer. Ensure the filter pan magnet is in M4000 display shows B. Missing filter pan magnet. place and replace if missing.
- Page 74 7.3.1 Incomplete Filtration Should the auto filtration procedure fail an error message is generated. Follow the instructions on the screen to return the oil and clear the error. DISPLAY ACTION Press the √ (check) button if the vat is full to continue. IS VAT FULL? controller returns to idle cook mode or .
- Page 75 7.3.2 Filter Busy When FILTER BUSY is displayed the filter interface board is waiting on another vat to be filtered or waiting on another function to finish. Wait 15 minutes to see if problem is corrected. If not, call your local FAS. 7.4 Troubleshooting Auto Top Off Issues PROBLEM PROBABLE CAUSES...
- Page 76 PROBLEM PROBABLE CAUSES CORRECTIVE ACTION Power cycle fryer by disconnecting and reconnecting 5-pin bulk oil control power Incorrect setup procedure. cord on rear of fryer. Frypot won’t fill. Dispose valve not completely closed. Ensure the dispose valve handle is pushed Bulk oil tank is empty.
- Page 77 Code ERROR MESSAGE EXPLANATION CAN BUS ERROR - CALL SERVICE Communications are lost between boards. USB ERROR USB connection lost during an update. SYSTEM INTERFACE BOARD 2 MISSING - CALL SERVICE SIB board 2 connection lost or board failure. MISCONFIGURED ENERGY TYPE The fryer is configured for the incorrect energy type.
-
Page 78: Rti (Bulk Oil) Instructions
BIELA14-T SERIES GEN III LOV™ ELECTRIC FRYER APPENDIX A: RTI (BULK OIL) INSTRUCTIONS NOTE: The instructions in this manual for using a bulk oil system for filling and discarding oil are for an RTI system. These instructions may not be applicable to other bulk oil systems. -
Page 79: Jib Preparation With Solid Shortening Option
BIELA14-T SERIES GEN III LOV™ ELECTRIC FRYER APPENDIX B: JIB Preparation with Solid Shortening Option Open second or third door from the left of fryer and remove brace in JIB cabinet. Attach alignment bracket to bottom of ATO box brace with provided nuts. -
Page 80: Solid Shortening Melting Unit Use
BIELA14-T SERIES GEN III LOV™ ELECTRIC FRYER APPENDIX E: Solid Shortening Melting Unit Use Reset oil reservoir system Ensure shortening melting unit is on. Fill melting unit with shortening. Melting Allow 2-3 hours for solid shortening to melt. DO ... - Page 81 THIS PAGE INTENTIONALLY LEFT BLANK...
- Page 82 FRYMASTER 8700 LINE AVENUE, SHREVEPORT, LA 71106‐6800 800‐551‐8633 318‐865‐1711 WWW.FRYMASTER.COM EMAIL: FRYSERVICE@WELBILT.COM *8197423* WWW.WELBILT.COM Welbilt provides the world’s top chefs, and premier chain operators or growing independents with industry leading equipment and solutions. Our cutting‐edge designs and lean manufacturing tactics are powered by deep knowledge, operator insights, and culinary expertise. All of our products are backed by KitchenCare® – our aftermarket, repair, and parts service. CLEVELAND DELFIELD® FRYMASTER® KOLPAK® MANITOWOC® MERRYCHEF® CONVOTHERM® FITKITCHEN™ GARLAND LINCOLN MERCO® MULTIPLEX® ©2018 Welbilt Inc. except where explicitly stated otherwise. All rights reserved. Continuing product improvement may necessitate change of specifications without notice.
Need help?
Do you have a question about the Gen III LOV and is the answer not in the manual?
Questions and answers