
Related Manuals for KSB Multi Eco


Summary of Contents for KSB Multi Eco
- Page 1 Centrifugal Pump Multi Eco Multi Eco Multi Eco-Pro Multi Eco-Top Installation/Operating Manual...
- Page 2 All rights reserved. The contents provided herein must neither be distributed, copied, reproduced, edited or processed for any other purpose, nor otherwise transmitted, published or made available to a third party without the manufacturer's express written consent. Subject to technical modification without prior notice. © KSB SE & Co. KGaA, Frankenthal 18/01/2018...
-
Page 3: Table Of Contents
Commissioning/Start-up .......................... 30 6.1.1 Prerequisites for commissioning/start-up .................. 30 6.1.2 Priming the pump .......................... 30 6.1.3 Opening a consumer installation...................... 31 6.1.4 Setting the start-up und stop pressures (Multi Eco Top only)............ 31 6.1.5 Start-up............................... 32 6.1.6 Shutdown ............................ 33 Operating limits.............................. 33 Multi Eco 3 of 60... - Page 4 Drainage/cleaning ............................ 37 Inspection work .............................. 37 7.3.1 Cleaning the suction strainer ...................... 37 7.3.2 Checking the pre-charge pressure of the accumulator (Multi Eco Top only) ........ 37 7.3.3 Checking the automatic devices for starting and stopping the pump........... 37 Dismantling the pump set.......................... 38 7.4.1 General information/Safety regulations................... 38...
-
Page 5: Glossary
Self-priming ability Ability of a filled pump to evacuate a suction line, i.e. to self-prime from an unfilled suction line. Suction lift line/suction head line The pipeline which is connected to the suction nozzle Multi Eco 5 of 60... -
Page 6: General
The order number and order item number uniquely identify the pump (set) and serve as identification for all further business processes. In the event of damage, immediately contact your nearest KSB service centre to maintain the right to claim under warranty. Noise characteristics see (ð Section 4.8, Page 19) 1.2 Installation of partly completed machinery... - Page 7 1 General Symbol Description Step-by-step instructions Note Recommendations and important information on how to handle the product Multi Eco 7 of 60...
-
Page 8: Safety
This applies to, for example: ▪ Arrow indicating the direction of rotation ▪ Markings for connections ▪ Name plate The operator is responsible for ensuring compliance with all local regulations not taken into account in this manual. Multi Eco 8 of 60... -
Page 9: Intended Use
– Hazards to persons due to electrical, thermal, mechanical and chemical effects and explosions – Failure of important product functions – Failure of prescribed maintenance and servicing practices – Hazard to the environment due to leakage of hazardous substances Multi Eco 9 of 60... -
Page 10: Safety Awareness
Never operate the pump (set) outside the limits stated in the data sheet and in this manual. The warranty relating to the operating reliability and safety of the supplied pump (set) is only valid if the equipment is used in accordance with its intended use. (ð Section 2.3, Page 9) Multi Eco 10 of 60... -
Page 11: Transport/Temporary Storage/Disposal
1. On transfer of goods, check each packaging unit for damage. 2. In the event of in-transit damage, assess the exact damage, document it and notify KSB or the supplying dealer (as applicable) and the insurer about the damage in writing immediately. - Page 12 ▷ Wear safety clothing and a protective mask, if required. ▷ Observe all legal regulations on the disposal of substances posing a health hazard. 3. Drain the pump as per operating instructions. 4. Do not kink the power cables. Multi Eco 12 of 60...
-
Page 13: Return To Supplier
2. Separate and sort the pump materials, e.g. by: - Metals - Plastics - Electronic waste - Greases and other lubricants 3. Dispose of materials in accordance with local regulations or in another controlled manner. Multi Eco 13 of 60... -
Page 14: Description Of The Pump (Set)
▪ Centrifugal pump ▪ Self-priming ▪ Multistage Pump for handling clean to turbid water not containing aggressive, abrasive or solid substances. 4.2 Designation Example: Multi Eco-Top 35 E / 50 Table 4: Designation key Code Description Multi Eco-Top Type series Size... -
Page 15: Configuration And Function
Bearings ▪ Deep groove ball bearings ▪ Grease-lubricated for life Multi Eco-Pro ▪ Multi Eco pump ▪ Controlmatic E.2 automatic control unit with glass-fibre reinforced polyamide housing and integrated pressure gauge, with cables for pump and mains connection Multi Eco-Top ▪... - Page 16 4 Description of the Pump (Set) Multi Eco Fig. 2: Sectional drawing of Multi Eco Suction nozzle Discharge nozzle Shaft Shaft seal Impellers Diffusers Discharge cover Function of The fluid enters the pump via the suction nozzle (1) and is accelerated outward by Multi Eco the rotating impellers (5).
- Page 17 4 Description of the Pump (Set) Multi Eco-Pro Fig. 3: Sectional drawing of Multi Eco-Pro Pump Pressure gauge Function of The Controlmatic E.2 automatic control unit is used to start and stop the pump (1) in Multi Eco-Pro line with consumer demand. Pressure is indicated by a pressure gauge (2).
-
Page 18: Scope Of Supply
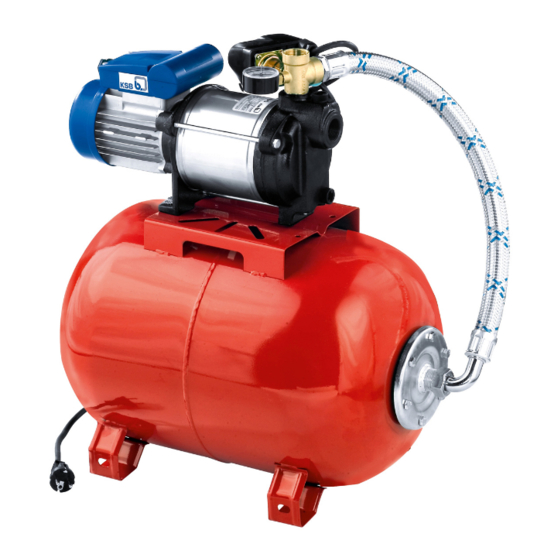
4 Description of the Pump (Set) Multi Eco-Top Fig. 4: Sectional drawing of Multi Eco-Top Pump Membrane-type accumulator Pressure gauge Function of When the system pressure drops, the pump (1) is automatically started via the Multi Eco-Top pressure switch (3). When the required pressure has been reached, the pump is stopped automatically. -
Page 19: Dimensions And Weights
4 Description of the Pump (Set) 4.7 Dimensions and weights Dimensions For pump set dimensions refer to (ð Section 9.3, Page 53) . Weights Table 5: Multi Eco D weights Size Weight [kg] Multi Eco 33 D Multi Eco 34 D Multi Eco 35 D... -
Page 20: Installation At Site
Excessive operating pressure Fluid spurting out and parts flying off as a result of components bursting! ▷ If the pump is to be installed in pressurised piping, fit a pressure reducer upstream of the pump. Multi Eco 20 of 60... -
Page 21: Checks To Be Carried Out Prior To Installation
ü The place of installation has been properly prepared. (ð Section 5.2, Page 21) 1. Place the pump set in horizontal position. 2. Bolt down the feet of the pump set or membrane-type accumulator (Multi Eco- Top). (Except transportable version of Multi Eco) 5.4 Piping... - Page 22 ü A sand filter is connected to the suction line. (The suction strainer must have a mesh size of more than 2 mm. For fluids containing sand (max. 50 g/m³) the suction strainer must have a mesh size of less Multi Eco 22 of 60...
- Page 23 5 Installation at Site than 1 mm!) NOTE KSB offers G1" and G1 " sand filters for installation on the suction side of the pump. They can be ordered from specialist suppliers. Multi Eco 23 of 60...
- Page 24 1. Fit a swing check valve into the piping (Multi Eco Top/Pro: mandatory; Multi Eco Pro: recommended). The swing check valve is not included in the scope of supply.
- Page 25 4. Screw the connection fitting into the pump. (Screw plastic fittings in by hand.) (Tighten metal connection fittings to a tightening torque of 100 Nm with a wrench.) 5. Slide the suction line onto the connection fitting and fasten with a clamp. Multi Eco 25 of 60...
- Page 26 2. Screw the connection fitting into the pump. (Screw plastic fittings in by hand.) (Screw in metal connection fittings with a wrench (tightening torque: 100 Nm)). 3. Slide the discharge line onto the connection fitting and fasten with a clamp. Multi Eco 26 of 60...
-
Page 27: Protective Equipment
▪ The single-phase motors of Multi Eco pump sets are equipped with a thermal overload protection device with automatic reset and start-up. ▪ The three-phase motors of Multi Eco pump sets are not equipped with a thermal overload protection device. -
Page 28: Checking The Direction Of Rotation
Hands inside the pump casing Risk of injuries, damage to the pump! ▷ Always disconnect the pump set from the power supply and secure it against unintentional start-up before inserting your hands or other objects into the pump. Multi Eco 28 of 60... - Page 29 The motor's direction of rotation must match the arrow indicating the direction of rotation on the pump's name plate. 3. If the motor runs in the wrong direction of rotation, check the electrical connection of the motor and the control system, if applicable. Multi Eco 29 of 60...
-
Page 30: Commissioning/Start-Up/Shutdown
6.1.2 Priming the pump 1. Unscrew the filler screw. 2. Fill in the fluid to be handled (min. 1.8 l) 3. Screw the filler screw back in and tighten to a torque of 10 Nm (max.). Multi Eco 30 of 60... -
Page 31: Opening A Consumer Installation
6 Commissioning/Start-up/Shutdown 6.1.3 Opening a consumer installation 1. Open a consumer installation. 6.1.4 Setting the start-up und stop pressures (Multi Eco Top only) 1. Set start-up pressure P1. Fig. 5: Setting start-up pressure P1 2. Set differential pressure P. Fig. 6: Pressure control... -
Page 32: Start-Up
▷ Switch off the pump (set) immediately. ▷ Eliminate the causes before returning the pump set to service. 1. Plug the mains plug into the mains socket. 2. Switch on the pump set. (Multi Eco P) Multi Eco 32 of 60... -
Page 33: Shutdown
Damage to connections and seals! ▷ Never exceed the operating pressure specified in the data sheet. Table 11: Maximum operating pressure Size Maximum operating pressure Multi Eco 33, 34 6 bar Multi Eco 35, 36, 65 10 bar Multi Eco 33 of 60... -
Page 34: Fluid Handled
It is advisable to then close the pump nozzles (e.g. with plastic caps or similar). 3. Oil or grease all exposed machined parts and surfaces of the pump (with silicone-free oil and grease, food-approved if required) to protect them against corrosion. Observe the additional instructions . Multi Eco 34 of 60... -
Page 35: Returning To Service
Risk of personal injury from moving parts or escaping fluid! ▷ As soon as the work is complete, re-install and/or re-activate any safety-relevant and protective devices. NOTE If the pump has been out of service for more than one year, replace all elastomer seals. Multi Eco 35 of 60... -
Page 36: Servicing/Maintenance
7 Servicing/Maintenance 7.1 Safety regulations NOTE All maintenance, service and installation work can be carried out by KSB Service or authorised workshops. For contact details please refer to the enclosed "Addresses" booklet or visit "www.ksb.com/contact" on the Internet. The operator ensures that maintenance, inspection and installation is performed by authorised, qualified specialist personnel who are thoroughly familiar with the manual. -
Page 37: Drainage/Cleaning
4. Remove filter and clean. 5. Re-install the filter in the piping. 7.3.2 Checking the pre-charge pressure of the accumulator (Multi Eco Top only) Check the pre-charge pressure of the accumulator once a year. ▪ Recommended pressure: 0.3 bar below the pump's start-up pressure. -
Page 38: Dismantling The Pump Set
7.4.3 Removing the complete pump set from the piping 1. Disconnect the discharge line from the discharge nozzle. 2. Disconnect the suction line from the suction nozzle. 3. Unbolt the motor foot from the foundation. Multi Eco 38 of 60... -
Page 39: Removing The Stage Casings
1. Undo the bolts at the pump casing. 2. Take off the pump casing. 3. Take off the pump shroud and O-ring 412.01 and discard O-ring 412.01. 4. Take off the fan hood and the O-ring. Discard the O-ring. Multi Eco 39 of 60... - Page 40 7. Pull the complete stage assembly off the shaft. 8. Dismantle impellers 230, diffusers 171 and sealing element of stage casing 412.02. Remove and discard O-ring 412.01. 9. Remove and discard circlip 932.03 (used for locking the mechanical seal). Multi Eco 40 of 60...
-
Page 41: Removing The Mechanical Seal And Rolling Element Bearings
2. Remove and discard the rotating part of mechanical seal 433. 3. Unscrew the fastening screws from the discharge cover. 4. Remove the discharge cover. 5. Remove the stationary part of mechanical seal 433 and thrower 270 and discard thrower 270. Multi Eco 41 of 60... -
Page 42: General Information/Safety Regulations
9. Remove and discard circlips 932.01 and 932.02. 7.4.6 General information/Safety regulations WARNING Improper lifting/moving of heavy assemblies or components Personal injury and damage to property! ▷ Use suitable transport devices, lifting equipment and lifting tackle to move heavy assemblies or components. Multi Eco 42 of 60... -
Page 43: Fitting The Rolling Element Bearings And The Mechanical Seal
7.4.7 Fitting the rolling element bearings and the mechanical seal ü Never use oil when fitting the rolling element bearings and the mechanical seal! 1. Clean the parts carefully prior to reassembly. 2. Fit new circlips 932.01 and 932.02 on the rotor. Multi Eco 43 of 60... - Page 44 5. Insert the rotor into the motor housing. Make sure that the upper rolling element bearing abuts the flexible disc. 6. Fit the stationary part of mechanical seal 433 and make sure it is correctly seated. Multi Eco 44 of 60...
- Page 45 9. Tighten the screws fastening the discharge cover to the motor housing. 10. Wet the shaft with soapy water for easier re-assembly of the rotating part of mechanical seal 433. 11. Slide on the rotating part of mechanical seal 433. Multi Eco 45 of 60...
-
Page 46: Fitting The Stage Casings
1. Fit the disc on the discharge cover. Make sure it is correctly seated! 2. Fit diffuser 171, impeller 230 and stage casing 109 of one stage after the other. Make sure the stage casing and diffuser are correctly aligned! Multi Eco 46 of 60... - Page 47 4. Fit washer 554.02, screw on and tighten the two nuts 921. Tightening torque: 10Nm! 5. Slide fan impeller 831 onto the motor shaft. 6. Fit fan hood 832 onto the motor housing. 7. Place new O-ring 412.03 onto the discharge cover. Multi Eco 47 of 60...
- Page 48 Make sure it is correctly seated! 9. Place new O-ring 412.01 onto the pump casing. 10. Fit the pump casing. 11. Screw the fastening bolts into the pump casing and tighten. Tightening torque: 10 Nm! Multi Eco 48 of 60...
-
Page 49: Reassembling The Pump Set
7.6.2 Recommended spare parts stock for 2 years' operation to DIN 24296 Table 12: Quantity of spare parts for recommended spare parts stock Part No. Description Number of pumps (including stand-by pumps) 10 and more Rolling element bearing 20 % Mechanical seal 20 % Multi Eco 49 of 60... -
Page 50: Trouble-Shooting
B Pump is running, but not enough output or pressure C Motor does not start, or motor stops and re-starts intermittently D The start-up and stop pressures have changed (Multi Eco-Top only) Table 13: Trouble-shooting A B C D Possible cause Remedy ✘... -
Page 51: Related Documents
Terminal box cover Stage casing without return vanes 81-42 Terminal box Diffuser Cable Impeller Fan impeller Deflector Fan hood Radial ball bearing Capacitor Gasket Switch O-ring Screw Mechanical seal Shaft nut 45-4 Spacer Lock washer Multi Eco 51 of 60... -
Page 52: Installation Example
Part No. Description Washer Circlip Bracket 9.2 Installation example 9.2.1 Multi Eco-Pro Fig. 8: Installation drawing of Multi Eco-Pro Suction head operation Suction lift operation Minimum 0.3 m Minimum 0.1 m Maximum 8 m Suction strainer with foot valve Suction strainer... -
Page 53: Multi Eco Top
9 Related Documents 9.2.2 Multi Eco Top Fig. 9: Installation drawing of Multi Eco-Top Suction head operation Suction lift operation Minimum 0.3 m Minimum 0.1 m Maximum 8 m Suction strainer with foot valve Suction strainer Gate valve Pipe clamp Pressure switch... - Page 54 57,5 R 1 / 4 R 1 / 4 Suction nozzle Discharge nozzle Four holes Ø 8 Length 1.5 m Table 17: Dimensions in mm Multi Eco-Top Ø A Ø B Suction Discharge nozzle nozzle 34 / 20 Rp 1 35 / 20...
- Page 55 9 Related Documents Multi Eco 55 of 60...
-
Page 56: Eu Declaration Of Conformity
Manufacturer: 128, rue Carnot, 59320 Sequedin (France) The manufacturer herewith declares that the product: Multi Eco (E, P, 1~) Multi Eco-Pro Multi Eco-Top (E, 1~) Series code range: 2014w25 - 2018w52 ▪ is in conformity with the provisions of the following Directives as amended from time to time: –... -
Page 57: Eu Declaration Of Conformity
128, rue Carnot, 59320 Sequedin (France) The manufacturer herewith declares that the product: Multi Eco (D, 3~) Multi Eco-Top (D, 3~) Series code range: 2016w16 - 2018w52 ▪ is in conformity with the provisions of the following Directives as amended from time to time: –... -
Page 58: Certificate Of Decontamination
We confirm that the above data and information are correct and complete and that dispatch is effected in accordance with the relevant legal provisions....................................Place, date and signature Address Company stamp Required fields Multi Eco 58 of 60... -
Page 59: Index
Faults Causes and remedies 50 Filter 24 Installation at site 21 Intended use 9 Maintenance 38 Misuse 9 Noise characteristics 19 Order number 6 Other applicable documents 6 Partly completed machinery 6 Piping 24 Preservation 13, 35 Product description 14 Reassembly 38, 43 Return to supplier 13 Returning to service 35 Multi Eco 59 of 60... - Page 60 KSB S.A.S. 128, rue Carnot • 59320 Sequedin (France) B.P. 60095 • 59482 Haubourdin Cedex (France) Tél. +33 3 2022-7000 • Fax +33 3 2022-7099 www.ksb.com...
Need help?
Do you have a question about the Multi Eco and is the answer not in the manual?
Questions and answers
I have to restart the pump several times a day, the pump is working but not automatically anymore. KSB ECO
The KSB Eco pump may not be operating automatically and requires multiple restarts each day due to a failure of a duty pump. If a duty pump fails, the control unit should automatically start the next pump. However, if this fails to happen or if there are issues with the control system or protective devices not being re-installed or re-activated after maintenance, the system may not function properly. Additionally, if the pump has been out of service for over a year without replacing elastomer seals, this could also affect performance.
This answer is automatically generated