Napoleon Allure Series Installation And Operation Manual
Hide thumbs
Also See for Allure Series:
- Installation and operation manual (60 pages) ,
- Service manual (30 pages) ,
- Installation and operation manual (120 pages)
Table of Contents
Advertisement
NEFL32FH-EU / NEFL42FH-EU / NEFL50FH-EU / NEFL60FH-EU / NEFL72FH-EU / NEFL100FH-EU
SAFETY INFORMATION
WARNING
!
FIRE OR EXPLOSION HAZARD
If the information in these instructions are
not followed exactly, a fi re or explosion may
result causing property damage, personal
injury, or loss of life.
- Do not store or use gasoline or other
fl ammable vapors and liquids in the vicinity of
this or any other appliance.
INSTALLER:
Leave this manual with the appliance
CONSUMER:
Retain this manual for future reference
Wolf Steel Ltd., 24 Napoleon Rd., Barrie, ON, L4M 0G8 Canada / 103 Miller Drive, Crittenden, Kentucky, USA, 41030
Phone (705)721-1212 • Fax (705)720-9081 • www.napoleonfi replaces.com • hearth@napoleonproducts.com
$10.00
MULTIPLE PRODUCT CODES (LEAVE BLANK IF N/A)
INSTALLATION AND
ADD MANUAL TITLE
OPERATION MANUAL
CERTIFIED TO THE CANADIAN AND AMERICAN NATIONAL STANDARDS:
CSA /
INTERTEK
LOGO
ENGLISH
ALLURE™ SERIES
PRODUCT NAME™
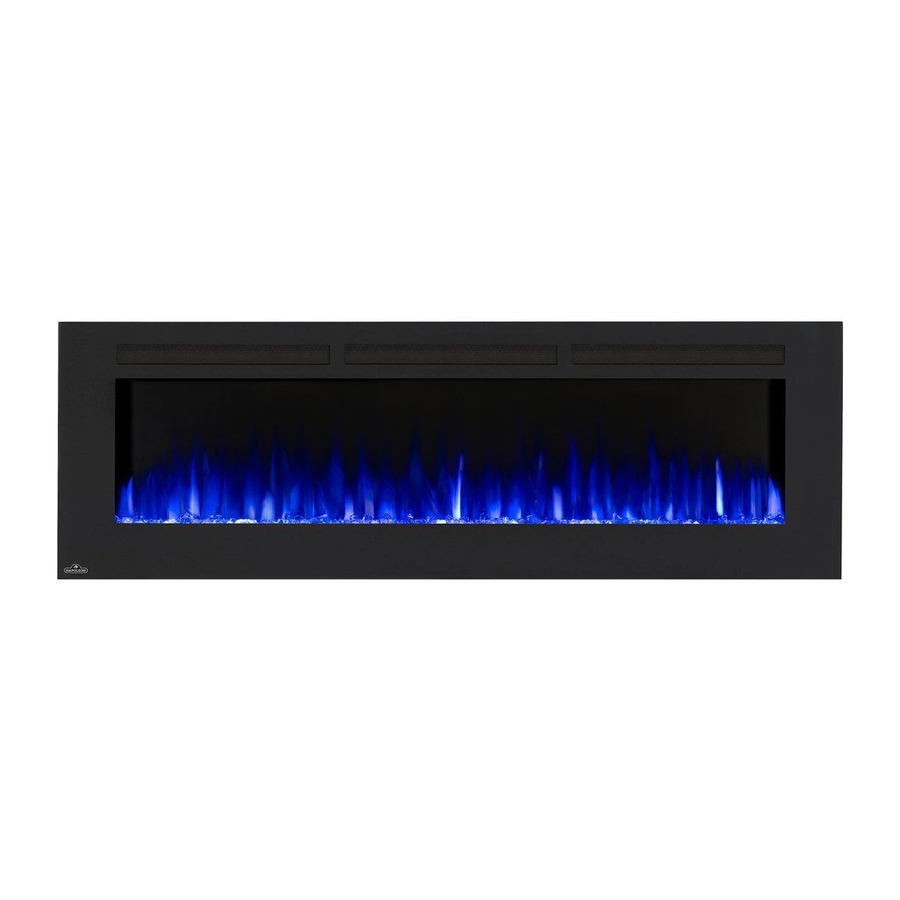
(NEFL50FH-EU ILLUSTRATED)
ADD PRODUCT CODE
(IF MULTIPLE, _____ ILLUSTRATED)
ADD PRODUCT IMAGE
FOR INDOOR USE ONLY
CSA 2.22 AND NO-46/ UL 1278
W415-1699 / 02.08.16
Advertisement
Table of Contents

Related Manuals for Napoleon Allure Series


Summary of Contents for Napoleon Allure Series
- Page 1 Retain this manual for future reference CSA / INTERTEK LOGO Wolf Steel Ltd., 24 Napoleon Rd., Barrie, ON, L4M 0G8 Canada / 103 Miller Drive, Crittenden, Kentucky, USA, 41030 Phone (705)721-1212 • Fax (705)720-9081 • www.napoleonfi replaces.com • hearth@napoleonproducts.com W415-1699 / 02.08.16 $10.00...
- Page 2 safety information WARNING • If equipped with a heater, this appliance DANGER can be hot when operated and can cause sever burned if contacted. • Do not operate appliance before reading and HOT GLASS WILL CAUSE understanding operating instructions. Failure BURNS.
- Page 3 safety information WARNING • To prevent a possible fi re, do not block air intakes or exhaust in any manner. Do not use on soft surfaces, like a carpet, where openings may become blocked. • Always plug appliances directly into a wall outlet/receptacle. Never use an extension cord or re locatable power tap (outlet/power strip).
-
Page 4: Table Of Contents
table of contents general information dimensions product information general instructions unpacking and testing appliance hardware parts list rating plate information locating appliance minimum clearance to combustibles installation minimum mantel clearances framing installing the appliance recessing the appliance into the wall installing the appliance into a mantel rubber feet installation hard wiring installation... -
Page 5: General Information
model designation 1.0 general information dimensions SIDE VIEW FRONT VIEW TOP VIEW product information This appliance has been tested in accordance with the GS Standards for fi xed and location-dedicated electric room appliances in Europe. If you need assistance during installation, please contact your local dealer. Dimensions NEFL32FH-EU 32"... -
Page 6: General Instructions
general information general instructions • Prior to plugging your appliance into an electrical outlet, verify that the house circuit breakers for the outlet are on. • The appliance may emit a slight, harmless odour when fi rst used. This odour is normal and it is caused by the initial heating of internal appliance elements and will not occur again. -
Page 7: Hardware Parts List
general information hardware parts list B - Wood Screws C - Drywall Anchors ( 6 ) ( 6 ) NEFL32FH-50FH NEFL32FH-50FH A - Fireplace (12) (12) NEFL60FH-72FH NEFL60FH-72FH ( 1 ) (16) (16) NEFL32FH-100FH NEFL100FH NEFL100FH F - Wall Bracket D - ST4x12 Metal Screws E - Remote Control ( 1 ) -
Page 8: Rating Plate Information
Manufacturer: Importer: Importer: Importer: Wolf Steel Ltd. Wolf Steel Europe Wolf Steel E Wolf Steel E 24 Napoleon Road, Poppenbouwing 29-31 Poppen DESIGNED IN NORTH AMERICA Barrie, ON, L4M 0G8 Canada Canada Canada 4191 NZ Geldermalsen BY WOLF STEEL LTD. -
Page 9: Minimum Clearance To Combustibles
2.0 installation installation WARNING • Risk of fi re! The power cord must not be pinched against a sharp edge. Secure cord to avoid tripping or snagging to reduce the risk of fi re, electric shock, or personal injury. Do nut run cord under carpeting. Do not cover cord with throw rugs, runners, or similar items. -
Page 10: Minimum Mantel Clearances
installation minimum mantel clearances WARNING • When using paint or lacquer to fi nish the mantel, the paint or lacquer must be heat resistant to prevent discoloration. Mantel 8" (203mm) Wall Floor Side View W415-1699 / 02.08.16... -
Page 11: Framing
installation framing Finishing Material (Non-load 5" 3 1/2" 127mm 89mm bearing) MODEL NO. NEFL32FH-EU 21" (535mm) 27 13/16" (707mm) NEFL42FH-EU 21" (535mm) 38" (965mm) NEFL50FH-EU 21" (535mm) 45 15/16" (1166mm) NEFL60FH-EU 21" (535mm) 55 13/16" (1418mm) NEFL72FH-EU 21" (535mm) 67 7/8" (1725mm) NEFL100FH-EU 21"... -
Page 12: Installing The Appliance
installation installing the appliance BODY Due to the many different materials used on different walls, it is highly recommended that you consult your local builder before you install this GLASS FRONT appliance on the wall. Select a location that is not prone to moisture and is located at least 21 5/8"... -
Page 13: Recessing The Appliance Into The Wall
installation recessing the appliance into the wall Due to the many different fi nish materials used on walls, it is highly recommended that you consult your local builder before you install this appliance in the wall. Select a location that is not prone to moisture and is located at least 36" (91.4cm) away from combustible materials such as curtain drapes, furniture, bedding, paper, etc. -
Page 14: Installing The Appliance Into A Mantel
installation note: The appliance tabs come bent. You must bend the tab fl at by hand when fully recessing the appliance into the wall. See Figure 4. FIG. 4 installing the appliance into a mantel Remove the glass front, refer to "front glass installation" section for removal instructions. Install the rubber feet onto the bottom of the appliance for stability, refer to "rubber feet installation"... -
Page 15: Rubber Feet Installation
installation rubber feet installation Place the appliance face down on a soft surface. Using a screw driver, remove the screws on the bottom of the appliance. Install the 4 rubber feet (6 rubber feet for NEFL60/72/100FH) onto the bottom of the appliance using the screws from Step B, see below. -
Page 16: Hard Wiring Installation
installation hard wiring installation WARNING • Turn off the appliance completely and let it cool down before servicing. Only a qualifi ed service person should service and repair this electric appliance. Hard wiring connection If it is necessary to hard wire this appliance, a qualifi ed electrician must remove the cord connection, and wire the appliance directly to the house hold wiring. -
Page 17: Front Glass Installation
3.0 fi nishing fi nishing WARNING • Power supply service must be completed prior to fi nishing to avoid reconstruction. • Heat vents and air openings cannot be covered in any circumstances. front glass installation WARNING • Glass may be hot. Do not touch glass until cooled. •... -
Page 18: Finishing
fi nishing FIG. 3 front glass removal FOR WALL MOUNT, PARTIAL RECESS AND MANTEL INSTALLED APPLIANCE ONLY: Remove the 2 screws from the top of the appliance, as shown below. Have two people lift the glass up and away from the appliance, holding the glass vertical not fl at while carrying. -
Page 19: Main Power Button
operating instructions 4.0 operating instructions WARNING • While the appliance is operating do not remove the glass panel. This will cause the remote control and touch panel to disfunction. Once the appliance has been plugged into a grounded electrical outlet, it is ready to operate. note: Ensure the house circuit breakers for the power supply are turned on. -
Page 20: Maintenance
maintenance 5.0 maintenance WARNING • Preparation for maintenance: always disconnect the power and allow the electric appliance to cool before performing any cleaning, maintenance, or relocation of this electric appliance. Turn controls to off and remove plug from outlet or turn of the house circuit breaker to electric appliance receptacle. •... -
Page 21: Wiring Diagram
wiring diagram 6.0 wiring diagram WARNING • Turn off the appliance completely and let cool before servicing. Only a qualifi ed service person should service and repair this electric appliance. NEFL32FH-EU NEFL42FH-EU NEFL50FH-EU W415-1699 / 02.08.17... - Page 22 wiring diagram NEFL60FH-EU NEFL72FH-EU NEFL100FH-EU W415-1699 / 02.08.16...
-
Page 23: Replacement Parts
7.0 replacement parts replacement parts WARNING • Failure to position the parts in accordance with this manual or failure to use only parts specifi cally approved with this appliance may result in property damage or personal injury. Contact your dealer for questions concerning prices and policies on replacement parts. Normally, all parts can be ordered through your Authorized dealer / distributor. - Page 24 replacement parts REF. NEFL32FH-EU NEFL42FH-EU NEFL50FH-EU NEFL60FH-EU NEFL72FH-EU NEFL100FH-EU Description W300-0226 W300-0224 W300-0227 W300-0228 W300-0229 W300-0230 Front Glass W475-1192 W475-1185 W475-1193 W475-1194 W475-1195 W475-1196 Acrylic Plastic Panel W405-0033 W405-0033 W405-0033 W405-0033 + W405-0033 + W405-0033 + LED Light W405-0037 W405-0037 W405-0037 W497-0014 W497-0013...
-
Page 25: Troubleshooting
8.0 troubleshooting replacement parts WARNING • Turn off the appliance completely and let cool before servicing. Only a qualifi ed service person should service and repair this electric appliance. SYMPTOM PROBLEM TEST SOLUTION Dim or no fl ame Flame brightness not selected See “OPERATING INSTRUCTIONS”... -
Page 26: 9.0 Warranty
Notwithstanding any provisions contained in the Limited Warranty, NAPOLEON’s responsibility under this warranty is defi ned as above, and it shall not in any event extend to any incidental, consequential, or indirect damages. -
Page 27: Service Warranty
10.0 service warranty replacement parts W415-1699 / 02.08.17... - Page 28 napoleonproducts.com...
Need help?
Do you have a question about the Allure Series and is the answer not in the manual?
Questions and answers