Aruba 6000 series Installation Manual
Mobility controller
Hide thumbs
Also See for 6000 series:
- Assembly & installation (6 pages) ,
- Installation and getting started manual (50 pages)
Table of Contents
Advertisement
Advertisement
Table of Contents

Related Manuals for Aruba 6000 series


Summary of Contents for Aruba 6000 series
- Page 1 Aruba 6000 Series Mobility Controller Installation Guide...
- Page 2 VPN client devices constitutes complete acceptance of liability by that individual or corporation for this action and indemnifies, in full, Aruba Networks, Inc. from any and all legal actions that might be taken against it with respect to infringement of copyright on behalf of those vendors.
-
Page 3: Table Of Contents
....... . Removing a Supervisor Card Aruba 6000 Series Mobility Controller Installation Guide... - Page 4 Certifications ......Proper Disposal of Aruba Equipment Aruba 6000 Series Mobility Controller 0510328-01 Installation Guide September 2007...
-
Page 5: Preface
A key to the various text conventions used throughout this manual Aruba Networks support and service information Overview of this Manual This manual is for trained technicians responsible for installing the Aruba 6000 series Mobility Controller. The manual is organized as follows: The Aruba 6000-series Chassis... -
Page 6: Text Conventions
{ Item A | Item B } In the command examples, items within curled braces and separated by a vertical bar represent the available choices. Enter only one choice. Do not type the braces or bars. Aruba 6000 Series Mobility Controller 0510328-01 Installation Guide September 2007... -
Page 7: Contacting Aruba Networks
Wireless Security Incident http://www.arubanetworks.com/support Response Team (WSIRT) /wsirt Support Email support@arubanetworks.com WSIRT Email wsirt@arubanetworks.com Please email details of any security problem found in an Aruba product. Telephone Numbers Aruba Corporate +1 (408) 227-4500 +1 (408) 227-4550 Support United States 800-WI-FI-LAN (800-943-4526) France... - Page 8 Preface viii Aruba 6000 Series Mobility Controller 0510328-01 Installation Guide September 2007...
-
Page 9: Chapter 1 System Overview
System Overview The Aruba 6000-series Mobility Controller is an enterprise-class, modular switch (based on the WS-5004 chassis) which connects, controls, and intelligently integrates wireless Access Points (APs) and Air Monitors (AMs) into the wired LAN. This chapter introduces you to the Switch name. It describes the general features of the modular system and illustrates key physical elements. -
Page 10: Physical Description
Slot 2 This slot is for the required line card. The line card provides network ports for connecting wireless APs, such as the Aruba Wireless Access Point, as well as wired LAN segments. Slot 3 This slot is for adding a second line card. - Page 11 On (|) position or while the power cord is plugged in. First verify the power switch is Off ( ) and the cord is unplugged. Be sure to exercise proper Electrostatic Discharge (ESD) AUTION precautions when handling Aruba 6000-series components. Aruba 6000 Series Mobility Controller Installation Guide...
- Page 12 System Overview Aruba 6000 Series Mobility Controller 0510328-01 Installation Guide September 2007...
-
Page 13: Installing The Chassis
3U rack space with 10 cm (4 inches) clearance to the left, right, front, and rear of the rack Another person to help position the switch Aruba power cord for each power supply, rated to at least 10 A with IEC320 connector Adequate power supplies and electrical power (see “Power Management”... -
Page 14: Precautions
Installing the Chassis Precautions Dangerous voltage in excess of 240VAC is always present AUTION while the Aruba Power Supply Module is plugged into an electrical outlet. Remove all rings, jewelry, and other potentially conductive material before working with this product. -
Page 15: Requirements
Installing the Chassis Requirements Minimum Switch Configuration An Aruba 6000 Series Mobility Controller Mobility Controller must include the following basic components (as shown in Figure 1-1 page One modular Mobility Controller chassis One fan tray One supervisor card in Slot 0... - Page 16 For best operation, keep the Switch name and all cords and cables at least 0.7 meters (2 feet) from fluorescent lighting fixtures, and 2 meters (6 feet) from photocopiers, radio transmitters, electric generators, and other sources of strong electromagnetic interference. Aruba 6000 Series Mobility Controller 0510328-01 Installation Guide September 2007...
-
Page 17: Mounting The Chassis
Use a Phillips or cross-head screwdriver to attach each bracket securely with four 6-32 flat head screws (included). Aruba 6000 Series Mobility Controller Installation Guide... - Page 18 12-24 screws Mounting the Switch name IGURE Use a Phillips or cross-head screwdriver to secure the switch to the rack with three 12-24 screws (included) for each mounting bracket. Aruba 6000 Series Mobility Controller 0510328-01 Installation Guide September 2007...
-
Page 19: Adding Modules
Use of a power line conditioner or Uninterruptable Power Supply (UPS) can decrease or mitigate problems caused by power service fluctuations. Verify that the output of any power shaping device is compatible with the Switch name power supplies. Aruba 6000 Series Mobility Controller Installation Guide... - Page 20 Repeat the above Steps 4, 5, and 6 for each installed power supply. Once power is connected, you can perform the power-on test (see page 13). Aruba 6000 Series Mobility Controller 0510328-01 Installation Guide September 2007...
-
Page 21: Verifying The Installation
The Status and Active/Standby LEDs are solid green. – The Utilization LED panel reflects the expected level of usage. In a typical power-on test performed after initial installation, a single blinking LED will indicate utilization of under 1%. Aruba 6000 Series Mobility Controller Installation Guide... - Page 22 Connect appropriate network cables (see “The Supervisor Card” and “The Line Cards” for port and cable information). You are now ready to perform the initial setup as described in the Aruba Quick Start Guide (which is included in the Accessory Kit).
-
Page 23: The Fan Tray
The Fan Tray The Aruba 6000-series Fan Tray (HW-FT) promotes proper air circulation for cooling the specialized modules in the Switch name and is required for their normal operation. This chapter describes the general features and physical characteristics of the fan tray, and provides instructions for replacing the module if necessary. -
Page 24: Physical Description
This handle is used for removing or inserting the module into the switch chassis. Do not use the fan tray handle to lift or move the Switch AUTION name. Serious damage could result. Aruba 6000 Series Mobility Controller 0510328-01 Installation Guide September 2007... -
Page 25: Replacing A Fan Tray
Inspect the new fan tray to verify that it is undamaged. Place the new fan tray in a safe, accessible place near the switch, ready for prompt insertion. Locate a #2 Phillips or cross-head screwdriver. Aruba 6000 Series Mobility Controller Installation Guide... - Page 26 When hot swapping the fan tray and when the connectors are properly engaged, power to the fans should be restored and they should start spinning. Check the fans to verify all of them are working. Aruba 6000 Series Mobility Controller 0510328-01 Installation Guide September 2007...
- Page 27 Use the screwdriver to push in and tighten both of the fastening screws on the faceplate of the newly installed fan tray. Rotate the screws clockwise until moderate resistance is felt, but do not over-tighten. Aruba 6000 Series Mobility Controller Installation Guide...
- Page 28 The Fan Tray Aruba 6000 Series Mobility Controller 0510328-01 Installation Guide September 2007...
-
Page 29: The Supervisor Card
This chapter describes the general features and physical description of the supervisor card, details the compatible cables and connectors, and covers the steps needed to insert and remove the module. The Aruba 6000 Supervisor Card’s crypto accelerator consists of 16 cores and the card supports 256 Mbytes of memory. Features Hot Swap Hot swapping should be performed by a trained technician. -
Page 30: Physical Description
This handle is used for removing or inserting the module into the switch chassis. Do not use the Supervisor Card Module handle for lifting AUTION or moving the Switch name. Serious damage could result. Aruba 6000 Series Mobility Controller 0510328-01 Installation Guide September 2007... - Page 31 Command-Line Interface (CLI) for initial configuration of the Switch name. It can also be used for management, troubleshooting, and to enable the 10/100 Mbps Ethernet management port for higher-level management functions. Aruba 6000 Series Mobility Controller Installation Guide...
- Page 32 Each LED from left to right represents an increment of 20% in the activity of the supervisor card. When all five LEDs are lit, the SCM is functioning at 100% capacity. Aruba 6000 Series Mobility Controller 0510328-01 Installation Guide...
-
Page 33: Port & Cable Specifications
The right-most of the lit LEDs will blink to verify the supervisor card is operating properly. No LEDs will be lit if the module is in standby mode or not functioning. Reset button Only push the reset button when directed to do so by Aruba technical support. Port & Cable Specifications Serial Port The serial port is located on the front panel of the supervisor card. - Page 34 CL2-P , CL3-P , MPP or CMP . Be sure to install cables in accordance with all applicable local regulations and practices. Aruba 6000 Series Mobility Controller 0510328-01 Installation Guide...
-
Page 35: Inserting A Supervisor Card
If the system is powered up, the module’s Power LED will light up green if the supervisor card is inserted properly. Secure the supervisor card. Aruba 6000 Series Mobility Controller Installation Guide... -
Page 36: Removing A Supervisor Card
Once disengaged from the backplane, the supervisor card should easily slide out the rest of the way. Cover blank slots. Aruba 6000 Series Mobility Controller 0510328-01 Installation Guide September 2007... - Page 37 The Supervisor Card For safety considerations, as well as to promote proper airflow for cooling and to prevent dust from entering the switch chassis, cover any unoccupied slot with a blank cover plate. Aruba 6000 Series Mobility Controller Installation Guide...
- Page 38 The Supervisor Card Aruba 6000 Series Mobility Controller 0510328-01 Installation Guide September 2007...
-
Page 39: Multi-Service Mobility Module
Aruba 6000 modular based Mobility Controller system utilizing 400 W power supplies. The Aruba 6000 is capable of containing up to four M3 Mark I modules, each of which can be configured as a master or local controller. - Page 40 Multi-Service Mobility Module Aruba 6000 Series Mobility Controller 0510328-01 Installation Guide September 2007...
-
Page 41: The Line Cards
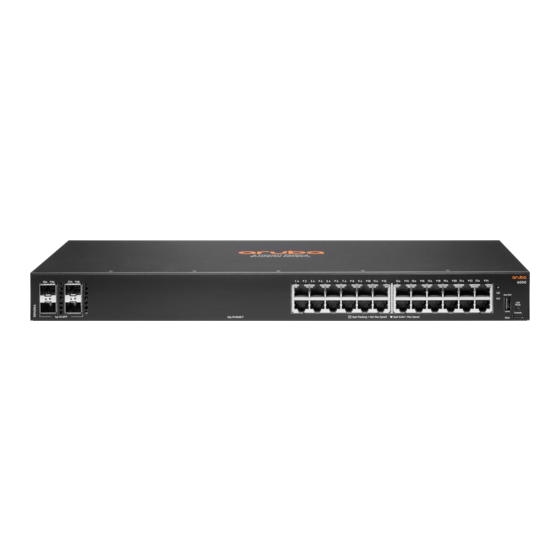
LC-24FE-2GE Features High Port Density Each Aruba LC-24FE-2GE line card has 24 10/100 Mbps Ethernet (FE) ports and 2 Gigabit Ethernet (GE) ports. Up to 3 line cards can be installed in the switch chassis, for a total of 72 FE and 6 GE ports per switch. -
Page 42: Physical Description
Flashing The port is transmitting or receiving data. The flashing Green rate is proportional to your network activity. Amber The Ethernet link on the port is encountering errors. Aruba 6000 Series Mobility Controller 0510328-01 Installation Guide September 2007... - Page 43 Line Card Status LED ABLE Status Description The line card is powered off or initializing. Green The line card is operating properly. Amber The line card is being initialized. The line card has failed. Aruba 6000 Series Mobility Controller Installation Guide...
- Page 44 Flashing The port is transmitting or receiving data. The flashing rate is Green proportional to your network activity. Amber The Ethernet link on the port is encountering errors. Aruba 6000 Series Mobility Controller 0510328-01 Installation Guide September 2007...
-
Page 45: Port & Cable Specifications
The Line Cards Port & Cable Specifications FE Ports There are two models of Aruba 6000-series Line Card, each with different port characteristics: The Aruba 6000-series Line Card (LC--2G24FE) has 24 FE ports The FE ports provide 10/100 Mbps Ethernet connections to APs and wired LAN segments. - Page 46 SPOE adapter with no intervening hubs, routers, switches, or other network equipment. Aruba SPOE adapters separate the serial and FE portions of the cable and route them to their individual ports on the connected device. There are two adapter models: CA-SPOE-ADAPT-1 adapts the Ethernet cable for DB-9 serial and RJ-45 FE devices.
- Page 47 The Line Cards CA-SPOE-ADAPT-2 adapts the Ethernet cable for RJ-45 serial and RJ-45 FE devices. The Aruba SPOE adapters are compatible with the following APs: Aruba SPOE Adapter Compatibility ABLE AP Make and Model Serial Aruba SPOE Adapter Aruba APs...
- Page 48 Web site or contact customer support (see page vii). Replacing a GBIC Insert GBIC With Label Up Squeeze Release Tabs and Remove GBIC GBIC Removal and Insertion IGURE Aruba 6000 Series Mobility Controller 0510328-01 Installation Guide September 2007...
-
Page 49: Lc-2G Features
10km (6.21 miles) LC-2G Features These instructions explain how to install an Aruba LC-2G Mobility Controller line card. This Aruba 6000-series Line Card has two Gigabit Ethernet (GE) ports. No power or serial connectivity is provided by the ports on this line card. -
Page 50: Physical Description
This handle is used for removing or inserting the module into the switch chassis. Do not use the line card handle to lift or move the Switch AUTION name. Serious damage could result. Aruba 6000 Series Mobility Controller 0510328-01 Installation Guide September 2007... - Page 51 No AP is detected on the port (lowest precedence) The LED states listed above are listed in order of precedence (highest to lowest). If more than one AP is connected to the port, the state with the highest precedence is displayed. Aruba 6000 Series Mobility Controller Installation Guide...
-
Page 52: Inserting A Line Card
If the system is powered up, the module’s Power LED will light up green if the line card is inserted properly. Secure the line card. Aruba 6000 Series Mobility Controller 0510328-01 Installation Guide September 2007... -
Page 53: Removing A Line Card
There may be moderate resistance as the module comes free from its connections with the chassis backplane, but do not use excessive force. Once disengaged from the backplane, the line card should easily slide out the rest of the way. Cover blank slots. Aruba 6000 Series Mobility Controller Installation Guide... - Page 54 For safety considerations, as well as to promote proper airflow for cooling and to prevent dust from entering the switch chassis, cover any unoccupied slot with a blank cover plate. Aruba 6000 Series Mobility Controller 0510328-01 Installation Guide September 2007...
-
Page 55: The Power Supply
The Power Supply The Aruba 6000-series Power Supply adapts electrical power for use with the Switch name. The switch chassis has multiple slots that can hold individual power supplies to support load sharing and fault tolerance. This chapter describes the general features and physical characteristics of the power supply. - Page 56 This feature depends on the number and type of modules installed in your Switch name. For details, see “Power Management” page Aruba 6000 Series Mobility Controller 0510328-01 Installation Guide September 2007...
-
Page 57: Physical Description
This handle is used for removing or inserting the module into the switch chassis. Do not use the power supply handle to lift or move the AUTION Switch name. Serious damage could result. Aruba 6000 Series Mobility Controller Installation Guide... - Page 58 10 A and conform to grounded electrical standards in the country where the product is used. Power Switch The power switch has two states: Off ( ) and On (|). Aruba 6000 Series Mobility Controller 0510328-01 Installation Guide September 2007...
-
Page 59: Power Management
(for systems not utilizing an M3 Mark 1) Power Requirements Worksheet This section covers power management for Aruba 6000 mobility controllers not utilizing M3 Mark I modules. Use this worksheet to determine the power required by your Switch name. Use a separate copy for each system deployed in your network. - Page 60 400W power supply (HW-PSU-400) 26 W unit overhead Maximum power load in Watts: Verify that the maximum power load does not exceed the capacity of your electrical circuits. Aruba 6000 Series Mobility Controller 0510328-01 Installation Guide September 2007...
-
Page 61: Power Management (For Systems Utilizing An M3 Mark I)
(for systems utilizing an M3 Mark I) This section covers power management for Aruba 6000 mobility controllers utilizing M3 Mark I modules. The Aruba 6000 supports up to three 400 W power supplies. If utilizing three primary power supplies for 1200 W of primary power, redundancy is not supported. -
Page 62: Inserting A Power Supply
Turn the captive fastening screws on the faceplate counter-clockwise until they are loose (they cannot be completely removed). Remove the cover plate and store it in a safe place. Aruba 6000 Series Mobility Controller 0510328-01 Installation Guide September 2007... - Page 63 When the power cord is attached, swing the power cord retaining clip to the right as shown in Figure 6-3. This will hold the plug in place and help prevent it from being removed accidentally. Aruba 6000 Series Mobility Controller Installation Guide...
- Page 64 Verify that the output of any power shaping device is compatible with the Switch name power supplies. For safety reasons, verify the power outlets and plugs are AUTION within easy reach of the operator and can be quickly disconnected if necessary. Aruba 6000 Series Mobility Controller 0510328-01 Installation Guide September 2007...
-
Page 65: Removing A Power Supply
Cover blank slots. For safety considerations, as well as to promote proper air flow for cooling and to prevent dust from entering the switch chassis, cover any unoccupied slot with a blank cover plate. Aruba 6000 Series Mobility Controller Installation Guide... - Page 66 The Power Supply Aruba 6000 Series Mobility Controller 0510328-01 Installation Guide September 2007...
-
Page 67: Appendix A Specifications
Operating: 0 to 40 ºC (32 to 104 ºF) Storage: 0 to 50 ºC (32 to 122 ºF) Minor alarm: 40 ºC Major alarm: 50 ºC Critical alarm: 60 ºC Humidity 5% to 95% (non-condensing) Altitude 3,048 m (10,000 feet), maximum Aruba 6000 Series Mobility Controller Installation Guide... -
Page 68: Operation
Any changes or modifications not expressly approved by the party responsible for compliance could void the user’s authority to operate this equipment. Aruba 6000 Series Mobility Controller 0510328-01 Installation Guide September 2007... - Page 69 This is a Class A product. In a domestic environment, this ARNING product may cause radio interference in which case the user may be required to take adequate measures. This product complies with EN55022 Class A and EN55024 standards. Aruba 6000 Series Mobility Controller Installation Guide...
-
Page 70: Safety
Dispose of used batteries according to the manufacturer’s instructions. Laser Notice The Aruba 6000 Line Cards used with this product use replaceable laser transceiver modules on some ports. CLASS 1 LASER PRODUCT Use of controls or adjustments of performance or procedures... -
Page 71: Certifications
AS/NZS CISPR 22 Class A Safety UL60950, CAN/CSA C22.2 No 60950, IEC/EN60950 Low Voltage Directive (LVD) 73/23/EEC 21 CFR Chapter 1, Subchapter J, Part 1040.10 (Laser Safety), IEC/EN 60825-1, EN 60825-2 (Laser Safety) Aruba 6000 Series Mobility Controller Installation Guide... -
Page 72: Proper Disposal Of Aruba Equipment
Specifically, restricted materials under the RoHS Directive are Lead (including Solder used in PCB's), Cadmium, Mercury, Hexavalent Chromium, and Bromine. Aruba declares compliance with the European Union (EU) WEEE Directive (2002/96/EC). For more information on WEEE, refer to: http://www.dti.gov.uk/sustainability/weee/...
Need help?
Do you have a question about the 6000 series and is the answer not in the manual?
Questions and answers