
Related Manuals for WEG ECW500


Summary of Contents for WEG ECW500
- Page 1 Motors I Automation I Energy I Transmission & Distribution I Coatings Automatic Voltage Regulator ECW500 Manual...
- Page 3 Manual Series: ECW500 Language: English Document No: 10003224697 / 03 Software Version: 1.3X Publication Date: 08/2018...
- Page 4 Summary of Reviews Revision Description Chapter First edition Detailing the MPFC and MRPC modes Inclusion of new parameters created under version V1.10 Addition of the new parameters created in the version V1.20 to the Quick Reference guide. 1 and 6 Inclusion of a configuration and operation description for the Autotuning function Inclusion of new parameters created on version V1.3X Description of analog output operation...
-
Page 5: Table Of Contents
3 SAFETY INSTRUCTIONS ..............14 SAFETY WARNINGS IN THE MANUAL................... 14 SAFETY WARNINGS IN THE PRODUCT ..................14 PRELIMINARY RECOMMENDATIONS ................... 15 4 ABOUT THE ECW500 ................16 ABOUT THE MANUAL ........................16 4.1.1 Symbols Used ........................16 SOFTWARE VERSION ........................17 CHARACTERISTICS ......................... - Page 6 Self-Calibration of the Analog Inputs ................58 7 MODBUS RTU COMMUNICATION............. 59 STRUCTURE OF THE MESSAGES IN THE RTU MODE ............... 59 MODBUS FUNCTIONS AVAILABLE ON THE ECW500 ..............59 7.2.1 Parameter Types of the ECW500 ..................59 SERIAL TRANSMISSION ......................... 60 7.3.1...
- Page 7 Summary 10.4.4 Control Configuration ....................66 10.4.5 Configuring the Protections ................... 67 10.5 TESTS ON THE OFFLINE MODES ....................67 10.5.1 Turning On and Off the Regulator with Machine Spinning ..........67 10.5.2 Test of the Excitation Current Limiter ................68 10.6 TESTS ON THE ONLINE MODES ....................
-
Page 9: Quick Parameter Reference
2 = 38400 bps 3 = 57600 bps 4 = 115200 bps 30008 Serial port parity 0 = None 1 = Odd 2 = Even 30010 Serial port stop bits 1 to 2 30012 Modbus ID 1 to 254 ECW500 | 1... - Page 10 31214 Status Word 0 a 127 31216 Command Word 0 a 32767 Ethernet 30258 Ethernet IP Field 1 0 a 255 30260 Ethernet IP Field 2 0 a 255 30262 Ethernet IP Field 3 0 a 255 2 | ECW500...
- Page 11 Potential transformer configuration 0 = Single phase 1 = Three phase OPERATION MODES 30206 Mode selection MTVC/MECC 0 = MECC 1 = MTVC 30208 Online mode selection 0 = Off 1 = MPFC Mode 2 = MRPC Mode ECW500 | 3...
- Page 12 LEOC enable 0 = False, 1 = True 30040 LEOC Proportional gain Kp 0.0 to 99.999 0.250 30042 LEOC Integral gain Ki 0.0 to 99.999 0.500 Terminal Overcurrent (LTOC) 30124 LTOC Enable 0 = False, 1 = True 4 | ECW500...
- Page 13 1.00 31060 Analog Output Signal 0 = 0 to 10 V 1 = 4 to 20 mA 31062 Analog Output Function 0 = Control Output 1 = Terminal Voltage 2 = Terminal Current 3 = Power Factor ECW500 | 5...
- Page 14 30304 RL1 Relay NC 0 = False, 1 = True 30306 RL2 Relay NC 0 = False, 1 = True 30308 RL3 Relay NC 0 = False, 1 = True 30310 RL0 annunciation type 0 = Momentary 6 | ECW500...
- Page 15 0 = False, 1 = True 30392 RL1 excitation diode failure 0 = False, 1 = True 30394 RL2 excitation diode failure 0 = False, 1 = True 30396 RL3 excitation diode failure 0 = False, 1 = True ECW500 | 7...
- Page 16 0 = False, 1 = True 30444 PTOV delay 0.5 to 60.0 s 1.0 s 30446 PTOV level 100 to 200 % (V 130 % Terminal Undervoltage (PTUV) 30448 PTUV enable 0 = False, 1 = True 8 | ECW500...
- Page 17 0 = False, 1 = True 30468 Delay PED 5 to 60 s 60 s 30470 PED Turn Off ECW500 0 = False, 1 = True Loss of Analog Current Input (PLCI) 31024 PLCI Enable 0 = False, 1 = True...
- Page 18 0 to 100 % (Ref. MECC/MTVC) 40062 Duty cycle -100 to 100 % 40064 Maximum excitation current 0 to 30 A 40066 Minimum excitation current 0 to 30 A 40068 U/F reference part -100 to 0 % (Ref. MTVC) 10 | ECW500...
- Page 19 Adjustable Range Address Setting Setting 40070 ECW500 CPU usage 0 to 100 % 40072 ECW500 CPU stack size 0 to 16383 bytes 40074 ECW500 CPU stack usage 0 to 16383 bytes 40076 Fundamental frequency of I 0 to 500 Hz...
-
Page 20: Errors, Warnings And Events
HMI (keypad) signalizes that there is an error present, and its code is registered on the events list; ■ the fault relay actuates (connectors 33 and 34). In order to enable the ECW500 again and operate it normally, it is necessary to reset it, which can be done the following ways: ■... -
Page 21: Events
WR012 Excitation overvoltage WR013 Excitation overcurrent WR014 Underfrequency WR015 Received command to reset parameters with the ECW500 enabled WR016 Alarm reset is missing to execute the command WR017 Analog input cable 4 to 20 mA broken WR018 Autotuning execution fail... -
Page 22: Safety Instructions
Safety Instructions 3 SAFETY INSTRUCTIONS This manual contains information necessary for the proper use of the voltage regulator ECW500. It has been written to be used by qualified personnel with suitable training or technical qualification for operating this type of equipment. -
Page 23: Preliminary Recommendations
NOTES! For the purposes of this manual, qualified personnel are those trained to be able to: 1. Install, ground, energize and operate the ECW500 according to this manual and the effective legal safety procedures. 2. Use protective equipment according to the established standards. -
Page 24: About The Ecw500
Due to the wide range of functions of this product, it may be used in applications different from those presented hereby. Neither does this manual aim at presenting all the possible applications of the ECW500, nor can the manufacturer take any liability for the use of the converter which is not based on this manual. -
Page 25: Software Version
(mili): ÷1.000 (x10 ■ (micro): ÷1.000.000 (x10 ■ n (nano): ÷1.000.000.000 (x10 SOFTWARE VERSION The software version used on the ECW500 defines the functions and programming parameters, and it can be updated during the product lifecycle. ECW500 | 17... -
Page 26: Characteristics
This manual refers to the software version as indicated on the back cover. For instance, the version 1.0X means are that do not affect the content of this manual. The version installed on the ECW500 can be checked on the HMI in the path "Menu -> Measures -> OS/FW Information" or by the Modbus 40112 address. -
Page 27: Label Information
About the ECW500 Figure 4.1 Simplified block diagram of the ECW500 LABEL INFORMATION The identification label of the product, located on the side of the regulator, contains important information about its model, such as voltage and current ranges allowed for operation. -
Page 28: Human Machine Interface (Hmi)
About the ECW500 Date code Serial number Operating temperature Electronics Power Supply Output Power Power Supply Voltage Feedback Current Feedback Output Relays Digital Inputs Product Certifications Figure 4.2 Identification label HUMAN MACHINE INTERFACE (HMI) Through the HMI of the product is possible to perform the command and configuration of the regulator, since this interface gives access to all parameters. -
Page 29: Installation
In order to keep the operation of the internal clock while the regulator is powered down, the keypad (HMI) of the ECW500 has a battery. If the battery is low or if it is not installed on the HMI, the clock time will be invalid. -
Page 30: Installation And Connection
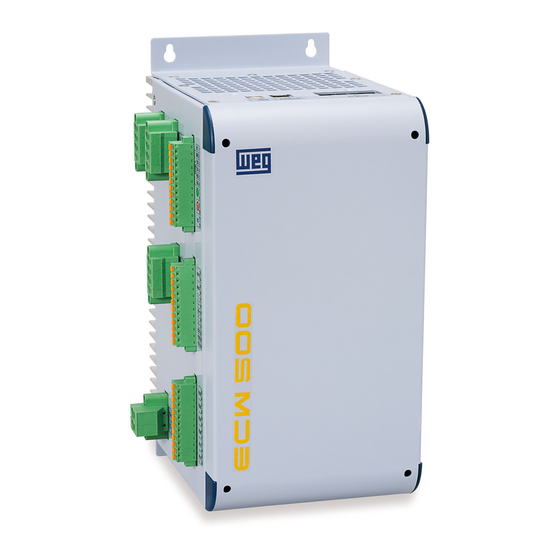
5 INSTALLATION AND CONNECTION RECEIVING AND STORAGE On the outside of the ECW500 package there is a label similar to the label that is affixed on the side of the product. Make sure the ECW500 identification label corresponds to the model purchased or if there were any damages during transport. - Page 31 Installation and Connection Figure 5.1 Front and back view with dimensions Figure 5.2 Left and right side views of ECW500 ECW500 | 23...
-
Page 32: Electrical Installation
A device must be provided to disconnect the power supply from the regulator, and it must be opened before beginning any connections. DANGER! The ECW500 must not be used as an emergency stop device. ATTENTION! The following information is merely a guide for proper installation. Comply with applicable local regulations for electrical installations. -
Page 33: Power And Grounding Wiring
Installation and Connection Figure 5.3 Typical connections of the ECW500. 5.3.1 Power and Grounding Wiring The use of wiring with gauges suitable for the regulator is essential to prevent damages to the installation and equipment. Thus, the following Table 5.1 presents the minimum recommended values for cables to connect the power circuit and also for the protection conductor (PE), based on NBR 5410 standard. -
Page 34: Protection Fuses
ECW500 Figure 5.4 Configuration of the elements for the protection of the input circuit of the ECW500. Table 5.2 Recommended Fuses for the Protection of the Input Circuit of ECW500 (AC side) Fuse Rated WEG Model Maximum I... -
Page 35: Grounding Connection
The supply lines allowed for use with the ECW500 are those of the TN or TT (IEC) type. The connection of lines of the IT type is also possible, since it is grounded via impedance. -
Page 36: Control Connections
5.3.4 Control Connections The control connections of the ECW500 (analog inputs/output, digital inputs/outputs) are made at terminals 1 to 36 and 52 to 75, located at the side of the product. The typical control functions and connections are shown in Figure 5.6. - Page 37 Low Level: 3V Digital input Increase Maximum input voltage: 30V Input current: 11mA @ 24Vcc Digital input Decrease Digital input Enable Online Operation Digital input Enable Parallel Operation Digital input Pre-position Figure 5.6 Control connections for the ECW500 ECW500 | 29...
- Page 38 In order to eliminate this effect, RC suppressors must be connected in parallel to the coils of those devices (in case of DC power supply, make the connection in parallel with the freewheel diodes). 30 | ECW500...
-
Page 39: Functional Description
Table 6.1. The initial screen displayed by the HMI of the ECW500 after the initialization shows the main variables of the synchronous machine, in addition to the regulator status and the current operating mode. - Page 40 Functional Description Table 6.1 Parameter group structure of the ECW500 V1.3X Level 0 Level 1 Level 2 Level 3 Level 4 Measures General Screen Machine Voltage/Current Machine Power Machine Field ECW Power Module Aux. Inputs/Outputs Control Variables Limiters Status Digital I/O Status Dig.
-
Page 41: Measurement Screens
The measurement screens have the profile shown below. In each line, there is a variable with its description, a number with 4 digits and a comma and then the measurement unit. On the measurement screen, the only available button is the return to the previous screen (Back). ECW500 | 33... -
Page 42: Edition Screens
The event screen is a special viewing screen that shows the last 12 events recorded by the ECW500. On this screen the events are listed in order of occurrence, with the most recent event shown in the first line of the first page. -
Page 43: Password Screen
If the password protection is not desired, the user can disable the function by entering a new password and selecting the value "disabled" (equivalent to number zero). After confirming the new password, the message "Password disabled" will show in the fourth line. Figure 6.8 Sequence of screens to disable the password ECW500 | 35... -
Page 44: Digital Inputs
The factory default password is 2. DIGITAL INPUTS The ECW500 has eleven (11) specific isolated digital inputs that allow full control of the equipment through this physical interface. The initial logical status of the digital inputs is zero (off), and for a digital input switches to logic state one (on) it requires that a voltage between 8 Vdc and 30 Vdc be applied. -
Page 45: On Digital Input
6.2.2 OFF Digital Input The OFF digital input is complementary to the ON input and it is used to disable the excitation of the ECW500. The OFF command has priority over the ON command. 6.2.3 MTVC Digital Input The MTVC digital input is used to change the operating mode of the ECW500 to MTVC (Mode: Terminal Voltage Control). -
Page 46: Enable Online Digital Input
ENABLE ONLINE and ENABLE PARALLEL digital inputs be activated simultaneously. If only the ENABLE ONLINE input is activated, no action will be taken by the ECW500 in these modes. If the regulator is operating in the parallel mode (MTVC_DROOP), simply activate the ENABLE ONLINE digital input to enter the online MPFC or MRPC modes. -
Page 47: Alarm Reset Digital Input
ANALOG INPUTS The ECW500 has two isolated analog inputs which can be used to actuate in the reference of each mode of operation or as a feedback signal for the MECC mode. For using the analog signal as reference, it is necessary to adjust the parameter 31048 in option 1 (Analog Input) or in the option 2 (Parameter + Analog Input). - Page 48 If the PLCI (protection of the current input loss) is enabled and its reading falls below 3.5 mA, the ECW500 will indicate broken wire failure. In this case, if the External Power Module parameter is set to 1 the regulator will shut down.
-
Page 49: Analog Output
MECC mode. In this mode it is also possible to operate with external feedback for the excitation current, giving the ECW500 the ability to control machines with nominal excitation above 20A. To use this feature, set parameter 31028 (External Power Module) to 1 (enabled) and choose which of the analog inputs will be used as feedback: the one in voltage (31054 = 1) or the one in current (31056 = 1). -
Page 50: Mtvc_Droop
On the other hand, in the line-drop compensation mode, the ECW500 regulates the voltage in a point outside the machine, in the step-up transformer or even in a point along the transmission system. The compensation produces an increasing reference voltage for the increase of the reactive power at the output of the machine. -
Page 51: Mpfc (Power Factor Control)
MPFC (Power Factor Control) (Mode: Power Factor Control) In this mode, the ECW500 controls the excitation, so that the power factor at the terminals of the machine is maintained constant based on the control reference in this mode. In this mode, the synchronous machine operates connected to the bus (online). - Page 52 Functional Description See the figure below and the Table 6.3 to understand the necessary conditions to switch from each operation modes. MTVC MECC MRPC MTVC_DROOP MPFC ONLINE MODES OFFLINE MODES Figure 6.14 Operation modes of ECW500 44 | ECW500...
-
Page 53: Limiters
MTVC or MECC→ MTVC DROOP: Digital Input ENABLE PARALLEL MTVC DROOP → MTVC or MECC: Digital Input DISABLE PARALLEL (ECW500 changes to MTVC or MECC mode depending on the configuration of the offline operating mode). MTVC → MRPC: Digital Input ENABLE PARALLEL + Digital Input ENABLE ONLINE (simultaneously) (Online operating mode must be in MRPC) MRPC →... - Page 54 V/Hz is the ratio of rated voltage and rated frequency multiplied by the slope constant (drop) configurable in the 30120 parameter of the ECW500. When the ratio V/Hz measured exceeds the set value, the limiter operates adding or subtracting a value to the main control loop reference with the objective of keeps the V/Hz value ratio constant.
-
Page 55: Excitation Overcurrent Limiter (Leoc)
(30066) and the high level to 10% above the low level. The LEOC time can be maintained at default value (10s). NOTE! The excitation overcurrent limiter actuates in all operating modes, except on the MECC mode. It can be disabled by parameter 30142 and a relay can be configured to indicate its operation. ECW500 | 47... -
Page 56: Excitation Undercurrent Limiter (Leuc)
(PxQ). Thus, the amount of reactive power absorbed by the machine is limited to the specified value. The ECW500 allows the customized adjustment of the PxQ curve through the setting of five active power points versus reactive power as shown in Figure 6.18. The points must follow the sequence shown in the figure, otherwise an alert will be generated when the regulator is put into operation. -
Page 57: Terminal Overcurrent Limiter (Ltoc)
The aim of the terminal overcurrent limiter (stator overcurrent limiter) is to prevent an excessive and destructive current through the terminals of the synchronous machine. When the LTOC acts, the ECW500 controls the excitation current in order to keep the stator current below the specified levels. The gains of the LTOC PI loop must be set to ensure a dynamic operation suitable for each application. -
Page 58: Protections
The LTOC limiter has higher priority over the LEUC limiter. PROTECTIONS The ECW500 has ten protections for several events that may happen during the operation. The main objective of the protections is to warn the operator that there is an abnormal and harmful situation for the machine. -
Page 59: Feedback Loss Protection (Pfl)
To perform this function, the ECW500 monitors in real time the harmonic content of the wave form of the excitation current through the Fast Fourier Transform (FFT). Six parameters are available for configuration of the protection: ▪... -
Page 60: Excitation Loss Protection (Pel)
If the temperature exceeds the level set for a configured time for protection, a fault is generated. It is also possible to configure for the ECW500 to shut down the excitation if this fault occurs. Three parameters are available for the configuration of this protection: temperature level (30428), time for actuation (30430) and whether the ECW500 must shut down or not the excitation in case of fault (30432). -
Page 61: Analog Input In Current: Loss Protection (Plci)
The status relay has fixed function and indicates if the ECW500 in ON (in operation) or OFF. 6.9.2 General Fault Relay The general fault relay has fixed function and indicates whether there is an error or active fault on the ECW500. 6.9.3 Configurable Relays 0, 1, 2 and 3 The ECW500 has four relays with configurable indication functions indicated by the numbers 0, 1, 2 and 3. -
Page 62: Soft Start
This function increases the reference of the operating mode gradually up to the final value set. The ECW500 allows setting the start level of the reference in terms of percentage in relation to the final value and the time it will take the reference to reach the final value. - Page 63 Autotuning procedure. This percentage is related with the current duty cycle ratio value (40062). Example: If the ECW500 is operating with duty cycle (40062) of 35% and an excitation voltage (40046) of 13.5 Volts, an Output Level Variation adjusted in 5.0% will make that duty cycle swing between 36.75% (35% * 1.05) and 33.25% (35*0.95) during the Autotuning.
-
Page 64: Commands
To start the automatic tuning process, the autotuning command on Autotuning menu must be changed On . The Autotuning command can be also executed through the F2 key, since the HMI navigation screen be on the Autotuning menu. 56 | ECW500... -
Page 65: Messages
6.12 SPECIAL FUNCTIONS 6.12.1 Self-Calibration of the Excitation Current Measurement The ECW500 has a self-calibration function of the analog channel for reading the excitation current. The calibration allows correcting inaccuracies inherent in the product manufacturing and in the tolerance of components, providing greater precision for the measurement. -
Page 66: Self-Calibration Of The Analog Inputs
The current measurement calibration must be performed with the ECW500 excitation turned off. 6.12.2 Self-Calibration of the Analog Inputs For the analog input voltage (-10V to +10V), it is also available in the ECW500 the self-calibration function. It allows correcting inaccuracies inherent in the product manufacturing and in the tolerance of components, providing greater precision for measurement. -
Page 67: Modbus Rtu Communication
1 byte N bytes 2 bytes MODBUS FUNCTIONS AVAILABLE ON THE ECW500 The MODBUS functions available on the ECW500 are listed below. Detailed information to use these functions is found in the MODBUS protocol specification. ■ F0x01: Read Coils. ■... -
Page 68: Serial Transmission
However, the ECW500 only uses the RTU mode for the transmission of telegrams. The ECW500 uses an RS-485 interface that can be configured as Half Duplex or Full Duplex via parameter 30002. In the parameter table of chapter 1 you can check all the options for configuring this communication interface (parameters 30006 to 30014). - Page 69 Modbus RTU Communication Figure 7.1 Converter USB / RS485 ECW500 | 61...
-
Page 70: Ethernet Communication (Modbus Tcp)
Ethernet Communication (Modbus TCP) 8 ETHERNET COMMUNICATION (MODBUS TCP) The ECW500 has support for 10 and 100 Mbps Ethernet connections, Half or Full Duplex, in Modbus TCP protocol. For a correct communication and operation, parameters 30258 to 30280 must be configured according to the network, as well as parameters 31218 (port), 31220 (Id) and 31222 (timeout). -
Page 71: Anybus Communication
Communication. 9 ANYBUS COMMUNICATION The ECW500 supports multiple network protocols with the use of passive and active Anybus modules. When using a passive module, the settings applied are the same as the Modbus RS-485 / RS-422 (parameters 30002 to 30014). -
Page 72: Startup
Excitation current with rated load 10.4 CONFIGURING THE ECW500 10.4.1 Rated Parameters In order to start configuring the ECW500, you must start by the rated parameters of the synchronous machine and the system. See in Figure 6.2 System Rated terminal voltage_______ V... -
Page 73: Operating Modes And Limiters
ATTENTION! The configuration of the application parameters is essential for the proper operation of the product, since the conversion of some readings performed by the ECW500 is based on the values defined by those parameters. 10.4.2 Operating Modes and Limiters As a next step, the operating modes of the regulator and the limiters must be configured. -
Page 74: Control Configuration
Minimum active power to set the curve: ______________ Active Power Reactive Power Point 1 Point 2 Point 3 Point 4 Point 5 If the terminal overcurrent limiter (LTOC) is active, configure the levels and time to actuation of this limiter. 66 | ECW500... -
Page 75: Configuring The Protections
Result: _____________________________________________________________________________ 3. Put the regulator in the manual mode (MECC) and set the excitation current reference to 20% of the rated excitation current value. Enable the regulator and wait for the ramp to reach the reference setting. ECW500 | 67... -
Page 76: Test Of The Excitation Current Limiter
4. Change the reference of the MTVC mode for the rated value of the machine. The limiter must act immediately, holding the excitation current in the value adjusted as high level. After 10 seconds, the excitation current must be limited to the value set at the low level. Result: _____________________________________________________________________________ 68 | ECW500... -
Page 77: Tests On The Online Modes
7. Configure the reactive mode chosen to generate the minimum reactive possible. Configure the low level of LTOC limiter to a value 15% above the current at the setpoint with the minimum reactive. Increase the reference of reactive until the limiter becomes active. Result: _____________________________________________________________________________ ECW500 | 69... - Page 78 Result: _____________________________________________________________________________ 10. Check the dynamic response of the limiter and make the necessary adjustments. Kp LEUC: _____________________ Ki LEUC: _____________________ 11. Adjust the reference of the online mode chosen for normal operation. Reference (MPFC or MRPC): _____________________ 70 | ECW500...
-
Page 79: Maintenance
11.2 TECHNICAL ASSISTANCE If you have any question about service, contact the technical assistance. The contact channels are on the website http://www.weg.net, according to the country or region where the assistance is needed. NOTE! For consults or service requests, it is important to have the following data at hand: ■... -
Page 80: Instructions To Clean The Product
ECW500 seems not to be working If the ECW500 seems not to be working and the HMI will not turn on, check that the electronics power supply is within the specifications. The ECW500 has two redundant power supply inputs (AC and DC). Refer to the specification table in chapter 12 Technical Specifications. - Page 81 Limiters and protections actuating The limiters and protections of the ECW500 serve to protect both the synchronous machine and the equipment itself. If any of these conditions is indicated, make sure that the problem is solved. Also check that the configurations for each limiter and protections are correctly dimensioned for the relevant application.
-
Page 82: Technical Specifications
The auxiliary DC input for excitation allows a machine without enough remanent voltage to be controlled when the power supply comes from the machine terminals. The origin source must be galvanically isolated from the power supply. 74 | ECW500... -
Page 83: Eletronics / General Data
Profibus ■ DeviceNet ■ ANYBUS Modbus TCP ■ Profinet IO ■ EtherNet/IP ■ CC-Link The power supplies of the electronics are redundant and require an isolation transformer in the AC input if they have the same origin. ECW500 | 75... - Page 84 WEG Drives & Controls Automação LTDA. Jaraguá do Sul - SC - Brazil Phone 55 (47) 3276-4000 - Fax 55 (47) 3276-4020 São Paulo - SP - Brazil Phone 55 (11) 5053-2300 - Fax 55 (11) 5052-4212 automacao@weg.net www.weg.net...
Need help?
Do you have a question about the ECW500 and is the answer not in the manual?
Questions and answers