Table of Contents
Advertisement
Quick Links
INSTRUCTION MANUAL
pHTutor
Bench meter
Introduction
Thank you for selecting our pHTutor pH/Temperature bench meter.
This manual provides a step-by-step guide to operate the pHTutor bench meter.
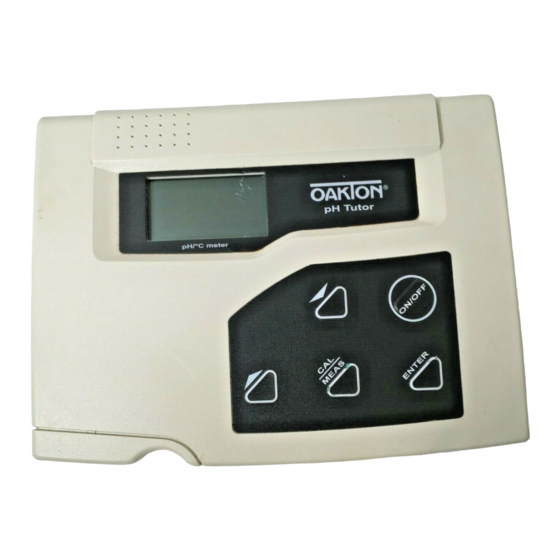
Display And Keypad Functions
Display
The LCD (Liquid Crystal Display) has an upper and lower display which shows the measured pH
and the measured temperature.
The display also shows error messages, keypad functions and program functions.
Keypad
A large splash proof membrane keypad with tactile feedback makes meter easy to use.
Powers on and shuts off the meter
Toggles between the measurement and calibration modes of the meter.
In SETUP mode, pressing CAL/MEAS key returns meter to the
measurement mode
Confirms the calibration values in calibration mode and the selections in the
SETUP menu.
Sets the calibration values during the calibration mode.
Scrolls through each SETUP menu and the configuration settings.
Rear Instrument Panel
The pHTutor bench meter provides a complete set of connectors for the various accessories
commonly used.
Connection
ATC
INPUT
REF
REC
GND
DC
Starting Up
Connect the accessory connectors at the rear of the instrument panel. During operation, it is
important that water does not get onto the BNC connector. Also avoid touching the connector
with soiled or wet hands.
Connecting the Electrode Holder (Optional Purchase)
This meter's base plate has a side metal bar to which you can attach an integral swivel electrode
holder. You can mount the electrode holder on either right or left side of the meter.
To position the electrode arm:
Use a Phillips screwdriver to remove the screw
holding the electrode holder. Slide the side metal
bar until the second screw slot lines up with the
original screw hole. Use the screw removed
earlier to secure the electrode holder into position.
www.
Find Quality Products Online at:
Function
For phono jack connection from the temperature probe for
Automatic Temperature compensation. The probe should
be a 30KW thermistor type.
For connection to pH electrodes with BNC type connectors.
Always ensure that the connector is clean and dry.
For connection to pin type reference electrode normally
used with half cell (mono) type pH electrodes.
Non-functional
For connection to the ground earth jack (standard tip connectors).
For connection for the AC/DC power adapter
To install the electrode arm to the meter:
To mount the electrode arm into the metal rod on the side bar, align
the slot with the metal rod and base of electrode arm. Push it
downwards until it fully sits into position.
NOTE: Move the base of the electrode holder if you wish to
swing the electrode holder about. To prevent the meter from
toppling over causing accidental spills, DO NOT swing the body
of the electrode holder.
GlobalTestSupply
.com
Temperature Calibration (Optional Probe Purchase)
For ATC, you must connect a temperature probe (optional purchase).
1.
While pressing the ENTER key, switch on the meter by pressing the ON/OFF key.
2.
Release the ENTER key. You will enter the setup mode with the display showing "CAL"
3.
Press ENTER key to enter the Temperature Calibration mode. The upper display act as the
adjustable temperature setting and the lower display shows the current measured temperature
value.
4.
Dip the temperature probe into a solution of known temperature, such as a temperature bath
for a few minutes until the temperature probe stabilizes.
Press ▲ or ▼ key to adjust the temperature setting to the known temperature value from
5.
step 4.
6.
Press the ENTER key to confirm the setting and to return to the measurement mode.
Note: To abort Temperature Calibration, do not press the ENTER key in step 6. Press the 'CAL
/ MEAS' key instead.
pH Buffer Set Selection
The pHTutor features USA (pH 4.01, pH 7.00 and pH 10.01) or NIST (pH 4.01, pH 6.86, and pH
9.18) standards. Select either one to suit your requirements.
1.
While pressing the ENTER key, switch on the meter by pressing the ON/OFF key.
2.
Release the ENTER key. You will enter the setup mode with the display showing "CAL".
Press the ▲ or ▼ key to scroll through the setup page until you view the "bUF" display.
3.
4.
Press the ENTER key to enter the buffer set selection page.
Choose the buffer set selection you desire using the ▲ and ▼ key and confirm your
5.
selection by pressing the ENTER key.
pH Calibration
Calibration should be done regularly, preferably once a week. You can calibrate up to three
points using either the USA or the NIST buffer set standards.
1.
Press ON/OFF key to switch unit on.
2.
Dip electrode about 2 to 3 cm into the pH standard buffer solution.
3.
Press the CAL key to enter calibration mode. The 'CAL'annunciator will be shown on top of
the LCD. The upper display will show the default measurement while the lower display will
indicate the pH standard buffer solution.
Note: The meter automatically recognizes the buffers as the buffer standard you have set in the
SETUP mode, i.e. either USA (pH 4.01, 7.00 or 10.01) or NIST (pH 4.01, 6.86 or 9.18) buffers.
Note: To abort calibration, press the 'CAL / MEAS' key.
4.
Allow the meter reading to stabilize (READY will be displayed) before pressing the ENTER
key to confirm the first calibration point. The upper display will be calibrated to the pH
standard buffer solution and the lower display will switch to the next calibration point.
Note: If the upper measured display is not within the buffer acceptable window, an error
message "ERR" and the electrode icon will flash upon pressing the ENTER key. Press CAL/
MEAS key to exit calibration and resume to the measurement mode. Check electrode condition
and recalibrate.
sales@GlobalTestSupply.com
Advertisement
Table of Contents

Related Manuals for Oakton pHTutor


Summary of Contents for Oakton pHTutor
- Page 1 Display And Keypad Functions For connection for the AC/DC power adapter The pHTutor features USA (pH 4.01, pH 7.00 and pH 10.01) or NIST (pH 4.01, pH 6.86, and pH Display 9.18) standards. Select either one to suit your requirements.
- Page 2 Combination Use the ▲ or ▼ key to decide your option on the user reset function. The pHTutor are warranted to be free from manufacturing defects for 3 years and electrode Electrode, 12 X 110 mm, nO deactivates reset function ●...
Need help?
Do you have a question about the pHTutor and is the answer not in the manual?
Questions and answers