
Related Manuals for Siemens SIDOOR AT12


Summary of Contents for Siemens SIDOOR AT12
- Page 1 SIDOOR Elevator door drive AT12 Manual · 02/2012 Products for specific requirements Answers for industry.
- Page 3 ___________________ Elevator door drive AT12 Introduction ___________________ Safety notes ___________________ Definitions Products for specific requirements ___________________ Overview of controls SIDOOR ___________________ Functions and device Elevator door drive AT12 responses Mechanical installation and ___________________ setting Manual Electric adjustment and ___________________ commissioning ___________________ The relay contacts ___________________...
- Page 4 Note the following: WARNING Siemens products may only be used for the applications described in the catalog and in the relevant technical documentation. If products and components from other manufacturers are used, these must be recommended or approved by Siemens. Proper transport, storage, installation, assembly, commissioning, operation and maintenance are required to ensure that the products operate safely and without any problems.
-
Page 5: Table Of Contents
Table of contents Introduction..............................7 Safety notes............................... 9 General safety instructions ......................9 Definitions..............................11 Overview of controls ..........................13 Functions and device responses ......................15 Learn and test run........................15 DOOR OPEN command ......................15 DOOR CLOSE command ......................15 Learn run button...........................16 Parameter settings........................16 Blockage detection "CLOSE".......................17 Blockage detection "OPEN"......................17... - Page 6 Table of contents Appendix..............................37 Order nos. of the individual parts ....................37 Dimension drawing of AT12 controller ..................38 24 V geared motor with rubber-metal anti-vibration mount and mounting bracket..... 39 Deflector pulley with tensioning device and mounting bracket ........... 40 Door clutch holder ........................
-
Page 7: Introduction
The sales contract contains the entire obligation of SIEMENS. The warranty contained in the contract between the parties is the sole warranty of SIEMENS. Any statements contained in these operating instructions neither expand nor restrict the scope of these contractual warranty conditions. - Page 8 Introduction Elevator door drive AT12 Manual, 02/2012, A2B00086683A-04...
-
Page 9: Safety Notes
Safety notes Before commissioning Please read through these instructions carefully. They contain essential information for the installation, use and safety of the equipment. General safety instructions WARNING Only appropriately qualified personnel should work on or in the vicinity of this equipment. Personnel must be thoroughly familiar with all the warnings, notices, and functions of the AT12 door controller described in the operating instructions. - Page 10 Safety notes 2.1 General safety instructions Elevator door drive AT12 Manual, 02/2012, A2B00086683A-04...
-
Page 11: Definitions
Definitions Initial speed Reduced speed in the opening and closing directions after power on until normal operation is detected. Creep speed Reduced speed in the vicinity of the OPEN position of the elevator door (creep distance). Cutter speed Reduced speed in the vicinity of the CLOSED position of the elevator door (cutter distance). Creep distance Range of door travel in the vicinity of the OPEN position. - Page 12 Definitions Elevator door drive AT12 Manual, 02/2012, A2B00086683A-04...
-
Page 13: Overview Of Controls
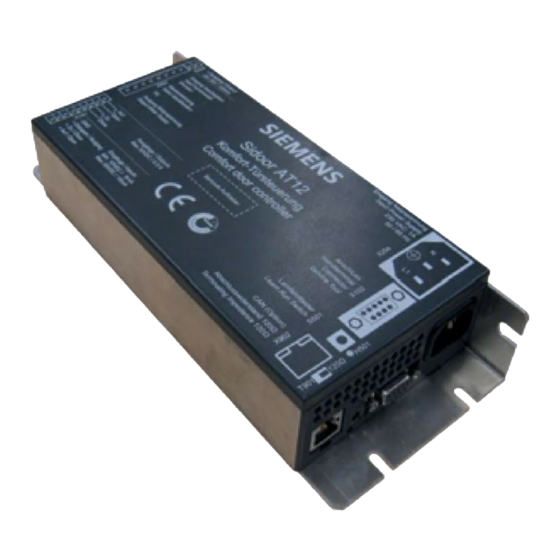
Overview of controls Sidoor AT12: X204: Mains connection 230 V (1 A, 50 / 60 Hz) X102: Connector for Service Tool and USB adapter (Software Kit) S501: Learn run button X902: CAN connector (CAN OPEN RJ45) T901: Switchable CAN terminating resistor 120 ohms... - Page 14 Overview of controls Elevator door drive AT12 Manual, 02/2012, A2B00086683A-04...
-
Page 15: Functions And Device Responses
Functions and device responses Learn and test run (S501) Pressing the learn run button for more than five seconds executes the automatic determination of the parameters: "CLOSED" 1. Detection of the direction of door movement and the position 2. Determination of the friction values of the door system and the weight of the door. "OPEN"... -
Page 16: Learn Run Button
Functions and device responses 5.4 Learn run button Learn run button S501 The learn run button ( ) combines the functions of the automatic learn and test run, and the option of opening and closing the door from the controller. The learn and test run is activated by pressing the learn run button for more than five seconds. -
Page 17: Blockage Detection "Close
Functions and device responses 5.6 Blockage detection "CLOSE" Blockage detection "CLOSE" "CLOSE" DOOR CLOSE If the door is blocked in the direction with a command present, the door stops and reverses direction. After reaching the open position, the door closes again at normal speed to within about 2 cm of the obstacle. -
Page 18: Closing Force
Functions and device responses 5.10 Closing force 5.10 Closing force The closing force can be set between 70 N and 120 N. Note The resulting closing force must be checked by a suitable measuring method, and must not exceed 150 N. WARNING When the closing force is set, it is imperative that any effective closing weight is taken into account. -
Page 19: Overload Protection
Functions and device responses 5.12 Overload protection 5.12 Overload protection DOOR OPEN DOOR CLOSE If the drive motor is subjected to severe strain by commands repeated in quick succession, the hold-open time is automatically increased. The DOOR CLOSE next closing movement is delayed, even if a command is present, the LED flashes red 4 times. - Page 20 Functions and device responses 5.12 Overload protection Elevator door drive AT12 Manual, 02/2012, A2B00086683A-04...
-
Page 21: Mechanical Installation And Setting
Mechanical installation and setting CAUTION Safe operation of the elevator door drive requires proper assembly and commissioning by qualified personnel, with due attention given to the warning notices in the operating instructions. The controller must be disconnected from the power supply before starting any work on the door drive. - Page 22 Mechanical installation and setting Elevator door drive AT12 Manual, 02/2012, A2B00086683A-04...
-
Page 23: Electric Adjustment And Commissioning
Electric adjustment and commissioning WARNING When electrical devices are used, certain parts of them have to carry dangerous voltages. Failure to observe the operating instructions can therefore lead to serious injuries or material damage. It is essential to observe the warning notices. The door movements cannot always be externally controlled while the controller is being commissioned (in particular during the automatic determination of parameters). - Page 24 Electric adjustment and commissioning (S501) 6. Keep the learn run button pressed until the door moves (learn run has started). During the learn run, the door is opened about 10 cm, and closed once or twice at creep speed. The friction of the door system is then determined by opening and closing the door once through a range of 25 cm at creep speed.
- Page 25 Electric adjustment and commissioning 12. Once the controller has detected the door "OPEN" and "CLOSED" end positions, the subsequent opening and closing movements proceed at normal speed once again. Note Door movements in the "OPEN" and "CLOSE" directions can also be actuated with the learn run button S501.
- Page 26 Electric adjustment and commissioning Parameters should always be adjusted during normal operation with the door in the "CLOSED" position, because the controller then accepts the values immediately. CAUTION Taking the counterweights into account, the maximum static closing force must not exceed 150 N! WARNING Risk of injury through moving mechanical parts...
-
Page 27: The Relay Contacts
The relay contacts The relay contacts can be used to report the following door states to the higher-level elevator controller: X101 (PIN3 and PIN4) ● "CLOSED" Door has reached the position. "CLOSED" The relay switches on when the controller has detected the position and the Pin 3 pulse generator ceases to output pulses, that is the door is stationary. - Page 28 The relay contacts Elevator door drive AT12 Manual, 02/2012, A2B00086683A-04...
-
Page 29: Can
The movement commands and door states can be sent by means of a CAN Bus protocol. A 120 ohms terminating resistor can be optionally connected via the slide switch T901. The resistor is switched in as default. The pin assignment of the RJ45 X902 socket corresponds to the CANopen pin assignment. The cable shield is not connected to the printed circuit board of the AT12. - Page 30 Elevator door drive AT12 Manual, 02/2012, A2B00086683A-04...
-
Page 31: Travel Curve
Travel curve Speed OPEN Acceleration Reverse ramp Brake ramp Cutter ramp OPEN OPEN distance Creep distance OPEN OPEN OPEN Creep speed Cutter speed OPEN OPEN Route Creep speed Cutter speed CLOSE CLOSE CLOSE Cutter Creep distance distance CLOSE Brake ramp Reverse ramp Acceleration ramp CLOSE... - Page 32 Travel curve Elevator door drive AT12 Manual, 02/2012, A2B00086683A-04...
-
Page 33: Operating Status Display
Operating status display The current operating states of the AT12 are indicated by a suitable error state display (Service Tool). Display Meaning Reserve RAM, EEPROM or CPU error (system error) Brake chopper error Error in the second shutdown route Increased hold-open time with longer motor switch-on time Motor undefined Motor blocked in direction of closure Incremental encoder error... -
Page 34: Speed Limit Curve
Operating status display 11.1 Speed limit curve 11.1 Speed limit curve The speed limit curve is the characteristic curve which defines the maximum permissible door speed V as a function of the total door panel weight. According to EN 81, the maximum kinetic energy of the door in the closing direction must not exceed 10 joules. -
Page 35: Technical Data
Technical data 12.1 DC geared motor Supply voltage 24 VDC Maximum speed 0.5 m/s Degree of protection IP 21 Gear ratio 15:1 Pulse generator 100 pulses/revolution Rated current 1.8 A 12.2 Control unit Supply voltag 230 V, 50 to 60 Hz Tolerance ±... - Page 36 Technical data 12.3 Regulations and standards Elevator door drive AT12 Manual, 02/2012, A2B00086683A-04...
-
Page 37: Appendix
Appendix Order nos. of the individual parts Order No. Plain text Short designation Control unit 6FB1111-1AT20-1AT1 AT12 controller AT12 Geared motor 6FB1103-0AT10-5MA0 24 V motor, pinion left, for doors up to 120 kg 6FB1103-0AT11-5MA0 24 V motor, pinion right, for doors up to 120 kg Accessories 6FB1104-0AT02-0AD0 Vibrating metal fitting small motor... -
Page 38: Dimension Drawing Of At12 Controller
Appendix A.2 Dimension drawing of AT12 controller Dimension drawing of AT12 controller Figure A-1 Dimension drawing of AT12 controllers Dimensions in mm Elevator door drive AT12 Manual, 02/2012, A2B00086683A-04... -
Page 39: Geared Motor With Rubber-Metal Anti-Vibration Mount And Mounting Bracket
Appendix A.3 24 V geared motor with rubber-metal anti-vibration mount and mounting bracket 24 V geared motor with rubber-metal anti-vibration mount and mounting bracket Geared motor (left) Motor mount (rubber-bonded metal) 4 M5x10 hexagonal safety bolts 7 M6x16 hexagonal safety bolts Mounting bracket Geared motor (left) Motor mount... -
Page 40: Deflector Pulley With Tensioning Device And Mounting Bracket
Appendix A.4 Deflector pulley with tensioning device and mounting bracket Deflector pulley with tensioning device and mounting bracket 2 DIN 933 M6x12 hexagonal bolts 2 DIN 125 6.4 washers Tension lug DIN 933 M6x30 tensioning bolt 3 M6x16 hexagonal safety bolts Tensioning device mounting bracket 2 DIN 933 M6x12 hexagonal bolts Tensioning device mounting bracket... -
Page 41: Door Clutch Holder
Appendix A.5 Door clutch holder Door clutch holder Figure A-4 Door clutch holder Elevator door drive AT12 Manual, 02/2012, A2B00086683A-04... -
Page 42: Assembly Suggestion
Appendix A.6 Assembly suggestion Assembly suggestion Figure A-5 Assembly suggestion Elevator door drive AT12 Manual, 02/2012, A2B00086683A-04... -
Page 43: Terminal Circuit Diagram Of Control Inputs
Appendix A.7 Terminal circuit diagram of control inputs Terminal circuit diagram of control inputs Elevator controller power supply Voage output +24 V DC 120 mA NUDGE NUDGE NUDGE OPEN OPEN CLOSE CLOSE CLOSE OPEN Connector with internal power supply Connector with external power supply Figure A-6 Terminal circuit diagram of control inputs CLOSE... -
Page 44: Diagnostics And Parameterization
Appendix A.8 Diagnostics and parameterization Diagnostics and parameterization The Service Tool and the Sidoor User Software can be used equally well for diagnostics and setting the parameters These tools are optionally available (see Appendix Order nos. of the individual parts (Page 37)). -
Page 45: Settings Record
Appendix A.9 Settings record Settings record Note Please take the adjustment range and the factory settings from chapter Electric adjustment and commissioning (Page 23) Function Set value Creep distance Open Cam distance Open Creep distance Close Cam distance Close Maximum speed Open mm/s Creep speed Open mm/s... - Page 46 Appendix A.9 Settings record Elevator door drive AT12 Manual, 02/2012, A2B00086683A-04...
- Page 48 Siemens AG Subject to change without prior notice Industry Sector Order No.: A2B00086683A-04 Postfach 23 55 © Siemens AG 2012 90713 FÜRTH GERMANY www.siemens.de/industry...
Need help?
Do you have a question about the SIDOOR AT12 and is the answer not in the manual?
Questions and answers