Advertisement
Table of Contents
Advertisement
Table of Contents

Related Manuals for ElectrIQ AIRFLEX15


Summary of Contents for ElectrIQ AIRFLEX15
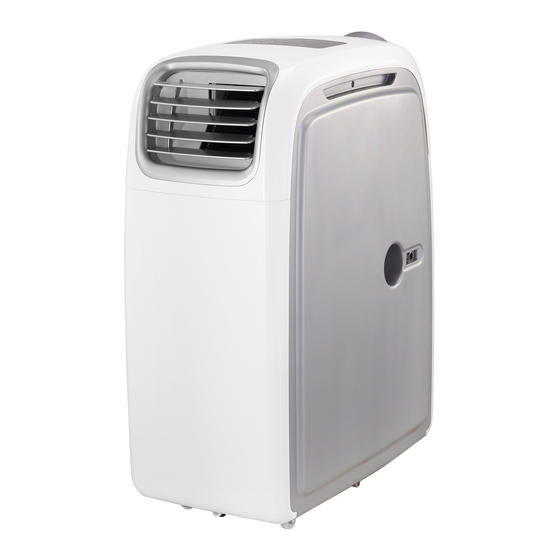
- Page 1 AIRFLEX15 PORTABLE AIR CONDITIONER WITH HEATPUMP Thank you for choosing ElectriQ Please read this user manual before using this innovative Air Conditioner and keep it safe for future reference. Visit our page www.electriQ.co.uk for our entire range of Intelligent Electricals...
-
Page 2: Table Of Contents
CONTENTS SAFETY INSTRUCTIONS FEATURES AND PARTS LIST INSTALLATION CONTROL PANEL AND SETTINGS OPERATION MODE USING THE COMFORT KIT (AVAILABLE SEPERATELY) DUAL DUCTING THE UNIT WATER-DRAINAGE MAINTENANCE TROUBLESHOOTING APPENDIX Page 2 of 24... -
Page 3: Safety Instructions
SAFETY INSTRUCTIONS Important! Carefully read the instructions before operating the unit. This Air Conditioner has an IP24 rating. It is designed mainly for indoor use but will stand up to outdoor use being protected against light rain and splashing. ... - Page 4 Always place the unit on a dry and stable surface. The appliance should not be installed in laundry or wet rooms The appliance must be placed in a room without sources of ignition (for example: open flames, an operating gas appliance or an operating electric heater). ...
-
Page 5: Features And Parts List
FEATURES AND PARTS LIST FEATURES Part of ElectrIQ range of Intelligent Air Conditioning products Cooling, Heating and Dehumidifying for use all year round. Powerful and Flexible for both Domestic and Commercial use Unique optional comfort kit with a wired remote control that enables the unit to be... -
Page 6: Installation
INSTALLATION Warning:Before using this unit, please keep it upright for at least 3-4 hours. This unit can easily be moved from one room to another. While moving the unit please note that it must always be kept upright and then placed on an even surface. - Page 7 ATTACHING THE HOSE 1. Clip the hose connector and front vent to the sides of the unit (after removing the hose from storage) 2. Insert the hose and rotate it firmly into the adapter 3. To remove the hose twist it in the opposite direction.
- Page 8 INSTALLATION OF WINDOW KIT Partially open the window and then fix the window kit to the window horizontally or vertically. Keep at least 50 cm from any objects and the air inlets grills on the side of the unit. Clip the other end of the hose with the fishtail adapter to the air outlet of the window slider. Make sure the unit is upright and there are no obstructions to the air inlet and outlet grills.
-
Page 9: Control Panel And Settings
CONTROL PANEL AND SETTINGS This portable air conditioner boasts the functions: cooling, heating, and dehumidify. The fan has three speeds: high, medium and low Temperature range settings are: 15 – 25 C in heating and 17 – 30 C in cooling mode. The LED screen is able to display the temperature set, fault codes, diagnostic and protective codes. - Page 10 (1) STANDBY Button Press this button to turn the unit on and enter cooling mode. Press again and the unit will switch off. (2) TEMP + Button These are used to increase the desired temperature In cooling mode, the temperature can be set between 17 – 30°C In heating mode, the temperature can be set between 15 –...
- Page 11 (7) to (9) FUNCTION INDICATORS An LED will illuminate to show which mode the unit is currently in. This can be changed between Dehumidify (7), Cooling (8) and Heating (9) using the Function Button (3) (10) IR REMOTE SENSOR Receives infra red signals from the supplied remote control (11) to (14) FAN SPEED INDICATORS An LED will illuminate to show which fan speed the unit is currently set to.
- Page 12 REMOTE CONTROL Power To enter / exit standby Mode. Speed Fan speed selection (N/A in dehumidification mode) Temp + Increase desired temperature in 1 degree increments Temp - Decrease desired temperature in 1 degree increments Mode Change between heating, cooling, dehumidifying, fan and auto modes Timer Set the timer.
-
Page 13: Operation Mode
20-22°C in cooling mode. The ElectrIQ Airflex 15 is a self-evaporating air conditioner, so under normal use there is usually no need to empty the internal tank. However if there is a high amount of humidity in the air or if the unit is not vented correctly, water will be collected in the internal tank. - Page 14 The hose can be vented via a tilted window, a door or wall aperture. Make sure that no warm air from outside can enter the room. Set the function to “COOLING”. Set the target temperature using the temperature control. The target temperature range is selectable between 17°C and 30°C. The unit must only be used in an ambient temperature of up to 32°C.
- Page 15 HEATING Be aware that on very cold days the unit should only be operated indoors. When the outside temperature gets colder, it will take longer to heat the room. We recommend that when you have achieved the desired temperature to leave the unit running on thermostatic control and it will maintain the temperature set very economically.
- Page 16 HEATING WHEN AC IS PLACED OUTDOORS (DUCTING THE HOT AIR INTO THE ROOM) Connect the air hose to the hot air outlet of the air conditioner after exchanging the grills if necessary. The air hose will send hot air into the room, while the front grills will expel cold air. The unit is placed outside the room to be heated.
-
Page 17: Using The Comfort Kit (Available Seperately)
2. Attach the comfort kit in position in the room, ensuring there is space behind, to allow both the vent pipe and communication wire to be routed to the Airflex15 3. Attach the wire from Comfort Kit to the side of the air conditioner. - Page 18 Page 18 of 24...
-
Page 19: Dual Ducting The Unit
DUAL DUCTING THE UNIT The Airflex 15 also supports dual ducting in both cooling and heating modes. This means the unit can operate with two hoses connected at the same time. To do this the unit should be set up with the Comfort Kit or a compatible gravity flap for sending cooled / heated air into the room, with a second pipe connected sending the waste air outside. -
Page 20: Water-Drainage
WATER-DRAINAGE This model is an advanced self-evaporative air conditioner, which reduces the need to empty the water tank in cooling mode. If the unit is vented correctly most of the water is reused to cool the condenser coils and any excess is evaporated. As such for cooling mode, to ensure the unit runs at maximum efficiency, we would advise for continuous drainage not to be used. -
Page 21: Maintenance
MAINTENANCE CLEANING Please shut off the unit and unplug from the mains before cleaning or performing any maintenance CLEAN THE SURFACE Clean the plastic housing with a duster or a soft wet cloth. Do not use chemical solvents (such as benzene, alcohol or gasoline) as they may cause irreversible damage. -
Page 22: Troubleshooting
TROUBLESHOOTING Do not repair or disassemble the unit by yourself, unauthorized repair attempts will invalidate the warranty and may cause bodily harm. Problem Reason Solution Ensure the unit is plugged in and attempt No power supply to turn on the unit. The unit does Water-full indicator (E4) Drain the internal water tank... -
Page 23: Appendix
Please contact the local council for details of your local household waste recycling centres. TECHNICAL DATA: MODEL ElectrIQ Airflex15 V2 Capacity Cooling: 4000 W Heating: 3200 W Rated Input (EN 60335) - Page 24 ElectrIQ UK SUPPORT www.ElectrIQ.co.uk/support Please, for your own convenience, make these simple checks before calling the service line. If the unit still fails to operate call: 0871 620 1057 or complete the online form 1. Has the unit been standing upright for at least 2 hours? 2.
Need help?
Do you have a question about the AIRFLEX15 and is the answer not in the manual?
Questions and answers