Table of Contents
Advertisement
Quick Links
AnaCONT
LE-100
LG-100
LP-100
Two-wire compact analytical transmitters
Manufacturer
:
Dodávateľ:
NIVELCO Process Control Co.
MICROWELL spol., s r.o.
SNP 2018/42, 927 00, Šaľa
H-1043 Budapest, Dugonics u. 11.
TEL.:(+421) 31 770 7585, 770 7587
Phone (36-1)
:
889-0100
Fax:
(36-1)
889-0200
E-mail:microwell@microwell.sk
E-mail: sales@nivelco.com
www.nivelco.com
http://www.microwell.sk
BKI 11 ATEX 0012 X
le00100a0600p_05
1 / 60
Advertisement
Table of Contents

Related Manuals for NIVELCO AnaCONT LE-100


Summary of Contents for NIVELCO AnaCONT LE-100
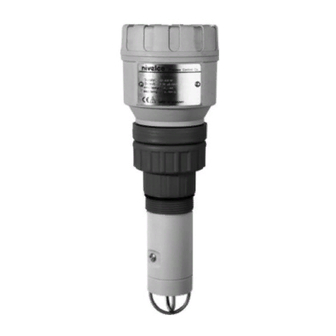
- Page 1 AnaCONT LE-100 LG-100 LP-100 Two-wire compact analytical transmitters Manufacturer Dodávateľ: NIVELCO Process Control Co. MICROWELL spol., s r.o. SNP 2018/42, 927 00, Šaľa H-1043 Budapest, Dugonics u. 11. TEL.:(+421) 31 770 7585, 770 7587 Phone (36-1) 889-0100 Fax: (36-1) 889-0200 E-mail:microwell@microwell.sk...
- Page 2 pH- and ORP- Dissolved oxygen pH- and ORP- Dissolved oxygen sensors and transmitters (compact type) sensors and transmitters (integrated type) 2 / 60 le00100a0600p_05 BKI 11 ATEX 0012 X...
-
Page 3: Table Of Contents
TABLE OF CONTENTS 1. INTRODUCTION.............................................. 5 1.1. A ............................................5 PPLICATION 1.2. O ..........................................5 PERATION PRINCIPLE 1.2.1. Characteristics of an ideal pH electrode .......................................... 5 1.2.2. Characteristics of an ideal ORP electrode........................................6 1.2.3. Characteristics of an ideal DO sensor ..........................................6 2. - Page 4 6. PROGRAMMING ............................................36 6.1. T SAP-300 ........................................36 DISPLAY UNIT 6.2. M SAP-300 ..................................37 EASURING WITH THE DISPLAY UNIT 6.3. P SAP-300 ................................40 ROGRAMMING WITH THE DISPLAY MODULE 6.3.1. Components of the programming interface ........................................40 6.3.2. Menu structure................................................41 6.4.
-
Page 5: Introduction
Thank you for choosing a NIVELCO instrument. We are sure that you will be satisfied throughout its use! 1. INTRODUCTION 1.1. A PPLICATION The AnaCONT compact transmitters, liquid analytical instruments are suitable for high precision measurement and transmission of acidity or alkalinity - pH (Hydrogen ion concentration) value -, reducing and oxidizing capability - ORP (Oxidation Reduction Potential) value -, or Dissolved Oxygen content of process water, wastewater, surface water, ground water and drinking water. -
Page 6: Characteristics Of An Ideal Orp Electrode
1.2.2. Characteristics of an ideal ORP electrode Negative voltage output in liquids with reduction potential, Positive voltage output in liquids with oxidation potential, Output voltage is equal to the redox potential (according to the Nernst equation) pH independent measurement with certain types ... -
Page 7: Order Codes
2. ORDER CODES Not all combinations possible! AnaCONT instruments: AnaCONT L UNCTION OUSING ROBE UTPUT ATERIAL Transmitter Plastic BSP 1½ “ / PP 4 … 20 mA Transmitter + Aluminium BSP 1½ “ / PVDF 4 … 20 mA / HART display Integrated NPT 1½... - Page 8 The extension unit, adjustment unit and the sensor housing can be ordered to every analytical device, apart from the type of the electrode, measurement principal and measured quantity. Sensor protection tube is available only for LP--, or LR-- instruments. – –...
- Page 9 : L A A – – 0 LIDING SLEEVE : LAA-10T-0 ONSOLE MOUNTING BRACKET OUNTING BRACKET LAA-10K-0 DN80 PN16 / PP DN100 PN16 / PP DN125 PN16 / PP DN150 PN16 / PP DN200 PN16 / PP 20 mm Console mounting bracket, 200 mm Mounting bracket, 200 mm : LAA-10-0 LIDING SLEEVE WITH FLANGE...
- Page 10 ATERIAL L A P – 0 – 0 1½” ENSOR PROTECTION TUBE PVDF 2” 1½”: LAP-10-0 2”: LAP-20-0 ROTECTION TUBE ROTECTION TUBE FOR EXTENSION TYPE FOR BASIC TYPE BSP1 1/2" BSP1 1/2" BSP 2" Ø51 Ø51 Sensor protection tube is available only for LP--, or LR-- instruments ...
-
Page 11: Configurations
2.1. C ONFIGURATIONS CONT LE--, CONT LP -- OMPACT TANDARD TYPE NTEGRATED TANDARD TYPE LG-- : LAP-20-0)* ENSOR PROTECTION TUBE : LAP-20-0)* ENSOR PROTECTION TUBE Ø95 BSP1 1/2" BSP1 1/2" *Further configuration drawings show only compact types, however many accessories are available to order with integrated types. Essential dimension values are shown in the drawings of the standard types. - Page 12 CONT L-- CONT L-- TANDARD TYPE TANDARD TYPE : LAP-20-0)* ENSOR PROTECTION TUBE : LAR--0 IPE EXTENSION : LAP-10-0)* ENSOR PROTECTION TUBE Ø63 BSP1 1/2" BSP1 1/2" BSP2" BSP 1 ½" pH/ORP pH/ORP Ø51 * Sensor protection tube is available only for LP--, or LR-- instruments. ...
- Page 13 CONT L-- CONT L-- TANDARD TYPE TANDARD TYPE : LAR--0 : LAR--0 IPE EXTENSION IPE EXTENSION : LAA-10-0 : LAA-10K-0 LIDING SLEEVE WITH FLANGE ONSOLE MOUNTING BRACKET : LAP-10-0)* : LAP-10-0)* ENSOR PROTECTION TUBE ENSOR PROTECTION TUBE BSP 1 ½" BSP 1 ½"...
- Page 14 CONT L-- CONT L-- TANDARD TYPE TANDARD TYPE : LAK--0 : LAK--0 ABLE EXTENSION ABLE EXTENSION : LAF--0 : LAP-20-0)* USPENDED PIPE EXTENSION ENSOR PROTECTION TUBE : LAP-10-0)* ENSOR PROTECTION TUBE As per order codes As per order codes Ø63 BSP1 1/2"...
- Page 15 CONT L-- CONT L-- TANDARD TYPE TANDARD TYPE : LAK--0 : LAK--0 ABLE EXTENSION ABLE EXTENSION : LAF--0 : LAF--0 USPENDED PIPE EXTENSION USPENDED PIPE EXTENSION : LAA-10-0 : LAA-10K-0 LIDING SLEEVE WITH FLANGE ONSOLE MOUNTING BRACKET : LAP-10-0)* : LAP-10-0)* ENSOR PROTECTION TUBE ENSOR PROTECTION TUBE As per order...
-
Page 16: Technical Data
3. TECHNICAL DATA ENERAL DATA Material of sensor housing Polypropylene (PP), PVDF Electrode As per order code Compact type: Plastic: Glass fibre plastic PBT Metal: Powder paint coated Aluminium Housing material Integrated type: Same as the sensor housing PP sensor housing: –10 °C ... +90 °C, Medium temperature PVDF sensor housing: -15 °C …. - Page 17 EASUREMENT DATA Range: 0…14pH, Reserve: ±2pH, Accuracy*: 0.1% of the measured value ±1 digit ±0.01% /°C, pH measurement Linearity: ±0.004pH, Resolution: 0.01pH, (internal resolution 0.004pH), Measuring cycle: 300msec, on display: 1 sec Range: ±1000mV, Reserve: ±200mV, Accuracy*: 0.1% of the measured value ±1 digit ±0.01% /°C, ORP measurement Linearity: ±0.001%, Resolution: 0.1mV, Measuring cycle: 300msec, on display: 1sec Range: 0…20ppm v.
-
Page 18: Echnical Data Of The P
3.1. T LP-- I ECHNICAL DATA OF THE P ELECTRODES NCLUDING X VERSIONS NSTRUMENTS Type 4xpher112seph 4xphed112seph 4xphex112seph Range [pH] 1...12 1...12 1...12 Process temperature °C 0…80 0…80 0…100 Max. process pressure [bar] 16 (<25°C), 6 (<100°C) Min. conductivity µs/cm Diaphragm (the conductive aperture of the reference PTFE (Teflon) ring / 3 mol KCl 2 pcs ceramic rod / 3 mol KCl... - Page 19 4xphep112seph 4xphekl112sph Range [pH] 1...12 1...12 Process temperature °C 0…80 0…60 Max. process pressure [bar] Min. conductivity µs/cm Diaphragm (the conductive aperture of the reference Ceramic / 3 mol KCl Ceramic (polycarbonate) electrode)/electrolyte in closed glass-house Connection / insertion length [mm] SN6 &...
-
Page 20: Nstruments
3.2. T ECHNICAL DATA OF THE ELECTRODES NCLUDING X VERSIONS LR-- I NSTRUMENTS 4xorrherpseor 4xorrhexpseor 4xorrheptseor Process temperature °C 0…80 0…100 0…60 Max. process pressure [bar] 16 (<25°C), 6 (<100°C) Min. conductivity µs/cm Diaphragm (the conductive aperture of the reference electrode)/electrolyte PTFE (teflon) ring / KCl Circular recess / solid electrolyte Ceramic... - Page 21 4xorrhespseor 4xorrheppseor 4xorrheklseor Process temperature [°C] 0…60 0…80 0…60 Max. process pressure [bar] Min. conductivity [µs/cm] Diaphragm / electrolyte Ceramic Ceramic Ceramic (polycarbonate housing) Connection / insertion length [mm] SN6 & PG13,5 / 120 SN6 & PG13,5 / 120 SN6 & PG13,5 / 120 slightly polluted water drinking water swimming pools...
-
Page 22: Versions ) For LD-- Instruments
3.3. T LD-- I ECHNICAL DATA OF THE SENSORS NCLUDING X VERSIONS NSTRUMENTS 4x085g0023ydo (20 ppm) 4x085g0022ydo (10 ppm) DO range [ppm] 0...20 0...10 Process temperature [°C] 0…50 0…50 Max. process pressure [bar] Min. speed of medium-flow [m/s] 0,05 0,05 Response time [sec] Accuracy [%;... -
Page 23: Maintenance And Reapair
Repairs during or after the warranty period are carried out exclusively at the Manufacturer’s. Equipments sent back for repairs should be cleaned or neutralised (disinfected) by the User. All sensors and electrodes including the NIVELCO recommended ones need proper storage, handling and calibration to have long life-time and give reliable measurement. Improper handling and lack of calibration will lead to unreliable measurement 4.1. -
Page 24: Periodic Calibration Of The Ph Electrode
4.2.1. Periodic calibration of the pH electrode The calibration has to be done minimum in two measuring points (using two different buffer solutions). The calibration points have to be selected so that the widest measuring range is covered. The common calibration points are 4.00pH and 10.00pH, 4.00pH and 7.00pH, 7.00pH and 10.00pH, or even more points for example 4.00pH, 7.00pH and 10.00pH. -
Page 25: Verification Of The Orp Electrode
4.2.2. Verification of the ORP electrode The calibration can be done (for example) with a 465 mV buffer solution. After the electrode is rinsed with distilled water put the electrode into the buffer solution. The electrode should reach the correct measurement value in 30 seconds. If the measured value is less with more than (the acceptable) 20mV the electrode should be cleaned. - Page 26 Before the calibration pour the salts in the distilled water with continuous mixing. For sensitivity calibration it is necessary a full-scale standard to determine the slope of the calibration line. Water solubility of oxygen at atmospheric pressure is well known dependent on temperature and pressure, so air-saturated water is a natural choice for full-scale standard. The air-saturated water is difficult to prepare and use.
-
Page 27: Maintenance Of The P Hand Orp Electrodes
4.3. M AINTENANCE OF THE P ELECTRODES In this chapter you can find some recommendations regarding re-hydration, chemical cleaning and reactivation of the electrodes. Disassembling the electrode During this operation be careful not to expose the fragile electrode to mechanical (bending, squeezing, tensile) forces! ... - Page 28 2. Non-organic deposits Rinse the electrode with warm water then dry up gently using a soft rag! Soak the electrode for 15 mins in 0.1 mol/l EDTA (ethylenediaminetetraacetic acid) solution! Rinse the electrode again with warm water then dry up gently using a soft rag! ...
-
Page 29: Maintenance Of The Mdo Sensor
OFTWARE UPDATE Based on the observation and needs of our customers NIVELCO constantly improves the operating software of the device. The software can be upgraded with the help of the ELink (USB) communication adapter plugged into the socket of the SAP-300 display. For software updates and for more information about software updates please contact NIVELCO. -
Page 30: Installation
5. INSTALLATION 5.1. M OUNTING When choosing the installation place please ensure proper space for later calibrations, verification or maintenance service. (see placement on page 32. ) Make sure that the transmitter is protected against overheating that can be caused by direct sunshine. ... -
Page 31: Installation Of Do Sensor
5.1.2. Installation of DO sensor Prior to mounting into the process the instrument should be put into operation-ready state. For this the user has to insert the DO sensor (packed separately) into the instrument as described below: During this operation be careful not to expose the fragile DO sensor to mechanical (bending, squeezing, tensile) forces! ... - Page 32 PLACEMENT The instrument should be mounted within a max. 45° angle, compared to vertical position. Types mounted with 4xphekl112seph / 4xorrheklseor electrode may be positioned horizontally as well! If the unit is installed using a fitting piece the user has to assure that before and after the fitting piece >3 DN >10 DN there is a straight pipe with the appropriate length to minimalize sedimentation and turbulency.
-
Page 33: Special Application Possibilities Of The Integrated Type Instruments
BUBBLE, FOAM Near the electrode (sensor), liquid in the pipeline should be free of bubbles or foam. Installation of the threaded models Screw the unit into its place and tighten by hand. Don’t use any tool! After tightening, the enclosure can be rotated to the proper position. (Safety bolt prevents rotation more than 350°). 5.1.3. -
Page 34: Wiring
5.2. W IRING The instrument operates from 12.5 … 36 V galvanic isolated and not grounded DC power supply in two wire system. (For Ex version: 12.5 … 30 V DC!) Sum of the resistance of the equipped instruments, between the transmitter and the power supply, mainly depends on the supply voltage of power supply applied, and the overall resistance value cannot exceed 1200 ohms. -
Page 35: Wiring Of Integrated Instruments
5.2.2. Wiring of Integrated instruments Green The insrument can be connected directly to the suitable power suply unit. When extending the Yellow cable, a junction box is needed to use for this purpouse. Shielding should be connected with the shield of the extending cable and should be grounded at the signal processing device. Grey ... -
Page 36: Programming
DISPLAY UNIT The SAP-300 is a 64x128 dot-matrix LCD display which can be plugged into the transmitter. (Universal – usable in other NIVELCO devices as well – provided that the system software supports SAP-300.) Warning! The SAP-300 module is based on LCD technology, so please make sure it is not exposed to permanent heat or direct sunlight, in order to avoid damage of the display unit. -
Page 37: Measuring With The Sap-300 Display Unit
6.2. M SAP-300 EASURING WITH THE DISPLAY UNIT Elements of the display: pH measurement 1. Primary value (PV), in a dimension depended on the type of the instrument 2. SENSOR VOLTAGE – informative data in case of pH measurement 3. Trend direction arrows. The empty triangle shows when the measured value is small, the filled triangle shows large-scale change. - Page 38 A. Calculated value of the output current. After the dimension, the mode of current output is indicated by inverse inscription: Manual mode (see 6.4.2.1) HART address is not 0, so output current has become overwritten to 4mA (see 6.4.2.1) Analogue transmission reacts to a programmed failure condition if an upper or lower fault current is programmed. (see 6.4.2.4) B.
- Page 39 Information displays: Press button to cycle between the information displays. RELAY 1. The general information display (DEV. INFO): overall T : 26.5°C running time (OV. RUN TIME), run time after power on Io: 12.00mA (RUN TIME), type of interface (INTERFACE), relay (RELAY) and logger (LOGGER) indication.
-
Page 40: Programming With The Sap-300 Display Module
6.3. P SAP-300 ROGRAMMING WITH THE DISPLAY MODULE When entering the menu the instrument makes a copy of the actual parameters, all changes are done to this duplicated parameter set. During programming the instrument keeps measuring and transmitting with the current (and intact) parameter set. After exiting the menu the instrument replaces the original parameters with the new parameter set and will measure according the new parameters. -
Page 41: Menu Structure
Dialog window WARNING The system sends messages or warnings using dialog windows. These usually can be acknowledged by LOAD DEFAULT TO pressing the button or the user can choose between two options (usually YES or NO) by pressing PARAMETER TABLE! buttons. -
Page 42: Programmable Features Description
6.4. P ROGRAMMABLE FEATURES DESCRIPTION 6.4.1. Basic measurement settings 6.4.1.1 Measuring unit (Only for DO measurement) Parameter: P02: b Menu path: BASIC SETUP / MEASURING UNIT Default value: Description: Dimension of PV: primary value. mg/l %sat Primary values are the same in case of displaying ppm and mg/l, only displayed and transmitted dimension changes. - Page 43 6.4.1.4 Temperature compensation unit Parameter: P02: a Menu path: BASIC SETUP / TEMP. COMPENSATION / UNIT Default value: Description: Dimension of the temperature measurement ºC ºC ºF 6.4.1.5 Temperature compensation fixed value Parameter: Menu path: BASIC SETUP / TEMP. COMPENSATION / MANUAL VALUE Default value: Description: Value of the manual temperature compensation (see 6.4.1.3)
-
Page 44: Analogue Output
6.4.2. Analogue output 6.4.2.1 Output current mode Parameter: P12: b Menu path: OUTPUT SETUP / ANALOG OUTPUT / CURRENT MODE Default value: Description: Transmission mode of the current output [AUTO, MANUAL] AUTO AUTO The output current is calculated from the measured value, output is active. -
Page 45: Relay Output
6.4.2.5 Fixed output current Parameter: Menu path: OUTPUT SETUP / ANALOG OUTPUT / MANUAL VALUE Default value: Description: Parameter for setting the fixed output current 4 mA Values between 3.8 and 20.5 can be entered. The output current will be set to the entered value and analogue transmission will be suspended. - Page 46 6.4.3.3 Relay output energised value Parameter: Menu path: OUTPUT SETUP / RELAY OUTPUT / ENERGIZED VALUE (EN) Default value: Description: Value of the relay when it will become energised (C1 open, C2 pH measurement ORP measurement DO measurement closed) 0 pH - 1000 mV 0 ppm 6.4.3.4 Relay output de-energised value...
-
Page 47: Digital Output
6.4.4. Digital output 6.4.4.1 HART polling address Parameter: Menu path: OUTPUT SETUP / SERIAL OUTPUT / ADDRESS Default value: Description: HART polling address (only HART capable types) The polling address can be set between 0 and 15. For a single instrument the polling address is 0 and the output is 4...20mA (analogue output). - Page 48 6.4.5.2 Loop test Parameter: Menu path: SERVICE/OUTPUT TEST / ANALOG OUTPUT Description: Loop current test (mA) Values between 3.9 and 20.5 can be entered. The output current will be set to the entered value. The measured current on the output should be equal to the set value.
- Page 49 6.4.5.5 ORP Sensor calibration Parameter: Menu path: SERVICE / SENSOR CALIBRATION Description: Calibration of the ORP sensor. SENSOR SETUP SET ZERO POINT Setting the zero point of the sensor PARAMETER EDITOR SET ZERO POINT 1. Measured value (without setting). 0005 2.
- Page 50 6.4.5.7 Simulation This function helps the user to check the outputs and the additional processing instruments connected to the output. (Irrespectively of the instruments) To start simulation the instrument must return to Measuring mode. Simulation mode Parameter: P84: a Menu path: SERVICE / SIMULATION / MODE Default value: Description:...
- Page 51 Upper value of the simulation Parameter: Menu path: SERVICE / SIMULATION / UPPER VALUE Default value: Description: Highest value of the simulation pH measurement ORP measurement DO measurement 14 pH 1000 mV 8.24 ppm 6.4.5.8 Temperature simulation This function helps the user to check the outputs and the additional processing instruments connected to the output. To start simulation the instrument must return to Measuring mode.
- Page 52 Temperature simulation cycle Parameter: Menu path: SERVICE / TEMP. SIMULATION / TIME Default value: Description: Cycle time of the temperature simulation 60 sec Bottom value of the temperature simulation Parameter: Menu path: SERVICE / TEMP. SIMULATION / BOTTOM VALUE Default value: Description: Lowest value of the temperature simulation 0 ºC...
-
Page 53: P H Sensor Calibration
6.5. ENSOR CALIBRATION This function is for periodic calibration of the pH sensor. Entering the SERVICE / SENSOR CALIBRATION menu the instrument will display a warning message that the user is about to change critical parameters of the measurement system. The user can enter the menu by pressing the (OK) button or exit to the previous menu by pressing the (NO) button. - Page 54 Adding, modifying a calibration point The following special screen helps the user to set a calibration point. The user can see the uncalibrated measured values and also the pair values of the selected table line. Value, measurable without sensor calibration Trend display for monitoring installation.
-
Page 55: Adding An Item To The Calibration Table
6.5.2. Adding an item to the calibration table (SERVICE | SENSOR CALIBRATION | ADD ITEM) This menu point adds a line to the table and enters to view/edit table display at the same time. Editing is done as described above. 6.5.3. -
Page 56: Do Sensor Calibration
6.6. DO S ENSOR CALIBRATION This function is for periodic calibration of the DO sensor. The sensor is aging during the usage of the instrument. When the life-time of the sensor is over the sensor should be replaced. In case of sensor replacement the sensor should be calibrated compensating the aging. -
Page 57: Calibration Of Zero Point (0%)
6.6.2. Calibration of Zero point (0%) (SERVICE / SENSOR CALIBRATION / CAL. IN ZERO SOL.) Rinse the DO sensor with distilled water then dry up gently using a soft rag. Immerse the sensor into 5% sodium sulphite referential liquid. Please wait until the measured value (2) get stabilized. Change in the measured value (2) can be followed on the trend bargraph (1). -
Page 58: Error Codes
Logic error Check the sensor calibration table! POINT PAIR ERR. Logic error Check the sensor calibration table! le00100a0600p_05 2015. October Nivelco reserves the right to change technical data without notice! 58 / 60 le00100a0600p_05 BKI 11 ATEX 0012 X... - Page 59 BKI 11 ATEX 0012 X le00100a0600p_05 59 / 60...
-
Page 60: Le00100A0600P_05
60 / 60 le00100a0600p_05 BKI 11 ATEX 0012 X... - Page 61 6. MEN UMAP MAIN MENU BASIC SETUP MEASURING UNIT ---------------------- -------------------------------- ----------------------------------- BASIC SETUP MEASURING UNIT(DO) MODE OUTPUT SETUP mg/l DAMPING TIME SERVICE %sat TEMP. COMPENSATION --------------------------------- SALINITY CORRECTION(DO) AUTO PRESSURE CORRECTION(DO) MANUAL DAMPING TIME TEMP. COMPENSATION UNIT -------------------------------- --------------------------------- MODE C°...
Need help?
Do you have a question about the AnaCONT LE-100 and is the answer not in the manual?
Questions and answers