Advertisement
20100618 issue 2
60cm Built In Induction
啊哈
Cooktop
Installation and User manual
Content
Safety instructions---------------------------------- 1
Product description--------------------------------- 3
Installation--------------------------------------------- 4
Start using your appliance--------------------------8
Maintenance and troubleshooting----------------10
Warranty------------------------------------------------ 11
Advertisement

Subscribe to Our Youtube Channel
Related Manuals for Bellini BI64T


Summary of Contents for Bellini BI64T
-
Page 1: Table Of Contents
20100618 issue 2 60cm Built In Induction 啊哈 Cooktop Installation and User manual Content Safety instructions---------------------------------- 1 Product description--------------------------------- 3 Installation--------------------------------------------- 4 Start using your appliance--------------------------8 Maintenance and troubleshooting----------------10 Warranty------------------------------------------------ 11... -
Page 2: Safety Instructions
BI63T carefully before using even if you are familiar with the product. The manual should be kept BI64T in a safe place for future reference. In case of failure, only the Authorized Service Technician may repair this hob. Otherwise the guarantee will be null and void. - Page 3 Safety instructions Safety when cleaning Objects that melt and things that boil over can For cleaning, the appliance must be switched off burn onto the glass ceramic and should be and cooled down. removed straightaway. For safety reasons, the cleaning of the appliance Do not use the cooking zones with empty with steam jet or high pressure cleaning cookware or without cookware.
-
Page 4: Product Description
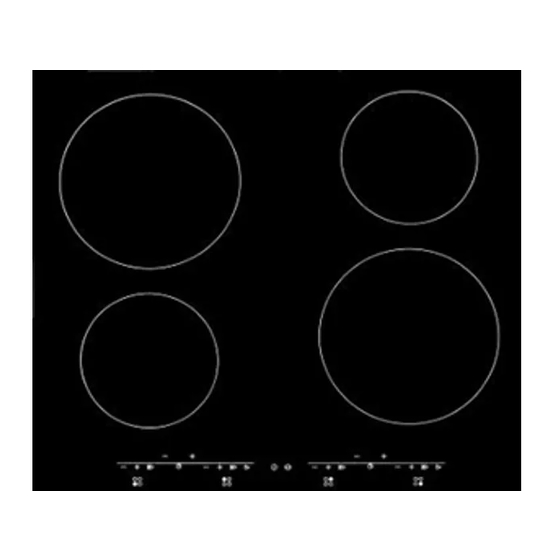
Product description 2200w, max 2800w(booster) 160mm 210mm 210mm Smaller zone180mm, bigger zone 280mm 210mm 160mm 160mm Control Panel Control Panel 1400w 2800w, max 3600w(booster) BI63T BI64T... - Page 5 Installation 1. Bench top Cut-out Dimensions Important There must be a minimum distance of 100 mm between the hole in the bench top and the wall panels of the adjoining cupboards. If the bench top is more than 30 mm thick, or if hob is placed on a false top, the ventilation holes of the hob must not be obstructed and be given adequate clearance as shown in the figures below (Point 2, to install your appliance above cupboard with door).
- Page 6 Installation 2. Placement of the Induction Hob Your appliance can be installed above a drawer, cupboard with a door or an oven. Note: The electronic circuits of the induction hob must be cooled by a flow of fresh air as shown in the diagram below and the Important Note below must be carefully adhered to.
- Page 7 Installation - To install your appliance above an oven The Induction hob may be flush-mounted above an oven of the same brand. This oven has an upper ventilation system and can therefore be installed in a elevated position. To do this, remove the front cross bar of the cupboard and allow for a minimum space of 5 mm between bench top and top of the oven to facilitate adequate ventilation .
-
Page 8: Installation
Installation Step 2: Find out your electrical network type and connect wires as below: ○ + ○ + ○ + ○ + ○ + ○ + 3(L3) 4(N2) 3(L3) 4(N2) 3(L3) 4(N2) ○ + ○ + ○ + ○ + ○... -
Page 9: Start Using Your Appliance
Start using your appliance Display Description Explanation These show the above touch control sensor is controlling which zone of the appliance. Zone indicators Power setting of the zones, from 0 to 9, for example, this display shows power selected at level 5 Increase/decrease power setting An H lights up on the power display to indicate that a... - Page 10 Start using your appliance Timer: You can program your appliance to let it keep cooking at desired power setting and duration. Press timer “+” to initiate timer function, a “t” will display. Press timer “+” or “-“ to set cooking duration you wanted, maximum duration is 99min. Press power “+”...
- Page 11 3. Choose proper pan material Glass, ceramic, earthen-ware, aluminum, copper and non-magnetic stainless steel pans are generally unsuitable. However, enameled stainless steel pans with a special base suitable for induction cooking may be used (make sure the pan is labeled as suitable for induction cooking). Caution: Avoid scraping the glass of the hob when you move the pans.
-
Page 12: Maintenance And Troubleshooting
Maintenance & Troubleshooting Caution: Before maintenance or cleaning is carried out, the range hood should be disconnected from the main power supply. Ensure that the range hood is switched off at the wall socket and the plug removed. Spills and splashes will not harden and stick to the glass, as it hardly heats up. Both Vitro-ceramic and induction rings should however be cleaned of any spills or splashes as quickly as possible. -
Page 13: Warranty
State and Territory Laws. damage or connected to incorrect power supply. The original purchaser of this Bellini product is 6. The Company (and any company related to the provided with the following warranty, subject to the Company) will not be liable for any special, following warranty conditions. - Page 14 NOTES:...
Need help?
Do you have a question about the BI64T and is the answer not in the manual?
Questions and answers