Table of Contents
Advertisement
Quick Links
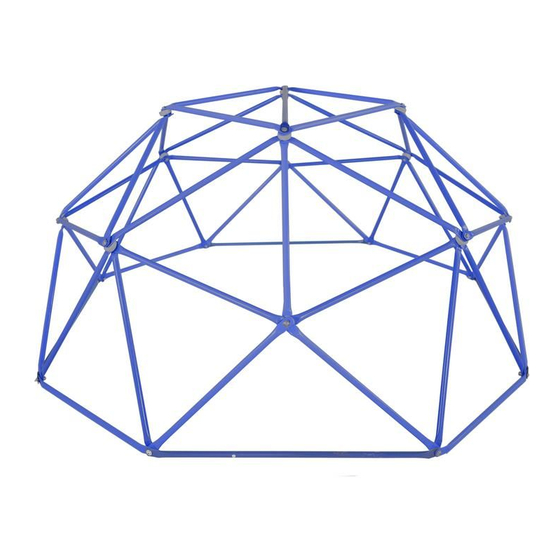
DOME CLIMBER WITH COVER
USER AND ASSEMBLY MANUAL
Tips : It will take 2 people around 45 mins to assemble this product.
!
- Misuse and abuse of this product can result in injury.
- Read instructions before assembly or using this product. Retain Instructions.
- Always inspect product before use, checking for worn, defective or missing parts.
- Suitable for age 3-8 years. Max user weight 45 kg.
- Assembly by adults.
- Adult supervision at all times.
- Only for outdoor and domestic use.
- Before you start assembly please check all parts are included, if any parts are missing or you
need advice, please contact Customer Services: by email support@sportspowerfit4kids.com,
by phone (+44) 0330 0904 420 or visit www.sportspowerfit4kids.com
WarningS!
SW-076C
Advertisement
Table of Contents

Summary of Contents for SPORTSPOWER SW-076C
- Page 1 - Only for outdoor and domestic use. - Before you start assembly please check all parts are included, if any parts are missing or you need advice, please contact Customer Services: by email support@sportspowerfit4kids.com, by phone (+44) 0330 0904 420 or visit www.sportspowerfit4kids.com SW-076C...
- Page 2 • Assemble all parts loosely, by hand, before tightening any bolts or fixings. BEFORE STARTING ASSEMBLY, PLEASE CHECK ALL PARTS ARE INCLUDED. IF ANY PARTS ARE MISSING, (+44) 0330 0904 420, PLEASE CALL EMAIL support@sportspowerfit4kids.com, OR VISIT www.sportspowerfit4kids.com...
- Page 3 CONTENTS x20 (630mm) x24 (660mm) x5 (875mm) VIEW PRODUCT VIEW PRODUCT VIEW PRODUCT x8 (M8x12mm) x12 (M5x14mm) x12 (M8x30mm) VIEW PRODUCT VIEW PRODUCT VIEW PRODUCT x12 (M6) x24 (M6) VIEW PRODUCT VIEW PRODUCT VIEW PRODUCT x2 (M4x60mm) x1 (M8) VIEW PRODUCT VIEW PRODUCT VIEW PRODUCT x4 (M4x245mm)
- Page 4 ASSEMBLY step 1 Locate all A and C tubes needed to form the base of the climber and place them on flat surface as shown below. Leave these in position and move to a clear space nearby to install the top sections of the climber in the next steps.
- Page 5 ASSEMBLY step 2 Connect six B tubes together in the sequence shown in the enlarged diagram. Make sure 3 tubes are placed above the plastic connector #F, and three are below. Repeat this step and assemble four sets. x 4 x 4...
- Page 6 ASSEMBLY step 3 Connect two sets of the B tubes assembled in the previous step together with three A tubes as shown in the enlarged diagram. Make sure the plastic connector #F is placed between 2 A tubes and 2 B tubes. Repeat this step and assemble 2 sets.
- Page 7 ASSEMBLY step 4 Attach base tubes A and C to the frame assembled in the previous step as shown below. Repeat in the same manner for the other set. x 4 x 4 x 4...
- Page 8 ASSEMBLY step 5 Connect the two assembled halves to form the climber. Secure together by adding two A tubes as shown in the enlarged diagram. The picture below is showing the view from the top of the climber. VIEW FROM TOP x 4 x 4 x 4...
- Page 9 ASSEMBLY step 6 Add an A tube to connect the top part of the two sides as shown below. Make sure the plastic connection #F is placed between two A tubes and 2 B tubes. x 4 x 4...
- Page 10 ASSEMBLY step 7 Join the top of climber together by adding four A tubes as shown below. x 4 x 4...
- Page 11 ASSEMBLY step 8 Connect a C tube at the top to complete the climber frame. IMPORTANT REMINDER: Now go back over the entire unit and fully tighten all nuts and bolts. x 4 x 4 P.10...
- Page 12 ASSEMBLY step 9 Secure the climber to the ground using the four anchors provided. Make sure the anchors are fully inserted into the ground to avoid any tripping hazards. P.11...
- Page 13 ASSEMBLY step 10 The cover can be used as a tent for children to play inside. To install, place the cover over the climber and secure the bottom to the frame with Velcro. P.12...
- Page 14 If any assistance is needed contact the than the correct intended use. Teach children to use the (+44) 0330 0904 420 by email product correctly. support@sportspower t4kids.com, or visit • Please retain these instructions for future reference. www.sportspower t4kids.com for replacement parts.
- Page 15 User’s Manual). (c) Defects, damages or accidents due to the malfunction, connection to or use of non-Sportspower or unauthorized parts. In such event, Sportspower reserves the right to cancel the Limited Warranty coverage immediately.


Need help?
Do you have a question about the SW-076C and is the answer not in the manual?
Questions and answers