Table of Contents
Advertisement
Quick Links
Advertisement
Table of Contents

Related Manuals for M2TECH NASH


Summary of Contents for M2TECH NASH
- Page 1 M2TECH NASH MC/MM PHONO PREAMPLIFIER USER MANUAL REV. P A – 6/2018...
- Page 2 M2Tech NASH MC/MM PHONO PREAMPLIFIER REVISION P A – JUNE 2018 www.m2tech.biz Copyright © 2018, M2Tech Srl...
- Page 3 For a proper operation of this unit, all connections to other equipment in the system must be done when all equipment are off. Failing to comply with this advice may lead to damage to the NASH . The label above, printed on the product case, indicates that the product, when no more usable, can’t be...
- Page 4 A – JUNE 2018 www.m2tech.biz Dear customer, Thank you for purchasing NASH. You are the owner of a very high quality phono preamplifier with many unique features, designed to obtain the best performance in conjunction with every M2Tech product. NASH implements a specific set of technological and functional solutions, from the all- discrete components design, to the passive RIAA, to a wealth of inputs, to the Bluetooth®...
-
Page 5: Table Of Contents
7.2.6. AUTO OFF: Setting the Automatic Switch-off ...........20 7.2.7. STANDBY LED: Setting the Front Panel LED behaviour........21 7.2.8. POWER MODE: Setting the NASH behaviour when power is applied ....21 7.2.9. REMOTE ON/OFF: Setting the NASH to Accept/Ignore the IR Remote ON/OFF command ........................22... - Page 6 M2Tech NASH MC/MM PHONO PREAMPLIFIER REVISION P A – JUNE 2018 www.m2tech.biz Copyright © 2018, M2Tech Srl...
-
Page 7: Unpacking And Placing The Unit
NASH’s Bluetooth® module and your smartphone/tablet. The NASH is a high efficiency low power design, therefore very low power is lost in heat. Anyway an adequate air flow is recommended. Avoid smoke, moisture, dirt and liquids from reaching the unit. Please note that any signs of abuse will void warranty coverage. - Page 8 M2Tech NASH MC/MM PHONO PREAMPLIFIER REVISION P A – JUNE 2018 www.m2tech.biz Copyright © 2018, M2Tech Srl...
-
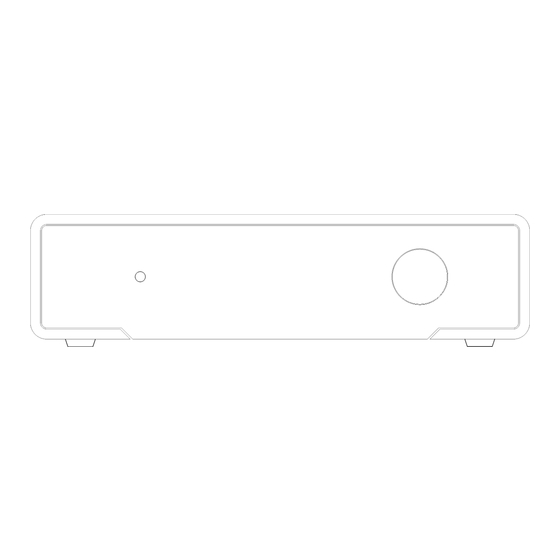
Page 9: Front Panel
A more prolonged press while the NASH is on will cause it to switch off. 2) Standby LED. When the NASH is in standby mode, this LED blinks to indicate to the user that the device can be switched on by the included remote control. This LED is steadily lit during the firmware update procedure. - Page 10 M2Tech NASH MC/MM PHONO PREAMPLIFIER REVISION P A – JUNE 2018 www.m2tech.biz Copyright © 2018, M2Tech Srl...
-
Page 11: Back Panel
11) Line inputs. Connect line-level sources like tuners, tape decks, TV’s. Female RCA. 12) Outputs. Connect to your preamplifier or integrated amplifier. Female RCA. 13) Power mode switch. Allows for choosing the way the NASH behaves when power is applied. See chapter 8 for details. - Page 12 A – JUNE 2018 www.m2tech.biz 16) Trigger input. Connect the trigger output of another device to automatically power the NASH on and OFF. 5V to 15V accepted. 3.5mm jack. 17) Bluetooth® module antenna. Keep clear from metal shields for optimal communication.
-
Page 13: Remote Control
M2Tech Rockstars series products. Please note when a command is sent to the NASH the “PHONO” key blinks in green. If any of the other key “DAC”, “AMP” or “PLAYER”... - Page 14 M2Tech NASH MC/MM PHONO PREAMPLIFIER REVISION P A – JUNE 2018 www.m2tech.biz Copyright © 2018, M2Tech Srl...
-
Page 15: Connecting And Powering The Unit
Connect the stock wall adaptor to the NASH power input (Fig. 2, 15) and to a wall outlet. NOTE: If you also own the Van Der Graaf MkII and you with to power the Nash with it, do not connect the stock wall adaptor and connect the NASH to the Van Der Graaf MkII instead, using one of the 4-pin cables provided with the latter. - Page 16 M2Tech NASH MC/MM PHONO PREAMPLIFIER REVISION P A – JUNE 2018 www.m2tech.biz Copyright © 2018, M2Tech Srl...
-
Page 17: Using The Nash
7. Using the NASH At activation, the NASH spends a little time to ensure that all supplies reach their nominal levels, during which the model name is displayed. After the activation delay is expired, some general operational information is shown on the NASH display: the selected source, MM stage gain (not for line inputs) and the high pass filter setting (not for line inputs). -
Page 18: Display Backlight: Setting The Display Backlight
7.2.2. MC GAIN: Setting the gain of the MM stage when the MC input is used When the MC Input is used, the gain chain of the Nash is made of three stages: the MC preamp, the MM first stage and the MM second stage. The MC preamp gain is set by the rear panel gain pot (Fig.2, 6). -
Page 19: Mc Filter 16Hz: Setting The High Pass Filter For The Mc Input
7.2.3. MC FILTER 16Hz: setting the high pass filter for the MC input The NASH is provided with a high-pass (anti-rumble) filter. This filter cuts low frequencies below 16Hz and is very useful with warped records. Also, the 16Hz filter complies with the new IEC curve used in modern records, which adds a 16Hz high-pass to the standard RIAA curve. -
Page 20: Mm Filter 16Hz: Setting The High Pass Filter For The Mm Input
7.2.5. MM FILTER 16Hz: setting the high pass filter for the MM input The NASH is provided with a high-pass (anti-rumble) filter. This filter cuts low frequencies below 16Hz and is very useful with warped records. Also, the 16Hz filter complies with the new IEC curve used in modern records, which adds a 16Hz high-pass to the standard RIAA curve. -
Page 21: Standby Led: Setting The Front Panel Led Behaviour
7.2.7. STANDBY LED: Setting the Front Panel LED behaviour The front panel LED of the NASH (Fig.1, 2) can be set to operate in three different modes, at user’s convenience: ON: the LED will be continuously blowing when the NASH is in standby ... -
Page 22: Remote On/Off: Setting The Nash To Accept/Ignore The Ir Remote On/Off Command
This way, pushing the on/off key on the remote will instruct the VAN DER GRAAF M II to enable/disable its outputs to power the NASH and other attached M2Tech units on/off in the programmed order. Please read the VAN DER GRAAF M II user manual for details. -
Page 23: Bt Info: Accessing Bluetooth Le Interface Information
NASH. 7.2.12. FIRMWARE REVISION: Accessing Firmware Revision Information NASH features are handled by a microcontroller. It may be useful to check the version of the firmware executed by the microcontroller, using this menu feature. 7.2.13. DEFAULT: Restoring Factory Settings User may need or want to restore the factory settings. - Page 24 M2Tech NASH MC/MM PHONO PREAMPLIFIER REVISION P A – JUNE 2018 www.m2tech.biz Copyright © 2018, M2Tech Srl...
-
Page 25: Trigger And Power Modes
Of course, whenever the NASH is in standby it is possible to activate it by pushing the front panel button (Fig.1, 1) or by sending an ON/OFF command by the IR remote control or by the smartphone app. - Page 26 M2Tech NASH MC/MM PHONO PREAMPLIFIER REVISION P A – JUNE 2018 www.m2tech.biz Copyright © 2018, M2Tech Srl...
-
Page 27: Setting Mm Input Resistance And Capacitance
11. Considerations on NASH gain and output level The NASH can deliver up to 95dB total gain on the MC input, and up to 65dB on the MM input. These values largely exceed the usual gains for a phono preamplifier, which range between 40dB for an MM input and 60-65dB for an MC input. - Page 28 MC preamplifier powered by a proprietary discrete components ultra-low noise dual regulator. Thanks to these low-noise amplifiers, the NASH can deliver at least 2.5V at its output with every cartridge model, with great noise performance. This means that the NASH has an output value which is aligned to that of digital sources like DAC’s, CD/DVD players and...
-
Page 29: Specifications
Frequency response: ......RIAA +/- 0.5dB (20Hz-20kHz) Supply voltage: ......... 15V Power consumption: ......5W Input:..........5.5/2.1mm barrel jack with positive on internal External supply voltage:....+15V/-15V/+5V Size:..........200x50x200mm (w x h x d) Weight..........2.0kg (device and ancillaries) 2.4kg (packed) Copyright © 2018, M2Tech Srl...
Need help?
Do you have a question about the NASH and is the answer not in the manual?
Questions and answers