
Related Manuals for M2TECH MANUNTA EVO Phono 3


Summary of Contents for M2TECH MANUNTA EVO Phono 3
- Page 1 MANUNTA BY M2TECH EVO Phono 3 MC/MM Phono PreamplifiER USER MANUAL REV. P A – 11/2022...
- Page 2 MANUNTA EVO Phono 3 BY M2Tech Phono PreamplifiER www.manunta-audio.com REVISION P A – November 2022 Copyright © 2022, M2Tech Srl...
- Page 3 WARNING: the information contained in this manual are considered to be reliable and accurate. M2Tech reserves the right to change or modify the information any time, without prior advice. It’s up to the customer to ensure that the manual being consulted is the latest version.
- Page 4 The gain is enough to accommodate every cartridge model and to drive every amplifier. The fully-loaded remote control allows for total control of the Evo Phono 3, as well as other Manunta by M2Tech products. We’re sure that your expectations will be fulfilled by purchasing Evo Phono 3: you’ll hear...
-
Page 5: Table Of Contents
4. Remote Control.......................13 5. Connecting and Powering the Unit.................15 6. Cleaning the Unit......................17 7. Using the Evo Phono 3....................19 7.1. Gain Settings......................19 7.2. MC Input Load Impedance..................19 7.3. MM Capacitive Load....................20 7.4. Subsonic Filter......................20 8. Specifications........................21 Copyright © 2022, M2Tech Srl... - Page 6 MANUNTA EVO Phono 3 BY M2Tech Phono PreamplifiER www.manunta-audio.com REVISION P A – November 2022 Copyright © 2022, M2Tech Srl...
-
Page 7: Unpacking And Placing The Unit
Avoid smoke, moisture, dirt and liquids from reaching the unit. Please note that any signs of abuse will void warranty coverage. Do not place the unit on thick carpets or inside a box or piece of furniture, not even close to curtains. Copyright © 2022, M2Tech Srl... - Page 8 MANUNTA EVO Phono 3 BY M2Tech Phono PreamplifiER www.manunta-audio.com REVISION P A – November 2022 Copyright © 2022, M2Tech Srl...
-
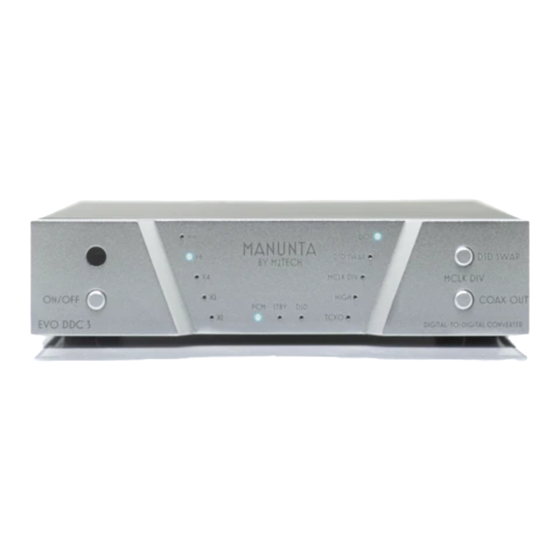
Page 9: Front Panel
7) MM gain select / MM subsonic button. Use this button to set the gain of the MM stage (short press) and to toggle the 16Hz subsonic filter for the MM input (long press). Push this button together with the MC gain select button to set the MM input capacitive load. Copyright © 2022, M2Tech Srl... - Page 10 8) MC gain select / MC subsonic button button. Use this button to set the gain of the MC step-up (short press) and to toggle the 16Hz subsonic filter for the MC input (long press). Push this button together with the MM gain select button to set the MM input capacitive load. Copyright © 2022, M2Tech Srl...
-
Page 11: Back Panel
NOT connect to a phono input. Gold plated RCA socket. 14) Power supply input. Connect the connector from the stock 15V adaptor or from the Evo Supply 3 or M2Tech Van Der Graaf MkII. 5.5/2.1mm barrel jack with positive on tip. Copyright © 2022, M2Tech Srl... - Page 12 MANUNTA EVO Phono 3 BY M2Tech Phono PreamplifiER www.manunta-audio.com REVISION P A – November 2022 Copyright © 2022, M2Tech Srl...
-
Page 13: Remote Control
Standby key: This allows for putting the Evo Phono 3 in standby mode (prolonged push) and for awakening it. DIM: Display dimming. PHONO: Instructs the remote to send commands using the Phono system code. IN+/IN-: Input selection. Figure 3 Copyright © 2022, M2Tech Srl... - Page 14 MANUNTA EVO Phono 3 BY M2Tech Phono PreamplifiER www.manunta-audio.com REVISION P A – November 2022 Copyright © 2022, M2Tech Srl...
-
Page 15: Connecting And Powering The Unit
Evo Supply 3. M2Tech’s Van Der Graaf M II can also be used. Should the user opt for use of power supply not provided by Manunta by M2Tech or M2Tech, we reserve the right to void the Evo Phono 3 warranty. - Page 16 MANUNTA EVO Phono 3 BY M2Tech Phono PreamplifiER www.manunta-audio.com REVISION P A – November 2022 Copyright © 2022, M2Tech Srl...
-
Page 17: Cleaning The Unit
The Evo Phono 3 should be cleaned with a soft, slightly damp cloth. Do not use alcohol or any other types of cleaning fluids as they could damage the unit. Avoid fluids from dropping or leaking inside the unit. Fluids of any type poured into the unit will void your warranty. Copyright © 2022, M2Tech Srl... - Page 18 MANUNTA EVO Phono 3 BY M2Tech Phono PreamplifiER www.manunta-audio.com REVISION P A – November 2022 Copyright © 2022, M2Tech Srl...
-
Page 19: Using The Evo Phono 3
Evo Phono 3; anyway it will impair the sound quality, particularly in the treble range. NOTE: Please note this setting only affects the MC input, the MM input’s load impedance is always 47k Ohms. Copyright © 2022, M2Tech Srl... -
Page 20: Mm Capacitive Load
The subsonic filter can be independently set for MM and MC inputs by using the related gain button with a long press. Copyright © 2022, M2Tech Srl... -
Page 21: Specifications
MM load impedance......47k Ohms MM load capacitance......0pF, 100pF, 220pF, 320pF Output impedance:......5 Ohms Subsonic filter:........high-pass, -3dB @ 16Hz Supply:..........15V 230mA Power consumption:......3.5VA 0.3VA standby Size:............250x40x160mm (w x h x d) Weight..........0.7kg (device and ancillaries) 1kg (packed) Copyright © 2022, M2Tech Srl...
Need help?
Do you have a question about the MANUNTA EVO Phono 3 and is the answer not in the manual?
Questions and answers