Table of Contents
Advertisement
Quick Links
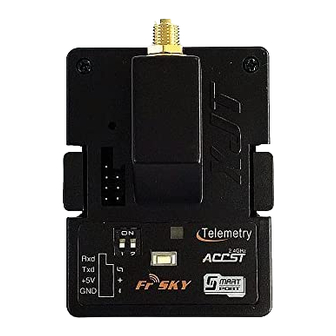
Instruction Manual for FrSky 2.4G RADIO SYSTEM XJT Module
Thank you for purchasing FrSky 2.4G RADIO SYSTEM XJT module. In order to fully enjoy the benefits of this system, please
read the instruction manual carefully and set up the device as described below.
Operating Voltage Range: 6~15 V
Operating Current: 140mA@6V
Output Power: ≤ 100mW
Module Slot: JR/Graupner Type
Two auto‐detected modulations of PXX (mode selection, bind, model match, range check, failsafe, etc. on radio side)
or CPPM.
Three selectable modes of D8 (existing 8ch two‐way), D16 (new 16ch two‐way full duplex transmission) and LR12
(new 12ch one‐way long range).
Smart Port enabled, realizing two‐way full duplex transmission.
Detect the module antenna's working status and give sound warnings if the module antenna is broken or does not
have intact contact, etc.
Super lower latency (approx. 1/3 of current systems) and higher precision (transmitter's hardware and software
support required, such as FrSky transmitters).
Introduction
Overview
Specifications
What's New!
Modulations: PXX or CPPM (auto‐detected)
Modes: D8, D16 or LR12 (selectable)
Telemetry Interface: Smart Port, RS232 Serial Port
Upgrade Interface: Smart Port, RS232 Serial Port
1
www.frsky‐rc.com
05/09/13
Advertisement
Table of Contents

Related Manuals for FrSky XJT


Summary of Contents for FrSky XJT
- Page 1 www.frsky‐rc.com 05/09/13 Instruction Manual for FrSky 2.4G RADIO SYSTEM XJT Module Introduction Thank you for purchasing FrSky 2.4G RADIO SYSTEM XJT module. In order to fully enjoy the benefits of this system, please read the instruction manual carefully and set up the device as described below. Overview Specifications Operating Voltage Range: 6~15 V Modulations: PXX or CPPM (auto‐detected) Operating Current: 140mA@6V Modes: D8, D16 or LR12 (selectable) Output Power: ≤ 100mW Telemetry Interface: Smart Port, RS232 Serial Port Module Slot: JR/Graupner Type Upgrade Interface: Smart Port, RS232 Serial Port What’s New! Two auto‐detected modulations of PXX (mode selection, bind, model match, range check, failsafe, etc. on radio side) or CPPM. Three selectable modes of D8 (existing 8ch two‐way), D16 (new 16ch two‐way full duplex transmission) and LR12 (new 12ch one‐way long range). Smart Port enabled, realizing two‐way full duplex transmission. Detect the module antenna’s working status and give sound warnings if the module antenna is broken or does not have intact contact, etc. Super lower latency (approx. 1/3 of current systems) and higher precision (transmitter’s hardware and software support required, such as FrSky transmitters). ...
- Page 2 05/09/13 Smart Port (S. Port) is a signal wire full duplex digital transmission interface developed by FrSky Electronic Co., Ltd. All products enabled with Smart Port (including XJT module, X8R receiver, new hub‐less sensors, new Smart Dashboard, etc), serial port user data and other user input/output devices can be connected without limitations for numbers or sequences at a high transmission speed. Binding Procedure Binding is the process of uniquely associating a particular receiver to a transmitter module. A transmitter module can be bound to multiple receivers (not to be used simultaneously). A receiver can only be bound to one transmitter module. Follow the steps below to finish the binding procedure. 1. Turn on the transmitter while holding the F/S button on the 2.4G RADIO SYSTEM XJT module (see Mode and Compatibility table above). Release the button. The RED LED on the 2.4G RADIO SYSTEM XJT module will flash, indicating the transmitter is ready to bind to the receiver. 2. Connect the battery to the receiver while holding the F/S button on the receiver. The RED LED on the receiver will flash, indicating the binding process is completed (please refer to the corresponding receiver’s instruction manual for details) 3. Turn off both the transmitter and the receiver. 4. Turn on the transmitter and connect the battery. The RED LED on the receiver indicates the receiver is receiving commands from the transmitter. The receiver/transmitter module binding will not have to be repeated, unless one of the two is replaced. Note: After binding procedure is completed, recycle the power and check if the receiver is really under control by linked transmitter. Range Check A pre‐flight range check should be done before each flying session. Reflections from nearby metal fences, concrete buildings or trees can cause loss of signal both during range check and during the flight. Follow the steps below to perform the range check. ...
- Page 3 FCC STATEMENT 1. This device complies with Part 15 of the FCC Rules. Operation is subject to the following two conditions: (1) This device may not cause harmful interference. (2) This device must accept any interference received, including interference that may cause undesired operation.
Need help?
Do you have a question about the XJT and is the answer not in the manual?
Questions and answers