Table of Contents

Subscribe to Our Youtube Channel
Related Manuals for Harvia C260


Summary of Contents for Harvia C260
- Page 1 C260 Control unit Steuergerät 03072008...
-
Page 2: Table Of Contents
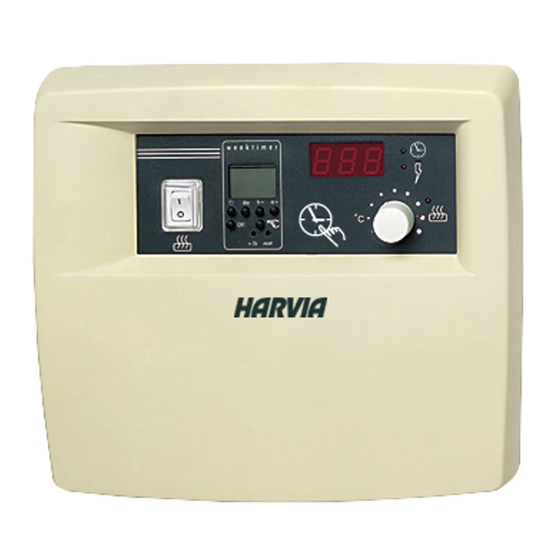
COntEntS Inhalt 1. COntROl UnIt C260 ..........3 1. StEUERGERÄt C260..........3 1.1. Technical Data ...............3 1.1. Technische Daten C260VKK..........3 2. InStRUCtIOnS FOR USE ...........4 2. BEDIEnUnGSanlEItUnG ...........4 2.1. Main Switch (1) ............4 2.1. Hauptschalter (1) ............4 2.2. Weekly Timer (Weektimer) (2) ........5 2.2. -
Page 3: Control Unit C260
1. COntROl UnIt C260 1. StEUERGERÄt C260 Control unit C260 is intended for the control of elec- Das C260-Steuergerät ist zur Steuerung von Sau- tric heaters fitted with 2 series parallel connectors naöfen von Großsaunen gedacht, die in 2 Gruppen for use in large saunas. -
Page 4: Instructions For Use
2. InStRUCtIOnS FOR USE 2. BEDIEnUnGSanlEItUnG Before you switch the heater on check always that Bevor Sie den Ofen anschalten, bitte überprüfen, there aren’t any things over the heater or in the near dass keine Gegenstände auf dem Ofen oder in der distance of the heater. -
Page 5: Weekly Timer (Weektimer) (2)
If the battery is empty and a power failure exceeds mehr als 1 Minute Länge auftritt, werden die Pro- 1 minute, the programs are erased. gramme gelöscht. If the control unit is controlled by remote control, Wenn das Steuergerät per Fernbedienung gere- gelt wird, schaltet es den Ofen auch nach einem the control unit will continue to switch the heater on and off normally even after a power failure. -
Page 6: New Timing Program Pair (Fig. 4)
2.2.3. new timing Program Pair (fig. 4) 2.2.3. neues Zeitschalt-Programmpaar (abb. 4) Press [Menu] to open the settings menu. Press [Ok] Drücken Sie [Menu], um das Einstellungsmenü zu four times to skip clock time and weekday set- öffnen. Drücken Sie vier Mal [Ok], um die Uhrzeit- tings. -
Page 7: Clearing A Timing Program Pair (Fig. 6)
3. Set minutes and press [Ok]. 2. Stellen Sie die Stunden ein und drücken Sie [Ok]. 4. Set weekday(s). Press [Ok] to continue to the 3. Stellen Sie die Minuten ein und drücken Sie [Ok]. next timing program or [Menu] to return to 4. -
Page 8: Heater Off
hours. After the selection is made the screen dis- ximal einstellbare Dauer ist 12 Stunden. Nach dem plays the amount of time left for the unit to remain Einstellen erscheint in der Anzeige abwechselnd die on alternately with the temperature of the sauna verbleibende Einschaltzeit und die Temperatur der and the relevant indicator lights 6 and 7 flash in Sauna, und die Kontrolllampen 6 und 7 leuchten im... -
Page 9: Instructions For Installation
3. InStRUCtIOnS FOR InStallatIOn 3. InStallatIOnSanlEItUnG In accordance with the regulations in force, connect- Die anschlüsse der Steuer- und leistungseinheit ing the control and power units and the thermostat sowie des thermostats an das Stromnetz und unter- to the mains may only be carried out by a suitably einander dürfen nur von einem hierfür autorisierten authorised, professional electrician. -
Page 10: Electrical Connections
tions for the two lower fastening screws (2 and 3) hängen, bis sichergestellt ist, daß die Schraube in and follow the same procedure, except that these der schmalen Führung des Rückteils eingerastet ist. screws should be screwed tightly in as far as they Für die beiden unteren Befestigungsschrauben (2 go. -
Page 11: Use Of The Control Unit By Remote Control
Figure 9. Setting the alternative of operating times Abbildung 9. Einstellungsalternativen für die Einschaltzeiten Normal (ON)/ special use (OFF) 1 2 3 4 Normal (ON)/ Specialbrauch (OFF) Weektimer (ON)/remote control (OFF) Weektimer (ON)/Fernsteuerung (OFF) N L K3 K2 Holding time Haltezeit a. -
Page 12: Indicator Lamp
3, 4, 5 and 6 in the control unit’s connector strip in Querschnitt hat, sofern sichergestellt ist, daß nach Figure 11. Installation of control unit (C260) sensor box and of the heaters L20–L33 Abbildung 11. Installation des Fühlers für C260 und der Öfen L20–L33... -
Page 13: Installing The Power Unit C260K
Über die Kontaktoren und Sicherungen der Lei- electric power to flow along the heater’s two power stungseinheit werden die Ströme beider Stromzu- cables. The connection is shown in figure 14. fuhrkabel geleitet. Die Schaltung ist in Abbildung C260-20 14 dargestellt. K1: contactor 63 A C260-20 •... -
Page 14: Electrical Connections
3.3.3. Electrical Connections 3.3.3. Elektrische Schaltungen The electrical connections are made in accordance Die elektrischen Anschlüsse werden dem Schaltbild with the connections diagram (Fig. 8). (Abb. 8) entsprechend vorgenommen. Figure 13. Installation of the power unit on a wall Abbildung 13. Installation der Leistungseinheit an der Wand K1: 63A F1, F2 (16A ) MAX 22 kW... - Page 15 Harvia Oy PL 12 40951 Muurame Finland www.harvia.fi...
Need help?
Do you have a question about the C260 and is the answer not in the manual?
Questions and answers