
Subscribe to Our Youtube Channel
Related Manuals for Felix Storch Tec 4.0 to Tec 4.1 Upgrade Kit

Summary of Contents for Felix Storch Tec 4.0 to Tec 4.1 Upgrade Kit
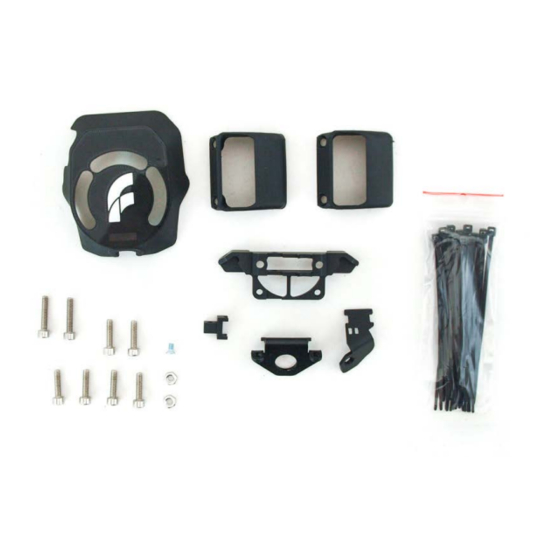
- Page 1 FELIX Tec 4.0 to Tec 4.1 Upgrade Kit For Both Single and Dual head 3D printers Upgrade manual In the box v 1.0 www.felixprinters.com...
- Page 2 Chapter: Preparing Upgrade 10 Minutes Tools: 5,5 mm 17 mm Tools: Remove front cover Remove cable ties Caution, be carefull Remove Z-sensor by removing nut. Tools: Tools: Remove sleeve from cables. Remove LED Strip carefully with tweezers. 17 mm www.felixprinters.com...
- Page 3 Tools: (2x) Remove M4 x 40 bolt. Remove Front Bracket Lower extruder / fan bracket Unplug motor cables Tools: Write on each cable the corresponding motor number. Disassemble RIGHT fan assembly. Remove finger guard and fan duct. LEFT: 0 RIGHT: 1 www.felixprinters.com...
- Page 4 Tools: Tools: Disassemble LEFT fan assembly. TOP: old bracket Assembly of NEW mover and bracket Remove finger guard and fan duct. BOTTOM: new bracket including M3 x 20 bolt. Place bolt and nut in new bracket. 5,5 mm Note: do NOT use old mover in combination with new bracket. www.felixprinters.com...
- Page 5 Chapter: Assembly 10 Minutes Tools: Glue Calibration Card 7 mm 17 mm Tools: place bracket with M3 x 6 (2x) Slide Dual fan into fan duct. Note: sticker on fan should face inwards. Left fan duct Right fan duct (2x) Assemble fan ducts. Tools: Tools: Parts needed for fan duct assembly.
- Page 6 Connect motor cables. Place hot-end(s) in their sockets. Mount fan assembly Parts needed to assemble the z-sensor bracket. LEFT: 0 RIGHT: 1 after that. Lock tightly with M4 x 20 bolts. 13 mm Assemble z-sensor bracket as shown in the image. Tools: Tools: Glue Mount front fan to z-sensor bracket...
- Page 7 Tools: Place LED Strip onto bracket. Place Z-sensor assembly onto extruder. Connnect Z-sensor assembly by tightning bolts. (4x) Lock cables with cable ties. Tools: Tools: Bundle heater + thermistor with cable ties. Place back sleeve and tighten with Note: do NOT bundle them with the other cable tie.
- Page 8 You have completed the upgrade from FELIX Tec 4.0 to Tec 4.1. Please proceed with all the calibration steps which are explained in the Quick Start Manual. Are you experiencing issues or do you have any questions? Please check www.felixprinters.com/support for more information or contact Move Z-sensor right above front adjustment Tools: Tools:...
Need help?
Do you have a question about the Tec 4.0 to Tec 4.1 Upgrade Kit and is the answer not in the manual?
Questions and answers