Advertisement
Quick Links
A MAJOR CAUSE OF FIRES IS FAILURE
TO MAINTAIN REQUIRED CLEARANCES
(AIR SPACES) TO COMBUSTIBLE
MATERIALS. IT IS OF UTMOST
IMPORTANCE THAT THIS PRODUCT BE
INSTALLED ONLY IN ACCORDANCE
WITH THESE INSTRUCTIONS.
®
Appliance Type: Pellet Fuel
Burning Cooking Appliance
Test Standards
Conforms To:
UL Subject 2728
Certified To:
5009323
ULC/ORD STD C2728
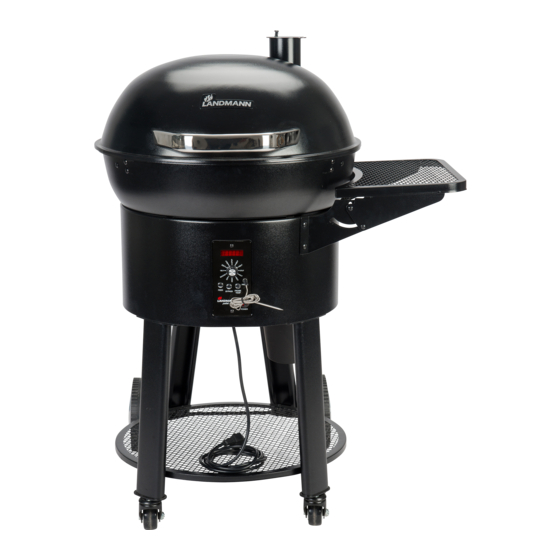
Pellet Kettle Grill
Assembly and Operating
Instructions for Model:
470106
VER. 7, 7/28/2017
!
Please read this entire manual
before assembling and using this
pellet fuel burning appliance.
Failure to follow these
instructions could result in
property damage, bodily injury or
even death.
Contact local building or fire
officials about restrictions and
installation inspection
requirements in your area.
Please save this instruction
manual for future reference.
Advertisement

Subscribe to Our Youtube Channel
Related Manuals for Landmann 470106


Summary of Contents for Landmann 470106
- Page 1 ® Pellet Kettle Grill Assembly and Operating Instructions for Model: 470106 VER. 7, 7/28/2017 Please read this entire manual before assembling and using this pellet fuel burning appliance. Failure to follow these instructions could result in property damage, bodily injury or even death.
- Page 2 PAGE 2 ® READ FIRST! RULES FOR PELLET KETTLE GRILL SAFE OPERATION. • WARNING! THE GRILL IS FOR OUTDOOR USE ONLY! • THE SIDE SHELF CAN HOLD 15 LBS. SAFELY, DO NOT • WARNING! NEVER USE GASOLINE, GASOLINE-TYPE PUT MORE THAN 15 LBS. ON THE SIDE SHELF. FUEL, KEROSENE, CHARCOAL LIGHTER FLUID, OR •...
- Page 3 PAGE 3 ® READ FIRST! RULES FOR PELLET KETTLE GRILL SAFE OPERATION. WARNING! FUEL • USE ONLY FOOD GRADE HARDWOOD PELLETS CARBON MONOXIDE HAZARD! MADE FOR PELLET GRILLS. • DO NOT USE HEATING PELLETS WHICH MAY BURNING WOOD OR CHARCOAL PRODUCES CONTAIN HAZARDOUS CONTAMINANTS.
- Page 4 PAGE 4 ® HARDWARE AND SMALL PART LISTING x 15 (15) M6 x 12MM (8) M8 x 15MM HEXBOLT BOLT x 12 (12) M6 FLANGE (2) M10 LOCKING (4) 20MM WASHER HEXNUT HEXNUT...
- Page 5 PAGE 5 ® ASSEMBLED PARTS (1) LID (1) MAIN GRILL ASSEMBLY (1) BOTTOM SHELF (2) FRONT LEGS (1) RIGHT BACK LEG (1) LEFT BACK LEG (1) LID HANDLE (1) CHIMNEY ASSEMBLY (1) COVER...
- Page 6 PAGE 6 ® ASSEMBLED PARTS (1) MEAT PROBE (1) HEAT DIFFUSER (2) LOW GREASE TRAY (1) HIGH GREASE HOLDERS TRAY HOLDER (1) DRIP TRAY (2) WHEELS (1) COOKING GRATE (2) WHEEL COVERS (1) GREASE BUCKET (1) WHEEL AXLE...
- Page 7 PAGE 7 ® EXPLODED VIEW FOR ASSEMBLED PARTS PELLET KETTLE PARTS MAIN GRILL ASSEMBLY ........1 .
- Page 8 PAGE 8 PELLET KETTLE ASSEMBLY INSTRUCTIONS ® A Phillips or plain screwdriver and adjustable wrench are needed for assembly. Assembly time: 45 minutes STEP STEP 1: ASSEMBLE THE LEGS Very carefully turn the main grill assembly [ A ] over. Assemble the (2) front legs [ C ] to the main grill using (4) hexbolts [ AB ].
- Page 9 PAGE 9 PELLET KETTLE ASSEMBLY INSTRUCTIONS ® STEP 3: ASSEMBLE BOTTOM SHELF Align the bottom shelf [ F ] with the tabs on the legs and assemble with (4) 12MM bolts [ AA ] and (4) M6 flange hexnuts [ AC ]. Tighten bolts securely. STEP DO NOT RETURN PRODUCT TO THE STORE.
- Page 10 PELLET KETTLE PAGE 10 ASSEMBLY INSTRUCTIONS ® STEP 4: ASSEMBLE LID AND STEP 5: ASSEMBLE THE LOCKING RING TEMPERATURE PROBE Insert the temperature probe through the slot on the lid [ B ]. See STEP 4A. Assemble the lid to the hinge using (2) 12MM bolts [ AA ] and (2) M6 flange hexnuts [ AC ].
- Page 11 PELLET KETTLE PAGE 11 ASSEMBLY INSTRUCTIONS ® STEP 5: ASSEMBLE THE LID HANDLE Align the lid handle [ K ] with the holes in the lid and assemble using (2) 12MM bolts [ AA ]. Tighten securely. STEP DO NOT RETURN PRODUCT TO THE STORE. IF YOU HAVE QUESTIONS OR HAVE TROUBLE WITH ASSEMBLY, PLEASE CALL 1-877-347-4557 FOR ASSISTANCE.
- Page 12 PELLET KETTLE PAGE 12 ASSEMBLY INSTRUCTIONS ® STEP 6: ASSEMBLE THE CHIMNEY ASSEMBLY Align the chimney assembly [ L ] with the lid. Assemble using (3) 12MM bolts [ AA ] and (3) M6 flange hexnuts [ AC ]. Tighten bolts securely. STEP DO NOT RETURN PRODUCT TO THE STORE.
- Page 13 PELLET KETTLE PAGE 13 ASSEMBLY INSTRUCTIONS ® STEP 7: ASSEMBLE THE DRIP PAN HOLDERS Assemble (1) low drip pan holder [ S ] to the back of the firebowl using (1) 12MM bolt [ AA ]. This bolt will thread into the hinge.
- Page 14 PELLET KETTLE PAGE 14 ASSEMBLY INSTRUCTIONS ® STEP STEP 8: PLACE HEAT DIFFUSER Place the heat diffuser [ M ] onto the fire pot. Make sure the diffuser is fully FIRE POT inserted and level. WARNING! DO NOT OPERATE GRILL WITHOUT THE HEAT DIFFUSER IN PLACE.
- Page 15 PAGE 15 PELLET KETTLE ASSEMBLY INSTRUCTIONS ® STEP STEP 9: PLACE DRIP TRAY Align the drip tray [ N ] tube with the slot and place the drip tray on the TUBE holders. SLOT The drip tray will rest in an angled position.
- Page 16 PELLET KETTLE PAGE 16 ASSEMBLY INSTRUCTIONS ® STEP STEP 10: PLACE COOKING GRATE Place the cooking grate [ P ] onto the holders. The bars should align with the front of the grill. DO NOT RETURN PRODUCT TO THE STORE. IF YOU HAVE QUESTIONS OR HAVE TROUBLE WITH ASSEMBLY, PLEASE CALL 1-877-347-4557 FOR ASSISTANCE.
- Page 17 PELLET KETTLE PAGE 17 ASSEMBLY INSTRUCTIONS ® STEP 11: PLACE GREASE BUCKET Hang the grease bucket [ Q ] on the hook located on the tube. The grease GREASE BUCKET bucket must be used at all times. HOOK STEP DO NOT RETURN PRODUCT TO THE STORE. IF YOU HAVE QUESTIONS OR HAVE TROUBLE WITH ASSEMBLY, PLEASE CALL 1-877-347-4557 FOR ASSISTANCE.
- Page 18 PELLET KETTLE PAGE 18 ASSEMBLY INSTRUCTIONS ® STEP 12: PLACE COVER Fold the side shelf down. Place cover [ H ] on grill and use the pull strings to tighten. Keep the grill out of the weather and elements. Use cover only after the grill is completely cool to the touch.
- Page 19 PAGE 19 ® OVERVIEW OF THE ASSEMBLED GRILL These are the main components of the Pellet Kettle. The Pellet Kettle uses an electrically powered auger and fan that is connected to a control panel to control the burning of fuel pellets for temperature and smoke. Hopper lid Grill lid Open the hopper lid and add...
- Page 20 PAGE 20 ® BE AWARE OF HOT AND MOVING PARTS Inside the grill and hopper, there are moving parts and hot parts that the grill user must be aware of. Keep hands and fingers away from these parts. HOPPER LID SCREEN GUARD FIREBOWL HOPPER...
-
Page 21: Control Panel Introduction
PAGE 21 ® CONTROL PANEL INTRODUCTION 6 DIGIT LED DISPLAY DISPLAY DEFINITIONS Monitors current grill functions and status of the grill. Dual temperature - - - - - The power is on, the monitor of setting and current control dial is set to temperatures. -
Page 22: Initial Firing Instructions
PAGE 22 ® INITIAL FIRING INSTRUCTIONS Follow these instructions when the grill is going to be used for the first time. WARNING! Follow these instructions anytime the grill runs out of pellets. NEVER PLACE FIREWOOD OR CHARCOAL IN THE FIREBOWL. Pellet fuel INITIAL FIRING Use pellet fuel that is labeled for... - Page 23 PAGE 23 ® INITIAL SEASONING INSTRUCTIONS Prior to first use, follow these steps to season your grill and rid the grill of any manufacturing residues and paint odor. 1. Open the lid, press POWER button on and turn the dial to SMOKE. 2.
-
Page 24: Food Temperatures
PAGE 24 ® HELPFUL OPERATING TIPS 6. Maintaining the grill is the responsibility of the 1. The temperature setting can be adjusted at anytime owner. The firebowl, drip tray and drip tray tube during use. The grill will increase temperature faster must be cleaned occasionally to remove grease than decrease. - Page 25 PAGE 25 ® MAINTENANCE, GRILL CLEANUP AND STORAGE All cleanup procedures are to be performed only while the smoker is turned off, completely cooled except where noted and unplugged from the electrical source. After every use. Inspect Clean the cooking grate with a cleaning tool while the Frequently inspect and clean the grill for insects and grill is still warm.
-
Page 26: Troubleshooting
PAGE 26 ® TROUBLESHOOTING PROBLEM CAUSE SOLUTION 1. Verify there is a flame in the fire pot, if not turn the dial to SHUT DOWN and then 1. Flame has gone out. FLAME to SMOKE in the same sequence to restart. 2. - Page 27 PAGE 27 ® TROUBLESHOOTING PROBLEM CAUSE SOLUTION NO PELLETS 1. Pellets not reaching the fire pot 1. Verify there are pellets in the hopper. 2. Verify auger is rotating. REACHING 3. If there are pellets in the hopper and the THE FIRE POT auger is turning, it may take up to 5 minutes for the pellets to reach the fire pot.
- Page 28 PAGE 28 ® MAIN GRILL ASSEMBLY PARTS MAIN GRILL ASSEMBLY PARTS LID HINGE ........1 PELLET HOPPER HOUSING .
- Page 29 PAGE 29 ® PELLET BURNER ASSEMBLY PARTS PELLET BURNER PARTS PELLET BURNER ASSEMBLY ........1 AUGER MOTOR ASSEMBLY .
- Page 30 PAGE 30 ® CONTROL PANEL WIRING DIAGRAM AND PARTS MEAT PROBE TEMPERATURE PROBE INSIDE GRILL BLACK / BLACK AUGER MOTOR Rated Voltage: 120V / 60Hz WHITE Input power: 20W Motor speed: 1.6 RPM (no load) Max torque: 25N BACKSIDE OF CONTROL PANEL WHITE / WHITE PURPLE...
- Page 31 WARM TO HOT WITH Congratulations on your EXTENDED USE. purchase of the Pellet Kettle Grill! At Landmann USA, we strive to provide you with an easy to use, easy to assemble product. However, in the unlikely event your package should have a...
-
Page 32: Limited Warranty
These warranties are limited to non-commercial residential use only. Product repair or replacement as provided under this warranty is your exclusive remedy. Landmann shall not be liable for any incidental or consequential damages or breach of any express or implied warranty on this product or any part thereof, except to the extent prohibited by applicable law.
Need help?
Do you have a question about the 470106 and is the answer not in the manual?
Questions and answers