Table of Contents
Advertisement
Available languages
Available languages
Español p. 24
This appliance is for
Household use only.
This is not a
commercial appliance.
ASSEMBLY, CARE AND USE INSTRUCTIONS
READ CAREFULLY
IMPORTANT:
RETAIN THESE INSTRUCTIONS FOR FUTURE REFERENCE
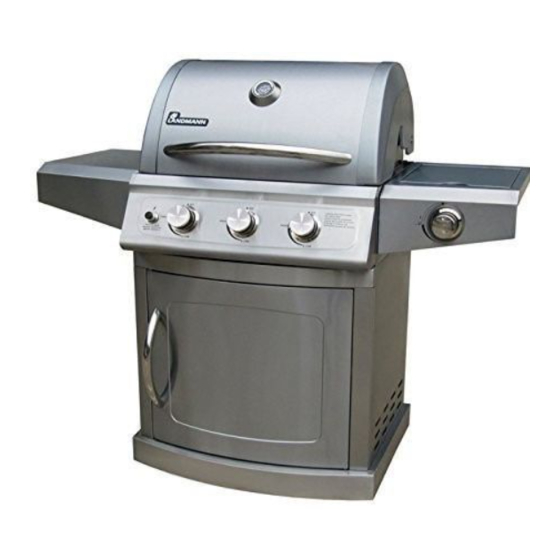
3 Burner LP Barbecue Grill
ITM. / ART. 966686
MODEL 42170/42172
|
Questions, problems, missing parts? Before returning to your retailer, call our customer
service department at: 1-800-321-3473 8:00 AM - 5:00 PM (EST) English Only,
or Email CustomerService@landmann-usa.com
Advertisement
Chapters
Table of Contents

Related Manuals for Landmann 42170


Summary of Contents for Landmann 42170
- Page 1 RETAIN THESE INSTRUCTIONS FOR FUTURE REFERENCE 3 Burner LP Barbecue Grill ITM. / ART. 966686 MODEL 42170/42172 Questions, problems, missing parts? Before returning to your retailer, call our customer service department at: 1-800-321-3473 8:00 AM - 5:00 PM (EST) English Only,...
-
Page 2: Table Of Contents
Table of Contents Important Safety Information ........2 Lighting Instructions ..........16 Liquid Propane (LP) Safety Information....4 Care and Maintenance ..........17 Package Contents ............ 6 Cooking Methods and Grilling Tips ......18 Preparation ............... 7 Troubleshooting ............19 Hardware Contents .......... - Page 3 SHOULD assembly must be made through the NOT be operated in a building, garage, or any manufacturer, LANDMANN-USA. other enclosed area. DO NOT obstruct the flow of combustion and ventilation air. Keep the ventilation openings of the cylinder enclosure free and clear of debris.
-
Page 4: Liquid Propane (Lp) Safety Information
Important Safety Information The LP gas supply cylinder to be used must be State of California Proposition 65 Warnings constructed and marked in accordance with the Specification for LP Gas Cylinders of the U.S. This product contains one or more Department of Transportation (DOT) or the National chemicals known to the state of Standard of Canada, CAN/CSA-b339 (Cylinders,... - Page 5 Liquid Propane (LP) Safety Information Please review the below guidelines and safety information when using Liquid Propane (LP) gas. General Information make sure to keep both the grill and the cylinder in lb. LP gas cylinder. an outdoor area with good ventilation. ALWAYS leak test the LP cylinder connection to for use on this grill, provided that it is compatible the regulator whenever changing LP cylinders.
-
Page 6: Package Contents
Package Contents Part Description Quantity Part Description Quantity Bottom panel Left shelf Non-locking caster Right shelf Locking caster Flame tent Tank tray bolt Cooking grate Left side panel Warming rack Right side panel Grease tray Back panel Grease box Cart frame AA battery Grill body Magnet... -
Page 7: Preparation
Preparation Before beginning assembly of this grill, make sure all parts are present (see Package Contents on page 6 and Hardware Contents below). If any part is missing or damaged, DO NOT attempt to assemble the product. Estimated assembly time: 50 minutes with two people Hardware Contents Tools Required 2 pt Phillips... - Page 8 Assembly Instructions Thread tank tray bolt (D) through hole in back of bottom Attach magnet (W) to bottom panel (A) and secure panel (A) and holder. Secure firmly with washer and with bolts (EE) as shown. small bolt. Note: Washer and small bolt are attached to the tank tray bolt (D) and must be removed for assembly.
- Page 9 Assembly Instructions Attach back panel (G) to bottom panel (A) using Secure back panel (G) to left and right side panels bolts (AA). (E, F) using bolts (AA) as shown. From front of cart, install cart frame (H) to top of left Secure cart frame (H) with bolts (AA) to top of left and and right side panels (E,F).
- Page 10 Assembly Instructions Finish securing cart frame (H) to side panels (E,F) with additional bolts (AA) as shown. Lower grill body (J) onto left and right side panels (E, F) and align bolts from step 12 with keyholes on top of side panels. Slide grill body forward. Insert bolts (AA) into back bolt location.
- Page 11 Assembly Instructions Secure the regulator and hose assembly to the inside right side panel (F) with one bolt (EE) as shown. Thread door bottom pin (L) into hole on bottom panel (A). Align bottom hole on lower right corner of door (K) to fit over door bottom pin (L).
- Page 12 Assembly Instructions Attach side shelf brackets (M) to left and right side of the grill body (J). Secure using bolts (AA) as shown. Attach right shelf (P) to side shelf brackets with step Attach left shelf (N) to side shelf brackets with step bolts (DD) and M6 nuts (CC) as shown.
- Page 13 Assembly Instructions First insert flame tents (Q), then cooking grates (R) From back of grill, first slide grease tray (T) into slots and warming rack (S) in that order. on the grill body (J) until it lines up with the bottom of the grill.
- Page 14 Tank Assembly Open cabinet door (K). Twist the tank bolt (D) counterclockwise until it is loosened. Place the 20 lb LP gas fuel tank bottom collar into the Tighten the tank bolt (D) clockwise against the bottom mounting hole in the tank tray. collar of the 20 lb LP gas fuel tank to secure.
-
Page 15: Connecting Gas Cylinder
Connecting Gas Cylinder 1. ALWAYS place the propane cylinder on the tank To prevent fire or explosion holder under the cart. hazard when testing for a leak: 2. ALWAYS confirm that all burner control knobs are 1. ALWAYS perform the “leak test“ OFF position before activating the gas before lighting the grill and each supply. -
Page 16: Lighting Instructions
Lighting Instructions Prior to the first use, it is important to clean your grill Match Lighting with heat. This will clean the internal parts by burning off any residue and odor from the manufacturing process. To perform this cleaning, operate the grill for approximately 30 minutes at the highest heat setting with the lid closed. -
Page 17: Care And Maintenance
Care and Maintenance Please use the following guidelines to keep your grill DO NOT line the grease tray with clean and looking new. Before any cleaning, make OFF position and grill aluminum foil. is cool to the touch. Cleaning the Outside of the Grill Hose Inspection For the stainless steel surfaces, wash the outside of The hose should be inspected periodically for any... -
Page 18: Cooking Methods And Grilling Tips
Care and Maintenance To Reinstall Burner Changing AA Battery 1. Be sure the gas valve orifices are correctly When changing the AA battery, make sure to only use positioned inside the burner inlet. standard AA batteries, ensuring the proper polarity 2. -
Page 19: Troubleshooting
Troubleshooting Problem Cause Solution Grill will not light. 1. LP cylinder valve is closed. 1. Turn ON LP cylinder valve. 2. LP cylinder gas level is low. 2. Replace LP cylinder. 3. Igniter battery is not properly 3. Properly install or replace igniter installed or battery needs to be battery. -
Page 20: Replacement Parts List
Replacement Parts Questions, problems, missing parts? Before returning to your retailer, call our customer service department at 1-800-321-3473, 8:00 a.m. – 5:00 p.m., EST, Monday – Friday. Part Description Part# Part Description Part# Bottom panel FA0001 Grease box FA0019 AA battery Non-locking caster FA0002 Door magnet... -
Page 21: Grilling Guidelines
Grilling Guidelines Cooking Burner Type Description Method setting Thickness Total time Instructions BEEF Steaks NY Strip, Rib eye, Direct High 1 in / 10-15 min Turn meat only once, Porterhouse, T-Bone, 2.5 cm halfway through the Sirloin, Filets grilling time NY Strip, Rib eye, Direct High... - Page 22 Grilling Guidelines Cooking Burner Type Description Method setting Thickness Total time Instructions Shrimp 18-20 oz / 510-566 g Direct High 3-6 min VEGETABLES Corn on the In Husk Direct Medium 20-30 min Husked Direct Medium 12-15 min Potatoes Baking, whole Direct High 45-90 min Individually wrapped in...
-
Page 23: Warranty
Our customer service department can be reached at 1-800-321-3473 8:00 AM - 5:00 PM (EST) English Only, or Email CustomerService@landmann-usa.com Please note for the United States, that some state states do not allow the exclusion or limitation of incident or consequential damages or limitations on how long an implied warranty lasts, so the above limitations or exclusions may not apply to you. - Page 24 MODELO 42170/42172 ¿Preguntas, problemas, piezas faltantes? Antes de devolverlo a su vendedor minorista, llame a nuestro departamento de atención al cliente al: 1-800-321-3473 entre 8:00 a.m. y 5:00 p.m. (EST) Sólo en inglés, o envíe un correo electrónico a CustomerService@landmann-usa.com...
-
Page 25: Información Importante Sobre La Seguridad
Contenido Información importante sobre la seguridad ....25 Instrucciones para el encendido ........39 Información de seguridad sobre el propano Cuidado y mantenimiento ..........40 líquido (PL) ............... 27 Métodos de cocción y consejos para asar Contenido del empaque ..........29 a la parrilla ................ - Page 26 área cerrada. deberá obtener a través del NO obstruya el flujo de los gases de combustión fabricante, LANDMANN-USA. ni del aire de ventilación. Mantenga libres las aberturas de ventilación del compartimento del tanque y sin residuos.
-
Page 27: Información De Seguridad Sobre El Propano Líquido (Pl)
Información importante sobre la seguridad El tanque de suministro de gas PL que se use Advertencias de la Proposición 65 del Estado de deberá estar construido y marcado conforme a las California Especificaciones para Tanques de Gas PL del Este producto contiene una o Departamento de Transporte de Estados Unidos (DOT) más sustancias químicas que el o de la Norma Nacional de Canadá, CAN/CSA-b339... - Page 28 Información de seguridad sobre el propano líquido (PL) Por favor, revise las indicaciones siguientes y la información sobre la seguridad cuando use gas de propano líquido (PL). Información general después de usarla, asegúrese de que tanto estándar de gas PL de 20 libras. la parrilla como el tanque estén en un área al descubierto, con buena ventilación.
-
Page 29: Contenido Del Empaque
Contenido del empaque Pieza Descripción Cantidad Pieza Descripción Cantidad Panel inferior Estante izquierdo Rueda sin freno Estante derecho Rueda con freno Placa para las llamas Perno de la bandeja Rejilla para cocinar del tanque Rejilla para calentar Panel lateral izquierdo Bandeja para la grasa Panel lateral derecho Recipiente para la grasa... -
Page 30: Preparación
Preparación Antes de empezar a montar esta parrilla, asegúrese de que estén todas las piezas (consulte el Contenido del empaque de la página 6 y el Material incluido a continuación). Si falta alguna pieza o si está dañada, NO intente montar el producto. - Page 31 Instrucciones de montaje Enrosque el perno (D) de la bandeja del tanque a través Coloque el imán (W) en el panel inferior (A) y fíjelo con del orificio situado en la parte posterior del panel inferior los pernos (EE) como se muestra. (A) y del soporte.
- Page 32 Instrucciones de montaje Fije el panel posterior (G) en el panel inferior (A) Fije el panel posterior (G) en el panel lateral derecho utilizando los pernos (AA). y el izquierdo (E, F) con los pernos (AA), según se muestra. Desde el frente del carro, instale el bastidor del carro (H) Con los pernos (AA), fije el bastidor del carro (H) en la parte superior de los paneles laterales izquierdo a la parte superior de los paneles izquierdo y derecho...
- Page 33 Instrucciones de montaje Termine de sujetar el bastidor del carro (H) a los paneles laterales (E, F) con más pernos (AA), según se muestra. Baje el cuerpo de la parrilla (J) sobre el panel lateral izquierdo y el derecho (E, F) y alinee los pernos del paso 12 con los orificios de la parte superior de los paneles.
- Page 34 Instrucciones de montaje Fije con un perno (EE) el regulador y la unidad de la manguera en la parte interior del panel lateral derecho (F), según se muestra. Enrosque el pasador inferior de la puerta (L) en el orificio del panel inferior (A). Alinee el orificio de la esquina inferior derecha de la puerta (K) de forma que encaje en el pasador (L) de la parte inferior de la puerta.
- Page 35 Instrucciones de montaje Una los soportes de los estantes laterales (M) al lado izquierdo y derecho del cuerpo de la parrilla (J). Fíjelos con los pernos (AA), según se muestra. Una el estante derecho (P) a los soportes de los Una el estante izquierdo (N) a los soportes estantes laterales correspondientes con los pernos correspondientes con los pernos con collar (DD)
- Page 36 Instrucciones de montaje Inserte primero las placas para las llamas (Q); después Desde la parte posterior de la parrilla, primero deslice las rejillas para cocinar (R) y después la rejilla para la bandeja para grasa (T) en las ranuras del cuerpo calentar (S), en ese orden.
- Page 37 Montaje del tanque Abra la puerta del armario (K). Gire el perno del tanque (D) en sentido contrario a las manecillas del reloj hasta que se afloje. Coloque el collarín inferior del tanque de combustible Apriete el perno del tanque (D) girándolo en el sentido de gas PL de 20 libras en el orificio de montaje de la de las manecillas del reloj contra el collarín inferior del bandeja para el tanque.
-
Page 38: Conexión Del Tanque De Gas
Conexión del tanque de gas 1. SIEMPRE coloque el tanque de gas en el Para evitar el riesgo de incendio portatanque que se encuentra debajo del carro. o explosión, cuando compruebe 2. Antes de abrir el suministro de gas, asegúrese si hay alguna fuga: SIEMPRE de que las perillas de control de todos los 1. -
Page 39: Instrucciones Para El Encendido
Instrucciones para el encendido Antes de usar por primera vez, es importante limpiar Encendido con fósforos. la parrilla con calor. Esto limpiará las partes internas al quemar todos los residuos y olores del proceso de fabricación. Para realizar la limpieza, ponga a funcionar la parrilla aproximadamente 30 minutos al calor máximo, con la cubierta cerrada. -
Page 40: Cuidado Y Mantenimiento
Cuidado y mantenimiento Por favor, siga las indicaciones siguientes para NO forre con papel aluminio mantener su parrilla limpia y que luzca como nueva. el interior de la bandeja para Antes de limpiar, asegúrese de que todos los PRECAUCIÓN la grasa. quemadores estén en la posición APAGADO y que la parrilla esté... -
Page 41: Métodos De Cocción Y Consejos Para Asar A La Parrilla
Cuidado y mantenimiento Para reinstalar el quemador Cambio de la pila AA 1. Asegúrese de que los orificios de la válvula de Al cambiar la pila AA, asegúrese de que usa sólo pilas gas estén colocados correctamente dentro de la estándar AA y que la polaridad sea la correcta al colocar entrada del quemador. -
Page 42: Resolución De Problemas
Resolución de problemas Problema Causa Solución La parrilla no se 1. La válvula del tanque de PL está 1. Abra la válvula del tanque de PL. enciende. cerrada. 2. El nivel de gas del tanque de PL 2. Sustituya el tanque de PL. está... -
Page 43: Lista De Piezas De Repuesto
Piezas de repuesto ¿Preguntas, problemas, piezas faltantes? Antes de devolver a su vendedor minorista, llame a nuestro departamento de atención al cliente al 1-800-321-3473, entre 8:00 a.m. y 5:00 p.m., EST, de lunes a viernes. Pieza Descripción Núm. de Pieza Descripción Núm. -
Page 44: Indicaciones Para Asar A La Parrilla
Indicaciones para asar a la parrilla Método Configu- de coc- ración del Tiempo Tipo Descripción ción quemador Espesor total Instrucciones CARNE DE RES Bistecs NY Strip, Rib eye, Directo Alto 1 pulg. / 10 – 15 min. Porterhouse, T-Bone, 2,5 cm una vez a la mitad del solomillo, filetes tiempo para asar... - Page 45 Indicaciones para asar a la parrilla Método Configu- de coc- ración del Tiempo Tipo Descripción ción quemador Espesor total Instrucciones Gambas 18 – 20 oz / Directo Alto 3 – 6 min. 510 – 566 g VERDURAS Mazorca de Con la cáscara Directo Medio 20 –...
-
Page 46: Garantía
Puede comunicarse con nuestro departamento de atención al cliente llamando al 1-800-321-3473 entre las 8:00 a.m. y las 5:00 p.m. (EST), sólo en inglés, o enviando un correo electrónico a CustomerService@landmann-usa.com Por favor, tenga en cuenta que en Estados Unidos algunos estados no permiten la exclusión o limitación de accidentes o de daños indirectos o limitaciones en la duración de una garantía implícita, por lo que puede ser...
Need help?
Do you have a question about the 42170 and is the answer not in the manual?
Questions and answers