Table of Contents
Advertisement
Quick Links
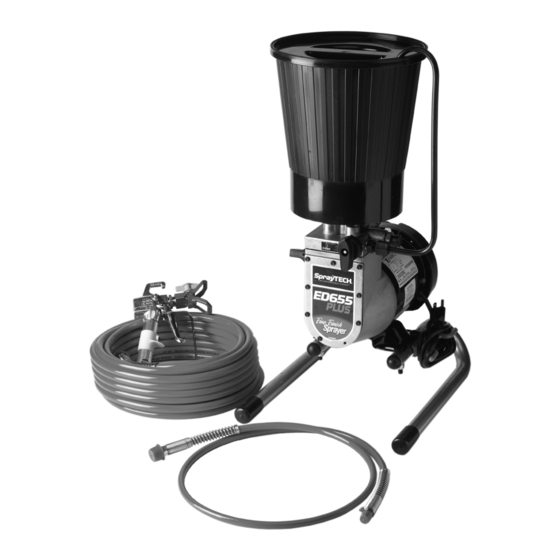
ED655 Plus
Owner's Manual
Printed in the U. S. A.
Airless Pump
Model Number 0508090
SprayTECH
Technical Assistance: 1-800-292-4637
0505 © 2005 SprayTECH. All rights reserved. Form No. 0508278A
1770 Fernbrook Lane
Minneapolis, MN 55447
Order Entry: 1-800-443-4500
Fax: 1-800-525-9501
w ww.sp ra y t e c h i nc . c om
Advertisement
Table of Contents

Related Manuals for SprayTECH ED655 Plus


Summary of Contents for SprayTECH ED655 Plus
- Page 1 Minneapolis, MN 55447 Technical Assistance: 1-800-292-4637 Order Entry: 1-800-443-4500 Fax: 1-800-525-9501 w ww.sp ra y t e c h i nc . c om Printed in the U. S. A. 0505 © 2005 SprayTECH. All rights reserved. Form No. 0508278A...
-
Page 2: Table Of Contents
• When the thermally protected automatic reset disconnects 15. Fire extinguisher equipment shall be present and the motor from the power supply, relieve pressure by working. turning the priming valve to PRIME. • Turn the ON/OFF switch to OFF. © SprayTECH. All rights reserved. -
Page 3: Grounding Instructions
3. Do not overreach or stand on an unstable support. Keep effective footing and balance at all times. 4. Stay alert and watch what you are doing. 5. Do not operate the unit when fatigued or under the influence of drugs or alcohol. © SprayTECH. All rights reserved.. -
Page 4: General Description
Checking the Outlet Valve (optional) latex paints, primers, and stains 1. Firmly press the optional pusher valve button on the side of the pump housing to make sure the outlet ball valve moves freely. Pusher Valve Button (optional) © SprayTECH. All rights reserved. -
Page 5: Attaching The Paint Hose
8. Turn the motor switch to OFF. the gun unless the tip is completely (gun will not spray) turned to either the spray or the unclog position. ALWAYS engage the gun trigger lock before removing, replacing or cleaning tip. © SprayTECH. All rights reserved. -
Page 6: Mounting The Paint Hopper
PRIME/SPRAY knob is turned to PRIME or until the spray gun is triggered to relieve the pressure. Return Tube Paint Hopper Cover © SprayTECH. All rights reserved. -
Page 7: Spraying
If the pressure is set too high, the spray pattern will be too light. If the pressure is set too low, tailing will appear or the paint will spatter out in gobs rather than in a fine spray. © SprayTECH. All rights reserved. -
Page 8: Cleanup
5. After the sprayer is primed, turn the PRIME/SPRAY knob 3. Turn the PRIME/SPRAY knob to SPRAY. to SPRAY and gradually turn the pressure control knob clockwise to increase the pressure. 6. Test the sprayer on a practice piece and begin spraying. © SprayTECH. All rights reserved. - Page 9 10 Trigger the gun and gradually turn the pressure control knob clockwise to 1/2 pressure. Continue to trigger the gun for approximately 30 seconds. 11. Turn the pressure control knob counterclockwise to its lowest setting. 12. Turn the PRIME/SPRAY knob to PRIME. © SprayTECH. All rights reserved.
-
Page 10: Maintenance
1. Remove the outlet valve body with a wrench. 2. Remove and clean the ball stop and small spring inside the valve using a wire hook or tweezers. Replace the spring if it is broken or worn. © SprayTECH. All rights reserved. -
Page 11: Troubleshooting
6. Allow the motor to cool and move the sprayer to a tripped. cooler spot. 7. There is a problem with the motor. 7. Take the sprayer to a SprayTECH Authorized Service Center. The sprayer starts up but does not 1. The unit will not prime properly or has lost prime. - Page 12 état de fonctionnement. • Tous les accessoires doivent avoir une valeur nominale d'au moins 2800 PSI. Cette exigence s'applique aux têtes de pulvérisation, aux pistolets, aux rallonges et aux tuyaux. Français © SprayTECH. Tous droits réservés.
- Page 13 à une distance de plus de 100 pieds du bloc d'alimentation, utiliser d'autres tuyaux à peinture et non pas d'autres rallonges. Par ailleurs, les rallonges plus courtes assureront une alimentation maximale et un bon fonctionnement. © SprayTECH. Tous droits réservés. Français...
- Page 14 • No use NUNCA una pistola de atomización que no tenga a rociar y con la mascarilla para asegurar la protección un bloqueador o un protector de gatillo puesto y que necesaria contra la inhalación de vapores dañinos. funcione. Español © SprayTECH. Todos los derechos reservados.
- Page 15 100 pies de su fuente de energía, alargue la manguera de pintura, no la extensión. Las extensiones más cortas asegurarán que se tenga la máxima energía eléctrica para una operación apropiada. © SprayTECH. Todos los derechos reservados. Español...
-
Page 16: Parts Listings
Washer..........2 0555124 Diaphragm pump ........1 0508660 Screw............2 0508271 Left leg ..........1 0508270 Right leg..........1 0551525 Plug............2 0508377 Cord wrap ..........1 0555513 Tube cap..........2 0508267 Mounting plate ........1 0508259 Handle assembly ........1 9811122 Lock nut ..........4 © SprayTECH. All rights reserved. -
Page 17: Diaphragm Pump
Piston spring ..........1 0278237 Hydraulic housing assembly 0270548 Piston washer ..........1 (includes items 23 – 25)......1 0089456 Retainer ............1 0270462 Fan (not shown)..........1 0278359 Gasket ............1 0270612 Fan cover (not shown)........1 0278341 Hydraulic cover ...........1 © SprayTECH. All rights reserved. -
Page 18: Pump Head Assembly
Ball..............1 (includes items 1 – 6) 0047485 Outlet spring ..........1 0278361 Ball guide ............1 9871114 O-ring............1 0278335 Outlet fitting..........1 0278337 Pusher body..........1 0278250 Pusher stem assembly .......1 0278368 Pusher spring..........1 0156646 Seal.............1 0278340 Pusher washer..........1 © SprayTECH. All rights reserved. - Page 19 Notes/Nota © SprayTECH. All rights reserved.
-
Page 20: Limited Warranty
Limited Warranty SprayTECH, a division of Wagner Spray Tech Corporation ("SprayTECH"), warrants that at the time of delivery to the original purchaser for use (“End User”), the equipment covered by this warranty is free from defects in material and workmanship. With the exception of any special, limited, or extended warranty published by SprayTECH, SprayTECH ’s obligation under this...
Need help?
Do you have a question about the ED655 Plus and is the answer not in the manual?
Questions and answers