Advertisement
Advertisement
Table of Contents

Related Manuals for DNP SnapLab SL620A


Summary of Contents for DNP SnapLab SL620A
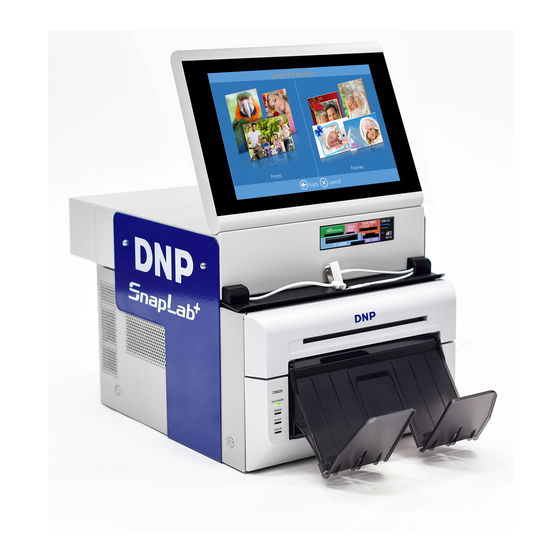
- Page 1 SnapLab SL620A Installation and Quick Start Guide Exclusively for DNP DS-Series™ Printers Software v1.1.1 PN: DOC-U-SL620-DLND-01 Rev: 10.31.2018...
-
Page 2: Table Of Contents
SL620A Installation and Quick Start Guide Summary Visit www.dnpphoto.com for the latest documentation, FAQs and more! Summary ......................... 2 Warnings Chapter 1 ....................3 Warning on power connection ..........................3 Compliance Notices ............................. 3 Installation Chapter 2 ................... 5 Box content ................................5 Attaching the Topper to the DS620A printer ....................... -
Page 3: Warnings Chapter 1
SL620A Installation and Quick Start Guide Warnings Chapter To reduce the risk of fire or electric shock, do not expose this equipment to rain or moisture. To avoid electrical shock, do not open the DS-T mini and DS-Printer covers. Refer servicing to qualified staff only. - Page 4 Connect the equipment into an outlet on a circuit different from that to which the receiver is connected. Consult the dealer or an experienced radio/TV technician for help. Warning: Changes or modifications to this device not expressly approved by DNP Photo Imaging could void the user’s authority to operate the equipment.
-
Page 5: Installation Chapter 2
SL620A Installation and Quick Start Guide Installation Chapter Box content The box contents: Topper Power cord USB cable Rear Bracket with 2 x M3 screws Router holder Side brackets 4 x M3 screws (This document) Netgear Router... -
Page 6: Attaching The Topper To The Ds620A Printer
SL620A Installation and Quick Start Guide Attaching the Topper to the DS620A printer Loosen the two lower screws on printer back side. Position the router holder slots between screws and DS620A backplate with a top to bottom movement. Gently tighten the two screws. Lower screws used to attach the router holder support the kiosk. - Page 7 SL620A Installation and Quick Start Guide Insert the Wi-Fi router into the router support. Connect the supplied network cable and power cable to the WiFi router before inserting the router into the mounting bracket. Connect the Ethernet cable to the LAN port 1 – 4 (not the Yellow Internet Port).
- Page 8 SL620A Installation and Quick Start Guide Use the opening lever to open the lock of the DS620A and pull out the mechanism unit by approximate 10 cm. Gently position the DS-Tmini on top of the DS620A. Slide the DS-Tmini backwards until the two front hooks engage with DS620A top cover.
- Page 9 SL620A Installation and Quick Start Guide Use the two M3 screws supplied with the rear bracket to fix it to the back side of the DS-Tmini. Connect the two side brackets to the sides of the DS-Tmini. Please note that they are left and right side and they are not the same.
- Page 10 Netgear Router. NOTE: The steps above enable SnapLab to DS620A receive files from a user’s cell phone using the DNP PhotoPrints. power NOTE: The SnapLab can also be configured to enable functionality such as printing images from a user’s social media account.
-
Page 11: Quick Start Chapter 3
SL620A Installation and Quick Start Guide Quick Start Chapter Make sure all power supply cables (Printer, Router and DS-Tmini) are connected. Starting SL620A 1) Switch ON the DS620A printer. NOTE: Always power on the printer and the WIFI router first, before powering up the SnapLab Terminal. 2) Load media into the printer (please refer to DS620A Quick Reference Guide). - Page 12 SL620A Installation and Quick Start Guide 2) Click the Settings button 3) Choose Settings > Language Available Languages Czech Japanese English Polish Finnish Portuguese French Romanian German Russian Greek Spanish Hungarian Ukrainian Italian Available languages: The Photo Editing Software both editing & admin settings are available from the above list of languages.
-
Page 13: Make A Print Order
SL620A Installation and Quick Start Guide Make a print order This is the Workflow of creating and printing Single Sided Print product. 1) Select Prints. 2) Select Media where images are located, as an example, the USB device. 3) Select the Images. By pressing + or - sign the print quantity can also be entered at this stage. - Page 14 SL620A Installation and Quick Start Guide 4) Select Product and Paper Finish type. 5) Edit print quantity, crop and enhance images, add text. 6) Add Text. To change text dimensions and rotation click and drag on rotation button.
-
Page 15: Shutdown The Sl620A
SL620A Installation and Quick Start Guide 7) View the order summary. 8) Enter the Customer Name. 9) Press Next to finish the order. Shutdown the SL620A 1) Enter into Main Panel by touching in sequence the lower left and right corners of the monitor. -
Page 16: Troubleshooting Chapter 4
2) Click on Computer shutdown button 3) Wait until DS-Tmini automatically switches OFF. 4) Switch OFF the DS620A printer. 5) Disconnect the power cables. Troubleshooting Chapter For any technical issue(s) and question(s), please contact the DNP IAM technical support team at: dnpsupport@dnp.imgcomm.com...
Need help?
Do you have a question about the SnapLab SL620A and is the answer not in the manual?
Questions and answers