Table of Contents
Advertisement
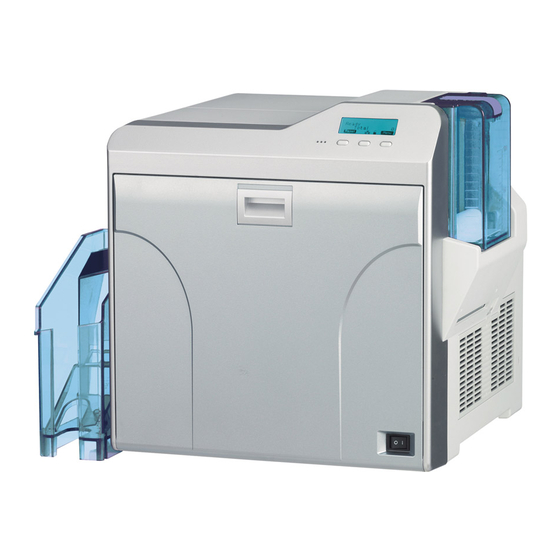
Card Printer
CX-D80
Thank you for purchasing this product.
Please read through this "Electronic Manual"
carefully in advance to ensure proper use of the
product. Also, to make sure that the product is
used safely, please read through the "Safety
Precautions" in the "READ ME FIRST" booklet.
Please store the manuals properly after reading
so that they can be referred to whenever
necessary.
Electronic
Manual
LST1008-002B
Advertisement
Table of Contents

Related Manuals for DNP CX-D80


Summary of Contents for DNP CX-D80
- Page 1 Card Printer CX-D80 Electronic Manual Thank you for purchasing this product. Please read through this “Electronic Manual” carefully in advance to ensure proper use of the product. Also, to make sure that the product is used safely, please read through the “Safety Precautions”...
-
Page 2: Table Of Contents
Contents Before Use About this Manual ..............3 Precautions ................3 Disclaimer ................7 Name and Functions of Parts ..........7 Specifications ..............10 Accessories/Products Sold Separately ......10 Options ................11 Operating the Printer Printing a Card ..............12 Operation Panel .............. -
Page 3: Before Use
Before Use About this Manual Precautions Contents of this Manual Safety Precautions The copyright of this manual belongs to our company. Reprint and Please read through all the following items before using the duplicate of this manual in part or full without the prior consent of our printer. - Page 4 Before Use Warnings...
- Page 5 Before Use Caution...
- Page 6 Before Use Precautions During Use Precautions on Retransfer Film/Ink Ribbon Please read through all the following items before using the printer. Put on the supplied gloves when handling the retransfer film/ink ribbon. Direct contact of your hand with the printing surface may result in printing errors.
-
Page 7: Disclaimer
Before Use Disclaimer Name and Functions of Parts Internal Mechanism Diagram A Card feeder unit This is the roller for feeding cards. B Bend remedy unit (optional) Corrects bending of the card after retransfer. C Retransfer heating roller Transfers images printed on the retransfer film to the card. D Non-contact IC encoder (optional) Writes data to a non-contact IC card. - Page 8 Before Use Front Right A NG card outlet If a card is left inside the printer when the power is turned on or A Sliding knob reset, the card will be automatically discharged. Opens/closes the printer door. Cards in the printer are discharged when an error occurs in the magnetic stripe card or IC card.
- Page 9 Before Use When Printer Door is Open Retransfer Film Cassette A Card feed roller shaft When a card jam occurs, attach a jog dial to turn the card feed roller. B Card turn over unit shaft A Bobbin holder (black) When a card jam occurs, attach a jog dial to turn the card turn For securing the take-up side of the retransfer film.
-
Page 10: Specifications
Before Use Specifications Accessories/Products Sold Separately Main Specifications Accessories Please check to ensure that the printer accessories are in place Item Description when unpacking the product package. Recording system Dye sublimation retransfer CD-ROM x 1 Instruction Manual x 1 Paper feed mode Automatic “READ ME FIRST”(LST1004) x 1 Recording density... -
Page 11: Options
Before Use Options Options Bend remedy unit Device for correcting card bend after printing. Magnetic encoder Device for writing data to a magnetic stripe card. It can only be installed on a double-sided printer. Contact IC encoder Device for writing data to a contact IC card. Non-contact IC encoder Device for writing data to a non-contact IC card. -
Page 12: Operating The Printer
Operating the Printer After ensuring that a [Ready] message appears on the LCD panel of Printing a Card the printer, start printing Cautions: If you see an [Initializing..] or [Preheating..] message on the LCD panel of the printer, this means the printer is not ready yet. Printing cannot be performed until a [Ready] massage appears. -
Page 13: Operation Panel
Operating the Printer Operation Panel Icon Displays on the Operation Panel USB connection Name and Functions of Parts IP address established Printer information can be viewed through the network. However, printing is performed through USB connection. IP address not established A Operation panel Displays the settings, operating status, and error messages. - Page 14 Operating the Printer Downloading Operation Panel Operation Display D o w n l o a d i n g . . Background color Changes according to the printer’s operating status. During startup Bright green Magnetic encoding in progress Under normal circumstances Sky blue M G E n c o d i n g .
-
Page 15: Setting Mode
Operating the Printer Setting Mode Print Displays the printing settings. Settings can be viewed on the printer’s operation panel. Settings can be changed on the status monitor of the computer. Settings "Setting Using the Operation Panel" (A page 22) YMC Level: -3, -2, -1, 0, 1, 2, 3 "Sequence of Setting Modes"... - Page 16 Operating the Printer Bend Remedy Option Displays the bend remedy mode settings. Displays the optional settings. Settings Settings Temp Level: -5, -4, -3, -2, -1, 0, Off MG: None, ISO For setting the bend remedy heating roller temperature. Displays the availability of a magnetic encoder or the type of Selecting a larger value increases the temperature.
-
Page 17: Sequence Of Setting Modes
Operating the Printer Sequence of Setting Modes Settings can be viewed on the printer’s operation panel. Settings can be changed on the status monitor of the computer. "Setting mode" (A page 15) Press I Enters the setting mode. Press J Pressing it each time displays the next setting item. - Page 18 Operating the Printer...
-
Page 19: Factory Settings
Operating the Printer Network Factory Settings Item Factory Settings Media Printer Name PRINTER01 Item Factory Settings Host IF Ink Type IPv4 DHCP Film Type 1000 Setting IP Address 192.168.0.141 Card Thickness Standard Subnet Mask 255.255.255.0 Print Gateway 192.168.0.1 Item Factory Settings Effective IP IP Address YMC Level... -
Page 20: Security Lock
Operating the Printer Press B Security Lock The security lock function can be applied to the printer door and card hopper to prevent opening of the printer door as well as removal of cards. The lock can be turned on/off using the status monitor on the computer. - Page 21 Operating the Printer Deactivating the Security Lock Deleting the Security Key Number When a security lock is turned on, you can deactivate it as follows. You can delete a registered security key number as follows. To change the security key number, you have to delete it and Press the operation button (center) for at least three seconds register a new number again.
-
Page 22: Setting Using The Operation Panel
Operating the Printer Setting Using the Operation Panel Initializing Printer When Installing the Cassette Memo: When detaching the ink ribbon cassette or retransfer film cassette Initialization from the printer body, dust may adhere to the ink ribbon or retransfer Whenever the power is turned on, cue (initialization) is performed film. - Page 23 Operating the Printer Initializing printer after feeding by two images Test Print A Press J to set to [2'nd Panel, OK?] Prints the printer’s built-in test pattern, or the different settings. The printer unit can be made to run alone when a system error occurs by separating the computer from the printer.
- Page 24 Operating the Printer If download fails and printer cannot be started up Firmware Update If download of the printer firmware fails, the printer may not be able to start up when it is rebooted. When this occurs, download Press I the firmware again according the following procedure.
- Page 25 Operating the Printer Display Mode Setting Counter Setting This is used for setting the information to be displayed on the This is used for setting the type of counter displayed on the operation panel. operation panel. Settings Counter Types Counter: Total Cnt: total counter Displays the counter preset in "Counter setting".
- Page 26 Operating the Printer Press F Enters the settings change mode. Counter Reset This is used to reset the free counter and error counter. Press I A [Cleaning] message appears. Press A and select a setting Press B to confirm the setting Pressing B confirms the setting and returns you to the previous screen.
- Page 27 Operating the Printer Press F Contrast Setting Enters the settings change mode. For setting the contrast of the operation panel display. Settings -3, -2, -1, 0, 1, 2, 3 Selecting a larger value increases the contrast. Press I A [Cleaning] message appears. Press A and select a setting Press B to confirm the setting Pressing B confirms the setting and returns you to the previous...
- Page 28 Operating the Printer Buzzer Setting Unit Number Setting For setting whether to sound the buzzer when an error occurs or For setting the printer’s unit number according to the USB when settings are changed. environment. Settings Settings On: turns on buzzer sound, Off: turns off buzzer sound No.1 - No.10 Press I Press I...
- Page 29 Operating the Printer Check to ensure that [Film Search] is displayed on the operation panel of the printer Transport Mode Setting Press I When transporting or moving the printer, ensure that the heating roller is fastened to a safe position. A [Cleaning] message appears.
-
Page 30: Setting Using The Status Monitor
Operating the Printer Setting Using the Status Monitor "Status Monitor Settings" (A page 107) -
Page 31: Replacement
Replacement Align the orientation of the cards, and set them in the printer Cards Magnetic stripe cards Set the card with the magnetic stripe facing upward and toward the printer, or facing downward and toward you. Cards have Run Out Replenish the cards. -
Page 32: Ink Ribbon
Replacement A With the inked surface facing outward, align the yellow side of the Ink Ribbon unused ribbon with the arrow on the cassette, and unwind it along the three shafts. B Insert the ink ribbon firmly into the bobbin holders with the ribbon Ink Ribbon has Run Out set to the far end of the guides. -
Page 33: Retransfer Film
Replacement Press KNB to reset the printer Retransfer Film Retransfer Film has Run Out Replace with a new retransfer film. Cautions: If the security lock is on, deactivate it. After work is complete, activate the security lock again. Stand the cassette on a flat surface as illustrated in the diagram. Avoid doing so on the floor as dust attached to it may cause printing errors. - Page 34 Replacement Install a new retransfer film Press KNB to reset the printer Install while referring to the indication on the label of the cassette. A When installing the retransfer film, make sure that at least three black lines are wound onto the take-up side. B With the retransfer face facing outward, align the unused side of the film with the arrow on the cassette, and unwind it along the three shafts.
-
Page 35: Maintenance
Maintenance Wash the cleaning roller with water Servicing of Parts Wash the roller with water, and remove any dirt from the surface of the cleaning roller with your finger. Request for routine servicing In order to prevent printing errors and malfunctions from occurring in advance, please request for routine servicing by the servicing personnel. - Page 36 Maintenance Card Load Roller Fan Filter Card jams may occur if the card load roller is dirty. The color of the printed card may appear faded or dirt may appear conspicuous if the fan filter is dirty. Cautions: Perform cleaning after printing about 10,000 cards. If the security lock is on, deactivate it.
- Page 37 Maintenance Turn on the power Card Feed Roller/Heating Roller The color of the printed card may appear faded or dirt may appear conspicuous if the card feed roller or heating roller is dirty. Perform cleaning after printing about 1,000 cards. Cautions: If the security lock is on, deactivate it.
- Page 38 Maintenance After the cleaning card is discharged, turn off the power, install the Press B retransfer film cassette, close the printer door, and install the card A [Cleaning..] message appears. hopper Cautions: If the retransfer heating roller is hot, a [HR is too hot!] message will be displayed.
- Page 39 Maintenance Press I to set to [Cleaning] Magnetic Head If the magnetic head is dirty, errors may occur during writing to or reading of the magnetic stripe card. Clean the magnetic head after approximately every 1,000 cards. Cautions: If the security lock is on, deactivate it. After work is complete, activate the security lock again.
- Page 40 Maintenance After the cleaning card is discharged, turn off the power, and install the card hopper Bobbin Holders If burrs produced by friction with the bobbins are attached to the bobbin holders, they may fall onto the card, ink ribbon, or retransfer film, causing printing errors.
- Page 41 Maintenance Apply alcohol to a cotton swab (large), and use it to wipe the four bobbin holders Thermal Head (Cotton swab and alcohol: sold separately) Lines may appear on the card after printing if the thermal head is dirty. Clean the thermal head after printing about 10,000 images. Cautions: If the security lock is on, deactivate it.
- Page 42 Maintenance Apply alcohol to a cotton swab (large), and use it to wipe the thermal Insert the ink ribbon cassette along the guide rail until a “click” head sound is heard, followed by closing the printer door (Cotton swab and alcohol: sold separately) Wipe the thermal head with care in the horizontal direction.
-
Page 43: Servicing Based On Print Output
Maintenance Servicing Based on Print Output Colors Appear Faded or Dirt is Conspicuous "Clean the cleaning roller." (A page 35) "Clean the fan filter." (A page 36) "Clean the card feed roller/heating roller." (A page 37) "Clean the bobbin holders." (A page 40) Card Jam "Clean the cleaning roller."... -
Page 44: Troubleshooting
Troubleshooting When an Error Message is Displayed Jam(Discharge) 94 Check the error code and error code number displayed on the operation panel. Card jam near the card outlet. Error Code Error Code No. "Remove the jammed card." (A page 51) J a m ( H o p p e r ) Jam(Retran.) 95 List of Error Codes... - Page 45 Troubleshooting Ink Run Out B2 TR Heater F1 Ink ribbon has run out. The retransfer heating roller is faulty. "Replace with a new one." (A page 32) Turn off and on the power again. If the same problem recurs, turn off the power and consult our authorized dealers.
-
Page 46: Cards
Troubleshooting If the card cannot be removed by hand Cards A Press KNB to reset the printer Cards have Run Out "Replenish the cards." (A page 31) Card Jam Error codes are displayed on the operation panel according to the location of the card jam. - Page 47 Troubleshooting If the card cannot be discharged Error Code Jam(TurnOver) 91 A Turn off the power B Open the printer door, and check the position of the jammed Card jam near the card turn over unit. card Turn off the power Remove the card hopper C Attach the jog dial to the cleaning roller shaft Detach the card load slot cover...
- Page 48 Troubleshooting Remove the jammed card in the card turn over unit from the card If the card cannot be removed load slot A Install the cleaning unit B Attach the jog dial to the cleaning roller shaft and card turn over unit shaft "If the card cannot be removed"...
- Page 49 Troubleshooting Turning the card turn over unit moves the card inside the unit Error Code Jam(MG) 92 outward. Turn the card turn over unit while turning the cleaning roller shaft so that the card is retained inside the card turn over Card jam in the magnetic encoder unit.
- Page 50 Troubleshooting If the card cannot be discharged Error Code Jam(Transfer) 93 A Turn off the power, and detach the card hopper Card jam in the card feed roller. Press KNB to reset the printer B Open the printer door, and check the position of the jammed card C Attach the jog dial to the card feed roller shaft and cleaning roller shaft The card is discharged from the NG card outlet.
- Page 51 Troubleshooting If the card cannot be discharged Error Code Jam(Discharge) 94 A Turn off the power, and open the printer door B Pull out the retransfer film cassette, and check the position of Card jam near the card outlet. the card Press KNB to reset the printer C Attach the jog dial to the card feed roller shaft The card is discharged from the card outlet.
- Page 52 Troubleshooting If the card is adhered to the retransfer film Error Code Jam(Retran.) 95 Remove the jammed card with a hand. Card jam near the retransfer heating roller. Open the printer door A [Please Remove Jam Card!] or [Please Close Door] message appears.
- Page 53 Troubleshooting If the card is inside the printer unit If the card is caught in the card feed roller to the right of the retransfer heating roller If the card is not drawn into the card feed roller and is left inside A Turn off the power, and detach the card hopper the printer, use the tweezers (supplied) to remove the card.
-
Page 54: Ink Ribbon
Troubleshooting If the card is caught in the card feed roller to the left of the Ink Ribbon retransfer heating roller A Turn off the power B Check the position of the card Ink Ribbon has Run Out C Attach the jog dial to the card feed roller shaft "Replace with a new ink ribbon."... - Page 55 Troubleshooting Turn the take-up side using your hand until the broken portion can Press KNB to reset the printer no longer be seen Align the yellow side of the unused portion with the arrow indicated on the label of the cassette. Remove any slack in the ink ribbon Memo: To avoid printing errors, it is recommended that you forward by one...
-
Page 56: Retransfer Film
Troubleshooting Turn the take-up side using your hand until the broken portion can Retransfer Film no longer be seen Retransfer Film has Run Out "Replace with a new retransfer film." (A page 33) Retransfer Film is Broken Repair the retransfer film. Align the film side of the unused portion with the arrow indicated on Cautions: the label of the cassette. -
Page 57: Unable To Produce Desired Printing Results
Troubleshooting Unable to Produce Desired Printing Unable to Fit Retransfer Film Cassette into Printer Results With the printer door closed, turn on the power to cancel the transport mode. While in the transport mode, the retransfer film cassette cannot be Lines Appear on Card after Printing installed to the printer with the retransfer film loaded. -
Page 58: Printer Not Operating As Desired
Troubleshooting Printer not Operating as Desired Before Sending Printer for Repair Enter the symptoms into the troubleshooting sheet. Card is not Fed into the Printer Clicking the Print icon displays a PDF file. Is the card load roller dirty? Print out the PDF file and enter accordingly. "Clean the card load roller."... -
Page 59: Setup
Setup Installation and Connection Power Cord Connection Insert the power cord (supplied) to the AC inlet at the rear of the printer Printer Installation Cautions: Using the printer in an environment beyond the operating ambient temperature range may result in retransfer or printing errors. Check the “Precautions on installation location”... -
Page 60: Printing Media
Setup Printing Media Installing the Ink Ribbon Cautions: Stand the cassette on a flat surface as illustrated in the diagram. Avoid doing so on the floor as dust attached to it may cause printing errors. Remove any slack in the ink ribbon A Hold the cassette. - Page 61 Setup C Insert the retransfer film firmly into the bobbin holders with the film set to the far end of the guides. Installing the Retransfer Film A: take-up side (black) Cautions: B: unused side (green) Stand the cassette on a flat surface as illustrated in the diagram. Avoid doing so on the floor as dust attached to it may cause printing errors.
- Page 62 Setup Press KNB to reset the printer Setting Cards The card hopper is able to store up to about 100 cards with a thickness of 0.76 mm. Cautions: Get ready cards that are designated by the authorized dealer. If the security lock is on, deactivate it. After work is complete, activate the security lock again.
- Page 63 Setup Align the orientation of the cards, and set them in the printer Adjusting card thickness Magnetic stripe cards The thickness of a card that is adjustable is between 0.25 mm and Set the card with the magnetic stripe facing upward and toward 1.00 mm.
-
Page 64: Printer And Computer Connection
Setup Printer and Computer Connection Connecting with a LAN Cable Cautions: Connecting with a USB Cable Plug the LAN cable in correctly and firmly. Make use of a shielded LAN cable to avoid any malfunction. Cautions: If a USB cable is also connected at the same time when the power is While printing is in progress, do not turn off the power of the turned on, priority will be given to USB. -
Page 65: Computer Settings
Setup Computer Settings Install Cautions: System Requirements To install the software, log into the system as an administrative user The printer software runs under the following environments. (Administrators group). Microsoft Windows 7 32 bit / 64 bit A part of the illustrations in this Electronic Manual may not be Microsoft Windows Vista 32 bit (Service Pack 1) displayed depending on the computer’s environment. - Page 66 Manual. Setting) Clicking [Exit] ends the installation. CX-D80 U2 CX-D80 U2 Click [Next] CX-D80 U3 CX-D80 U3 A [Installation of CX-D80 USB printer] screen appears. CX-D80 U4 CX-D80 U4 CX-D80 U5 CX-D80 U5 CX-D80 U6 CX-D80 U6 CX-D80 U7 CX-D80 U7...
- Page 67 Setup Enter the shared name when you are sharing a printer. Windows Vista A [Windows Security] screen appears. A Click [Install] part Memo: A USB cable connection instruction screen appears. You can also set the shared name after installation is complete. Click [Next] A port selection screen appears.
- Page 68 Setup A [CX-D80U Port] screen appears. B Select [Install the software automatically (Recommended)], and click [Next] A [Hardware Installation] screen appears. Select the [Property] tab C Click [Continue Anyway] A Select this printer from [Printer List] A “Completing the Found New Hardware Wizard” screen Memo: appears.
- Page 69 Setup Windows 2000 Windows 2000 (Example) A [Digital Signature Not Found] screen appears. Cautions: To delete a printer, execute “Uninstall printer driver” after restarting Windows. Ethernet (LAN) Connection Cautions: Configure the IP address and other necessary settings for the printer A Click [Yes] in advance.
- Page 70 Clicking [Exit] ends the installation. Click [Next] Click [Next] A screen for entering the shared name appears. A [Installation of CX-D80 Ethernet printer] screen appears. Enter the shared name when you are sharing a printer. Read through the “Software License Agreement” Memo: If you accept the terms and conditions, select [I agree] to start You can also set the shared name after installation is complete.
- Page 71 Setup Click [Next] Windows Vista A port selection screen appears. A [Windows Security Alert] screen appears. Select [CX-D80N Port] under [Create a new port]. A Click [Unblock] The program will fail to function properly if you click on [Keep Click [Next] blocking].
- Page 72 Setup Windows Vista Windows Vista (Example) A [Windows Security] screen appears. A Click [Install] part Windows 2000 Windows 2000 (Example) A [Digital Signature Not Found] screen appears. Cautions: To delete a printer, execute “Uninstall printer driver” after restarting Windows. Update of Printer Driver To update A Click [Yes] Delete the existing printer driver...
- Page 73 Setup Select [Browse for a printer], and click [Next] A “Browse for Printer” screen appears. Network Sharing of Printer Windows XP/ Windows 2000 Cautions: Check to ensure that you can access the computer to which the printer is connected. Check also to ensure that the printer can be shared. Open “Printers”...
- Page 74 Setup Select a printer, and click [Next] Cautions: A driver installation confirmation screen appears. When the access authority of the computer is not proper, the printer may not be able to perform printing even if installation of the printer driver is completed. Ensure that the access authority is proper according to the instructions of the network administrator.
- Page 75 Setup Select the [Status Monitor] checkbox on the card printer setup screen Status Monitor A Select the language to use from the [Language] pull-down menu Selecting [Japanese] switches the program to the Japanese Installing the Status Monitor version. Cautions: Selecting [English] switches the program to the English version. The same status monitor can be used for printers connected via B Select [USB connection] or [Ethernet connection] from [Interface] USB and Ethernet.
- Page 76 Setup Click [OK] Exits the installation program. USB Driver You can now start the status monitor from [Start menu]. Installing the USB Driver Cautions: The following error may occur when you start executing the status Cautions: monitor on Windows Vista. The USB driver is also installed while you are installing the printer driver via USB connection.
- Page 77 Setup Select [Install the software automatically (Recommended)], and click Click [Locate and install driver software (Recommended)] [Next] A [User Account Control] screen appears. A [Hardware Installation] screen appears. Click [Continue] A [Found New Hardware] screen appears. Click [Continue Anyway] A “Completing the Found New Hardware Wizard” screen appears. Click [Don’t search online] A screen appears, prompting you to insert the disc.
- Page 78 Setup Click [Install this driver software anyway] Click [Next] An installation complete screen appears. A search method selection screen appears. Select [Search for a suitable driver for my device (recommended)], and click [Next] A “Locate Driver Files” screen appears. Click [Close] Installation of the USB driver is complete.
- Page 79 Setup Memo: Electronic Manual You can select the [Printer Driver] and [Status Monitor] checkboxes to install them simultaneously. Installing the Electronic Manual Clicking [Open the Electronic Manual] opens the Electronic Start up Windows, and set the supplied CD-ROM into the computer Manual.
-
Page 80: Uninstall
Check to ensure that the printer connected via USB is recognized on Click [Next] the computer. If the USB connection is not recognized, the USB A [Delete the CX-D80 USB printer] screen appears. driver cannot be correctly deleted. Set the supplied CD-ROM into the computer A card printer setup screen appears. - Page 81 Setup Select the printer to uninstall, and click [Next] Set the supplied CD-ROM into the computer An uninstall information confirmation screen appears. A card printer setup screen appears. Check the details, followed by clicking [Finish] To change a printer, click [Back]. Cautions: Uninstall the USB printer drivers accordingly for each printer unit number.
- Page 82 Setup Click [Next] An uninstallation complete screen appears. A [Delete the CX-D80 Ethernet printer] screen appears. Click [Finish] Check the details, followed by clicking [Next] Exits uninstallation. A printer model selection screen appears. Cautions: To reinstall the printer driver, perform the installation procedures after restarting Windows.
- Page 83 Setup Status Monitor Electronic Manual Uninstalling the Status Monitor Uninstalling the Electronic Manual Cautions: Exit the Electronic Manual Do not execute “Uninstall” if there are applications that are currently Select [Uninstall Electronic Manual] from [Start menu] running. If document printing is currently in progress, wait for all the jobs to complete.
-
Page 84: Ipsec
Setup IPSec Setting Procedures PC1.pfx CA.cer PC2.pfx CA.cer Printer01.pfx Printer01.pfx CA.cer CA.cer Certificate Authentication Preshared Key File Cautions: A Request the “PC Certificate” from the certification authority. B The “PC Certificate” and “Certification Authority Certificate” are Operate IPSec (IP Security) on Windows by following the issued by the certification authority. - Page 85 Setup Make use of applications such as Windows Notepad to create a preshared key string, and save it as a file with the extension “.key” Printer Certificate File Cautions: Operate IPSec (IP Security) on Windows by following the instructions of the network administrator for the location where the printer is installed.
- Page 86 Setup Memo: For procedures to set “Certificate Authentication” on the printer, refer to the section of the Status Monitor Settings. "File settings required for certificate authentication" (A page 116) Certification Authority Certificate File Cautions: Operate IPSec (IP Security) on Windows by following the instructions of the network administrator for the location where the printer is installed.
-
Page 87: Printer Driver Settings
Setup Printer Driver Settings [Print] Tab "[Setup] Tab" (A page 87) "[Print] Tab" (A page 87) "[Printing area] Dialog Box" (A page 89) "[Color] Dialog Box" (A page 90) "[Look up table] Dialog Box" (A page 90) "[Dither] Dialog Box" (A page 91) "[UV ink] Dialog Box"... - Page 88 Setup [UV ink...] button Using of Resin K ink For specifying settings related to UV ink print data. For specifying the component to print using the Resin K ink. Set a value in the [UV ink] dialog. Extraction "[UV ink] Dialog Box" (A page 91) Prints the black color component on each page using the Resin K Memo: ink.
- Page 89 Setup [Add] button Registers the input data. You can enter up to 8 input data. [Printing area] Dialog Box [Delete] button Settings related to the printing area using the peel-off ink or areas not to be printed using all YMCKUV inks. Deletes the information selected in the list.
- Page 90 Setup [Color] Dialog Box [Look up table] Dialog Box Settings related to color adjustment. Settings related to the look-up table. Brightness Name Brightness level. Registered name of the look-up table file. You can enter a name up to 30 characters. Contrast File Contrast level.
- Page 91 Setup [Dither] Dialog Box [UV ink] Dialog Box Settings related to dithering. Settings related to the data to be printed using the UV ink. Settings for the [MAC address position] and [Number of panels using the retransfer film] can be specified in this section. Cautions: This setting is enabled only when the [Print mode] item inside the [Print] tab is specified as [2.K] or [5.K+UV], and when the [Page split]...
- Page 92 Setup File information Settings related to the image file to be printed using the UV ink. Page Number for the Printed Document and Page Split Settings Memo: This setting is enabled when [Extraction]-[File] for the front side or back side is specified. Name Registered name of the image file.
- Page 93 Setup [Portrait] Orientation 256 colors Bit(s): 8 Prints using the UV ink with 256 gradation in accordance with the color palette. 32768 colors Bit(s): 15 Prints using the UV ink with 256 gradation. Only the “(MSB) GGGBBBBB-XRRRRRGG(LSB)” format is supported. 24 bits Bit(s): 24 Prints using the UV ink with 256 gradation.
- Page 94 Setup Retransfer Settings related to retransfer. Click on the corresponding square to [Printer settings] Dialog Box change the value. Settings related to the printer. Setting a value toward the top right end increases the transfer force. Select the checkbox for the setting item to enable, followed by However, the stronger heat also increases the deformation of the card.
- Page 95 Setup Optional configuration For specifying whether the options are installed. Non-contact IC encode Turn over unit Allows writing of data to a non-contact IC. Contact IC encode Bend remedy unit Allows writing of data to a contact IC. Non-contact IC encoder Turns over the card after IC encoding ISO Contact IC encoder Turns over the card after writing data to the non-contact/contact...
- Page 96 Setup Example of Printer Setting Single-sided Printing (Landscape) Application software Printer Graphic: colored Graphic: YMC ink Text: black Text: YMC ink + Resin K ink...
- Page 97 Setup Single-sided Printing (Portrait) Application software Printer Graphic: colored Graphic: YMC ink Text: black Text: Resin K ink...
- Page 98 Setup Double-sided Printing (Default) Application software Printer Graphic: colored Graphic: YMC ink Text: black Text: YMC ink + Resin K ink...
- Page 99 Setup Double-sided Printing (Single-side Lamination) Application software Printer Page 1 Front side Graphic: colored Graphic: YMC ink Text: colored Text: YMC ink Page 2 Back side Graphic: black Graphic: Resin K ink Text: black Text: Resin K ink Memo: If page 2 is set as colored, printing is performed using the Resin K ink after dithering is complete.
- Page 100 Setup Single-sided UV Printing Clicking [UV ink...] opens the [UV ink] dialog box. Application software Printer Graphic: colored Graphic: YMC ink Text: black Text: YMC ink + Resin K ink UV1.bmp: UV ink MAC address: UV ink...
- Page 101 Setup Page Split Application software Printer Page 1 Graphic: YMC ink + Resin K ink Graphic: colored Text: YMC ink + Resin K ink Text: colored Page 2 Graphic: black Text: black...
- Page 102 Setup Example of Encode Setting Encoding Only (ISO Card) Application software Printer Graphic: colored Graphic: none Text: black Text: none Inline Encoding Non-contact IC encode data: NIC Contact IC encode data: IC ISO track 1 magnetic encode data: ISO...
- Page 103 Setup Encoding and Printing (ISO Card) Application software Printer Graphic: colored Graphic: YMC ink Text: black Text: YMC ink + Resin K ink Inline Encoding Non-contact IC encode data: NIC ISO track 1 magnetic encode data: ISO...
- Page 104 Setup Encoding and Printing (JIS Card) Application software Printer Graphic: colored Graphic: YMC ink Text: black Text: YMC ink + Resin K ink Inline Encoding Non-contact IC encode data: NIC JIS2 magnetic encode data: JIS...
- Page 105 Setup Card Turn Over Illustration Turns over the card after loading Turns over the card after IC encoding Turns over the card after MG encoding Magnetic Contact IC Non-contact IC Eject Print Load encode encode encode Double-sided Logical configuration of printer...
-
Page 106: Port Monitor Settings
Setup [Find...] button Search for the printer after selecting [IPv4] or [IPv6]. The search Port Monitor Settings results are displayed in the [Printer List]. "[Property] Tab" (A page 106) Cautions: "[Version] Tab" (A page 106) The setting is incorrect if the following message appears. No Device: [Property] Tab Printer is not found. -
Page 107: Status Monitor Settings
Setup Windows XP Status Monitor Settings Cautions: What is status monitor? If a [Windows Security Alert] screen appears upon starting up the The status monitor is software for displaying the printer status as status monitor, click [Unblock]. well as specifying various printer settings. The status monitor will fail to function properly if you click on buttons other than [Unblock]. - Page 108 Setup Screen Configuration [Printer Status] Tab Displays the printer’s status. Information on the screen is automatically updated at regular intervals. Printer Status Ready mode. The printer is ready to start printing. A Close button Closes the status monitor. B Screen selection tabs Use these to switch to the following screens.
- Page 109 Setup Media Status Printer icons Displays the remaining space on the media. The icon on the left is displayed when the printer is functioning normally. After printing more than 1000 cards since the last cleaning, Card Quantity it changes to the icon display shown on the right. Displays the remaining card quantity as [Enough] or [None].
- Page 110 Setup MG Unit [Printer Setting] Tab Number of Retry For specifying the printer settings. For setting the maximum number of retries when writing to or Make sure that you take down the set values before making any reading of the magnetic stripe fails. The default value is [1]. changes.
- Page 111 Setup Card Type The appropriate value varies according to the type of card used. You [Retransfer] Tab can change the card type in the [Media Setting] Tab. The retransfer settings screen enables you to set the conditions of For more details, refer to "Card Type" (A page 112) in the “[Media retransfer to the card.
- Page 112 Setup [Bend Remedy] Tab [Media Setting] Tab The bend remedy settings screen enables you to set the conditions for This is used for specifying the printing media settings. the card’s bend remedy. Ink Status Bend Remedy Setting Name Setting procedures Displays the name of the loaded ink ribbon.
- Page 113 Setup Film Type Displays the specification of the loaded retransfer film in the number of [Property] Tab images. This is not an indication of the current film level. This tab displays the device configuration. [Update] button Applies the selected value to the printer. [Refresh] button Displays the printer settings on the screen.
- Page 114 Setup Registering printers for the IPv4 address [Printer Select] Tab A Select [IPv4], and enter the IPv4 address in the pull-down This tab is used for selecting a printer and specifying the network menu. settings. B Click [Scan Printer] to display the registration confirmation dialog box.
- Page 115 Setup Security Setting Obtain and IP Address Automatically Values such as the IPv4 address can be automatically acquired from For setting items related to the IPSec of Ethernet (LAN). The settings the DHCPv4 server. are displayed in the read-only mode when connection is established If the DHCPv4 server is not found, settings in the [Use the following via Ethernet (LAN).
- Page 116 Setup Select [CA Certificate] for [Download Type], and click [Select...] File settings required for preshared key authentication A preshared key file is required for preshared key authentication. Select [Preshared Key] for [Download Type], and click [Select...] Select a certification authority certificate file, and click [Write] Select a preshared key file, and click [Write] Click the [Close] button on the [IPSec Setting] screen IPSec setting for the printer is complete after closing the screen.
- Page 117 Setup [Security Lock] Tab [Others] Tab For displaying and setting the security lock status. This tab enables you to perform test prints and download the firmware. Memo: For printers connected via Ethernet (LAN), the test print and firmware download items are not displayed. Status Displays the current security lock status.
-
Page 118: Inline Encoding
Setup Example Inline Encoding "Inline Encoding Format" (A page 118) "Character Code List" (A page 119) ~?1DEF Inline Encoding Format A Textbox character strings of application software Inline encoding can be performed by enabling the settings in the B Character string to be printed on card [Encode] tab of the printer driver settings. - Page 119 Setup Character Code List ASCII character code list Below is the list of usable ASCII character codes. Specify the text string to encode using the usable half-width characters for each of the unit codes. b4 b3 b2 b1 " & <...
-
Page 120: List Of Error Codes
Setup List of Error Codes Printer (Error Code:0x01000000-0x01040000) Error Code Description Actions (Reference Page No.) 0x0102D000 Cards have run out. Replenish the cards. (A page 31) The card hopper is detached. Install the card hopper. (A page 63) 0x0102D100 The printer door is open. Close the door, and press K N B to reset the printer. - Page 121 Setup Printer (Error Code:0x01040000-0x02000000) Error Code Description Actions (Reference Page No.) 0x01044400 A hardware error has occurred. Turn off and on the power again. If the same problem recurs, turn off the power and consult our authorized dealers. 0x0104AB00 An error has occurred in the mechanical component of the magnetic encoder.
- Page 122 Setup Printer Driver (Error Code:0x02000000-) Error Code Description Actions (Reference Page No.) Printer is not found. Check the printer connection. 0x02RRRRRR 0x0300274D Printer is not found. Check the printer connection. Printing using a USB-connected printer cannot To print via Ethernet (LAN) connection, disconnect the USB cable from be performed via Ethernet (LAN) connection.
-
Page 123: Frequently Asked Questions
Setup Frequently Asked Questions Image at the top right corner is not printed "Printing Settings" (A page 123) In the case of printing using UV ink, the printer always prints the MAC address. If the “Number of retransfer film panels” in the UV ink "UV Ink"... - Page 124 LST1008-002B...
Need help?
Do you have a question about the CX-D80 and is the answer not in the manual?
Questions and answers