Advertisement
Quick Links
Operating Instructions and Parts Manual
Mast-R-Fence and Rout
JessEm Tool Company
61 Forest Plain Road
Oro-Medonte, Ontario, Canada
L3V 0R4
Local: 705-726-8233
Fax: 705-327-0295
Toll Free: 1-866-272-7492 Website:
www.jessem.com Email:
jessem@jessem.com
Instructions and Parts Manual
Fence and Rout-R-Fence
Models: 04010 and 04100
Models:
Fence
Advertisement

Subscribe to Our Youtube Channel
Summary of Contents for JessEm Tool Mast-R-Fence
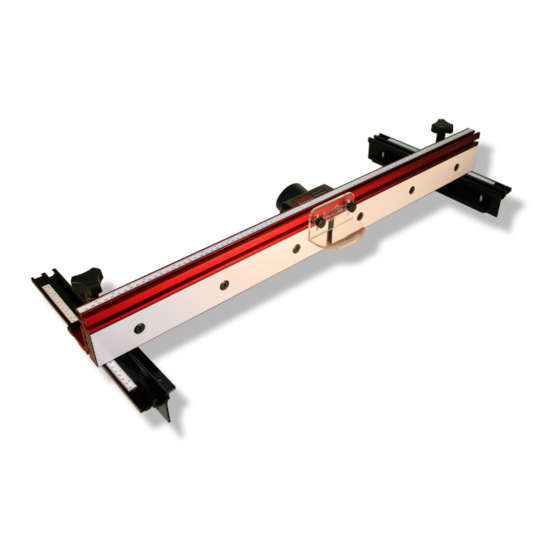
- Page 1 Operating Instructions and Parts Manual Instructions and Parts Manual Mast-R-Fence and Rout Fence and Rout-R-Fence Fence Models: Models: 04010 and 04100 JessEm Tool Company 61 Forest Plain Road Oro-Medonte, Ontario, Canada L3V 0R4 Local: 705-726-8233 Fax: 705-327-0295 Toll Free: 1-866-272-7492 Website: www.jessem.com Email:...
- Page 2 The consumer is responsible for shipping costs to return product to JessEm Tool Company. We will repair or replace the product at our discretion and JessEm Tool will return shipment to you at no charge.
-
Page 3: California Proposition 65 Warning
Important Safety Precautions Before operating any machinery or power tool, read and understand all safety instructions in the owner’s manual for the tool or machine. If you do not have a manual, contact the manufacturer and obtain one before using any tool or machine. - Page 4 Tools Required for Assembly Tools Required for Assembly Phillips screw driver 10 mm wrench or socket 10 mm wrench or socket 3/16” Drill Bit* 1/16” Drill Bit* *Note: This is required if you are not mounting to a Je *Note: This is required if you are not mounting to a JessEm table top.
- Page 5 Figure 3 Figure 5 Mounting the Fence Tracks to the Table Take one of the fence track assemblies and Note: If you are mounting the fence to a line it up with the mark you made in figure 4. JessEm table top proceed to the next Make a mark on the underside of the table page section “For JessEm table”.
- Page 6 For JessEm Table Top Move the fence back and use it to position the If you are mounting the fence to a JessEm rear end of the bracket in the same way and table top the top is already pre- drilled for tighten the rear bolt.
- Page 7 Adjusting the Fence Track Scales Then insert the threaded tip of the extension knob through the slot fence and into the threaded hole in the T- nut (Fig. 9). The scales on the fence tracks are Twisting the lock-down knob clockwise will adjustable for added versatility in fasten the fence to the tracks and hold the positioning the fence.
- Page 8 T-slot on the left fence track (Fig. 12). The nylon spacer should be slightly loose to The Mast-R-Fence offers a unique means allow for some movement. of keeping the fence centered on the table with a nylon bushing. Take the...
- Page 9 Slide the fence back to the center of the Slide the fence back to the center of the table. Re-check to see if the fence is check to see if the fence is centered on the table. If not repeat until centered on the table.
- Page 10 Installing Sub-Fence Offset Track Fence Offset Track Fence Model 04010 and Model 04100 are both Fence Model 04010 and Model 04100 are both equipped with sub-fence offset tracks. These t tracks. These offset tracks are designed to be installed two offset tracks are designed to be installed two allow for a 1/32”...
- Page 11 Attaching the Router Bit Guard Attaching the Router Bit Guard Take the clear polycarbonate guard Take the clear polycarbonate guard and two of the black knurled knobs knobs and two 1/4” square nuts. Insert each . Insert each knob through each slot in the guard slot in the guard and thread a square nut onto each bolt onto each bolt...
- Page 12 04100 Rout-R-Fence Parts List Item No. Part No. Description Part Specification 04100-001 Fence Track Mtg Angle Wood Screw 4.8MX25M 04100-002 Fence Track Mtg Nut 04100-003 Fence Track Mtg Angle 04100-004 Fence Miter Track 04100-005 Fence Track Mtg Washer 6.5MX14.5MX1.2M 04100-006 Fence Track Mtg Bolt M6X16 04100-007...
- Page 14 04010 Mast-R-Fence II Parts List Item No. Part No. Description Specification 04010-001 Scale Mounting Bar and Scale 04010-002 Fence Track 04010-003 Fence Bracket Mtg Track Screw M5X12 04010-004 Track Mounting Angle 04010-005 Flat Washer 6.5X14.5X1.2 04010-006 Fence Track Scale Locking Knob...


Need help?
Do you have a question about the Mast-R-Fence and is the answer not in the manual?
Questions and answers