Advertisement
Available languages
Available languages
Quick Links
EIBENSTOCK
Vakuum Technik
Originalbetriebsanleitung.......................2 - 10
D
GB
Original Instructions..............................11 – 19
F
Notice originale.....................................20 - 28
Oorspronkelijke gebruiksaanwijzing....29 - 37
NL
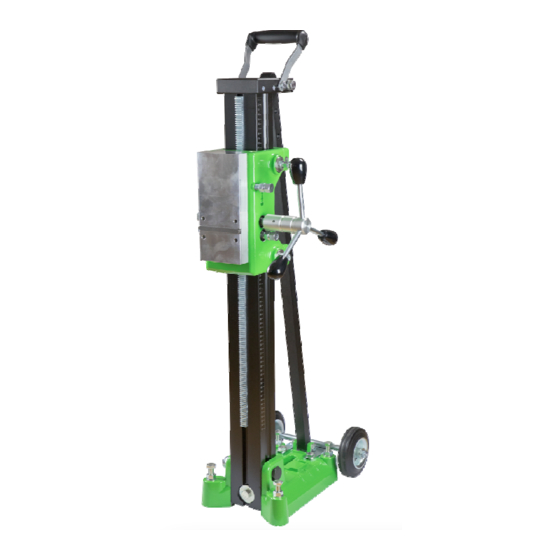
Diamantbohrständer / Diamond Drill Rigs
Support de Carottage Appareil de forage diamant
Diamant Boorinstallatie
PLB 450 G
Advertisement

Related Manuals for EIBENSTOCK PLB 450 G


Summary of Contents for EIBENSTOCK PLB 450 G
- Page 1 EIBENSTOCK Vakuum Technik Originalbetriebsanleitung……....2 - 10 Original Instructions......11 – 19 Notice originale........20 - 28 Oorspronkelijke gebruiksaanwijzing….29 - 37 Diamantbohrständer / Diamond Drill Rigs Support de Carottage Appareil de forage diamant Diamant Boorinstallatie PLB 450 G...
- Page 3 DEUTSCH Wichtige Sicherheitshinweise Warnung vor allgemeiner Gefahr Warnung vor gefährlicher elektrischer Spannung Warnung vor heißer Oberfläche Maschine, Bohrkrone und Bohrständer sind schwer – Vorsicht Quetschgefahr Reiß- bzw. Schneidgefahr Zu Ihrem Schutz sollten Sie folgende Schutzmaßnahmen treffen Gehörschutz benutzen Augenschutz benutzen Schutzhelm benutzen Schutzhandschuhe benutzen Schutzschuhe benutzen...
- Page 4 Diamantbohrständer mit Drehkreuz, Innensechskantschlüssel SW 6 und SW 8, 4 Innensechskantschrauben M 8 x 20 und Bedienungsanleitung im Karton. Bestimmungsgemäßer Gebrauch Der Diamantbohrständer PLB 450 G ist für Bohrmotoren mit Befestigung mittels Montageplatte (z.B.: PLD 450) ausgelegt. Der maximale Bohrdurchmesser darf 450mm nicht überschreiten! Beim Überkopf-Bohren ist generell eine Wasserauffangvorrichtung zu verwenden.
- Page 5 Einsatz Überprüfen Sie nach jeder Neueinstellung den festen Sitz der Schrauben, damit sicher mit dem Bohrständer gearbeitet werden kann. Anbringung des Drehkreuzes ■ Bringen Sie das Drehkreuz (1) in Abhängigkeit von der auszuführenden Arbeit links oder rechts am Schlitten (2) an. ■...
- Page 6 Befestigung durch Schnellspannsäule Um den Bohrständer mittels der Schnellspannsäule verstreben zu können, muss der Abstand zur gegenüberliegenden Wand zwischen 1,7 m und 3 m betragen. Positionieren Sie den Bohrständer. Setzen Sie die Schnellspannsäule in die Aussparung hinter der Säule auf dem Ständerfuß...
- Page 7 Befestigung der Kernbohrmaschine Vorsicht beim Einsetzen der Maschine, Quetschgefahr! Tragen Sie Schutzhandschuhe! Montage der Maschinenplatte Fahren Sie den Maschinenhalter so weit nach oben, bis dieser in der Endlage einrastet. Öffnen Sie mit Hilfe des Drehkreuzes die Feststellschraube (siehe Pfeil) der Montageplatte. Entnehmen Sie die Montageplatte und verbinden Sie sie wie nachfolgend beschrieben mit der Kernbohrmaschine Zum Lieferumfang gehören eine Montageplatte,...
- Page 8 Sie sicher arbeiten können und bei Betriebsstörungen sofort eingegriffen werden kann. Hinweis: Beim Bohrständer PLB 450 G kann das Drehkreuz auf zwei verschiedenen Achsen am Schlitten montiert werden. Die obere Achse (1) wirkt direkt und die untere Achse (2) wirkt mit einer Untersetzung von 1:3 auf den Antrieb des Schlittens, für eine bessere...
- Page 9 Bohren schräg bohren Entfernen Sie die Schraube welche die Bohrsäule bei 90° arretiert. Öffnen Sie mit dem Drehkreuz die obere Schraube der Abstützung und entfernen Sie diese. Bringen Sie die Säule in die gewünschte Position. Stecken Sie die Schraube durch die entsprechende Bohrung in der Abstützung und ziehen Sie diese mithilfe des Drehkreuzes fest Die unterschiedlich einstellbaren Neigungswinkel...
- Page 10 Entriegeln des Schlittens: Um den Schlitten (1) zu entriegeln, ziehen Sie den Sicherungsknopf (2) heraus. Um den Schlitten zu sperren, bewegen Sie ihn, bis die Sperrwelle das Loch in der Säule passiert und in ihrer Lage einrastet. Sperren Sie den Schlitten stets, wenn die Baugruppe nicht verwendet wird.
- Page 11 Schäden, die durch Material- oder Herstellfehler entstanden sind, werden unentgeltlich durch Reparatur oder Ersatzlieferung beseitigt. Beanstandungen können nur anerkannt werden, wenn das Gerät unzerlegt an den Lieferer oder eine Eibenstock-Vertragswerkstatt gesandt wird. Konformitätserklärung Es ist erforderlich, dass die in diesem Bohrständer betriebene Maschine ( z.B.: PLD 450 B) den in den technischen Daten des Bohrständers beschriebenen...
-
Page 12: Important Instructions
ENGLISH Important Instructions Important instructions and warning notices are allegorated on the machine by means of symbols: Warning: general precaution Warning: dangerous voltage Warning: hot surface Tool, drill bit and rig are heavy – Caution: risk of squashing Danger of tearing or cutting During work you should wear goggles, ear protectors, protective gloves, and sturdy work clothes! Wear ear protection... - Page 13 4 Allen screws M 8 x 20 and operating instructions in a cardboard box. Application for Indented Purpose The diamond drill rig PLB 450 G is made for diamond core drills which are fixed by means of a mounting plate (for instance PLD 450).
- Page 14 After each readjustment always check that the screws are tightly fixed so that safe operating of the drill rig is possible. Mounting the turnstile Mount the turnstile (1) on the right or left side of the carriage (2) depending on the work to be performed.
- Page 15 Fastening by means of quick action bracing unit In order to brace the drill rig by means of the quick action bracing unit, the distance to the opposite wall must be between 1.7 m and 3 m. Position the drill rig. Place the quick-release column in the recess behind the column on the stand foot (G).
- Page 16 Fixing the Core Drill Motor Caution! When mounting the machine, risk of squashing. Wear protective gloves! Setting up the mounting plate Move the machine holder upwards until it locks in the top position. Use the turnstile to open the locking device of the mounting plate (see arrow).
- Page 17 Note: On the PLB 450 G drill rig, the turnstile can be mounted on the carriage on two different axes. The upper axis (1) acts directly and the lower axis (2) acts with a 1:3 reduction on...
- Page 18 Drilling Inclined drilling Remove the screw, which locks the column at 90°. Open the top screw of the support with the turnstile. Place the column into the desired position and screw the support at the appropriate hole on back. The different adjustable tilt angles are marked on the column.
- Page 19 Unlocking the carriage: To unlock the carriage (1) pull out the lock knob (2). To lock the carriage move the carriage until the locking shaft passes the hole in the column and jumps into place. Always lock the carriage when the assembly is not in use.
- Page 20 Complaints will be accepted only if the tool is returned in non-dismantled condition to the manufacturer or an authorized Eibenstock service centre. declaration of conformity It is necessary that the machine (f. e. PLD 450 B) used in this drill rig comply with the requirements which are described in the specifications of the drill rig (f.
- Page 21 FRANÇAIS Instruction d’utilisation Attention : Règles de sécurité Attention : Tension dangereuse Attention : Surface chaude L’outil, la couronne et le support sont lourds Attention : Risque d’écrasement Danger de déchirure ou de coupure Pour votre protection quelques mesures de sécurité doivent être prises : Utilisez un protecteur anti-bruit Utilisez des lunettes de protection Utilisez un casque...
- Page 22 Support de carottage avec manette, clé hexagonale SW 6 et SW 8, 4 Allen vis M8 x 20 et instruction d’utilisation dans le carton. Utilisation prescrite Cet appareil de forage diamant PLB 450 G est conçu pour des mèches à couronne annulaire avec diamants avec un porte-outil à changement rapide spécial.
- Page 23 Opérations Vérifiez après chaque utilisation que les vis soient fixées correctement pour une utilisation en toute sécurité. Montage de la manette ■ Montez la manette (1) au chariot (2) du coté gauche ou du coté droit en fonction du travail à exécuter ■...
- Page 24 Fixation du support avec colonne de serrage rapide Pour pouvoir fixer le support avec la colonne de serrage rapide, la distance entre les murs doit être entre 1.7 m à 3 m. Positionnez le support. Positionnez la colonne de serrage rapide le plus près possible de la colonne sur la base.
- Page 25 Fixation de la carotteuse Portez des gants de protection ! Attention ! Lors du montage de la machine, il existe un risque d'écrasement. Mise en place du support de montage Déplacez le support de la machine vers le haut jusqu'à ce qu'il se verrouille en position haute. Utilisez la manette pour ouvrir le dispositif de verrouillage du support de montage.
- Page 26 Maintenez votre endroit de travail sans encombrement (environ 2 m). Indice: Sur la foreuse PLB 450 G, le tourniquet peut être monté sur le chariot sur deux axes différents. L'axe supérieur (1) agit directement et l'axe inférieur (2) agit avec une réduction de...
- Page 27 Forage Perçage oblique: Retirez la vis, qui maintient le pilier à 90°. Desserrez le boulon de montage latéral sur la plaque de base. Dévissez le vis sur le support à l’aide du levier. Faites à présent pivoter la colonne à l’angle souhaité.
- Page 28 Déblocage du plateau: Pour débloquer le plateau (1), tirez sur le bouton de blocage (2). Pour bloquer le plateau, déplacez-le afin que l'arbre de blocage passe devant un orifice dans la colonne et s'enclenche. Bloquez toujours le plateau si l'ensemble n'est pas utilisé.
- Page 29 éliminés gratuitement par la réparation ou une livraison de remplacement. Les réclamations ne peuvent être acceptées que lorsque l’appareil est envoyé non démontée au fournisseur ou au service de Eibenstock. Certificat de Conformité Il est nécessaire que la machine (par ex. : PLD 450) utilisée dans cet appareil de forage respecte les exigences décrites dans les spécifications de l'appareil de...
- Page 30 Nederlands Belangrijke richtlijnen en veiligheidsvoorschriften staan met symbolen op de machine. Opgelet: Veiligheidsregels Opgelet: Gevaarlijk voltage Opgelet: Heet oppervlak Het gereedschap, de kernboor en de steun zijn zwaar Opgelet: Risico op verpletterd worden Gevaar op scheurwonden en snijwonden Draag tijdens uw werk een veiligheidsbril, oorbescherming, beschermende handschoenen en stevige werkkleding! Draag een geluidwerende helm Draag een veiligheidsbril...
- Page 31 SW 6 en SW 8 en gebruiksaanwijzingen in een kartonnen doos. Toepassing voor Bestemd Doeleinde De diamant boorinstallatie PLB 450 G is ontwikkeld voor diamantkern boorkoppen (bijv.PLD 450) met een speciale snelwisseling bevestiging. De max. boordiameter mag niet groter zijn dan 450 mm.
- Page 32 Gebruik Controleer na elke herafstelling altijd of de schroeven stevig zijn aangedraaid om een zo veilig mogelijk gebruik van de boorinstallatie te garanderen. Het draaihendel monteren • Monteer het draaihendel (1) op de rechter –of linkerzijde van het drager (2) aan de hand van het te verrichten werk.
- Page 33 Bevestiging d.m.v. de snelsteuneenheid Om de boorinstallatie vast te kunnen zetten d.m.v. de snelsteuneenheid, moet de afstand tot de tegenoverstaande muur tussen 1,7 m en 3 m zijn. Plaats de boorinstallatie op de gewenste plek. Plaats de snelsteuneenheid zo dicht mogelijk achter de ondersteuning op de basis (G) van de installatie.
- Page 34 De Kernboormotor Bevestigen Draag werkhandschoenen! Opgelet! Uw handen lopen tijdens montage van de machine het risico verpletterd te raken. De montageplaat bevestigen Verplaats de machinehouder omhoog totdat deze vastklikt in de hoogste stand. Gebruik de draaihendel om de vergrendeling van de montageplaat te openen.
- Page 35 Hint: Op het booreiland PLB 450 G kan het tourniquet op de slede op twee verschillende assen worden gemonteerd. De bovenste as (1) werkt direct en de onderste as (2) werkt met een 1:3 reductie...
- Page 36 Boren Hellend boren Verwijder de schroef die de pillaar op 90° vergrendele. De klem op de steun losdraaien met de hendel. De kolom nu draaien totdat de gewenste hoek is bereikt. De schroef weer vastdraaien. De verschillende instelbare inclinatie zijn gemarkeerd op de steun.
- Page 37 Het ontgrendelen van de wagen: Om de wagen (1) te ontgrendelen, trekt u de blokkeerknop (2) naar buiten. Om de wagen te vergrendelen, beweegt u de wagen todat de as van de blokeerinrichting het gat in de kolom passeert en op zijn plaats springt.
- Page 38 Draai de tegenmoer weer vast en controleer of de drager eenvoudig op de kolom beweegt. Garantie Op Eibenstock-gereedschap staat garantie overeenkomstig de nationale, wettelijke bepalingen (de faktuur of leveringsbon geldt als garantiebewijs) Defecten, die aan natuurlijke slijtage, overbelasting of onvakkundige behandeling toe te schrijven zijn, zijn van de garantie uitgesloten.
- Page 39 Notizen / Notes / Notes / Notitie...
- Page 40 Ihr Fachhändler Your distributor Votre marchand spécialisé Uw distributeur Vakuum Technik GmbH Am Steinbächel 3 08309 Eibenstock...
Need help?
Do you have a question about the PLB 450 G and is the answer not in the manual?
Questions and answers