Advertisement
Quick Links
Advertisement

Related Manuals for Axio MET AX-102


Summary of Contents for Axio MET AX-102
- Page 1 AX-102 - User’s Guide...
- Page 2 2. INTRODUCTION Congratulations on your purchase of AX-102 manual range digital multimeter, AX-102 series auto range digital multimeter. This range meters have been designed as a higher stable, higher reliable and anti-fall arrest 3 1/2 compact digital multimeter, with equipped 20mm LCD display for easy reading each digit and with dual integral A/D converter for large scale integrated circuit, as well as over-load protection circuit, to make this range meters as an excellent durable instrument.
- Page 3 This symbol indicates that the operator must refer to an explanation in the operating instruction to avoid personal injury or damage to the meter. Grounding High Voltage Double Insulation Power Switch CAUTIONS: • Improper use of this meter can cause damage, shock, injury or death. Read and understand this user manual before operating the meter.
-
Page 4: Panel Description
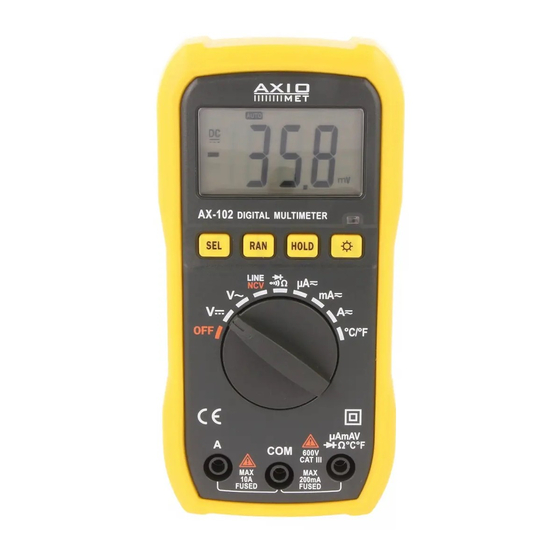
4. PANEL DESCRIPTION 1. LCD display 2. Select Button (shift the measurements of AC, DC current; Temperature, Diode & Continuity check) 3. Range button (Auto/Manual range shift) 4. Rotary switch... -
Page 5: Technical Specifications
5. 10A jacks 6. NCV/LINE LED Indicator 7. Backlit button 8. Data hold button 9. COM jack 10. VΩmA Jack Note: Tilt stand and battery compartment are on rear of unit 5. TECHNICAL SPECIFICATIONS 5.1. General Specifications Max display 2000 count digital multimeter Overload protection, full range protection Data hold function Backlit LCD... - Page 6 200V//100mV// 500V//1V//±(0.8% reading + 5 digits) Overload Protection: 200mV Range at 250V DC or 250V AC RMS Other ranges at 600V DC or 600V AC RMS 5.2.3. AC Voltage Range//Resolution//Accuracy 2V//1mV//±(1.0% reading + 10 digits) 20V//10mV//±(1.0% reading + 10 digits) 200V//0.1V//±(1.0% reading + 10 digits) 500V//1V//±(1.0% reading + 10 digits) 600V//1V//±(1.0% reading + 10 digits)
-
Page 7: Operating Instructions
5.2.6. Resistance Range//Resolution//Accuracy 200Ω//0.1Ω//±(1.0% reading + 2 digits) 2kΩ//0.001kΩ//±(1.0% reading + 2 digits) 20kΩ//0.01kΩ//±(1.0% reading + 2 digits) 200kΩ//0.1kΩ//±(1.0% reading + 2 digits) 2MΩ//0.001MkΩ//±(1.0% reading + 2 digits) 20MΩ//0.01MΩ//±(1.0% reading + 2 digits) Overload protection: 250V DC or 250V AC RMS Maximum open circuit voltage: <3.2V 5.2.7. - Page 8 4) Read the voltage in the LCD display. The polarity of red test lead connection will be indicated when making DC Voltage measurement. NOTE: Unstable display may occur, especially at the low voltage range measurement, even no test leads insert at input terminals, if an erroneous readings suspected, short the V/ΩmA jack and COM jack and make sure the zero displayed at LCD.
- Page 9 4) Touch the test probe tips to the circuit or wire you wish to check, the max. value of resistance under check will be showed in display, if the resistance is less than 70Ω±30Ω, the audible signal will sound. NOTE: In a circuit, a good diode should produce a forward bias reading of voltage, however, the reverse-bias reading can be variable based on resistance of other pathways between the probe tips.
-
Page 10: Maintenance
4) Read the temperature in the LCD display. 5) Push SEL button to shift the unit of ℃ or °F 6.6. NCV (Non-Contact Voltage) Detection WARNING: Due to external interference source, this function may cause wrong voltage detection, the detection result is for reference only. - Page 11 To avoid electric shock, do not operate the meter until the battery and fuse covers are in place and fastened securely. 7.2. Battery Installation To avoid the false readings, replace the battery as soon as the battery indicator appears. 1) Turn power off and disconnect the test leads from the meter. 2) Open the rear battery cover by using screwdriver.
Need help?
Do you have a question about the AX-102 and is the answer not in the manual?
Questions and answers