Fike CyberCat 1016 Operation & Maintenance Manual
Addressable fire alarm control system
Hide thumbs
Also See for CyberCat 1016:
- Installation manual (100 pages) ,
- Programming manual (128 pages)

Related Manuals for Fike CyberCat 1016


Summary of Contents for Fike CyberCat 1016
- Page 1 Operation & Maintenance Manual 10-064, CyberCat 1016 10-066, CyberCat 254 Addressable Fire Alarm Control System P/N 06-326-2, Rev. 6 September 2015...
- Page 2 Authority Having Jurisdiction is mandatory. Fike cannot be held liable for any incidental or consequential damages arising from the loss of property or other damages or losses resulting from the use or misuse of Fike products beyond the cost of repair or replacement of any defective components.
-
Page 3: Table Of Contents
TABLE OF CONTENTS TABLE OF CONTENTS SECTION DESCRIPTION PAGE Introduction ........................1-1 About This Manual ......................1-1 Product Support ....................... 1-1 Safety Information ......................1-1 Related Documentation ....................1-1 Understanding CyberCat ....................1-2 1.5.1 System Controller ......................1-2 1.5.2 Intelligent Addressable Devices ..................1-2 1.5.3 Peripheral Devices ...................... -
Page 4: Section Description Page
TABLE OF CONTENTS SECTION DESCRIPTION PAGE 3.3.13 Fan Restart Operation ....................3-17 3.3.13.1 CRM4 Fan Restart Operation ..................3-17 3.3.13.2 Addressable Relay Fan Restart Operation ..............3-18 3.3.13.2.1 AHU Fire Key ......................... 3-18 Intelligent Detector Features ..................3-19 3.4.1 Alarm Verification ......................3-19 3.4.2 Pre-Alarm ........................ - Page 5 TABLE OF CONTENTS SECTION DESCRIPTION PAGE Diagnostic Menu 4 ......................5-16 5.8.1 Amplifier Status ......................5-17 5.8.2 Peripheral Supervision Data ..................5-18 5.8.3 Voice Zones ........................5-21 5.8.3.1 Voice Zones Status ....................... 5-22 5.8.3.2 Voice Zones Priorities ....................5-22 5.8.4 Peripheral Firmware Version ..................
- Page 6 TABLE OF CONTENTS LIST OF EXHIBITS EXHIBIT DESCRIPTION PAGE Related Documentation ....................1-1 1-2 thru 1-41 Programming Features ..................1-4 thru 1-43 CyberCat Main Display ....................2-1 Status LEDs ........................2-2 Status LED Descriptions ....................2-2 System Normal Display ....................2-5 System Event Display ......................
- Page 7 TABLE OF CONTENTS EXHIBIT DESCRIPTION PAGE 5-10 Keypad Diagnostics Screen .................... 5-8 5-11 VESDA 1 Diagnostics Screen ..................5-8 5-12 VESDA 2 Diagnostics Screen ..................5-9 5-13 Peripheral Diagnostics Screen ..................5-9 5-14 Fire-Phone Diagnostics Screen ..................5-10 5-15 System Sensor Loop Diagnostics Screen ..............5-10 5-16 Auxiliary Switch Cards Diagnostics Screen ..............
- Page 8 TABLE OF CONTENTS REVISION HISTORY Document Title: CyberCat Addressable Fire Alarm System Operation and Maintenance Manual Document Reorder Number: 06-326-2 Revision Section Date Reason for Change Separated manual into separate All Sections 01/2011 Installation, Operation and Programming Manuals Changed CyberCat manual P/N from 06-326-1 to 06-326 and added Section 1.4 and 1.5 06/2011...
-
Page 9: Introduction
Fike has a worldwide distribution network. Each distributor is trained to properly sell, install, and service Fike equipment. Look on the inside of the door, left side, there should be a sticker with an indication of the distributor who sold the system. If you cannot locate the distributor, please call Fike Customer Service for locating your nearest distributor, or go to our web-site at www.fike.com. -
Page 10: Understanding Cybercat
254 devices in any combination. Each device must be assigned a unique address (1-254) for proper supervision by the controller. When shipped from Fike, each device is addressed as Loop 0, Address 0. The device address must be changed (programmed) into the device during system installation using the IR Tool (P/N 55-051) or Hand-Held Programmer (P/N 10-2648). -
Page 11: Emergency Communication System
1.5.4 EMERGENCY COMMUNICATION SYSTEM Fike’s Emergency Communication System (ECS) is a combination system that consists of a variety of components that have been designed to be seamlessly integrated into the CyberCat system in order to provide the following ECS functions: In-Building Fire Emergency Voice/Alarm Communications (EVACS); In- Building Mass Notification (MNS);... -
Page 12: Ul (90.23) Operational Limitations
1.0 INTRODUCTION UL (90.23) OPERATIONAL LIMITATIONS The following tables identify the configurable features that can be changed by using the panel’s programming software C-Linx. The table also identifies features that are available, but are not permitted to be used per the CyberCat system’s UL listing. - Page 13 If synchronization is selected, both NAC circuits will use the same sync protocol. Refer to Fike document 06-186 for compatible sync protocol. Only allows the installer to assign the night time sensitivity to a different obscuration level than during normal working hours. No other functions are affected or disabled.
- Page 14 1.0 INTRODUCTION Exhibit 1-4: Programming Features Cont. Permitted in UL Settings Circuit or 864? Possible Settings permitted Component Program Feature or Option (Y/N) (Defaults shown bold) in UL 864 Notes Relays Relay Selection A / B / C / D No Module Installed / CRM4 / Module CRPM (Opt 1) / CRPM (Opt...
- Page 15 Message 20 character user defined (PERIPHERAL ID 02) Zone Assignment 0 - 254 Supervision Unsupervised / Supervised Voice No Voice / EVAX / Fike STD / EXP Status History Transmit Compact / Verbose Unpacked / Packed History Packing History Message...
- Page 16 Supervision IP Address 000.000.000.000 User Defined Panel IP Supervision 000.000.000.000 1 – 10 History Transmits (Fike recommends 2) Supervision Timeout 1 – 59 (Sec., Min., Hour) 4 min. default IP Time IP Time Disabled Accept IP Time Send IP Time Notes: Defines the location of the panel with respect to others on the network.
- Page 17 Notes: CyberCat 254 has only one (1) addressable loop. CyberCat 1016 can have up to four (4) addressable loops. Can be assigned to 4 discrete zones, 2 zone ranges or 1 range and 2 discrete zones. Pre-Alarm 2 setting must always be set equal or higher than Pre-Alarm 1 setting.
- Page 18 1.0 INTRODUCTION Exhibit 1-8: Programming Features Cont. Permitted in UL Settings Circuit or 864? Possible Settings permitted Component Program Feature or Option (Y/N) (Defaults shown bold) in UL 864 Notes Defaults Remote Annunciator (Photo Annunciator Type None / Remote LED – Detector) Follows Red / Remote LED –...
- Page 19 Remote Annunciator (See Exhibit 1-8 for programming features) Notes: CyberCat 254 has only one (1) addressable loop. CyberCat 1016 can have up to four (4) addressable loops. Can be assigned to 4 discrete zones, 2 zone ranges or 1 range and 2 discrete zones.
- Page 20 Remote Annunciator (See Exhibit 1-8 for programming features) Notes: CyberCat 254 has only one (1) addressable loop. CyberCat 1016 can have up to four (4) addressable loops. Can be assigned to 4 discrete zones, 2 zone ranges or 1 range and 2 discrete zones.
- Page 21 Remote Annunciator (See Exhibit 1-8 for programming features) Notes: CyberCat 254 has only one (1) addressable loop. CyberCat 1016 can have up to four (4) addressable loops. Can be assigned to 4 discrete zones, 2 zone ranges or 1 range and 2 discrete zones.
- Page 22 Remote Annunciator (See Exhibit 1-8 for programming features) Notes: CyberCat 254 has only one (1) addressable loop. CyberCat 1016 can have up to four (4) addressable loops. Can be assigned to 4 discrete zones, 2 zone ranges or 1 range and 2 discrete zones.
- Page 23 MNS Timeout Notes: CyberCat 254 has only one (1) addressable loop. CyberCat 1016 can have up to four (4) addressable loops. Can be assigned to 4 discrete zones, 2 zone ranges or 1 range and 2 discrete zones. If monitor module function type is set to Detection, an alarm verification time can be set.
- Page 24 Alarm Notes: CyberCat 254 has only one (1) addressable loop. CyberCat 1016 can have up to four (4) addressable loops. Can be assigned to 4 discrete zones, 2 zone ranges or 1 range and 2 discrete zones. If monitor module function type is set to Detection, an alarm verification time can be set.
- Page 25 Zone Assignments (activation) Notes: CyberCat 254 has only one (1) addressable loop. CyberCat 1016 can have up to four (4) addressable loops. Can be assigned to 4 discrete zones, 2 zone ranges or 1 range and 2 discrete zones. Modifies control module configuration for use with Pre-Action solenoid.
- Page 26 Zone Assignments (activation) Notes: CyberCat 254 has only one (1) addressable loop. CyberCat 1016 can have up to four (4) addressable loops. Timeout delay becomes active if relay state is set to ‘Time Delay’. Can be assigned to any 3 zones, 254 any zone, or 255 any zone (non-disable).
- Page 27 (1%ft – 3.98818%ft) Notes: CyberCat 254 has only one (1) addressable loop. CyberCat 1016 can have up to four (4) addressable loops. Can be assigned to 4 discrete zones, 2 zone ranges or 1 range and 2 discrete zones. Each detection level on the FAAST detector can be mapped to a panel state (user defined).
- Page 28 1.0 INTRODUCTION Exhibit 1-18: Programming Features Cont. Permitted in UL Settings Circuit or 864? Possible Settings permitted Component Program Feature or Option (Y/N) (Defaults shown bold) in UL 864 Notes Defaults Day Sensitivity Levels (FAAST Fire 1 Range 1-H Detector) (0.00046%ft –...
- Page 29 Detection Off Notes: CyberCat 254 has only one (1) addressable loop. CyberCat 1016 can have up to four (4) addressable loops. Can be assigned to 4 discrete zones, 2 zone ranges or 1 range and 2 discrete zones. Either = PA1, PA2, Supervisory, Trouble, Process, PAS Inhibit; Non-Latch = Reset, Silence, Acknowledge, Zone Disable, Fan Restart;...
- Page 30 (8 available) Notes: CyberCat 254 has only one (1) addressable loop. CyberCat 1016 can have up to four (4) addressable loops. Can be assigned to 4 discrete zones, 2 zone ranges or 1 range and 2 discrete zones. 1-22...
- Page 31 Peripheral Device Configuration Options Remote Address 2 - 32 Display 14 Custom Message 20 character user defined (Fike Remote Display) Corporate Logo 20 character user defined (Fike Corporation) Buzzer Operation Enabled / Disabled Show All History / Filter Network History Display...
- Page 32 1.0 INTRODUCTION Exhibit 1-22: Programming Features Cont. Permitted in UL Settings Circuit or 864? Possible Settings permitted Component Program Feature or Option (Y/N) (Defaults shown bold) in UL 864 Notes Graphic Address 2 - 32 Annunciator LED Number 3 - 256 (256 LED) LED Function No Function Assigned /...
- Page 33 1.0 INTRODUCTION Exhibit 1-23: Programming Features Cont. Permitted in UL Settings Circuit or 864? Possible Settings permitted Component Program Feature or Option (Y/N) (Defaults shown bold) in UL 864 Notes Zone Address 2 - 32 Annunciator LED Number 1 - 20 (20 LED) LED Function No Function Assigned /...
- Page 34 1.0 INTRODUCTION Exhibit 1-24: Programming Features Cont. Permitted in UL Settings Circuit or 864? Possible Settings permitted Component Program Feature or Option (Y/N) (Defaults shown bold) in UL 864 Notes Address 2 - 32 Annunciator LED Function (1-40) No Function Assigned / On 20-Zone –...
- Page 35 1.0 INTRODUCTION Exhibit 1-25: Programming Features Cont. Permitted in UL Settings Circuit or 864? Possible Settings permitted Component Program Feature or Option (Y/N) (Defaults shown bold) in UL 864 Notes Assignment by Device Annunciator Select Devices 1 - 254 20-Zone Select / Clear Selection Options All Addresses / Even...
- Page 36 1.0 INTRODUCTION Exhibit 1-26: Programming Features Cont. Permitted in UL Settings Circuit or 864? Possible Settings permitted Component Program Feature or Option (Y/N) (Defaults shown bold) in UL 864 Notes Assignment by LED Annunciator Select LED Assignments 1 - 40 20-Zone Relay Peripheral Address...
- Page 37 1.0 INTRODUCTION Exhibit 1-27: Programming Features Cont. Permitted in UL Settings Circuit or 864? Possible Settings permitted Component Program Feature or Option (Y/N) (Defaults shown bold) in UL 864 Notes Relay Assignment by Zone Controller Select Zones 1 – 254 Selection Options Select / Clear All Zones / Even Zones / Odd...
- Page 38 1.0 INTRODUCTION Exhibit 1-28: Programming Features Cont. Permitted in UL Settings Circuit or 864? Possible Settings permitted Component Program Feature or Option (Y/N) (Defaults shown bold) in UL 864 Notes Smoke Smoke Group Configuration Control Card Group 1 - 6 6-Zone Switch Group Configuration On / Off / Auto...
- Page 39 1.0 INTRODUCTION Exhibit 1-29: Programming Features Cont. Permitted in UL Settings Circuit or 864? Possible Settings permitted Component Program Feature or Option (Y/N) (Defaults shown bold) in UL 864 Notes Smoke Smoke Group Configuration - Continued Control Card LED Function No Function Assigned / On 6-Zone –...
- Page 40 1.0 INTRODUCTION Exhibit 1-30: Programming Features Cont. Permitted in UL Settings Circuit or 864? Possible Settings permitted Component Program Feature or Option (Y/N) (Defaults shown bold) in UL 864 Notes Smoke Smoke Group Configuration Control Group 1 - 6 Graphic Card Switch Group Configuration On / Off / Auto 6-Zone...
- Page 41 1.0 INTRODUCTION Exhibit 1-31: Programming Features Cont. Permitted in UL Settings Circuit or 864? Possible Settings permitted Component Program Feature or Option (Y/N) (Defaults shown bold) in UL 864 Notes Smoke Smoke Group Configuration - Continued Control LED Function No Function Assigned / On Graphic Card –...
- Page 42 1.0 INTRODUCTION Exhibit 1-32: Programming Features Cont. Permitted in UL Settings Circuit or 864? Possible Settings permitted Component Program Feature or Option (Y/N) (Defaults shown bold) in UL 864 Notes Smoke Miscellaneous Control Peripheral Address 2 – 32 Graphic Card Enabled / Disabled Local Buzzer 6-Zone...
- Page 43 1.0 INTRODUCTION Exhibit 1-33: Programming Features Cont. Permitted in UL Settings Circuit or 864? Possible Settings permitted Component Program Feature or Option (Y/N) (Defaults shown bold) in UL 864 Notes Voice EVAC Common Amplifier Single Channel / Dual Application Type Channel / Page Only Miscellaneous Peripheral Address...
- Page 44 1.0 INTRODUCTION Exhibit 1-34: Programming Features Cont. Permitted in UL Settings Circuit or 864? Possible Settings permitted Component Program Feature or Option (Y/N) (Defaults shown bold) in UL 864 Notes Voice EVAC Message Assignments – Single Channel Amplifier State Drill / Evac / Alert / Alarm / Test Alarm / Supervisory / Process Message 1...
- Page 45 1.0 INTRODUCTION Exhibit 1-35: Programming Features Cont. Permitted in UL Settings Circuit or 864? Possible Settings permitted Component Program Feature or Option (Y/N) (Defaults shown bold) in UL 864 Notes Digital Paging DPM Settings Module Peripheral Address 2 - 32 Restart Audio on New Enabled / Disabled Activation (for sync)
- Page 46 1.0 INTRODUCTION Exhibit 1-36: Programming Features Cont. Permitted in UL Settings Circuit or 864? Possible Settings permitted Component Program Feature or Option (Y/N) (Defaults shown bold) in UL 864 Notes Remote Peripheral Address 2 - 32 Microphone Enabled / Disabled Restart Audio on New Activation (for sync) Restart Audio Time Delay...
- Page 47 1.0 INTRODUCTION Exhibit 1-37: Programming Features Cont. Permitted in UL Settings Circuit or 864? Possible Settings permitted Component Program Feature or Option (Y/N) (Defaults shown bold) in UL 864 Notes Switch Card Peripheral Address 2 - 32 20-Zone Switch Configuration (1 – 20) Function No Function Assigned / Panel Reset / Panel Silence /...
- Page 48 1.0 INTRODUCTION Exhibit 1-38: Programming Features Cont. Permitted in UL Settings Circuit or 864? Possible Settings permitted Component Program Feature or Option (Y/N) (Defaults shown bold) in UL 864 Notes Switch Card Relay Action Settings (Selection table active for Smoke Control only) 20-Zone Relay Action None / On / Auto / Off...
- Page 49 1.0 INTRODUCTION Exhibit 1-39: Programming Features Cont. Permitted in UL Settings Circuit or 864? Possible Settings permitted Component Program Feature or Option (Y/N) (Defaults shown bold) in UL 864 Notes Switch Card LED Configuration (1 – 40) 20-Zone LED Function No Function Assigned / On –...
- Page 50 1.0 INTRODUCTION Exhibit 1-40: Programming Features Cont. Permitted in UL Settings Circuit or 864? Possible Settings permitted Component Program Feature or Option (Y/N) (Defaults shown bold) in UL 864 Notes Switch Card Assignment by Device 20-Zone Select Devices 1 – 254 Select / Clear Selection Options All Addresses / Even...
- Page 51 1.0 INTRODUCTION Exhibit 1-41: Programming Features Cont. Permitted in UL Settings Circuit or 864? Possible Settings permitted Component Program Feature or Option (Y/N) (Defaults shown bold) in UL 864 Notes Air Sampling Detectors Configuration Options VESDA VESDA Zone Number 1 – 254 Compact, Alarm / Supervisory / State...
- Page 52 1.0 INTRODUCTION Reserved for future use. 1-44 CyberCat 254/1016 Operation Manual UL S2203 Rev 6, 09/2015 P/N: 06-326-2...
-
Page 53: User Interface
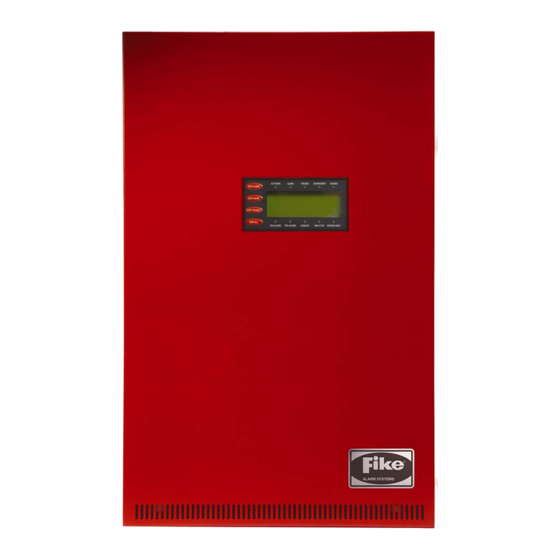
2.0 USER INTERFACE CYBERCAT MAIN DISPLAY The CyberCat system’s main display and control board, as shown in Exhibit 2-1, consists of a 4 x 20 LCD screen, general system status LEDs, and several push-buttons that allow you to navigate through the system menus and issue specific command and control functions. -
Page 54: System Status Leds
2.0 USER INTERFACE 2.1.1 SYSTEM STATUS LEDs Exhibit 2-2: Status LEDs Exhibit 2-3: Status LED Descriptions Indicator Color When Active To Turn Off AC Power Green Illuminates steady when proper primary AC Turns off when AC power is removed or is power is applied. -
Page 55: History Navigation Buttons
2.0 USER INTERFACE 2.1.2 HISTORY NAVIGATION BUTTONS When an event occurs, the system categorizes the event as an Alarm, Supervisory, or Trouble event and adds it to a corresponding history buffer. The information stored in each history buffer and can be displayed using the history step buttons shown below. -
Page 56: Navigation And Function Buttons
2.0 USER INTERFACE 2.1.4 NAVIGATION AND FUNCTION BUTTONS The navigation buttons on the main display are provided to allow you to easily navigate and change the systems operational parameters. A brief functional description of each button is provided below: NAVIGATION (+, ►, -, ◄) The ◄►... -
Page 57: Lcd Display
2.0 USER INTERFACE 2.1.5 LCD DISPLAY There are three main display screens for the CyberCat system: System Normal (no events present), System Event (if events are present) and Top Level Menu. A brief description of each display is provided as follows. 2.1.5.1 SYSTEM NORMAL DISPLAY The System Normal display, as shown in Exhibit 2-4, provides an example of the information presented on the main display when the panel is in normal operating condition. -
Page 58: System Event Display
2.0 USER INTERFACE 2.1.5.2 SYSTEM EVENT DISPLAY The System Event display, as shown in Exhibit 2-5, provides an example of the information presented on the main display when an event occurs. 1 2 3 4 5 6 7 8 9 0 1 2 3 4 5 6 7 8 9 0 A A L A R M : D E V I C E T Y P E... -
Page 59: Top Level Menu
2.0 USER INTERFACE 2.1.5.3 TOP LEVEL MENU The CyberCat is equipped with an extensive menu system that allows you to configure the systems operating parameters, view history events, perform system diagnostics, and view system operating parameters for maintenance purposes. From the System Normal Display, press the ESCAPE function button to view the Top Level Menu, as shown in Exhibit 2-8. -
Page 60: Password Protection
2.0 USER INTERFACE PASSWORD PROTECTION Access to the CyberCat system’s control and function buttons are restricted by the enclosure door. With the door closed and locked, responding personnel can only view system events on the panel display and use the accessible EVENT STEP buttons (if not covered by optional Lexan™) to filter through the systems event history. -
Page 61: Logging Onto The System
ENTER button to confirm the change. Note: If the Administrator password is changed and then forgotten, you must contact Fike and provide the 4-digit CODE displayed on Row D of the password entry screen along with a completed password indemnification form. - Page 62 2.0 USER INTERFACE Reserved for future use. 2-10 CyberCat 254/1016 Operation Manual UL S2203 Rev 6, 09/2015 P/N: 06-326-2...
-
Page 63: System Operation
3.0 SYSTEM OPERATION GENERAL OPERATION The CyberCat system operation is based upon a Zone and State Relationship. Each device, input or output must be assigned to at least one Zone and State. A Zone is defined as a specific area of protection or hazard to protect. -
Page 64: Silence Reminder
3.1.6.1 IP NETWORK Fike’s Ethernet module (P/N 10-2627) provides a means to connect up to 128 Cheetah Xi and CyberCat control panels (including 50 points) to an existing IP network for centralized monitoring. As events occur on a panel that is connected to an Ethernet network, it will transmit its history messages over the facilities Local Area Network (LAN) or Wide Area Network (WAN) to the supervising (monitoring) panel where the event will be indicated on the panel display. -
Page 65: Positive Alarm Sequence
3.0 SYSTEM OPERATION 3.1.7 POSITIVE ALARM SEQUENCE This feature is enabled or disabled for all outputs connected to the panel. When enabled, an Alarm signal from an automatic fire detection device shall be Acknowledged at the main panel display, remote keypad or input module within 15 seconds after annunciation of the Alarm event in order to initiate the alarm investigation phase. -
Page 66: Voice System Priorities
Voice or MNS operation (as stated above). In order to resolve which panel event or input switch should have operational control priority over another, Fike’s voice system allows you to assign a control priority level to the panel events and switches that initiate voice operations. -
Page 67: Panel Menu Structure
3.0 SYSTEM OPERATION PANEL MENU STRUCTURE The CyberCat control panel is equipped with an extensive menu structure. Refer to Appendix A for a complete breakdown of the system menu structure. Access to certain panel menus and functions (Configuration Menus) are password protected and require the operator to log onto the system in order to view them or gain access to make changes. -
Page 68: Normal State
3.0 SYSTEM OPERATION 1 2 3 4 5 6 7 8 9 0 1 2 3 4 5 6 7 8 9 0 P O W E R - U P R E S E T B C U S T O M M S G P A N E L 0 0 1... -
Page 69: Alarm/Waterflow State
3.0 SYSTEM OPERATION 3.3.3 ALARM / WATERFLOW STATE When and initiating device (detector, manual pull and input configured for detection or waterflow) activates, the control panel does the following: 1. ALARM LED flashes. 2. Panel sounder pulses. 3. LED on active device will turn on (RED) to indicate its activated status. It will light its remote LED as programmed, if connected. -
Page 70: Alarm Verification
3.0 SYSTEM OPERATION 3.3.4 ALARM VERIFICATION Refer to Section 3.4.1 for a complete description of the Alarm Verification feature. When a detector or input module configured for alarm verification activates, the control panel initiates an alarm verification time delay (0-60 seconds for detectors and 2 seconds for waterflow input) and does the following: 1. -
Page 71: Summing Alarm State
3.0 SYSTEM OPERATION 3.3.5 SUMMING ALARM STATE (NON-LISTED) Refer to Section 3.4.7 for a complete description of the Summing Alarm state. Summing is a method for up to eight “like type” smoke detectors (e.g., photoelectric, ionization, photo/heat & photo duct) to be grouped together to generate a fast alarm response to dispersed smoke. When a detector is active with a summing alarm, the control panel does the following: 1. -
Page 72: Trouble State
The panel TROUBLE LED will change from flashing to steady. The control panel will send a silence message to remote displays, history buffer, printers, PC monitoring stations, and DACT. 5. Investigate the cause of the Trouble event. Contact Fike for a complete listing of system event messages and suggested corrective actions. -
Page 73: Supervisory State
PC monitoring stations, and DACT. 5. Investigate the cause of the Supervisory event. Contact Fike for a complete listing of system event messages and suggested corrective actions. 6. Correct the condition causing the Supervisory event; the panel will require reset to restore the system to Normal (non-latching events). -
Page 74: Pre-Alarm State
3. Press the F2 button to toggle Rows C and D on display to show the extra 40 characters of the devices custom message. 4. Investigate the cause of the Pre-Alarm event. Contact Fike for a complete listing of system event messages and suggested corrective actions. -
Page 75: Process State
3.0 SYSTEM OPERATION 3.3.9 PROCESS STATE The Process State may be activated by any input configured for Process. These inputs are typically connected to non-alarm system contacts used for process management functions. When a Process event occurs the control panel does the following: 1. -
Page 76: Zone Disable State
3.0 SYSTEM OPERATION 3.3.10 ZONE DISABLE STATE The Zone Disable State may be activated by any input configured for Zone Disable. When a Zone is disabled, outputs in the disabled zone will not operateunless activated from a different zone that is not disabled. -
Page 77: Drill State
3.0 SYSTEM OPERATION 3.3.11 DRILL STATE Fire Alarm Drill inputs are frequently needed to perform a practice fire alarm drill/building evacuation test or for the Fire Department to evacuate a building. The Drill State can be activated from the main panel Drill button, an addressable input Monitor Module configured for Drill, or the Remote Display. -
Page 78: Walk-Test Operation
Walk-test operation can be initiated by the CyberCat controller or directly at each input device using Fike’s IR tool (P/N 55-051). When executed from the CyberCat panel, walk-test functions as a toggle mode, it is either ON or OFF. All SLC loop devices are taken off-line and will NOT initiate normal system events. -
Page 79: Fan Restart Operation
3.0 SYSTEM OPERATION 3.3.13 FAN RESTART OPERATION Fan Restart operation provides a means to sequence the restart of AHU fan motors after they have been shut down in response to a fire alarm event. Fan restart operation can be accomplished using the panel mounted CRM4 relay cards (P/N 10-2204) and/or addressable relay modules connected to the panel’s SLC loop programmed for ‘AHU Shutdown Relay’... -
Page 80: Addressable Relay Fan Restart Operation
3.0 SYSTEM OPERATION Manual Restart Upon activation of an ALARM event, the CRM4 relays will activate and remain active even after the control panel is reset. After reset, the fan restart sequence must be initiated manually using any of the following sources: 1) press the control panel’s “ENTER”... -
Page 81: Intelligent Detector Features
3.0 SYSTEM OPERATION INTELLIGENT DETECTOR FEATURES The CyberCat’s intelligent detectors offer a wide range of configurable features that can be used to provide optimum system performance. A brief description of each feature is provided in this Section for reference purposes. The following table shows the available features for each detector: Detector Photoelectric Photo/Heat... -
Page 82: Acclimate
3.0 SYSTEM OPERATION 3.4.3 ACCLIMATE The Acclimate feature allows the detector to observe its operating environment over a one-hour period. The detector then adjusts its alarm level between the user programmable Alarm Levels. This feature is enabled by default on all photo and ion detectors. It is internal to these devices and allows them to become accustomed to their operating environment. -
Page 83: Summing
Detector configuration can be changed using the panel’s programming software C-Linx to allow walk-testing using Fike’s IR tool. The IR tool or optional Remote Test Station must be used for duct detector walk-testing. Detectors may only be activated once during the walk- test mode. - Page 84 3.0 SYSTEM OPERATION Reserved for future use. 3-22 CyberCat 254/1016 Operation Manual UL S2203 Rev 6, 09/2015 P/N: 06-326-2...
-
Page 85: System History
The history buffer is battery backed by a lithium coin cell battery. If power is removed from the system, the history buffer will be saved. Refer to Fike document 06-639, “Event/History Messages” for a complete listing of system event messages and suggested corrective actions. -
Page 86: Top Level Menu
4.0 SYSTEM HISTORY History can also be viewed by accessing the History Menu. Press the ESCAPE button until the Top Level menu is displayed as shown below: 1 2 3 4 5 6 7 8 9 0 1 2 3 4 5 6 7 8 9 0 T O P L E V E L M E N U... -
Page 87: Alarm History
4.0 SYSTEM HISTORY 4.2.1 ALARM HISTORY The ALARM History screen allows you to view the current alarm events (1,600 total) present on the system since the last Reset of the panel. From the History Menu, press the F1 button to display the Alarm History screen: 1 2 3 4 5 6 7 8 9 0 1 2 3 4 5 6 7 8 9 0 A A L A R M :... -
Page 88: Trouble History
4.0 SYSTEM HISTORY 4.2.3 TROUBLE HISTORY The TROUBLE History screen allows you to view the current trouble events present on the system since the last Reset of the panel. From the History Menu, press the F3 button to display the Trouble History screen: 1 2 3 4 5 6 7 8 9 0 1 2 3 4 5 6 7 8 9 0 G E N E R A L T R O U B L E... -
Page 89: Zone History
4.0 SYSTEM HISTORY 4.2.5 ZONE HISTORY The ZONE History screen allows you to view the current system events (i.e., Alarm, Trouble, Supervisory, Alert, Evacuate and Page) present on the system by zone, since the last reset of the panel. From the History Menu, press the F5 button to display the Zone History screen: 1 2 3 4 5 6 7 8 9 0 1 2 3 4 5 6 7 8 9 0 A T R O U B L E... -
Page 90: Viewing Additional Event Information
4.0 SYSTEM HISTORY 4.2.7 VIEWING ADDITIONAL EVENT INFORMATION You can display additional event information from any of the History screens by pressing either the F1 or F2 button while viewing an event. The availability of additional information is tied to the type of system event being viewed. -
Page 91: System Diagnostics
If the installer is properly grounded at all times, damage due to static discharge will not occur. If the module requires repair or return to Fike, it must be shipped in an anti-static bag. 5. Reapply power to the system by reconnecting AC power then connecting system batteries. -
Page 92: Diagnostic Menu 1
5.0 SYSTEM DIAGNOSTICS DIAGNOSTIC MENU 1 The CyberCat has 5 diagnostic menus available as tools for troubleshooting the system. From the Top Level Menu screen, press the F3 button to display the Diagnostic Menu 1: 1 2 3 4 5 6 7 8 9 0 1 2 3 4 5 6 7 8 9 0 D I A G N O S T I C M E N U B F 1 - D E V I C E... -
Page 93: Device Type, Location And Led Diagnostics
5.0 SYSTEM DIAGNOSTICS 5.4.1.1 DEVICE TYPE, LOCATION AND LED DIAGNOSTICS The Device Type Diagnostic screen allows you to compare the type of addressable device held in the panel’s configuration at a specific address to the type of device present/found on the signaling line circuit (SLC). From the Device Diagnostic Menu, press the F1 button to display the Device Loc &... -
Page 94: Device Serial Number Diagnostic
5.0 SYSTEM DIAGNOSTICS 5.4.1.2 DEVICE SERIAL NUMBER DIAGNOSTIC The Device Serial Number Diagnostic screen allows you to compare the serial number stored in the panel for the specific address to the serial number of the actual device present/found on the signaling line circuit (SLC). From the Device Diagnostic Menu, press the F2 button to display the Device Serial Number Diagnostic screen: 1 2 3 4 5 6 7 8 9 0 1 2 3 4 5 6 7 8 9 0... -
Page 95: Value 1 Diagnostic
Row B (A2) = Voltage Regulator on main for AC power: 120VAC = 200-255, 240VAC = 206-255 • Row B (L2) = Loop 2 short circuit detect: Normal = 10-255 [CyberCat 1016 ONLY] • Row C (B1) = Battery circuit on Main controller: Normal = 31-255 •... -
Page 96: Value 2 Diagnostic
• Row B (C2-) = Loop 2 – supervision trouble >100 • Row B (L4) = Loop 4 short circuit detect: Normal = 10-255 [CyberCat 1016 ONLY] • Row C (C3+) = Loop 3 ++ supervision trouble < 100 •... -
Page 97: Led Test
5.0 SYSTEM DIAGNOSTICS 5.4.4 LED TEST From the Diagnostic Menu 1, press the F4 button to briefly illuminate all LEDs on the CyberCat display for approximately 10 seconds. The message “SENDING LED TEST” appears briefly to indicate the command has been sent. In addition, an LED test command is sent to all devices connected to the panel’s peripheral bus causing them to briefly illuminate all device LEDs. -
Page 98: Keypad Diagnostics
5.0 SYSTEM DIAGNOSTICS 5.5.1 KEYPAD DIAGNOSTICS The Keypad Diagnostics screen allows you to test the operation of the keypad, including LEDs. From Diagnostic Menu 2 screen, press the F1 button to view the Keypad Diagnostic screen: 1 2 3 4 5 6 7 8 9 0 1 2 3 4 5 6 7 8 9 0 K E Y P A D D I A G N O S T I C K E Y... -
Page 99: Vesda 2 Diagnostics
5.0 SYSTEM DIAGNOSTICS 5.5.3 VESDA 2 DIAGNOSTICS The VESDA 2 Diagnostics screen allows you to view the current fault list for the selected VESDA unit. From Diagnostic Menu 2 screen, press the F3 button to view the VESDA 2 Diagnostic screen: 1 2 3 4 5 6 7 8 9 0 1 2 3 4 5 6 7 8 9 0 A V E S D A Z O N E... -
Page 100: Fire-Phone Diagnostics
5.0 SYSTEM DIAGNOSTICS 5.5.4.1 FIRE-PHONE DIAGNOSTICS If the peripheral type is set to “Fire-Phone Int”, additional diagnostic screens become available that allows you to view the status of the System Sensor Loop (Series 500), as well as the supplemental fire-phone cards (4 total). -
Page 101: Vesdanet Communications
5.0 SYSTEM DIAGNOSTICS With the address selected, press the F2 button to display the Auxiliary Switch Cards diagnostics screen: 1 2 3 4 5 6 7 8 9 0 1 2 3 4 5 6 7 8 9 0 A F I R E - P H O N E I N T E R F A U X I L I A R Y C A R D S... -
Page 102: Diagnostic Menu 3
5.0 SYSTEM DIAGNOSTICS DIAGNOSTIC MENU 3 From the Diagnostic Menu 2 screen, press the F6 button to view the Diagnostic Menu 3 screen: 1 2 3 4 5 6 7 8 9 0 1 2 3 4 5 6 7 8 9 0 D I A G N O S T I C M E N U B F 1 - N E T W... -
Page 103: Diagnostic Menu 3
5.0 SYSTEM DIAGNOSTICS 5.6.2 NETWORK DIAGNOSTICS 2 The Network Diagnostics 2 screen allows you to view the status of communication between the CyberCat controller and installed network module, as well as network wiring troubles between panels. From the Diagnostic Menu 3 screen, press the F2 button to view the Network Diagnostic 2 screen: 1 2 3 4 5 6 7 8 9 0 1 2 3 4 5 6 7 8 9 0 A N O R E S P O N S E :... -
Page 104: Network Reset
5.0 SYSTEM DIAGNOSTICS 5.6.3 NETWORK DIAGNOSTICS 3 The Network Diagnostics 3 screen allows you to set the communication interval between the panel and the network module. From the Diagnostic Menu 3 screen, press the F3 button to view the Network Diagnostic 3 screen: 1 2 3 4 5 6 7 8 9 0 1 2 3 4 5 6 7 8 9 0 A N E T... -
Page 105: History Diagnostics
Row D – Allows selection of the history transmission variables when ENTER is pressed for a specific event. Consult with Fike Product Support for further details. Use the ◄► arrow buttons to position the cursor over the field; then press the +/– buttons to change the value at cursor. -
Page 106: Board Communication Diagnostics
The Board Communication Diagnostic screen allows you to view the status of the CyberCat’s microprocessor. This information is used can be used by Fike to diagnose potential problems with the control board itself. From the Diagnostic Menu 3, press the F5 button to view the Board Communication Diagnostic screen:... -
Page 107: Amplifier Status
5.0 SYSTEM DIAGNOSTICS 5.7.1 AMPLIFIER STATUS The Amplifier Status screen allows you to view the status of the communication between the CyberCat controller and all amplifiers being monitored by this panel. From the Diagnostic Menu 4 screen, press the F1 button to view the Amplifier Status screen: 1 2 3 4 5 6 7 8 9 0 1 2 3 4 5 6 7 8 9 0 A A M P L I F I E R... -
Page 108: Peripheral Supervision Data
5.0 SYSTEM DIAGNOSTICS 5.7.2 PERIPHERAL SUPERVISION DATA The Peripheral Supervision Data screen allows you to view the analog-to-digital conversion values for the peripheral device selected on Row A. From the Diagnostic Menu 4 screen, press the F2 button to view the Peripheral Supervision Data screen: 1 2 3 4 5 6 7 8 9 0 1 2 3 4 5 6 7 8 9 0 A A M P... - Page 109 5.0 SYSTEM DIAGNOSTICS Speaker circuit and audio source information (C###): Active Audio Active Audio Active Audio Active Audio Speaker Source Speaker Source Speaker Source Speaker Source Value Circuits Selected Value Circuits Selected Value Circuits Selected Value Circuits Selected None External External External External...
- Page 110 5.0 SYSTEM DIAGNOSTICS 2. Digital Paging Card Values A### - A-D value (0 – 255) for contact monitor supervision (Short range = 180 – 255, Open range = 0 – 50, Normal range = 51 – 179) B### - A-D value (0 – 255) for local/master fire-phone trouble supervision when not used for paging or party line (Short range = 155 –...
-
Page 111: Voice Zones
5.0 SYSTEM DIAGNOSTICS 5.7.3 VOICE ZONES The Voice Zones screen allows you to view the status of system zones with respect to voice conditions. From the Diagnostic Menu 4 screen, press the F3 button to view the Voice Zones screen: 1 2 3 4 5 6 7 8 9 0 1 2 3 4 5 6 7 8 9 0 A Z O N E R A N G E :... -
Page 112: Voice Zones Status
5.0 SYSTEM DIAGNOSTICS 5.7.3.1 VOICE ZONES STATUS The Voice Zones Status screen allows you to view the enabled/disabled status of individual voice zones. From the Voice Zones screen, press the F1 button to view the Voice Zones Status screen: 1 2 3 4 5 6 7 8 9 0 1 2 3 4 5 6 7 8 9 0 A A L E R T : Z O N E : 0 0 1 B E V A C :... -
Page 113: Peripheral Firmware Version
5.0 SYSTEM DIAGNOSTICS • Row D – Displays a description of the status numbers indicated in Row C. The numbers align with the following voice status conditions: 0 = Panel automatic conditions are active (see below). “AUTO-NONE” (no automatic voice condition is active) “AUTO-PROC”... -
Page 114: Diagnostic Menu 5
5.0 SYSTEM DIAGNOSTICS DIAGNOSTIC MENU 5 From the Diagnostic Menu 4 screen, press the F6 button to view the Diagnostic Menu 5 screen: 1 2 3 4 5 6 7 8 9 0 1 2 3 4 5 6 7 8 9 0 D I A G N O S T I C M E N U B F 1 - P A G E... -
Page 115: Audio Priority Status
5.0 SYSTEM DIAGNOSTICS 5.8.2 AUDIO PRIORITY STATUS The Audio Priority Status screen allows you to view which paging microphone has the “master” status in the voice system and the priority status of the active voice switch. There are no selectable items on this screen. From the Diagnostic Menu 5 screen, press the F2 button to view the Audio Priority Status screen: 1 2 3 4 5 6 7 8 9 0 1 2 3 4 5 6 7 8 9 0 A A U D... -
Page 116: Play Message Id Status
5.0 SYSTEM DIAGNOSTICS 5.8.3 PLAY MESSAGE ID STATUS The Play Message ID Status screen allows you to view the voice message numbers being transmitted by the panel to the amplifiers. From the Diagnostic Menu 5 screen, press the F3 button to view the Play Message ID Status screen: 1 2 3 4 5 6 7 8 9 0 1 2 3 4 5 6 7 8 9 0 A C T I V E... -
Page 117: Faast Detector Status
5.0 SYSTEM DIAGNOSTICS 5.8.4 FAAST DETECTOR STATUS The FAAST Detector Status screen allows you to view the current status levels transmitted by the detector to the panel. From the Diagnostic Menu 5 screen, press the F4 button to view the FAAST Detector Selection screen: 1 2 3 4 5 6 7 8 9 0 1 2 3 4 5 6 7 8 9 0 A 1 - 0 0 1 : F A A S T... -
Page 118: Voltages
5.0 SYSTEM DIAGNOSTICS VOLTAGES The main control board has two primary test points that are used when making voltage measurements on the board: TP1 = COM This test point should be used when making DC voltage measurements on the control board. Connect the voltmeter ground lead to this terminal;... -
Page 119: System Maintenance
Batteries (Lead Acid) - Replace every 3 years according to date of manufacture Battery (Lithium Coin cell) - Replace every 5 years with Fike battery P/N 02-4040 only. Use of another battery may present a risk of fire or explosion. -
Page 120: Fuse Replacement
6.0 SYSTEM MAINTENANCE 6.3 FUSE REPLACEMENT The CyberCat controller has five replaceable fuses (standard automotive) as shown in Exhibit 6-1. These fuses provide over current protection for the controller and are rated as followed: F1 – Primary AC Power input, 15 Amp (P/N 02-4174) F2 –... -
Page 121: Panel Maintenance Menus
The CyberCat’s Maintenance Menu provides several features that can be used by service personnel to maintain and test the addressable devices connected to the panel’s SLC circuits. It is intended for those who are trained and authorized to service Fike systems. Certain functions of the maintenance menus are password protected to prevent unauthorized access. -
Page 122: Device Address
6.0 SYSTEM MAINTENANCE 6.4.1.2 DEVICE ADDRESS The Device Address screen allows you to automatically assign an address to a new device or change the address of an existing device connected to the panel. From the Maintenance Menu, press the F2 button to access the Device Address screen: 1 2 3 4 5 6 7 8 9 0 1 2 3 4 5 6 7 8 9 0 S E L E C T... -
Page 123: Device Replace
6.0 SYSTEM MAINTENANCE The panel will indicate that it has detected a new device and will record a new device message in the history buffer. Once the ENTER button is pressed, the panel will record the device with the new address (the panel will auto-increment the address number after each successful address write): 1 2 3 4 5 6 7 8 9 0 1 2 3 4 5 6 7 8 9 0 C O N N E C T... -
Page 124: Retrieving Configuration Screen
6.0 SYSTEM MAINTENANCE Once the source device loop/address has been selected and the ENTER button has been pressed, the panel will read the configuration from the selected device and store it in the panel. Retrieval of the configuration can take several seconds. Do not press any buttons or navigate away from this screen while the “Retrieving Config From Device”... -
Page 125: Walk-Test
Detector devices (i.e., photo, photo/heat, photo/duct, ionization and heat detectors) can be configured using the panel’s configuration software C-Linx to allow for walk-testing using canned smoke or Fike’s IR tool. The IR tool must be used for duct detector walk-testing. Devices may only be activated once during the walk-test mode. -
Page 126: Panel Walk-Test
6.0 SYSTEM MAINTENANCE Output Devices: Each output device (i.e., control module, relay module and NAC) can be individually programmed to participate in a system walk-test. Outputs will activate continuous (4 second duration) if programmed for the specific Zone and State of the activated input device. This allows you to get an audible feedback from system output devices each time a device is tested. -
Page 127: Ir Tool Walk-Test
6.0 SYSTEM MAINTENANCE B. IR TOOL WALK-TEST When walk-test is executed using the IR tool, only the selected device will enter the walk-test mode excluding DUCT detectors with Remote Test Stations. All other devices will continue to operate normally. Utilize the following procedure to perform the walk-test: 1. -
Page 128: Maintenance Menu 2
6.0 SYSTEM MAINTENANCE 6.4.2 MAINTENANCE MENU 2 From the Maintenance Menu 1 screen, press the F6 button to access the Maintenance Menu 2 screen: 1 2 3 4 5 6 7 8 9 0 1 2 3 4 5 6 7 8 9 0 M A I N T E N A N C E M E N U B F 1 - M N S... -
Page 129: Mass Notification System Silence
6.0 SYSTEM MAINTENANCE 6.4.2.2 MASS NOTIFICATION SYSTEM SILENCE When the voice system amplifiers are activated for mass notification (MNS), they cannot be silenced using the standard control panel silence switches. The MNS Silence function provides a means for the system operator to silence the MNS system from the control panel (local or network). -
Page 130: Device Configuration Read
6.0 SYSTEM MAINTENANCE 6.4.2.4 DEVICE CONFIGURATION READ This menu provides a means to read the configuration of all addressable devices connected to the panel. From the Maintenance Menu 2, press the F4 button to access the screen: 1 2 3 4 5 6 7 8 9 0 1 2 3 4 5 6 7 8 9 0 R E A D A L L D E V I C E S... -
Page 131: Faast
6.0 SYSTEM MAINTENANCE 6.4.2.5 FAAST This menu provides a means to read the diagnostic condition of the FAAST detector connected to the panel, as well as isolate and disable the detector. The isolate condition allows the unit to continue to operate and annunciate alarms without affecting outputs. - Page 132 6.0 SYSTEM MAINTENANCE Reserved for future use. 6-14 CyberCat 254/1016 Operation Manual UL S2203 Rev 6, 09/2015 P/N: 06-326-2...
- Page 133 APPENDIX A A.1 CYBERCAT MENU STRUCTURE (V7.XX) SYSTEM STATUS <ESCAPE> SYSTEM EVENT <ESCAPE> FUNCTION SWITCH / TOP LEVEL MENU Time/Date F1 – EVENT SOURCE See Below #alm, #supv, #trbl F2 – EXPANDED CUSTOM MESSAGE FUNCTION SWITCHES / TOP LEVEL MENU F1- CONFIG CONFIGURATION MENU 1 ►...
- Page 134 APPENDIX A A.1 CYBERCAT MENU STRUCTURE (V7.XX) MAINTENANCE MENU 2 F4 – CFG RD ► F5 – FAAST ----- F1 – READ UNIT F2 – ISOLATE UNIT F3 – DISABLE UNIT F6 – AHU ON DIAGNOSTIC MENU 2 CONFIGURATION MENU 5 ►...
- Page 136 704 SW 10 Street Tel: (816) 229-3405 P.O. Box 610 Fax: (816) 229-0314 Blue Springs, Missouri 64013 www.fike.com...
Need help?
Do you have a question about the CyberCat 1016 and is the answer not in the manual?
Questions and answers