Table of Contents
Advertisement
Quick Links
Advertisement
Table of Contents

Related Manuals for Jet HBS-56MVS


Summary of Contents for Jet HBS-56MVS
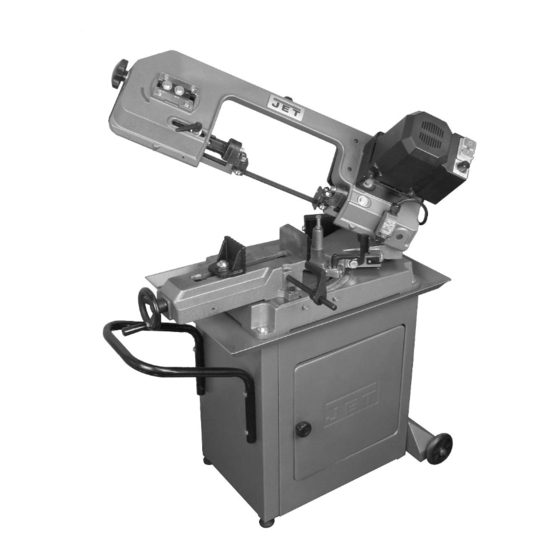
- Page 1 This .pdf document is bookmarked Operating Instructions and Parts Manual 5x6-inch Mitering Variable-Speed Band Saw Model HBS-56MVS 427 New Sanford Road LaVergne, Tennessee 37086 Part No. M-414558 Ph.: 800-274-6848 Edition 2 05/2018 www.jettools.com Copyright © 2018 JET...
-
Page 2: Important Safety Instructions
Do not use this band saw for other than its area and non-glare, overhead lighting. intended use. If used for other purposes, JET 17. Keep the floor around the machine clean and disclaims any real or implied warranty and holds free of scrap material, oil and grease. -
Page 3: On/Off Switch Padlock
24. Maintain tools with care. Keep saw blades 30. Never reach around or over a moving saw sharp and clean for the best and safest blade. performance. Follow instructions for lubricating 31. Feed work into a blade or cutter only against the and changing accessories. -
Page 4: About This Manual
If there are questions or comments, please contact your local supplier or JET. JET can also be reached at our web site: www.jettools.com. -
Page 5: Table Of Contents
10.2 Mechanical and electrical problems ....................... 19 11.0 Replacement Parts ............................. 19 11.1.1 HBS-56MVS Base and Stand Assembly – Exploded View ..............20 11.1.2 HBS-56MVS Base and Stand Assembly – Parts List ................21 11.2.1 HBS-56MVS Bow Assembly I – Exploded View .................. 23 11.2.2 HBS-56MVS Bow Assembly II –... -
Page 6: Specifications
4.0 Specifications Model number HBS-56MVS Stock number 414558 Motor and Electricals Motor type DC brushed motor Horsepower 1/2 HP (0.375 kW) Motor phase single Voltage 115 V only Cycle 60 Hz Listed FLA (full load amps) 3.8 A Motor speed... -
Page 7: Setup And Assembly
5.0 Setup and assembly Read understand instructions before attempting assembly. Band Saw must be disconnected from power during all assembly procedures. Failure to comply may cause serious injury. Compare the contents of your container with the following parts list to make sure all parts are intact. Missing parts, if any, should be reported to your distributor. -
Page 8: Assembly Of Stand
5.3 Assembly of Stand Insert axle (L) through holes of wheel base (D). Install wheel (H) and two 5/8”x30mm flat See Figure 5-3. washers (HP6) on each side of wheel. Insert Assemble left (A) and right (B) side plates with cotter pins (HP7) through holes on each end of six 5/16x3/4 hex cap screws, twelve flat axle and bend the ends of the cotter pins to... -
Page 9: Mounting Band Saw To Stand
Align holes at four corners of saw and chip pan with holes in stand. Band saw front faces same direction as JET logo on stand. Install 3/8x1-1/4 hex cap screw (HP1) with flat washer (HP5) in each of the four holes. When all four are inserted, tighten screws with 1/2"... -
Page 10: Electrical Connections
6.0 Electrical connections not permitted by the Canadian Electrical Code, C22.1. The HBS-56MVS Band Saw is rated for 115-volt power. The band saw comes with a plug designed for use on a circuit with a grounded outlet that looks like the one pictured in A, Figure 6-1. -
Page 11: Adjustments
7-2. The square should lie along entire length of 7.0 Adjustments jaw and blade without a gap. 7.1 Tools required for adjustments (Not all may be needed depending on adjustment.) Wrenches 10, 12, 14mm Hex wrench 6mm Square Straight edge Small clamp 7.2 Blade-to-table squareness The blade must be perpendicular to table to ensure... -
Page 12: Downfeed Stop
7.5 Downfeed stop assembly to other set of holes. Tighten screws securely. The weight of the bow guides the blade through the Remove stop screw (D, Figure 7-2) and swivel workpiece. The stop screw (G, Figure 7-3) prevents bow until pointer lines up with 60° on scale. blade from contacting base after the cut. -
Page 13: Blade Tracking
gained, the operator should develop a better “feel” for how tight to set a particular blade. Tick marks can be made on the tension knob for quickly resetting tension when re-installing a blade. 7.10 Blade tracking Blade tracking adjustment requires running saw with back cover open. Use caution when making this adjustment. -
Page 14: Blade Replacement
7.12 Blade replacement 7.13 Feed pressure adjustment The spring (Figure 7-9) moderates downfeed Use caution and proceed slowly pressure of bow. Turn screw with 12mm wrench, when working with or around a band saw blade. clockwise to decrease pressure, counterclockwise Use work gloves when handling it. -
Page 15: Operation
Consult the 8.0 Operation blade manufacturer’s literature for break-in of specific blades on specific materials. However, the following procedure will be adequate for break-in of The HBS-56MVS is equipped with a motor driver JET-supplied blades lower alloy ferrous containing a voltage feedback device to provide materials. -
Page 16: Evaluating Cutting Efficiency
Position workpiece in vise and tighten vise. 9.0 User-maintenance Workpiece should be fitted directly between jaws without adding other objects. When workpiece is profiled section, flat piece or Before doing maintenance on special shape, refer to examples in Figure 8-1 the machine, disconnect it from the electrical for proper clamping positions. -
Page 17: Lubrication
9.3 Lubrication Install new brush (or reinstall current brush) and gently press it all the way into hole until brass Ball bearings on blade guide assemblies and blade clip is secured. wheels are permanently lubricated and sealed, and Install cap. require no further lubrication. -
Page 18: Troubleshooting Hbs-56Mvs Band Saw
10.0 Troubleshooting HBS-56MVS Band Saw 10.1 Operational problems Symptom Possible Cause Correction Cuts not square. Blade not square to vise/material. Adjust vise square to blade. Blade surface not perpendicular to Adjust blade guides until perpendicular. table. Workpiece shifting in vise. -
Page 19: Mechanical And Electrical Problems
Air circulation through motor is Clean motor fan with vacuum to restore restricted. normal air circulation. Gear misalignment. Take unit to authorized JET service center. Gear case bearings are worn. Take unit to authorized JET service center for bearing replacement. Machine slows when Excessive feed pressure. -
Page 20: Hbs-56Mvs Base And Stand Assembly - Exploded View
11.1.1 HBS-56MVS Base and Stand Assembly – Exploded View... -
Page 21: Hbs-56Mvs Base And Stand Assembly - Parts List
11.1.2 HBS-56MVS Base and Stand Assembly – Parts List Index No Part No Description Size 1 ....TS-0081031 ....Hex Cap Screw ............5/16”-18x3/4” ....1 11 ....TS-0051051 ....Hex Cap Screw ............5/16”-18x1” ....2 17 ....HVBS462-017 ... Pivoting Rod ....................1 51 .... - Page 22 Index No Part No Description Size 423A ..HBS56MVS-423A ..Tension Spring Assembly (#423, 423-1) ............1 423-1 ..HBS56MVS-423-1 ..Brace ......................1 425 .... TS-1540061 ....Hex Nut ..............M8 ........ 1 426 .... TS-1550061 ....Flat Washer ............. M8 ........ 1...
-
Page 23: Hbs-56Mvs Bow Assembly I - Exploded View
11.2.1 HBS-56MVS Bow Assembly I – Exploded View... -
Page 24: Hbs-56Mvs Bow Assembly Ii - Exploded View
11.2.2 HBS-56MVS Bow Assembly II – Exploded View... -
Page 25: Hbs-56Mvs Bow Assembly - Parts List
11.2.3 HBS-56MVS Bow Assembly – Parts List Index No Part No Description Size 1 ....TS-0081031 ....Hex Cap Bolt............5/16”-18x3/4” ....3 2 ....TS-0561011 ....Hex Nut ..............1/4”-20 ......1 3 ....TS-0680021 ....Flat Washer ............. 1/4” ........ 1 16 .... - Page 26 392 .... TS-081C022 ....Phillips Pan Hd Machine Screw ....... #10-24x3/8” ....1 393 .... HBS56S-393 ..... Cable Clamp ....................1 ....LM000339 ....Speed Chart, HBS-56MVS (not shown) ............1 ....LM000340 ....ID Label, HBS-56MVS (not shown) ............... 1 ....
-
Page 27: Hbs-56Mvs Blade Guide Assembly - Exploded View
11.3.1 HBS-56MVS Blade Guide Assembly – Exploded View... -
Page 28: Hbs-56Mvs Blade Guide Assembly - Parts List
11.3.2 HBS-56MVS Blade Guide Assembly – Parts List Index No Part No Description Size 8 ....TS-0680031 ....Flat Washer ............. 5/16” ......2 11 ....TS-0051051 ....Hex Cap Screw ............5/16”-18x1” ....2 57 ....HVBS56M-057 ..Adjustable Bracket LH ................... 1 57A .... -
Page 29: Electrical Connections - Hbs-56Mvs Band Saw
12.0 Electrical Connections – HBS-56MVS Band Saw... -
Page 30: Warranty And Service
Accessories; Shop Tools; Warehouse & Dock products; Hand Tools; Air Tools NOTE: JET is a division of JPW Industries, Inc. References in this document to JET also apply to JPW Industries, Inc., or any of its successors in interest to the JET brand. - Page 31 This page intentionally left blank.
- Page 32 427 New Sanford Road LaVergne, Tennessee 37086 Phone: 800-274-6848 www.jettools.com...
Need help?
Do you have a question about the HBS-56MVS and is the answer not in the manual?
Questions and answers